2004 KIA CERATO open hood
[x] Cancel search: open hoodPage 81 of 315

Knowing your vehicle
70
3
1 23456789
In order to help provide protection
in a severe collision, the airbags
must inflate rapidly. The speed ofairbag inflation reduces the likeli-
hood of serious or life-threatening
injuries and is thus a mandatory
part of the airbag design.
However, airbag inflation can also
cause injuries which normally can
include facial abrasions, bruises
and broken bones, because thatspeed also causes the airbags to
expand with a great deal force.
There are even circumstances under which contact with the
steering wheel airbag can cause
fatal injuries, especially if the
occupant is positioned exces-
sively close to the steeringwheel. Noise and smoke
When the airbags inflate, they make
a loud noise and they leave smoke
and powder in the air inside of the
vehicle. This is normal and is a result
of the ignition of the airbag inflator.
After the airbag inflates, you may feel
substantial discomfort in breathing
due to the contact of your chest to
both the safety belt and the airbag,
as well as from breathing the smoke
and powder.
We strongly urge you
to open your doors and/or win-
dows as soon as possible after
impact in order to reduce discom-
fort and prevent prolonged expo-
sure to the smoke and powder.
Though smoke and powder are non-
toxic, it may cause irritation to the
skin (eyes, nose and throat etc). If
this is the case, wash and rinse with
the cold water immediately and con-sult the doctor if the symptom per-
sists.WARNING
Driver should sit as far back (at least 250 mm (10 inches)
away) from the steering wheel
airbag as possible to reduce
the risk of injury or death in a
collision. The front passenger
should always move their seat
as far back as possible and sit
back in their seat.
Airbag inflates instantly in an event of collision, passengers
may be injured by the airbag
expansion force if they are not
in proper position.
Airbag inflation may cause injuries which normally
include facial or bodily abra-
sions, injuries by the broken
glasses or burns by the explo-sives.
Page 89 of 315
Knowing your vehicle
78
3
1 23456789
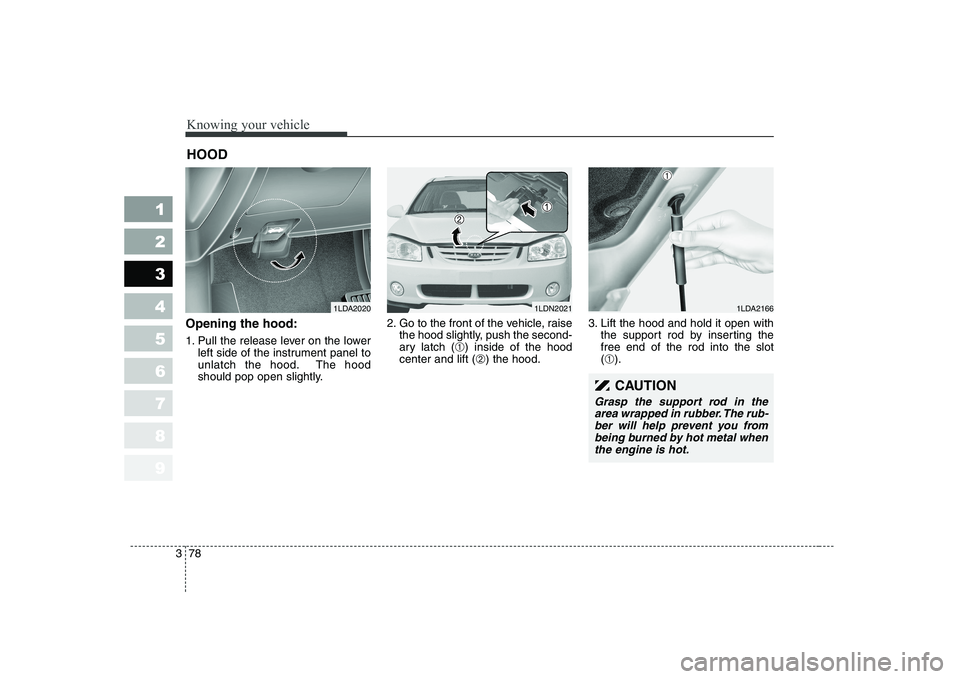
Opening the hood:
1. Pull the release lever on the lower
left side of the instrument panel to
unlatch the hood. The hood
should pop open slightly. 2. Go to the front of the vehicle, raise
the hood slightly, push the second-
ary latch ( ➀) inside of the hood
center and lift ( ➁) the hood. 3. Lift the hood and hold it open with
the support rod by inserting thefree end of the rod into the slot(➀ ).
HOOD
1LDA20201LDN20211LDA2166
CAUTION
Grasp the support rod in the
area wrapped in rubber. The rub-ber will help prevent you frombeing burned by hot metal when the engine is hot.
➀
Page 90 of 315
379
1 23456789
Knowing your vehicle
Closing the hood
1. Before closing the hood, check thefollowing:
ment must be correctly installed.
bustible material must be
removed from the engine com-
partment.
2. Secure the support rod in its clip.
3. Lower the hood to about 30 cm (12 inches) height and then let it
drop to properly lock in place.
Make sure the hood is properly
locked before driving.CAUTION
Before closing the hood, make sure that all engine parts andtools have been removed fromthe engine area and that noone’s hands are near the hood opening.
Do not leave gloves, rags or any other combustible materi-al in the engine compartment.Doing so may cause a heat- induced fire.
Page 196 of 315
Driving your vehicle
84
4
1 23456789
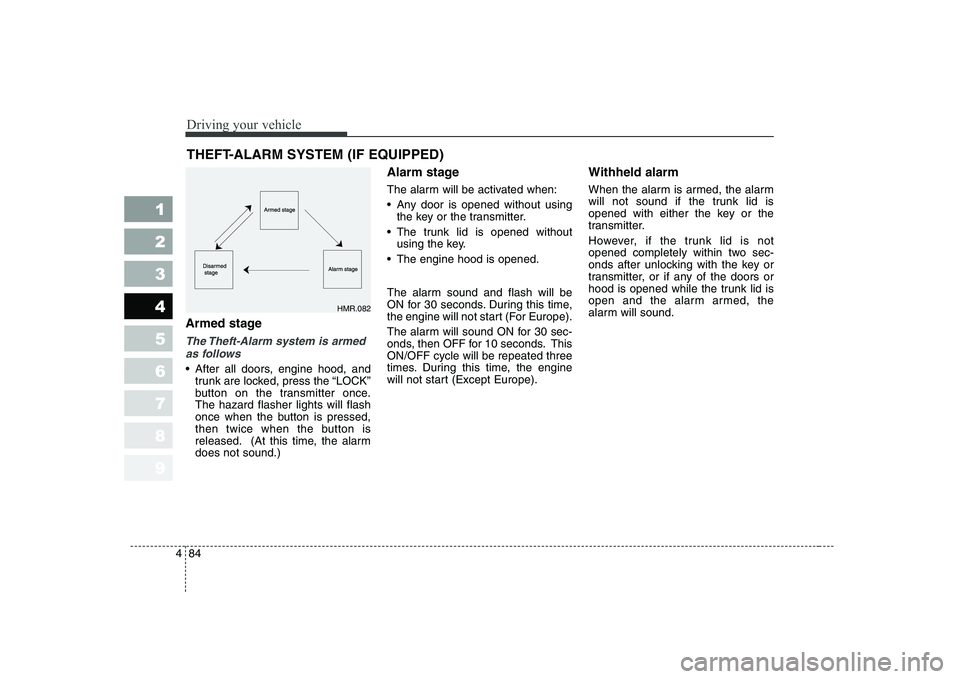
Armed stage
The Theft-Alarm system is armed
as follows
After all doors, engine hood, and trunk are locked, press the “LOCK”
button on the transmitter once.The hazard flasher lights will flash
once when the button is pressed,
then twice when the button is
released. (At this time, the alarmdoes not sound.) Alarm stage
The alarm will be activated when:
Any door is opened without using
the key or the transmitter.
The trunk lid is opened without using the key.
The engine hood is opened.
The alarm sound and flash will be
ON for 30 seconds. During this time,
the engine will not start (For Europe).
The alarm will sound ON for 30 sec-
onds, then OFF for 10 seconds. ThisON/OFF cycle will be repeated three
times. During this time, the engine
will not start (Except Europe). Withheld alarm
When the alarm is armed, the alarm
will not sound if the trunk lid is
opened with either the key or the
transmitter.
However, if the trunk lid is not
opened completely within two sec-
onds after unlocking with the key or
transmitter, or if any of the doors or
hood is opened while the trunk lid is
open and the alarm armed, the
alarm will sound.
THEFT-ALARM SYSTEM (IF EQUIPPED)
HMR.082
Page 223 of 315
63
In case of an emergency
OVERHEATING
If your temperature gauge indicates
overheating, if you experience a loss
of power, or if you hear a loud knock-
ing or pinging noise, the engine has
probably overheated. Should any of
these symptoms occur, use the fol-
lowing procedure:
1. Turn on the hazard warning flash- er, then drive to the nearest safe
location and stop your vehicle; set
the automatic transaxle in P
(Park), or shift the manual
transaxle to N (Neutral) and apply
the parking brake.
2. Make sure the air conditioner is off.
3. If coolant or steam is boiling out of the radiator, stop the engine and
call an Authorized Kia Dealer for
assistance. If coolant is not boiling out, allowthe engine to idle and open the
hood to permit the engine to cool
gradually.
If the temperature does not go
down with the engine idling, stop
the engine and allow sufficient
time for it to cool.
4. The coolant level should then be checked. If the level in the reser-
voir is low, look for leaks at the
radiator hoses and connections,
heater hoses and connections,
radiator, and water pump. If youfind a major leak or another prob-
lem that may have caused the
engine to overheat, do not operatethe engine until it has been cor-
rected. Call an Authorized Kia
Dealer for assistance. If you do not
find a leak or other problem, care-
fully add coolant to the reservoir.
If the engine frequently overheats,
have the cooling system checkedand repaired by an Authorized Kia Dealer.
1 23456789
WARNING - Removing
radiator cap
Do not remove the radiator cap when the engine and radiator
are hot. Scalding hot coolant
and steam may blow out under
pressure. This could cause seri-
ous injury.
Page 276 of 315
731
Maintenance
1 23456789
LUBRICANTS AND FLUIDS
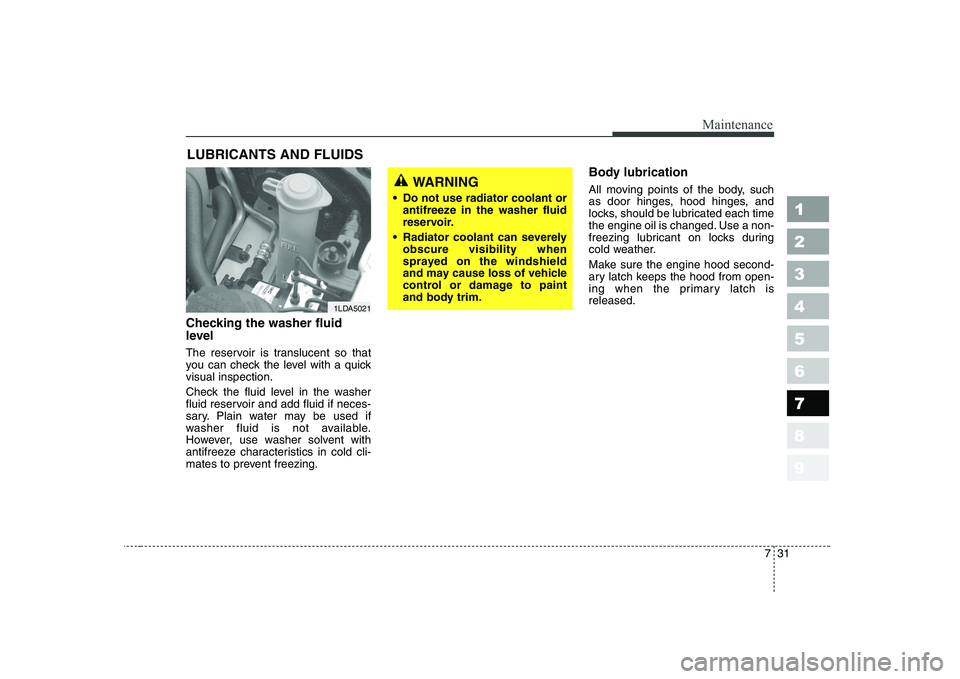
Checking the washer fluid
level
The reservoir is translucent so that
you can check the level with a quickvisual inspection.
Check the fluid level in the washer
fluid reservoir and add fluid if neces-
sary. Plain water may be used if
washer fluid is not available.
However, use washer solvent with
antifreeze characteristics in cold cli-
mates to prevent freezing. Body lubrication
All moving points of the body, such
as door hinges, hood hinges, and
locks, should be lubricated each time
the engine oil is changed. Use a non-
freezing lubricant on locks during
cold weather.
Make sure the engine hood second-
ary latch keeps the hood from open-
ing when the primary latch isreleased.
1LDA5021
WARNING
Do not use radiator coolant or antifreeze in the washer fluid
reservoir.
Radiator coolant can severely obscure visibility when
sprayed on the windshield
and may cause loss of vehicle
control or damage to paint
and body trim.
Page 295 of 315
Maintenance
50
7
1 23456789
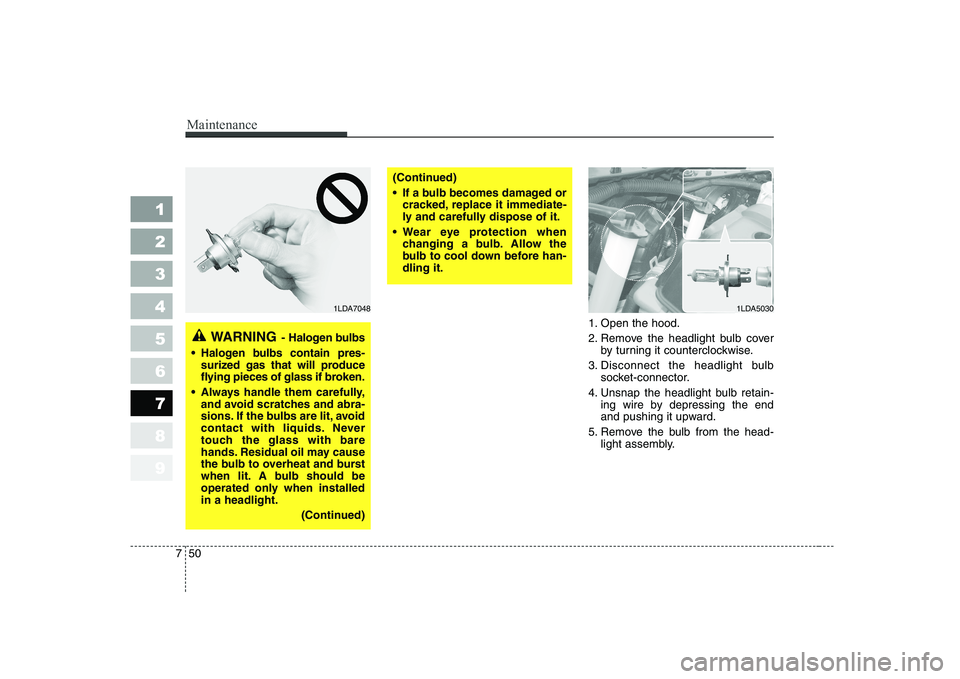
1. Open the hood.
2. Remove the headlight bulb cover
by turning it counterclockwise.
3. Disconnect the headlight bulb socket-connector.
4. Unsnap the headlight bulb retain- ing wire by depressing the end
and pushing it upward.
5. Remove the bulb from the head- light assembly.
WARNING - Halogen bulbs
Halogen bulbs contain pres-
surized gas that will produce
flying pieces of glass if broken.
Always handle them carefully, and avoid scratches and abra-
sions. If the bulbs are lit, avoid
contact with liquids. Never
touch the glass with bare
hands. Residual oil may cause
the bulb to overheat and burst
when lit. A bulb should be
operated only when installedin a headlight.
(Continued)
(Continued)
If a bulb becomes damaged orcracked, replace it immediate-
ly and carefully dispose of it.
Wear eye protection when changing a bulb. Allow the
bulb to cool down before han-dling it.
1LDA50301LDA7048
Page 296 of 315
751
Maintenance
1 23456789
6. Install a new headlight bulb andsnap the headlight bulb retaining
wire into position by aligning the
wire with the groove on the bulb.
7. Connect the headlight bulb socket- connector.
8. Install the headlight bulb cover by turning it clockwise.
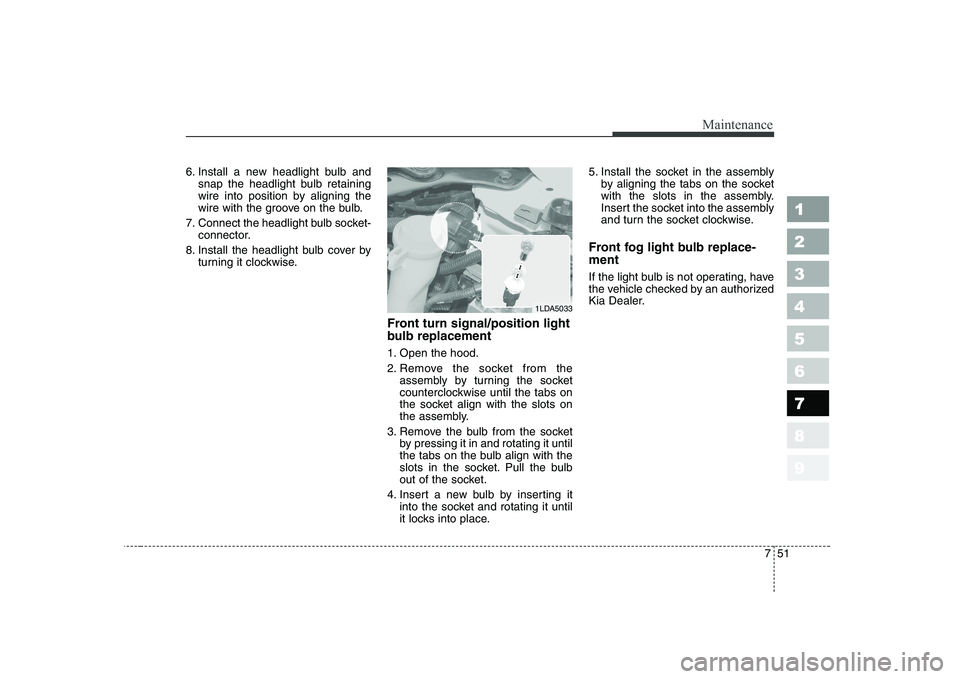
Front turn signal/position light
bulb replacement
1. Open the hood.
2. Remove the socket from theassembly by turning the socket
counterclockwise until the tabs on
the socket align with the slots on
the assembly.
3. Remove the bulb from the socket by pressing it in and rotating it until
the tabs on the bulb align with the
slots in the socket. Pull the bulb
out of the socket.
4. Insert a new bulb by inserting it into the socket and rotating it until
it locks into place. 5. Install the socket in the assembly
by aligning the tabs on the socket
with the slots in the assembly.
Insert the socket into the assembly
and turn the socket clockwise.
Front fog light bulb replace- ment
If the light bulb is not operating, have
the vehicle checked by an authorized
Kia Dealer.
1LDA5033