Page 56 of 208

1- 44 FEATURES OF YOUR HYUNDAI
B370A01A-AATHAZARD WARNING SYSTEM
The hazard warning system should be used
whenever you find it necessary to stop the car
in a hazardous location. When you must make
such an emergency stop, always pull off the
road as far as possible.
The hazard warning lights are turned on by
pushing in on the hazard switch. This causes all
turn signal lights to blink. The hazard warning
lights will operate even though the key is not in
the ignition.
To turn the hazard warning lights off, push in on
the switch a second time.
B380A01A-AATREAR WINDOW DEFROSTER
SWITCHThe rear window defroster is turned on by
pushing in on the switch. To turn the defroster
off, push in on the switch a second time. The
rear window defroster automatically turns itself
off after about 15 minutes. To restart the de-
froster cycle, push in on the switch again after
it has turned itself off.
!
1MS104018B
HEF-036
CAUTION:Do not clean the inner side of the rear
window glass with an abrasive type of glass
cleaner or use a scraper to remove foreign
deposits from the inner surface of the glass
as this may cause damage to the defroster
elements.
HEF-038A
Automatic type
Rotary and push button type
NOTE:The engine must be running for the rear
window defroster to operate.
Page 63 of 208

FEATURES OF YOUR HYUNDAI 1- 51
!
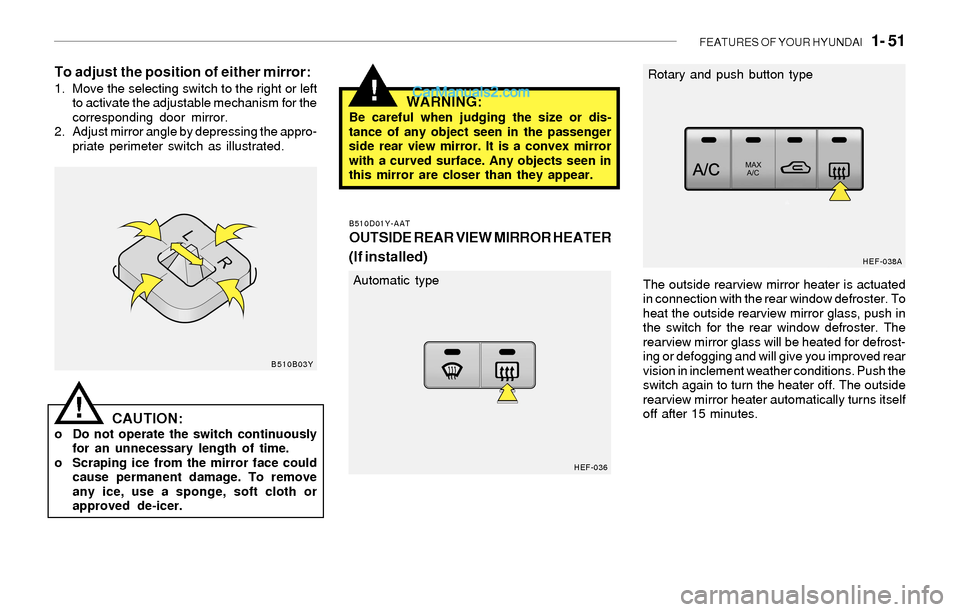
To adjust the position of either mirror:1. Move the selecting switch to the right or left
to activate the adjustable mechanism for the
corresponding door mirror.
2. Adjust mirror angle by depressing the appro-
priate perimeter switch as illustrated.
CAUTION:o Do not operate the switch continuously
for an unnecessary length of time.
o Scraping ice from the mirror face could
cause permanent damage. To remove
any ice, use a sponge, soft cloth or
approved de-icer.
WARNING:Be careful when judging the size or dis-
tance of any object seen in the passenger
side rear view mirror. It is a convex mirror
with a curved surface. Any objects seen in
this mirror are closer than they appear.
!
B510D01Y-AAT
OUTSIDE REAR VIEW MIRROR HEATER
(If installed)
The outside rearview mirror heater is actuated
in connection with the rear window defroster. To
heat the outside rearview mirror glass, push in
the switch for the rear window defroster. The
rearview mirror glass will be heated for defrost-
ing or defogging and will give you improved rear
vision in inclement weather conditions. Push the
switch again to turn the heater off. The outside
rearview mirror heater automatically turns itself
off after 15 minutes.
B510B03Y
HEF-036
Automatic type
HEF-038A
Rotary and push button type
Page 64 of 208

1- 52 FEATURES OF YOUR HYUNDAI
!
B510C01A-AATFOLDING THE OUTSIDE REARVIEW
MIRRORS
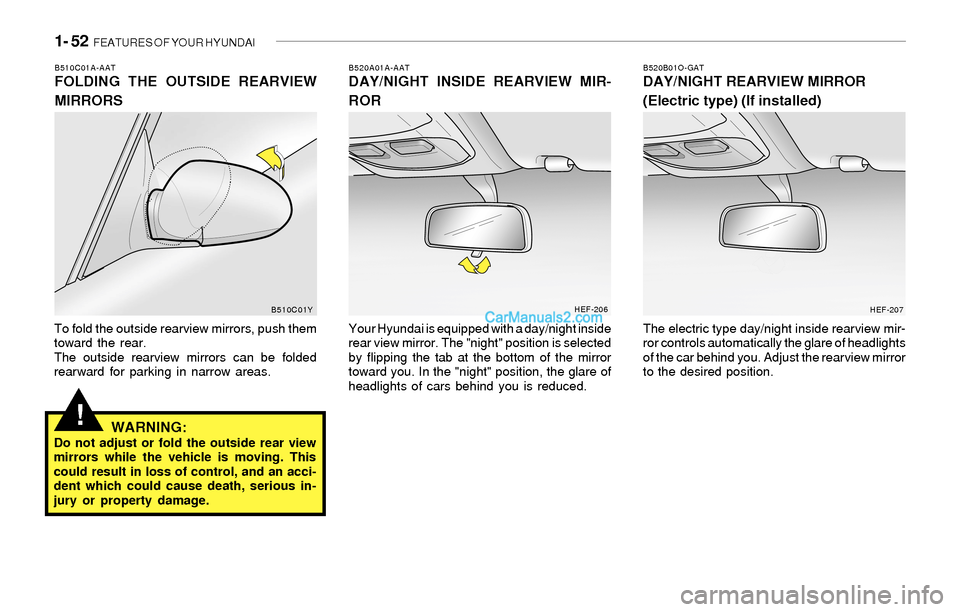
To fold the outside rearview mirrors, push them
toward the rear.
The outside rearview mirrors can be folded
rearward for parking in narrow areas.
WARNING:Do not adjust or fold the outside rear view
mirrors while the vehicle is moving. This
could result in loss of control, and an acci-
dent which could cause death, serious in-
jury or property damage.
B520A01A-AATDAY/NIGHT INSIDE REARVIEW MIR-
ROR
Your Hyundai is equipped with a day/night inside
rear view mirror. The "night" position is selected
by flipping the tab at the bottom of the mirror
toward you. In the "night" position, the glare of
headlights of cars behind you is reduced.
B520B01O-GATDAY/NIGHT REARVIEW MIRROR
(Electric type) (If installed)
The electric type day/night inside rearview mir-
ror controls automatically the glare of headlights
of the car behind you. Adjust the rearview mirror
to the desired position.
B510C01YHEF-206
HEF-207
Page 65 of 208

FEATURES OF YOUR HYUNDAI 1- 53
Indicator Light
B520C01L-GATHOMELINK MIRROR (If installed)
Your new vehicle may be equipped with an
automatic night vision mirror. During nighttime
driving, this feature will automatically detect and
reduce dangerous rearview mirror glare.
Your new mirror also comes with an integrated
HomeLink Universal Transceiver, which allows
you to program the mirror to activate your
garage door(s), estate gate, home lighting, etc.
The mirror actually learns the codes from your
various existing transmitters.
Automatic-Dimming Function
To assist you during nighttime driving, your
mirror will automatically dim upon detecting
glare from the vehicles behind you.
Press the button to turn the automatic-
dimming function off. The mirror indicator light
will turn off.
Press the button to turn the automatic-
dimming function on. The mirror indicator light
will illuminate.
NOTE:The mirror defaults to the "on" position
each time the vehicle is started.
B520C01LB520C01L
Glare Detection
Homelink buttons
Automatic-dimming mirror
function buttons
!
!
HOMELINK PROGRAMMING
CAUTION:
o Make sure people and/or objects are out
of the way of any garage doors or gates
you may be operating during the pro-
gramming procedures.
o Keep original transmitters for potential
future programming needs, or in case
you sell the vehicle.
o In the event you do sell your vehicle, it's
recommended you erase your pro-
grammed HomeLink mirror buttons.
WARNING:Do not use HomeLink with any garage door
opener that lacks the safety stop and re-
verse feature as required by federal safety
standards (includes garage doors manu-
factured before April 1, 1982), as these
doors can increase the risk of serious injury
or death. Call 1-800-355-3515 or visit
www.homelink.com for more information.
NOTE:If programming a garage door opener or
gate, it is advised to unplug the device
during the "cycling" process to prevent
possible motor burnout.
Page 67 of 208

FEATURES OF YOUR HYUNDAI 1- 55
Operating HomeLink
Simply press the appropriate HomeLink button
to activate the trained product (garage door,
security system, entry door lock, estate gate,
lighting, etc.). The original handheld transmit-
ters may also be used at any time.
Erasing Programmed Buttons
To erase the three HomeLink buttons, press
and hold the two outside buttons until the indica-
tor light begins to flash (after 20 seconds).
Release both buttons.
Individual buttons cannot be erased, but can be
reprogrammed.
Reprogramming a Single HomeLink
Button
To program a device to HomeLink using a
HomeLink button previously trained, follow these
steps:
1. Press and hold the desired HomeLink but-
ton. Do not release until step 4 has been
completed.
2. When the indicator light begins to flash slowly
(after 20 seconds), hold the handheld trans-
mitter 1 to 3 inches away from the bottom of
the mirror.
3. Press and hold the transmitter button (or, if
necessary, press and "cycle," as described
in the '"Gate Operator & Canadian Program-
ming" portion of this text).
4. The HomeLink indicator light will flash slowly
at first, then rapidly, indicating successful
programming. Release both buttons.
B520C02L
Flashing
Gate Operator Programming & Cana-
dian Programming
During programming, your handheld transmit-
ter may automatically stop transmitting.
Continue to press and hold the HomeLink button
while you press and repress ("cycle") your
handheld transmitter every two seconds until
the frequency signal has been learned. The
indicator light will flash slowly at first and then
rapidly upon successful programming.
Accessories
For more information on HomeLink and
HomeLink-compatible products, or to purchase
HomeLink accessories, call 1-800-355-3515
or visit www.homeink.com.
Page 74 of 208

1- 62 FEATURES OF YOUR HYUNDAI
!
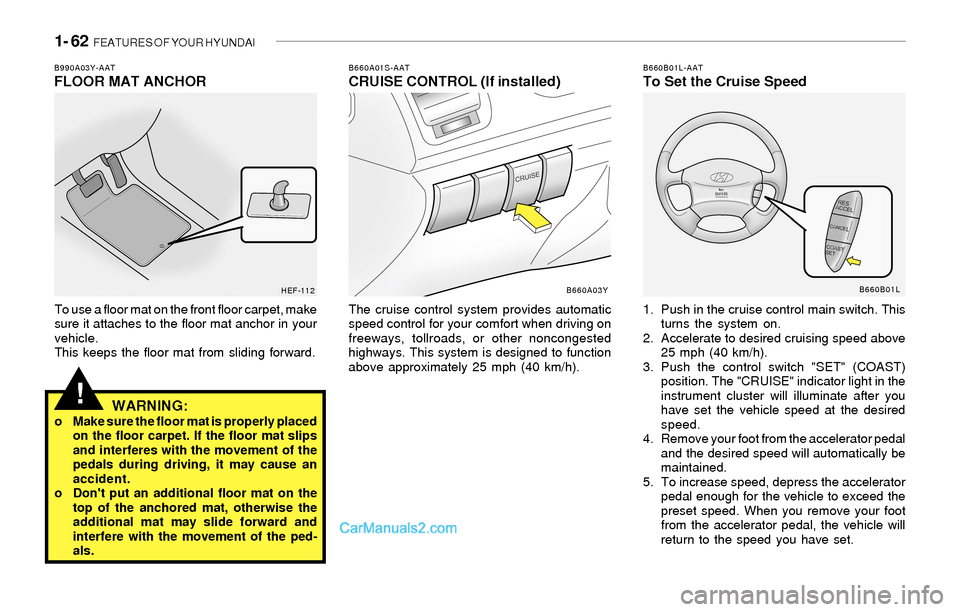
B660A01S-AATCRUISE CONTROL (If installed)
The cruise control system provides automatic
speed control for your comfort when driving on
freeways, tollroads, or other noncongested
highways. This system is designed to function
above approximately 25 mph (40 km/h).
B660B01L-AATTo Set the Cruise Speed
1. Push in the cruise control main switch. This
turns the system on.
2. Accelerate to desired cruising speed above
25 mph (40 km/h).
3. Push the control switch "SET" (COAST)
position. The "CRUISE" indicator light in the
instrument cluster will illuminate after you
have set the vehicle speed at the desired
speed.
4. Remove your foot from the accelerator pedal
and the desired speed will automatically be
maintained.
5. To increase speed, depress the accelerator
pedal enough for the vehicle to exceed the
preset speed. When you remove your foot
from the accelerator pedal, the vehicle will
return to the speed you have set.
B660A03Y
B990A03Y-AATFLOOR MAT ANCHOR
To use a floor mat on the front floor carpet, make
sure it attaches to the floor mat anchor in your
vehicle.
This keeps the floor mat from sliding forward.
WARNING:o Make sure the floor mat is properly placed
on the floor carpet. If the floor mat slips
and interferes with the movement of the
pedals during driving, it may cause an
accident.
o Don't put an additional floor mat on the
top of the anchored mat, otherwise the
additional mat may slide forward and
interfere with the movement of the ped-
als.
HEF-112B660B01L
Page 75 of 208

FEATURES OF YOUR HYUNDAI 1- 63
B660F01L-AATTo Reset at a Slower Speed
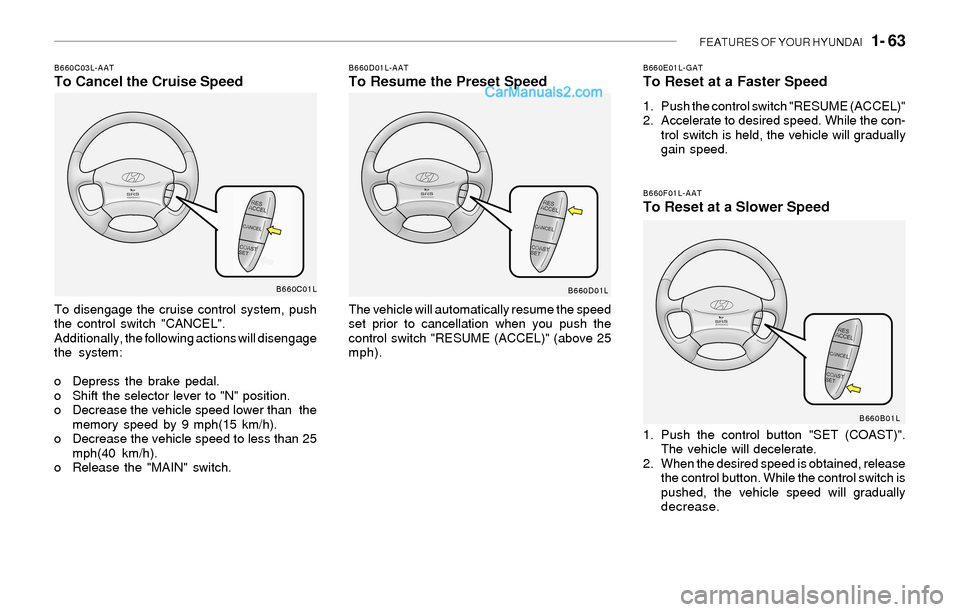
1. Push the control button "SET (COAST)".
The vehicle will decelerate.
2. When the desired speed is obtained, release
the control button. While the control switch is
pushed, the vehicle speed will gradually
decrease.
B660D01L-AATTo Resume the Preset Speed
The vehicle will automatically resume the speed
set prior to cancellation when you push the
control switch "RESUME (ACCEL)" (above 25
mph).
B660E01L-GATTo Reset at a Faster Speed
1. Push the control switch "RESUME (ACCEL)"
2. Accelerate to desired speed. While the con-
trol switch is held, the vehicle will gradually
gain speed.
B660C03L-AATTo Cancel the Cruise Speed
To disengage the cruise control system, push
the control switch "CANCEL".
Additionally, the following actions will disengage
the system:
o Depress the brake pedal.
o Shift the selector lever to "N" position.
o Decrease the vehicle speed lower than the
memory speed by 9 mph(15 km/h).
o Decrease the vehicle speed to less than 25
mph(40 km/h).
o Release the "MAIN" switch.
B660C01L
B660D01L
B660B01L
Page 78 of 208
1- 66 FEATURES OF YOUR HYUNDAI
B670E01A-AATTemperature ControlB670A02Y-GATRotary and Push Button Type
1. Fan speed control
2. Air Conditioning switch
3. Max A/Con switch
4. Air intake control
5. Rear window defroster
6. Temperature control
7. Air flow control
B670B02Y-AATFan Speed Control
(Blower Control)
This is used to turn the blower fan on and off and
to select the fan speed.
The blower fan speed, and therefore the volume
of air delivered from the system, may be con-
trolled manually by setting the blower control
between the "1" and "4" position.
NOTE:If the blower fan is off, it will set to the fresh
mode automatically and be able to select
"Fresh" mode or "Recirculation" mode.This is used to turn the heating system on and
off and to select the degree of heating desired.
B670A01Y
HEF-031HEF-032
123456
7CoolWarm