2004 Hyundai Santa Fe light
[x] Cancel search: lightPage 105 of 253

1FEATURES OF YOUR HYUNDAI
92
Floor-LevelWhen selecting the "Floor-Level", the indicator
light will come on and the air will be discharged
through the floor vents, windshield defroster
nozzle, side defroster nozzle and side ventila-
tor.
HSM118B670D03O
Bi-LevelWhen selecting the "Bi-Level", the indicator light
will come on and the air will be discharged
through the face vents and the floor vents. This
makes it possible to have cooler air from the
dashboard vents and warmer air from the floor
outlets at the same time.
Face-Level
When selecting the "Face-Level", the indicator
light will come on, causing air to be discharged
through the face level vents.
B670D02O
Page 106 of 253
1FEATURES OF YOUR HYUNDAI
93
B980F02O-AAT
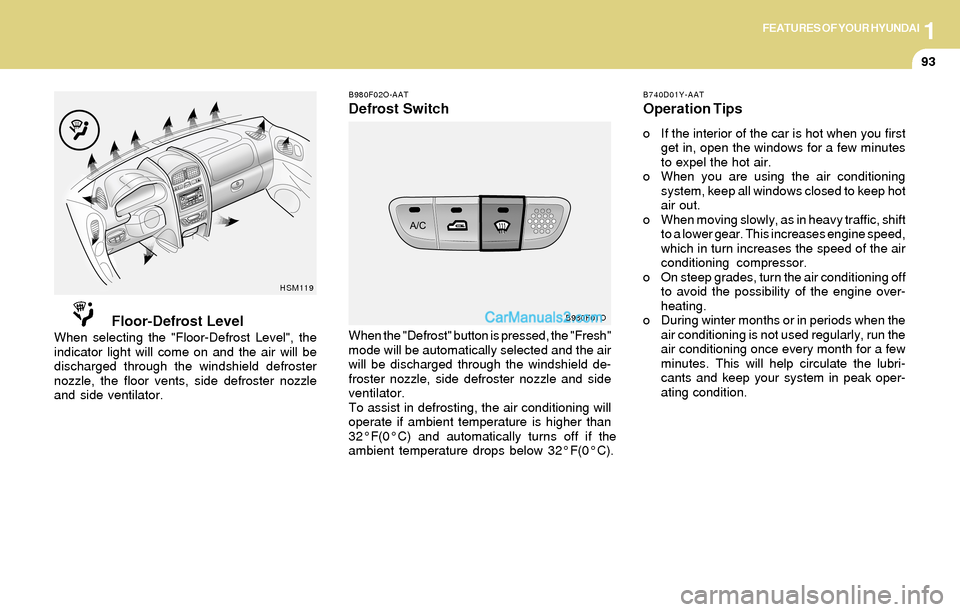
Defrost Switch
B980F01O
When the "Defrost" button is pressed, the "Fresh"
mode will be automatically selected and the air
will be discharged through the windshield de-
froster nozzle, side defroster nozzle and side
ventilator.
To assist in defrosting, the air conditioning will
operate if ambient temperature is higher than
32°F(0°C) and automatically turns off if the
ambient temperature drops below 32°F(0°C).
B740D01Y-AAT
Operation Tips
o If the interior of the car is hot when you first
get in, open the windows for a few minutes
to expel the hot air.
o When you are using the air conditioning
system, keep all windows closed to keep hot
air out.
o When moving slowly, as in heavy traffic, shift
to a lower gear. This increases engine speed,
which in turn increases the speed of the air
conditioning compressor.
o On steep grades, turn the air conditioning off
to avoid the possibility of the engine over-
heating.
o During winter months or in periods when the
air conditioning is not used regularly, run the
air conditioning once every month for a few
minutes. This will help circulate the lubri-
cants and keep your system in peak oper-
ating condition.
Floor-Defrost LevelWhen selecting the "Floor-Defrost Level", the
indicator light will come on and the air will be
discharged through the windshield defroster
nozzle, the floor vents, side defroster nozzle
and side ventilator.
HSM119
Page 121 of 253
1FEATURES OF YOUR HYUNDAI
108
7. TAPE/CD Select Button
Press this button to play a tape when listening
to the radio. Press TAPE/CD to switch between
the tape and compact disc if both are loaded.
The inactive tape or CD will remain safe inside
the radio for future listening.
8. Cassette Tape EJECT Button
Press this button, located to the right of the
cassette tape slot to eject a tape. The tape is
ejected with the radio off. Cassette tape may be
loaded with the radio off.
9. Cassette Tape Messages
CHECK TAPE
If this message appears on the radio display, the
tape won't play because of one of the following
errors.
o The tape is tight and the player can't turn the
tape hubs. Remove the tape. Hold the tape
with the open end down and try to turn the
right hub counterclockwise with a pencil.
Turn the tape over and repeat. If the hubs do
not turn easily, your tape may be damaged
and should not be used in the player. Try a
new tape to make sure your player is work-
ing properly.o The tape is broken. Try a new tape.
o The tape is wrapped around the tape head.
Attempt to get the cassette out. Try a new
tape.
CLEAN
If this message appears on the display, the
cassette tape player needs to be cleaned. It will
still play tapes, but you should clean it as soon
as possible to prevent damage to the tapes and
player. See "Care of Your Cassette Tape Player"
in the Index.
If any error occurs repeatedly or if an error can't
be corrected, contact your dealer.
10. Care of Your Cassette Tape Player
A tape player that is not cleaned regularly can
cause reduced sound quality, reined cassettes
or a damaged mechanism. Cassette tapes
should be stored in their case away from con-
taminants, direct sunlight and extreme heat. If
they aren't they may not operate properly or
may cause failure of the tape player.Your tape player should be cleaned regularly
after every 59 hours of use. Your radio may
display CLEAN to indicate that you have used
your tape player needs to be cleaned. It will still
play tapes, but you should clean it as soon as
possible to prevent damage to your tapes and
player. If you notice a reduction in sound quality,
try a known good cassette to see of it is the tape
or the tape player or fault. If this other cassette
has no improvement in sound quality, clean the
tape player.
The recommended cleaning method for your
cassette tape player is the use of a scrubbing
action, non-abrasive cleaning cassette with
pads which scrub the tape head as the hubs of
the cleaner cassette turn. The recommended
cleaning cassette is available through your
dealer.
When cleaning the cassette tape player with the
recommended non-abrasive cleaning cassette,
it is possible that the cassette may eject, be-
cause the cut tape detection feature on your
radio may recognize it as a broken tape. To
prevent the cleaning cassette from being
ejected, use the following steps:
1. Turn the ignition to ON or ACC.
2. Turn the radio off.
Page 125 of 253

1FEATURES OF YOUR HYUNDAI
112
8. Care of Your Compact Discs
Handle disc careful. Store them in their original
cases or other protective cases away from
direct sunlight and dust. If the surface of a disc
is soiled, dampen a clean, soft cloth in a mild,
neutral detergent solution and clean it, wiping
from the center to the edge.
Be sure never to touch the side without writing
when handling discs. Pick up discs by grasping
the outer edges or the edge of the hole and the
outer edge.
9. Care of Your Compact Disc Player
The use of CD lens cleaner discs is not advised,
due to the risk of contaminating the lens of the
CD optics with lubricants internal to the CD
mechanism.
10. CD Adapter Kits
It is possible to use a portable CD player adapter
kit with your cassette tape player after disabling
the tight/loose tape sensing feature on your tape
player.To disable the feature, use the following steps:
1. Turn the radio off.
2. Press and hold the TAPE CD Button. The
radio will display READY and flash the cas-
sette icon.
3. Insert the adapter into the cassette slot. It will
power up the radio and begin playing
This override routine will remain active until
EJECT button is pressed.
NOTE:Before you add any sound equipment to
your vehicle--like a tape player, CB radio,
mobile telephone or two-way radio--be sure
you can add what you want. If you can, it's
very important to do it properly. Added
sound equipment may interfere with the
operation of your vehicle's engine, Delphi
Electronics radio or other systems, and
even damage them. Your vehicle's systems
may interfere with the operation of sound
equipment that has been added improp-
erly. So, before adding sound equipment,
check with your dealer and be sure to check
federal rules covering mobile radio and
telephone units.
!CAUTION:o Do not insert warped or poor quality
discs into the CD player as damage to the
unit may occur.
o Do not insert anything like coins into the
player slot as damage to the unit may
occur.
o Do not place beverages close to the
audio system. The playback mechanism
may be damaged if you spill them.
o Do not impact on the audio system, or
the playback mechanism could be dam-
aged.
o Driving on the off-roads or other vibra-
tions may skip your compact disc.
Do not use the audio system on off-
roads as the discs could be scratched
and damaged.
o Do not grip or pull out the disc with your
hand while the disc is being pulled into
the unit by the self loading mechanism.
These can cause poor disc scratching to
occur or trouble in the compact disc
player.
o Avoid using CD-Recordable or CD-
Rewritable as the player could not be
operated in recording way of the CD
maker. When using the compact disc
player, genuine CDs are recommended.
Page 130 of 253
1FEATURES OF YOUR HYUNDAI
117
D295D03O-AAT
1. LOAD Button
This compact disc playing will accommodate up
to six discs.
To insert one disc do the following:
1. Turn the ignition on.
2. Press and release the LOAD Button.
3. Wait for the light, located to the right of the
slot, to turn green.
4. Load a disc. Insert a disc partway into the
slot, label side up. The player will pull the disc
in.
NOTE:This CD player is suitable only for 12 cm
discs, do not use irregular shaped CDs.
When the disc is inserted, the CD symbol will be
displayed. If you select an EQ setting for your
disc, it will be activated each time you play a disc.
If the radio is on or off, the disc will begin to play
automatically.
To inset multiple discs do the followings:
1. Turn the ignition on.
2. Press and hold the LOAD button for two
seconds.
You will then hear two beeps and the light,
located to the right of the slot, will begin to
flash.3. Once the light stops flashing and turns green.
Load a disc. Insert a disc partway into the
slot, label side up.
The player will pull the disc in.
Once the disc is loaded, the light will begin
flashing again. Once the light stop flashing
and turns green you can then load another
disc. The disc player takes up to six discs.
Do not try to load more than six.
When a disc is inserted, the CD symbol will
be displayed. If more than one disc has been
loaded, number for each disc will be dis-
played. If you select an EQ setting for your
disc, it will be activated each time you play a
disc.
If the radio is on or off, the last disc loaded will
begin to play automatically.
4. To load more than one disc but less than six,
complete Steps 1, 2 and 3. When you have
finished loading discs, with the radio on or off,
press LOAD to cancel the loading function.
The radio will begin to play the last CD loaded.
As each new track starts to play, the track
number will appear on the display.
Playing a Specific Loaded CD
For every CD loaded, a number will appear on
the radio display. To play a specific CD, first
press the CD select button to start playing a CD.
Then press the numbered button that corre-
sponds to the CD you want to play.A small bar will appear under the CD number that
is playing, it could be due to one of the following
conditions:
o The road is too rough. The disc should play
when the road is smoother.
o The disc is dirty, scratched, wet or upside
down.
o The air is very humid. If so, wait about an hour
and try again.
If any error occurs repeatedly or if an error can't
be corrected, please contact your dealer. If
your radio displays an error message, write it
down and provide it to your dealer when report-
ing the problem.
2. CD EJECT Button
This button will eject a disc or discs, if you have
multiple discs loaded. To eject a disc or discs
from the disc player perform one of the following
steps:
o Press and release the eject button to eject
the disc that is currently playing.
o To eject all of the discs, press this button for
two seconds, you will hear three beeps, and
the light will flash to let you know when a disc
is being ejected.
Page 134 of 253
1FEATURES OF YOUR HYUNDAI
121CARE OF CASSETTE TAPESCARE OF DISCS
B850A02L B850A02F-AAT
Proper HandlingStorageWhen not in use, place your discs in their
individual case and store them in a cool place
away from the sun, heat, and dust.
Do not grip or pull out the disc with your hand
while the disc is being pulled into the unit by the
self loading mechanism.
Keep Your Discs Clean
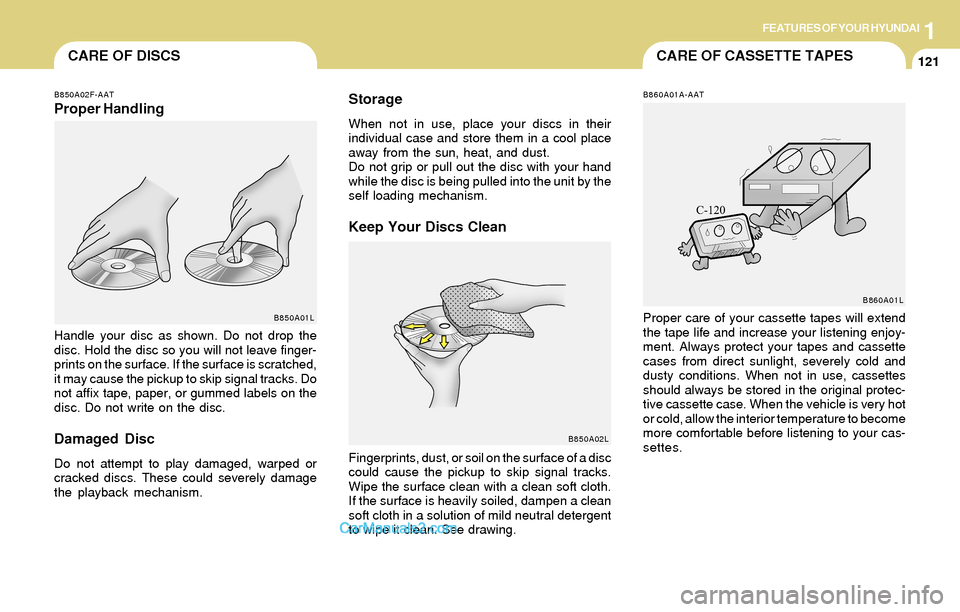
Handle your disc as shown. Do not drop the
disc. Hold the disc so you will not leave finger-
prints on the surface. If the surface is scratched,
it may cause the pickup to skip signal tracks. Do
not affix tape, paper, or gummed labels on the
disc. Do not write on the disc.
Damaged Disc
Do not attempt to play damaged, warped or
cracked discs. These could severely damage
the playback mechanism.Fingerprints, dust, or soil on the surface of a disc
could cause the pickup to skip signal tracks.
Wipe the surface clean with a clean soft cloth.
If the surface is heavily soiled, dampen a clean
soft cloth in a solution of mild neutral detergent
to wipe it clean. See drawing.
B860A01A-AAT
Proper care of your cassette tapes will extend
the tape life and increase your listening enjoy-
ment. Always protect your tapes and cassette
cases from direct sunlight, severely cold and
dusty conditions. When not in use, cassettes
should always be stored in the original protec-
tive cassette case. When the vehicle is very hot
or cold, allow the interior temperature to become
more comfortable before listening to your cas-
settes.B850A01L
B860A01L
Page 140 of 253
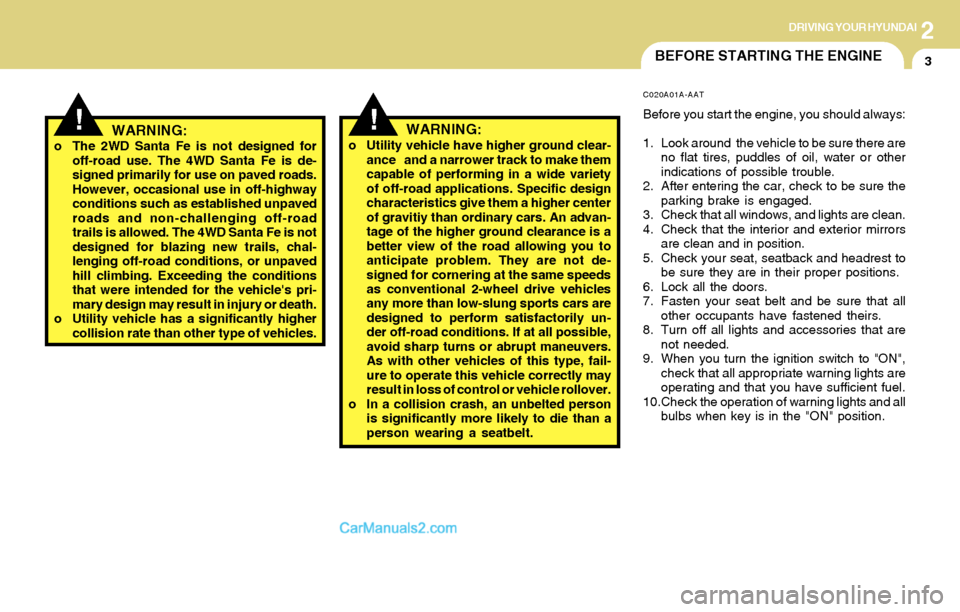
2DRIVING YOUR HYUNDAI
3BEFORE STARTING THE ENGINE
!!WARNING:o The 2WD Santa Fe is not designed for
off-road use. The 4WD Santa Fe is de-
signed primarily for use on paved roads.
However, occasional use in off-highway
conditions such as established unpaved
roads and non-challenging off-road
trails is allowed. The 4WD Santa Fe is not
designed for blazing new trails, chal-
lenging off-road conditions, or unpaved
hill climbing. Exceeding the conditions
that were intended for the vehicle's pri-
mary design may result in injury or death.
o Utility vehicle has a significantly higher
collision rate than other type of vehicles.
C020A01A-AAT
Before you start the engine, you should always:
1. Look around the vehicle to be sure there are
no flat tires, puddles of oil, water or other
indications of possible trouble.
2. After entering the car, check to be sure the
parking brake is engaged.
3. Check that all windows, and lights are clean.
4. Check that the interior and exterior mirrors
are clean and in position.
5. Check your seat, seatback and headrest to
be sure they are in their proper positions.
6. Lock all the doors.
7. Fasten your seat belt and be sure that all
other occupants have fastened theirs.
8. Turn off all lights and accessories that are
not needed.
9. When you turn the ignition switch to "ON",
check that all appropriate warning lights are
operating and that you have sufficient fuel.
10.Check the operation of warning lights and all
bulbs when key is in the "ON" position. o Utility vehicle have higher ground clear-
ance and a narrower track to make them
capable of performing in a wide variety
of off-road applications. Specific design
characteristics give them a higher center
of gravitiy than ordinary cars. An advan-
tage of the higher ground clearance is a
better view of the road allowing you to
anticipate problem. They are not de-
signed for cornering at the same speeds
as conventional 2-wheel drive vehicles
any more than low-slung sports cars are
designed to perform satisfactorily un-
der off-road conditions. If at all possible,
avoid sharp turns or abrupt maneuvers.
As with other vehicles of this type, fail-
ure to operate this vehicle correctly may
result in loss of control or vehicle rollover.
o In a collision crash, an unbelted person
is significantly more likely to die than a
person wearing a seatbelt.WARNING:
Page 142 of 253
2DRIVING YOUR HYUNDAI
5STARTING
!
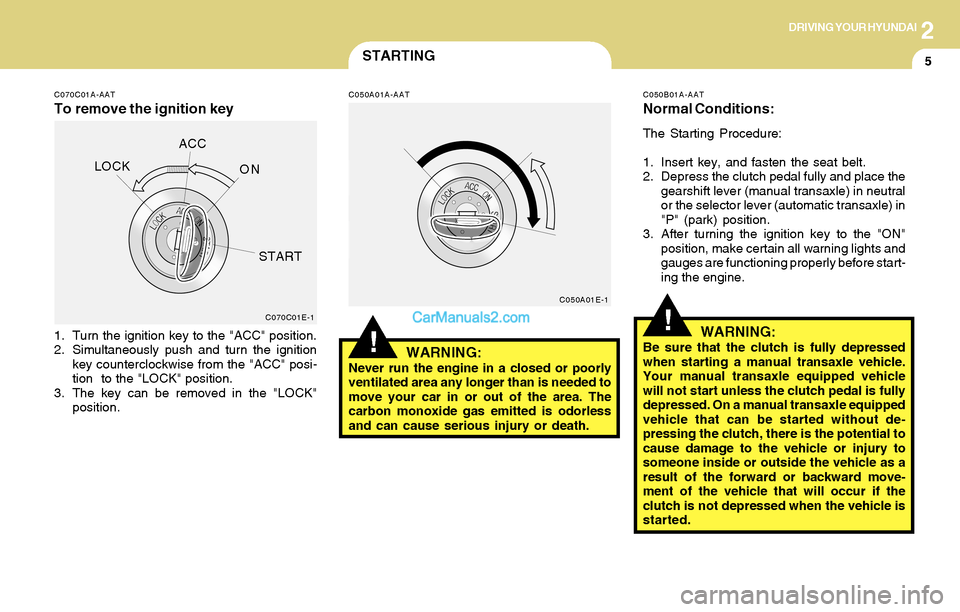
C070C01A-AAT
To remove the ignition key
C050A01A-AAT
1. Turn the ignition key to the "ACC" position.
2. Simultaneously push and turn the ignition
key counterclockwise from the "ACC" posi-
tion to the "LOCK" position.
3. The key can be removed in the "LOCK"
position.
WARNING:Never run the engine in a closed or poorly
ventilated area any longer than is needed to
move your car in or out of the area. The
carbon monoxide gas emitted is odorless
and can cause serious injury or death.
C050B01A-AAT
Normal Conditions:
The Starting Procedure:
1. Insert key, and fasten the seat belt.
2. Depress the clutch pedal fully and place the
gearshift lever (manual transaxle) in neutral
or the selector lever (automatic transaxle) in
"P" (park) position.
3. After turning the ignition key to the "ON"
position, make certain all warning lights and
gauges are functioning properly before start-
ing the engine.
WARNING:Be sure that the clutch is fully depressed
when starting a manual transaxle vehicle.
Your manual transaxle equipped vehicle
will not start unless the clutch pedal is fully
depressed. On a manual transaxle equipped
vehicle that can be started without de-
pressing the clutch, there is the potential to
cause damage to the vehicle or injury to
someone inside or outside the vehicle as a
result of the forward or backward move-
ment of the vehicle that will occur if the
clutch is not depressed when the vehicle is
started.
!C070C01E-1C050A01E-1
LOCKACC
ON
START