2004 Hyundai Santa Fe ignition
[x] Cancel search: ignitionPage 124 of 253
1FEATURES OF YOUR HYUNDAI
111
D285F02O-AAT
Playing a Compact Disc
Insert a disc partway into the slot. Label side up.
The player will pull it in and the disc should begin
playing. The display will show the CD symbol.
You can inset a compact disc with the ignition off.
NOTE:This CD player is suitable only for 12 cm
discs, do not use irregular shaped CDs.
1. SEEK/SCAN Button
SEEK
Press this Pushbutton to go to the next TRACK
and the track number will appear on the display.
If you hold this pushbutton or press it more than
once, the player will continue moving forward
through the disc. The sound will mute while
seeking.
SEEK
Press this Pushbutton to go to the previous
track if the current track has been playing for
less than eight seconds. If this pushbutton is
pressed and the current track has been playing
for more than eight seconds, it will go to the
beginning of the current track. TRACK and the
track number will appear on the display. If you
hold this pushbutton or press it more than once,
the player will continue moving back through the
disc. The sound will mute while seeking.
SCAN
Press and hold either SEEK SCAN arrow for
more than two seconds until SCAN appears on
the display and you hear a beep. Use SEEK
SCAN to listen to each track for a few seconds.
The sounds will mute while scanning. SCAN will
appear on the display. Press either SEEK SCAN
arrow again to stop scanning.
2. REVERSE Button
Press and hold this pushbutton to reverse
quickly within a track. Press and hold this
pushbutton for less than two seconds to re-
verse at six times the normal playing speed.
Press and hold it for more than two seconds to
reverse at 17 times the normal playing speed.
Release it to play the passage. The display will
show ET and the elapsed time.
3. FORWARD Button
Press and hold this pushbutton to advance
quickly within a track. Press and hold this
pushbutton for less than two seconds to ad-
vance at six times the normal playing speed.
Press and hold it for more than two seconds to
advance at 17 times the normal playing speed.
Release it to play the passage. The display will
show ET and the elapsed time.
4. RANDOM Button
Press this pushbutton to hear the tracks in
random, rather than sequential, order. RDM will
appear on the display. RDM T and the track
number will appear on the display when each
track starts to play. Press it again to turn off
random play. RDM OFF will appear on the
display.
5. BAND Select Button
Press this button to listen to the radio when a
disc is playing. The disc will stop but remain in
the player.
6. TAPE/CD Select Button
Press this button to play a CD when listening to
the radio. Press TAPE CD to switch between the
tape and compact disc if both are loaded. The
inactive tape or CD will remain safely inside the
radio for future listening.
7. CD EJECT Button
Press this button, located to the left of the CD slot
to eject a CD. Eject may be activated with either
the ignition or radio off. CDs may be loaded with
the radio and ignition off.
Page 130 of 253
1FEATURES OF YOUR HYUNDAI
117
D295D03O-AAT
1. LOAD Button
This compact disc playing will accommodate up
to six discs.
To insert one disc do the following:
1. Turn the ignition on.
2. Press and release the LOAD Button.
3. Wait for the light, located to the right of the
slot, to turn green.
4. Load a disc. Insert a disc partway into the
slot, label side up. The player will pull the disc
in.
NOTE:This CD player is suitable only for 12 cm
discs, do not use irregular shaped CDs.
When the disc is inserted, the CD symbol will be
displayed. If you select an EQ setting for your
disc, it will be activated each time you play a disc.
If the radio is on or off, the disc will begin to play
automatically.
To inset multiple discs do the followings:
1. Turn the ignition on.
2. Press and hold the LOAD button for two
seconds.
You will then hear two beeps and the light,
located to the right of the slot, will begin to
flash.3. Once the light stops flashing and turns green.
Load a disc. Insert a disc partway into the
slot, label side up.
The player will pull the disc in.
Once the disc is loaded, the light will begin
flashing again. Once the light stop flashing
and turns green you can then load another
disc. The disc player takes up to six discs.
Do not try to load more than six.
When a disc is inserted, the CD symbol will
be displayed. If more than one disc has been
loaded, number for each disc will be dis-
played. If you select an EQ setting for your
disc, it will be activated each time you play a
disc.
If the radio is on or off, the last disc loaded will
begin to play automatically.
4. To load more than one disc but less than six,
complete Steps 1, 2 and 3. When you have
finished loading discs, with the radio on or off,
press LOAD to cancel the loading function.
The radio will begin to play the last CD loaded.
As each new track starts to play, the track
number will appear on the display.
Playing a Specific Loaded CD
For every CD loaded, a number will appear on
the radio display. To play a specific CD, first
press the CD select button to start playing a CD.
Then press the numbered button that corre-
sponds to the CD you want to play.A small bar will appear under the CD number that
is playing, it could be due to one of the following
conditions:
o The road is too rough. The disc should play
when the road is smoother.
o The disc is dirty, scratched, wet or upside
down.
o The air is very humid. If so, wait about an hour
and try again.
If any error occurs repeatedly or if an error can't
be corrected, please contact your dealer. If
your radio displays an error message, write it
down and provide it to your dealer when report-
ing the problem.
2. CD EJECT Button
This button will eject a disc or discs, if you have
multiple discs loaded. To eject a disc or discs
from the disc player perform one of the following
steps:
o Press and release the eject button to eject
the disc that is currently playing.
o To eject all of the discs, press this button for
two seconds, you will hear three beeps, and
the light will flash to let you know when a disc
is being ejected.
Page 136 of 253

1FEATURES OF YOUR HYUNDAI
123ANTENNA
B870C01A-GAT
Manual Antenna (If installed)
B880C02B-AAT
Glass Antenna (If installed)
Your car uses a manual stainless steel antenna
to receive both AM and FM broadcast signals.
Pull up the antenna using your fingers, as shown
in the drawing.When the radio power switch is turned on while
the ignition key is in either the "ON" or "ACC"
position, your car will receive both AM and FM
broadcast signals through the antenna in the
rear quarter glass.
CAUTION:Before entering an automatic car wash or a
place with a low height clearance such as a
residential or commercial garage, be sure
that the antenna is fully retracted.
!
B870C01O
B880C01ONOTE:Look at a tape before you insert it. If the tape
is loose, tighten it by turning one of the
hubs with a pencil or your finger. If the label
is peeling off, do not put it in the drive
mechanism.
Do not leave tapes sitting where they are
exposed to hot, warm, or high humidity,
such as on top of the dashboard or in the
player. If a tape is excessively hot or cold, let
it reach a moderate temperature before
putting it in the player.
B860A03L
Page 140 of 253
2DRIVING YOUR HYUNDAI
3BEFORE STARTING THE ENGINE
!!WARNING:o The 2WD Santa Fe is not designed for
off-road use. The 4WD Santa Fe is de-
signed primarily for use on paved roads.
However, occasional use in off-highway
conditions such as established unpaved
roads and non-challenging off-road
trails is allowed. The 4WD Santa Fe is not
designed for blazing new trails, chal-
lenging off-road conditions, or unpaved
hill climbing. Exceeding the conditions
that were intended for the vehicle's pri-
mary design may result in injury or death.
o Utility vehicle has a significantly higher
collision rate than other type of vehicles.
C020A01A-AAT
Before you start the engine, you should always:
1. Look around the vehicle to be sure there are
no flat tires, puddles of oil, water or other
indications of possible trouble.
2. After entering the car, check to be sure the
parking brake is engaged.
3. Check that all windows, and lights are clean.
4. Check that the interior and exterior mirrors
are clean and in position.
5. Check your seat, seatback and headrest to
be sure they are in their proper positions.
6. Lock all the doors.
7. Fasten your seat belt and be sure that all
other occupants have fastened theirs.
8. Turn off all lights and accessories that are
not needed.
9. When you turn the ignition switch to "ON",
check that all appropriate warning lights are
operating and that you have sufficient fuel.
10.Check the operation of warning lights and all
bulbs when key is in the "ON" position. o Utility vehicle have higher ground clear-
ance and a narrower track to make them
capable of performing in a wide variety
of off-road applications. Specific design
characteristics give them a higher center
of gravitiy than ordinary cars. An advan-
tage of the higher ground clearance is a
better view of the road allowing you to
anticipate problem. They are not de-
signed for cornering at the same speeds
as conventional 2-wheel drive vehicles
any more than low-slung sports cars are
designed to perform satisfactorily un-
der off-road conditions. If at all possible,
avoid sharp turns or abrupt maneuvers.
As with other vehicles of this type, fail-
ure to operate this vehicle correctly may
result in loss of control or vehicle rollover.
o In a collision crash, an unbelted person
is significantly more likely to die than a
person wearing a seatbelt.WARNING:
Page 141 of 253
2DRIVING YOUR HYUNDAI
4KEY POSITIONSTO START THE ENGINE
C040A01A-AAT
CAUTION:The engine should not be turned off or the
key removed from the ignition key cylinder
while the car is in motion. The steering
wheel is locked by removing the key.
NOTE:Do not hold the key in the "START" position
for more than 15 seconds.
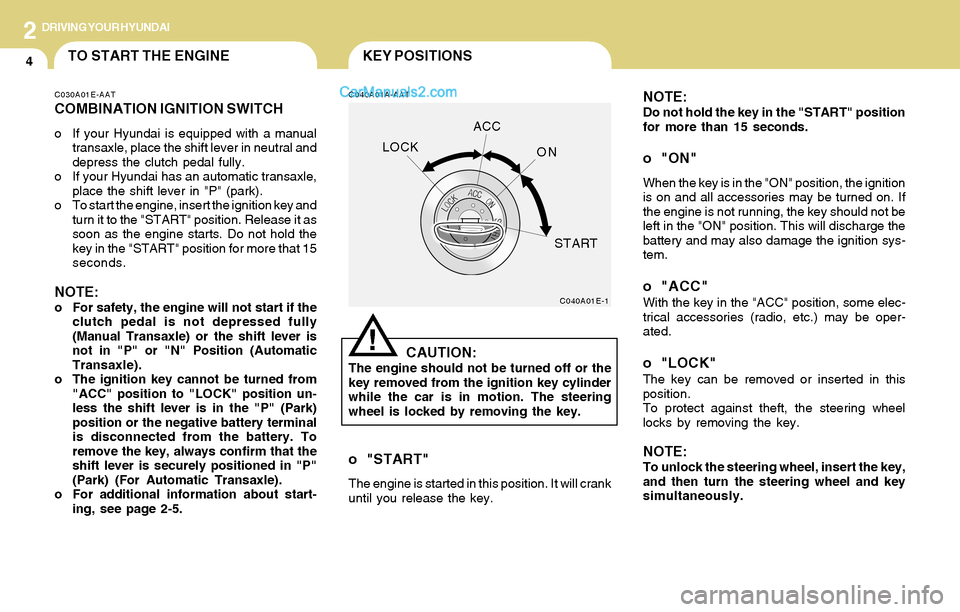
o "ON"
When the key is in the "ON" position, the ignition
is on and all accessories may be turned on. If
the engine is not running, the key should not be
left in the "ON" position. This will discharge the
battery and may also damage the ignition sys-
tem.
o "ACC"With the key in the "ACC" position, some elec-
trical accessories (radio, etc.) may be oper-
ated.
o "LOCK"The key can be removed or inserted in this
position.
To protect against theft, the steering wheel
locks by removing the key.
NOTE:To unlock the steering wheel, insert the key,
and then turn the steering wheel and key
simultaneously.
C040A01E-1
LOCKACC
ON
START
!
C030A01E-AAT
COMBINATION IGNITION SWITCH
o If your Hyundai is equipped with a manual
transaxle, place the shift lever in neutral and
depress the clutch pedal fully.
o If your Hyundai has an automatic transaxle,
place the shift lever in "P" (park).
o To start the engine, insert the ignition key and
turn it to the "START" position. Release it as
soon as the engine starts. Do not hold the
key in the "START" position for more that 15
seconds.
NOTE:o For safety, the engine will not start if the
clutch pedal is not depressed fully
(Manual Transaxle) or the shift lever is
not in "P" or "N" Position (Automatic
Transaxle).
o The ignition key cannot be turned from
"ACC" position to "LOCK" position un-
less the shift lever is in the "P" (Park)
position or the negative battery terminal
is disconnected from the battery. To
remove the key, always confirm that the
shift lever is securely positioned in "P"
(Park) (For Automatic Transaxle).
o For additional information about start-
ing, see page 2-5.
o "START"
The engine is started in this position. It will crank
until you release the key.
Page 142 of 253
2DRIVING YOUR HYUNDAI
5STARTING
!
C070C01A-AAT
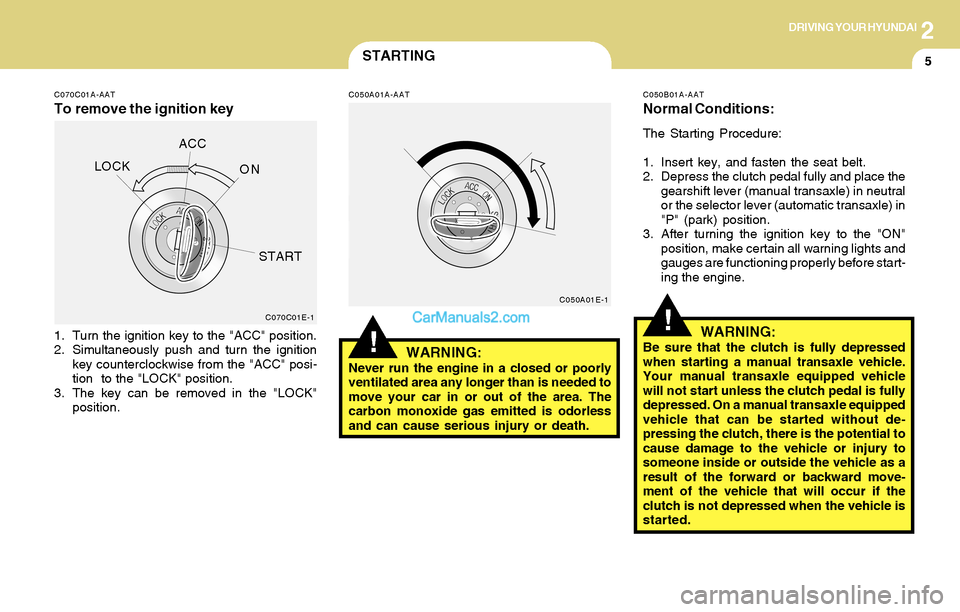
To remove the ignition key
C050A01A-AAT
1. Turn the ignition key to the "ACC" position.
2. Simultaneously push and turn the ignition
key counterclockwise from the "ACC" posi-
tion to the "LOCK" position.
3. The key can be removed in the "LOCK"
position.
WARNING:Never run the engine in a closed or poorly
ventilated area any longer than is needed to
move your car in or out of the area. The
carbon monoxide gas emitted is odorless
and can cause serious injury or death.
C050B01A-AAT
Normal Conditions:
The Starting Procedure:
1. Insert key, and fasten the seat belt.
2. Depress the clutch pedal fully and place the
gearshift lever (manual transaxle) in neutral
or the selector lever (automatic transaxle) in
"P" (park) position.
3. After turning the ignition key to the "ON"
position, make certain all warning lights and
gauges are functioning properly before start-
ing the engine.
WARNING:Be sure that the clutch is fully depressed
when starting a manual transaxle vehicle.
Your manual transaxle equipped vehicle
will not start unless the clutch pedal is fully
depressed. On a manual transaxle equipped
vehicle that can be started without de-
pressing the clutch, there is the potential to
cause damage to the vehicle or injury to
someone inside or outside the vehicle as a
result of the forward or backward move-
ment of the vehicle that will occur if the
clutch is not depressed when the vehicle is
started.
!C070C01E-1C050A01E-1
LOCKACC
ON
START
Page 143 of 253
2DRIVING YOUR HYUNDAI
6OPERATING THE MANUAL
TRANSAXLE
NOTE:
o To shift into reverse, rest the lever in
neutral for at least 3 seconds after your
car is completely stopped. Then move
the lever into the reverse position.
o During cold weather, shifting may be
difficult until the transaxle lubricant has
warmed up. This is normal and not harm-
ful to the transaxle.
o If you've come to a complete stop and
it's hard to shift into 1st or R(Reverse),
put the shift lever in N(Neutral) position
and release the clutch. Press the clutch
pedal back down, and then shift into 1st
or R(Reverse) gear position.
o Do not use the shift lever as a handrest
during driving, as this can result in pre-
mature wear of the transaxle shift forks.
CAUTION:When downshifting from fifth gear to fourth
gear, caution should be taken not to inad-
vertently press the gear lever sideways in
such a manner that second gear is en-
gaged. Such a drastic downshift may cause
the engine speed to increase to the point
that the tachometer will enter the red-zone.
Such over-revving of the engine may pos-
sibly cause engine damage.
!
4. Turn the ignition key to the "START" position
and release it when the engine starts.
After the engine has started, allow the engine
to run for 10 to 20 seconds prior to placing
the vehicle in gear.
The starter should not be operated for more
than 15 seconds at a time. Wait 15-30 sec-
onds between starting attempts to protect
the starter from overheating.C070A02A-AAT
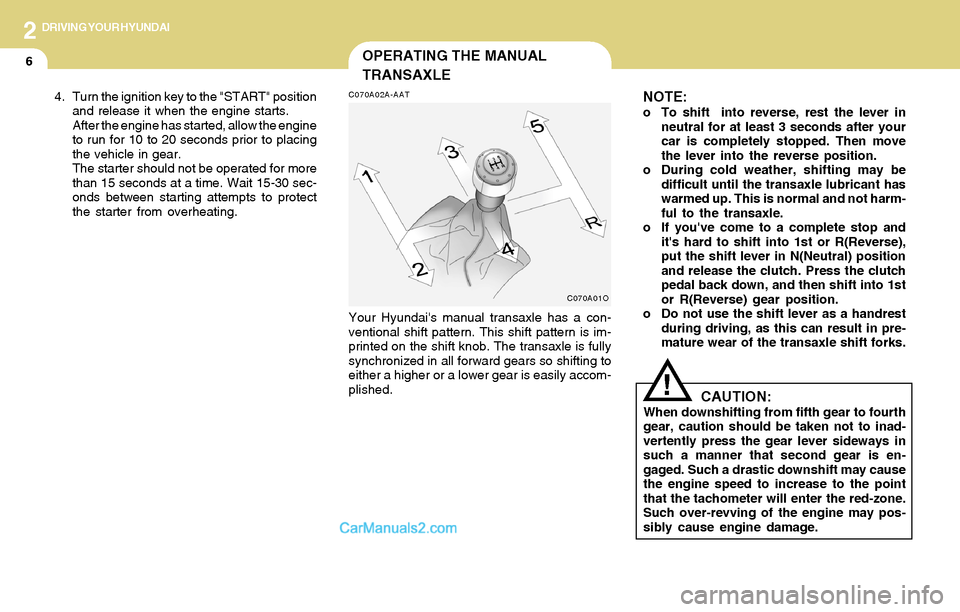
Your Hyundai's manual transaxle has a con-
ventional shift pattern. This shift pattern is im-
printed on the shift knob. The transaxle is fully
synchronized in all forward gears so shifting to
either a higher or a lower gear is easily accom-
plished.
C070A01O
Page 146 of 253
2DRIVING YOUR HYUNDAI
9
!
C090E01O-AAT
o D(Drive):
Use for normal driving. The transaxle will auto-
matically shift through a four gear sequence.
C090F01O-GAT
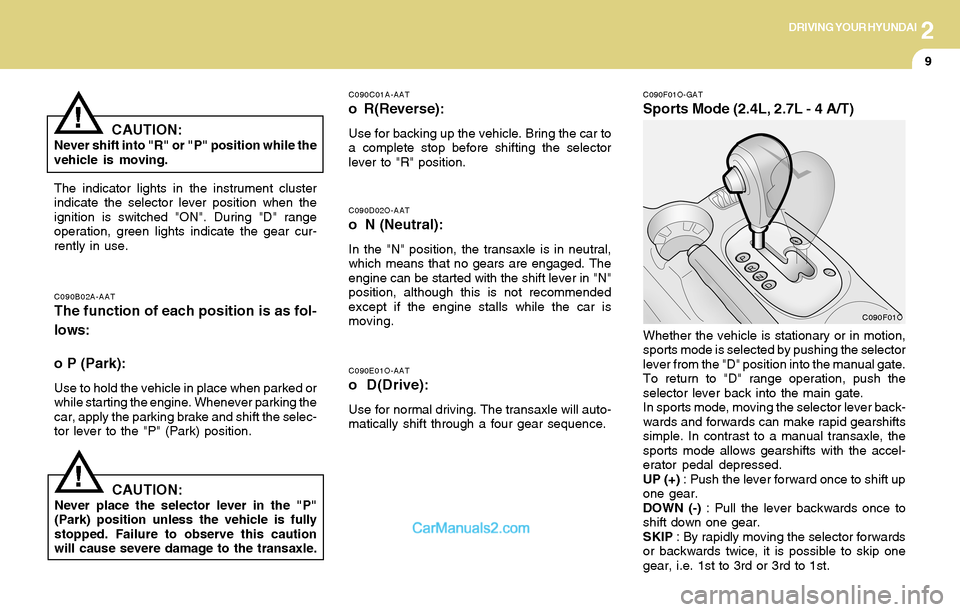
Sports Mode (2.4L, 2.7L - 4 A/T)
C090D02O-AAT
o N (Neutral):
In the "N" position, the transaxle is in neutral,
which means that no gears are engaged. The
engine can be started with the shift lever in "N"
position, although this is not recommended
except if the engine stalls while the car is
moving.
C090B02A-AATThe function of each position is as fol-
lows:
o P (Park):
Use to hold the vehicle in place when parked or
while starting the engine. Whenever parking the
car, apply the parking brake and shift the selec-
tor lever to the "P" (Park) position.
C090C01A-AAT
o R(Reverse):
Use for backing up the vehicle. Bring the car to
a complete stop before shifting the selector
lever to "R" position.
The indicator lights in the instrument cluster
indicate the selector lever position when the
ignition is switched "ON". During "D" range
operation, green lights indicate the gear cur-
rently in use.
CAUTION:Never place the selector lever in the "P"
(Park) position unless the vehicle is fully
stopped. Failure to observe this caution
will cause severe damage to the transaxle.Whether the vehicle is stationary or in motion,
sports mode is selected by pushing the selector
lever from the "D" position into the manual gate.
To return to "D" range operation, push the
selector lever back into the main gate.
In sports mode, moving the selector lever back-
wards and forwards can make rapid gearshifts
simple. In contrast to a manual transaxle, the
sports mode allows gearshifts with the accel-
erator pedal depressed.
UP (+) : Push the lever forward once to shift up
one gear.
DOWN (-) : Pull the lever backwards once to
shift down one gear.
SKIP : By rapidly moving the selector forwards
or backwards twice, it is possible to skip one
gear, i.e. 1st to 3rd or 3rd to 1st.
CAUTION:Never shift into "R" or "P" position while the
vehicle is moving.
!
C090F01O