2004 Hyundai Santa Fe key
[x] Cancel search: keyPage 80 of 253

1FEATURES OF YOUR HYUNDAI
67PARKING BRAKE
Gate Operator Programming & Cana-
dian Programming
During programming, your handheld transmit-
ter may automatically stop transmitting.
Continue to press and hold the HomeLink button
while you press and repress ("cycle") your
handheld transmitter every two seconds until
the frequency signal has been learned. The
indicator light will flash slowly at first and then
rapidly upon successful programming.
Accessories
For more information on HomeLink and
HomeLink-compatible products, or to purchase
HomeLink accessories, call 1-800-355-3515
or visit www.homeink.com.
B530A01A-AAT
Always engage the parking brake before leav-
ing the car. This also turns on the parking brake
indicator light when the key is in the "ON" or
"START" position. Before driving away, be sure
that the parking brake is fully released and the
indicator light is off.
o To engage the parking brake, pull the lever
up as far as possible.
o To release the parking brake, pull up and
press the thumb button. Then, while holding
the button in, lower the brake lever.
B530A01O
TAIL GATE
!
B540A01FC-AAT
WARNING:The tail gate should always be kept com-
pletely closed while the vehicle is in motion.
If it is left open or ajar, poisonous exhaust
gases may enter the car resulting in serious
illness or death to the occupants. See addi-
tional warnings concerning exhaust gases
on page 2-2.
B540A01O
o The tail gate can be locked or unlocked with
a key.
Page 81 of 253

1FEATURES OF YOUR HYUNDAI
68
o To close the tail gate window, lower the tail
gate window, and it will close by itself.
To be sure the tail gate window is securely
fastened, always try to pull it up again.
NOTE:The tail gate window lock is operated is in
connection with the tail gate lock. To open
the tail gate window make sure the tail gate
is unlocked with a key or the central door
locking switch. o The tail gate is opened by pulling the outside
handle up, raising the tail gate manually.
o To close, lower the tail gate, then press down
on it until it is closed. To be sure the tail gate
is fully closed, always try to pull it up again
without using the outside handle.
B540B02O-AATTail gate Window
B540B01O
o When you push the tail gate window release
button to open the tail gate window, it will
spring up slightly.
Raise the tail gate window. The window will
raise completly by itself after it has been
raised halfway.
B540C01HP-GAT
LUGGAGE COMPARTMENT LIGHT
Luggage compartment light has a 3-position
switch. The three positions are:
o In the "MIDDLE" position, the luggage com-
partment light comes on when the tail gate is
opened, then goes out when it is closed.
o In the "ON" position, the light stays on at all
times.
o In the "OFF" position, the light stays off at all
times.
B540C01O
LUGGAGE COMPARTMENT
Page 110 of 253

1FEATURES OF YOUR HYUNDAI
97
H260B04O-AAT
1. POWER ON-OFF Control Knob
The radio unit may be operated when the ignition
key is in the "ACC" or "ON" position. Press the
knob to switch the power on. The LCD shows
the radio frequency in the radio mode or the CD
track indicator in the CD mode. To switch the
power off, press the knob again.
VOLUME Control
Rotate the knob clockwise to increase the
volume and turn the knob counterclockwise to
reduce the volume.
BALANCE Control
Pull and turn the control knob clockwise to
emphasize right speaker sound (left speaker
sound will be attenuated). When the control
knob is turned counterclockwise, left speaker
sound will be emphasized (right speaker sound
will be attenuated).
2. FAD (Fader Control) Knob
Turn the control knob counterclockwise to
emphasize front speaker sound (rear speaker
sound will be attenuated). When the control
knob is turned clockwise, rear speaker sound
will be emphasized (front speaker sound will be
attenuated).
3. BASS Control Knob
Press to pop the knob out and turn to the left or
right for the desired bass tone.
TREB (Treble Control) Knob
Pull the bass control knob further out.
Turn to the left or right for the desired treble tone.
4. SCAN Button
When the scan button is pressed, the frequency
will increase and the receivable stations will be
tuned in one after another, receiving each sta-
tion for 5 seconds. To stop scanning, press the
scan button again.
5. TUNE (Manual) Select Button
Press the ( ) side or ( ) side to increase or to
decrease the frequency. Press either button
and hold down to continuously scroll.
Release button once the desired station is
reached.
SEEK Operation
(Automatic Channel Selection)
Press the TUNE select button for 0.5 sec or
more. Releasing it will automatically tune to the
next available station with a beep sound.
When the ( ) side is pressed longer than 0.5
second, releasing will automatically tune to the
next higher frequency and when the ( ) side is
pressed longer than 0.5 second, releasing will
automatically tune to the next lower frequency.
6. BAND Selector
Pressing the button changes the AM, FM1
and FM2 bands. The mode selected is dis-
played on LCD.
7. PRESET STATION SELECT Button
Six (6) stations for AM, FM1 or FM2 respec-
tively can be preset in the electronic memory
circuit on this unit.
FM/AM
Page 136 of 253

1FEATURES OF YOUR HYUNDAI
123ANTENNA
B870C01A-GAT
Manual Antenna (If installed)
B880C02B-AAT
Glass Antenna (If installed)
Your car uses a manual stainless steel antenna
to receive both AM and FM broadcast signals.
Pull up the antenna using your fingers, as shown
in the drawing.When the radio power switch is turned on while
the ignition key is in either the "ON" or "ACC"
position, your car will receive both AM and FM
broadcast signals through the antenna in the
rear quarter glass.
CAUTION:Before entering an automatic car wash or a
place with a low height clearance such as a
residential or commercial garage, be sure
that the antenna is fully retracted.
!
B870C01O
B880C01ONOTE:Look at a tape before you insert it. If the tape
is loose, tighten it by turning one of the
hubs with a pencil or your finger. If the label
is peeling off, do not put it in the drive
mechanism.
Do not leave tapes sitting where they are
exposed to hot, warm, or high humidity,
such as on top of the dashboard or in the
player. If a tape is excessively hot or cold, let
it reach a moderate temperature before
putting it in the player.
B860A03L
Page 138 of 253

DRIVING YOUR HYUNDAI
2
Engine Exhaust Can Be Dangerous! ............................ 2-2
Before Starting the Engine ............................................ 2-3
Key Positions ................................................................ 2-4
Starting..........................................................................2-5
Manual Transaxle ......................................................... 2-6
Automatic Transaxle ............................................ 2-8, 2-11
Anti-Lock Brake System (ABS) ..................................2-15
Brake Traction Control System (BTCS) .....................2-15
Full Traction Control System (FTCS) .........................2-17
Full-Time 4WD Operation...........................................2-18
Limited-Slip Differential................................................2-20
Good Braking Practices..............................................2-21
Driving for Economy...................................................2-22
Winter Driving.............................................................2-23
Trailer or Vehicle Towing ............................................2-26
2
Page 140 of 253

2DRIVING YOUR HYUNDAI
3BEFORE STARTING THE ENGINE
!!WARNING:o The 2WD Santa Fe is not designed for
off-road use. The 4WD Santa Fe is de-
signed primarily for use on paved roads.
However, occasional use in off-highway
conditions such as established unpaved
roads and non-challenging off-road
trails is allowed. The 4WD Santa Fe is not
designed for blazing new trails, chal-
lenging off-road conditions, or unpaved
hill climbing. Exceeding the conditions
that were intended for the vehicle's pri-
mary design may result in injury or death.
o Utility vehicle has a significantly higher
collision rate than other type of vehicles.
C020A01A-AAT
Before you start the engine, you should always:
1. Look around the vehicle to be sure there are
no flat tires, puddles of oil, water or other
indications of possible trouble.
2. After entering the car, check to be sure the
parking brake is engaged.
3. Check that all windows, and lights are clean.
4. Check that the interior and exterior mirrors
are clean and in position.
5. Check your seat, seatback and headrest to
be sure they are in their proper positions.
6. Lock all the doors.
7. Fasten your seat belt and be sure that all
other occupants have fastened theirs.
8. Turn off all lights and accessories that are
not needed.
9. When you turn the ignition switch to "ON",
check that all appropriate warning lights are
operating and that you have sufficient fuel.
10.Check the operation of warning lights and all
bulbs when key is in the "ON" position. o Utility vehicle have higher ground clear-
ance and a narrower track to make them
capable of performing in a wide variety
of off-road applications. Specific design
characteristics give them a higher center
of gravitiy than ordinary cars. An advan-
tage of the higher ground clearance is a
better view of the road allowing you to
anticipate problem. They are not de-
signed for cornering at the same speeds
as conventional 2-wheel drive vehicles
any more than low-slung sports cars are
designed to perform satisfactorily un-
der off-road conditions. If at all possible,
avoid sharp turns or abrupt maneuvers.
As with other vehicles of this type, fail-
ure to operate this vehicle correctly may
result in loss of control or vehicle rollover.
o In a collision crash, an unbelted person
is significantly more likely to die than a
person wearing a seatbelt.WARNING:
Page 141 of 253

2DRIVING YOUR HYUNDAI
4KEY POSITIONSTO START THE ENGINE
C040A01A-AAT
CAUTION:The engine should not be turned off or the
key removed from the ignition key cylinder
while the car is in motion. The steering
wheel is locked by removing the key.
NOTE:Do not hold the key in the "START" position
for more than 15 seconds.
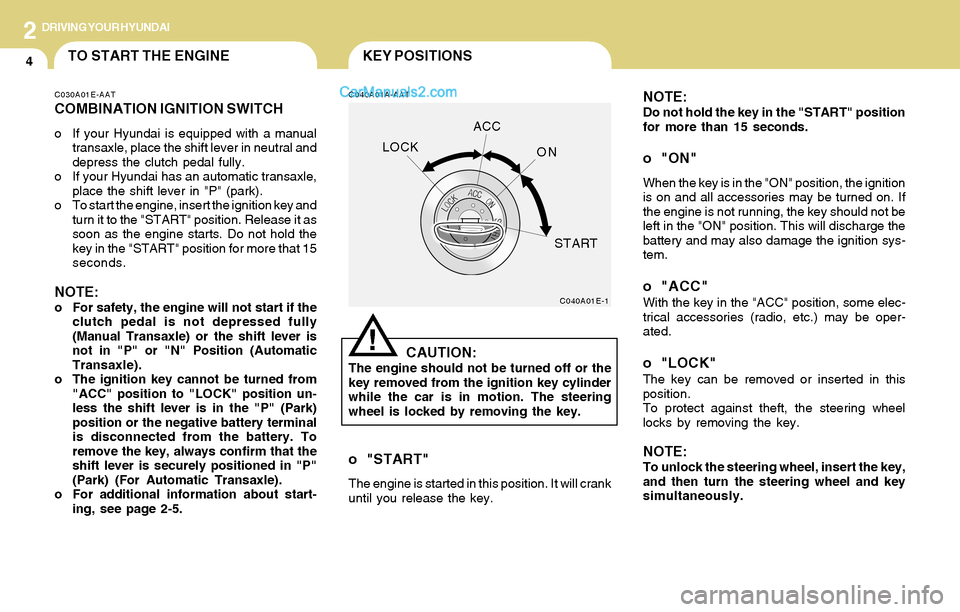
o "ON"
When the key is in the "ON" position, the ignition
is on and all accessories may be turned on. If
the engine is not running, the key should not be
left in the "ON" position. This will discharge the
battery and may also damage the ignition sys-
tem.
o "ACC"With the key in the "ACC" position, some elec-
trical accessories (radio, etc.) may be oper-
ated.
o "LOCK"The key can be removed or inserted in this
position.
To protect against theft, the steering wheel
locks by removing the key.
NOTE:To unlock the steering wheel, insert the key,
and then turn the steering wheel and key
simultaneously.
C040A01E-1
LOCKACC
ON
START
!
C030A01E-AAT
COMBINATION IGNITION SWITCH
o If your Hyundai is equipped with a manual
transaxle, place the shift lever in neutral and
depress the clutch pedal fully.
o If your Hyundai has an automatic transaxle,
place the shift lever in "P" (park).
o To start the engine, insert the ignition key and
turn it to the "START" position. Release it as
soon as the engine starts. Do not hold the
key in the "START" position for more that 15
seconds.
NOTE:o For safety, the engine will not start if the
clutch pedal is not depressed fully
(Manual Transaxle) or the shift lever is
not in "P" or "N" Position (Automatic
Transaxle).
o The ignition key cannot be turned from
"ACC" position to "LOCK" position un-
less the shift lever is in the "P" (Park)
position or the negative battery terminal
is disconnected from the battery. To
remove the key, always confirm that the
shift lever is securely positioned in "P"
(Park) (For Automatic Transaxle).
o For additional information about start-
ing, see page 2-5.
o "START"
The engine is started in this position. It will crank
until you release the key.
Page 142 of 253

2DRIVING YOUR HYUNDAI
5STARTING
!
C070C01A-AAT
To remove the ignition key
C050A01A-AAT
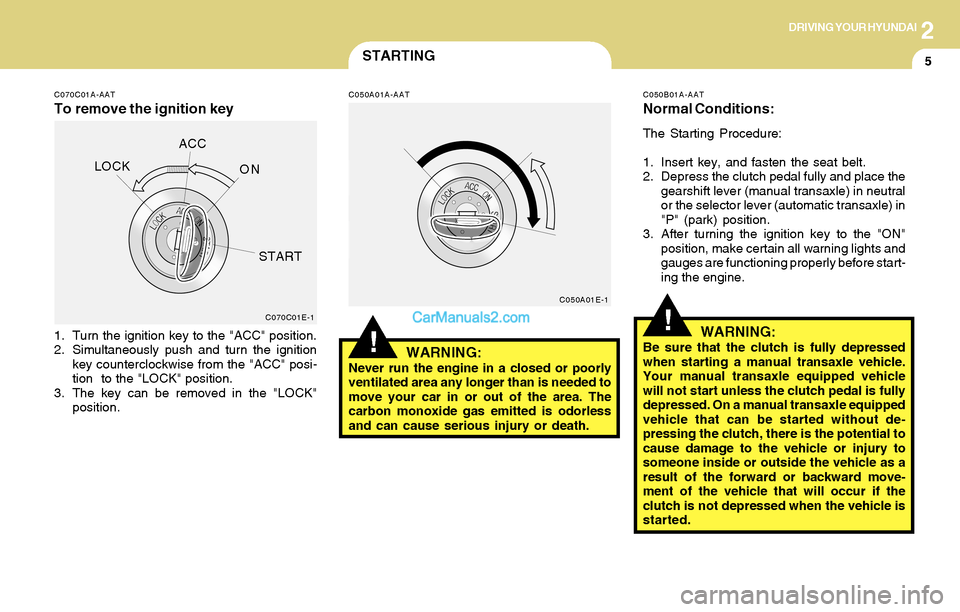
1. Turn the ignition key to the "ACC" position.
2. Simultaneously push and turn the ignition
key counterclockwise from the "ACC" posi-
tion to the "LOCK" position.
3. The key can be removed in the "LOCK"
position.
WARNING:Never run the engine in a closed or poorly
ventilated area any longer than is needed to
move your car in or out of the area. The
carbon monoxide gas emitted is odorless
and can cause serious injury or death.
C050B01A-AAT
Normal Conditions:
The Starting Procedure:
1. Insert key, and fasten the seat belt.
2. Depress the clutch pedal fully and place the
gearshift lever (manual transaxle) in neutral
or the selector lever (automatic transaxle) in
"P" (park) position.
3. After turning the ignition key to the "ON"
position, make certain all warning lights and
gauges are functioning properly before start-
ing the engine.
WARNING:Be sure that the clutch is fully depressed
when starting a manual transaxle vehicle.
Your manual transaxle equipped vehicle
will not start unless the clutch pedal is fully
depressed. On a manual transaxle equipped
vehicle that can be started without de-
pressing the clutch, there is the potential to
cause damage to the vehicle or injury to
someone inside or outside the vehicle as a
result of the forward or backward move-
ment of the vehicle that will occur if the
clutch is not depressed when the vehicle is
started.
!C070C01E-1C050A01E-1
LOCKACC
ON
START