2004 Hyundai Coupe turn signal
[x] Cancel search: turn signalPage 190 of 389

1CONTROLS AND EQUIPMENT
10
B070E02GK-GAT Replacing the battery When the transmitter's battery begins to get weak, it may take several pusheson the button to lock or unlock the doors, and the LED will not light. Re- place the battery as soon as possible. Battery type : CR2032 Replacement instructions:
Screwdriver 2. Remove the old battery from the
case and note the polarity. Make sure the polarity of the new battery is the same(+side facing down), then insert it in the transmitter.
3. Installation is the reverse order of disassembly.
1. Carefully seperate the case with a blade screwdriver as shown in theillustration. Battery
HGK122
HGK121
NOTE: Install a new battery within 30 sec- onds after remove the old one, if installing a new battery takes morethan 30 seconds, take the following steps.
1) Turn the ignition key to the "ACC" position.
2) Make sure that the turn signal lights blink once by pushing the "LOCK" or "UNLOCK" button on the transmitter.
Page 219 of 389

1
CONTROLS AND EQUIPMENT
39
1. Speedometer
2. Turn Signal Indicator Light
3. Odometer/Trip Odometer
4. Automatic Transaxle Position Indicator Light (Not all models)
5. Coolant Temperature Gauge
6. Trip Computer
7. Fuel Gauge
8. Tachometer
9. Electronic Stability Program (ESP) Indicator Light (Not all models)
10.Immobiliser Warning Light
11.Odometer/Trip Odometer Reset Knob 12.Charging System Warning Light
13.SRS (Airbag) Warning Light
14.Seat Belt Warning Light
15.High Beam Indicator Light
16.Oil Pressure Warning Light
17.Malfuction Indicator Light (Not all models)
18.Low Fuel Warning Light
19.Parking Brake/Brake Fluide Level Warning Light
20.Trip Computer Reset Knob21.CRUISE Indicator Light (Not all models)
22.CRUISE SET Indicator Light (Not all models)
23.Hatchback door Open Warning Light
24.Door Ajar Warning Light
25.Anti-Lock Brake Warning Light (Not all models)
Page 220 of 389

1CONTROLS AND EQUIPMENT
40
!
!
WARNING AND INDICATOR LIGHTS
SB210K1-ELOW OIL PRESSURE WARN ING LAMP
SB210G1-ETURN SIGNAL INDICA- TOR LAMPS
Operation of a turn signal is indicated by the warning lamp located in theinstrument cluster. If the lamp fails to illuminate or does not flash, a malfunc- tion within the turn signal system isindicated. 260P02Y-EAT ABS Service Reminder Indicator (Not all models)
When the key is turned to the "ON" position, the Anti-Lock Brake System SRI will come on and then go off in afew seconds. If the ABS SRI remains on, comes on while driving, or does not come on when the key is turned to the"ON" position, this indicates that there may be a problem with the ABS. If this occurs, have your vehiclechecked by your Hyundai dealer as soon as possible. The normal braking system will still be operational, butwithout the assistance of the anti-lock brake system. WARNING:
If the both ABS SRI and ParkingBrake/Brake fluid level warning lights remain "ON" or come on whiledriving, there may be a problem with E.B.D (Electronic brake force distribution).If this occurs, avoid sudden stops and have your vehicle checked by your Hyundai dealer as soon aspossible.SB210J1-E HIGH BEAM INDICATOR LAMP
The high beam indicator lamp will illu- minate whenever the headlamps areswitched to high beam of flash posi- tion.
CAUTION:
If the oil pressure warning light illuminates when the engine is run- ning, an insufficient oil pressure level for continued safe operationof the engine exists. Continued operation of the engine in this con- dition may result in serious enginedamage. Under normal circumstances, the light will illuminate when the igni- tion is turned "on" and will be extin- guished when the engine is started.
Page 230 of 389
1CONTROLS AND EQUIPMENT
50MULTI FUNCTION SWITCH
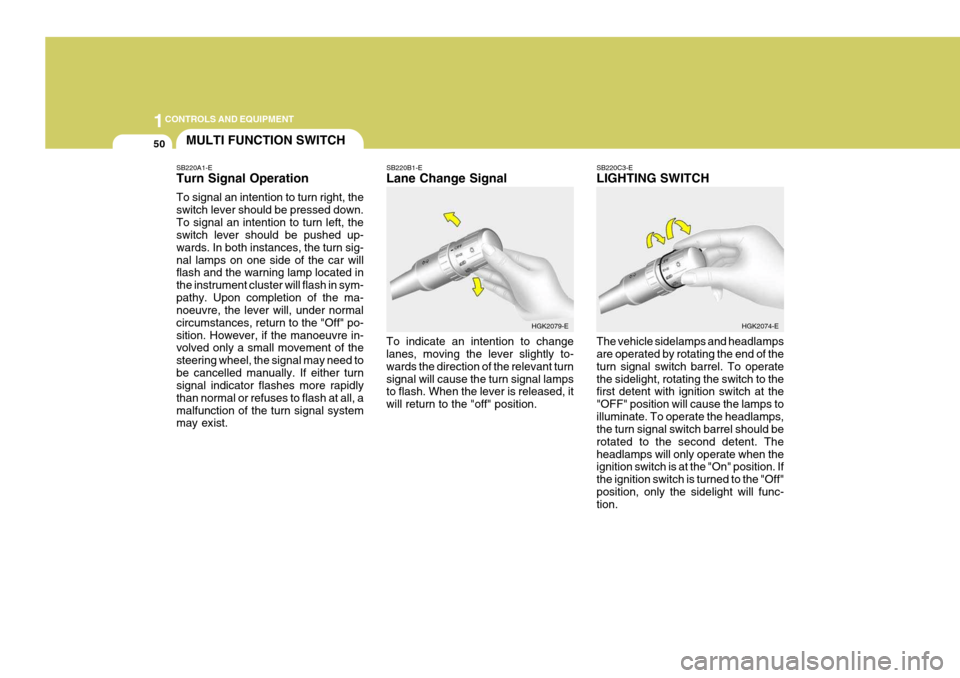
SB220A1-E Turn Signal Operation To signal an intention to turn right, the switch lever should be pressed down.To signal an intention to turn left, the switch lever should be pushed up- wards. In both instances, the turn sig-nal lamps on one side of the car will flash and the warning lamp located in the instrument cluster will flash in sym-pathy. Upon completion of the ma- noeuvre, the lever will, under normal circumstances, return to the "Off" po-sition. However, if the manoeuvre in- volved only a small movement of the steering wheel, the signal may need tobe cancelled manually. If either turn signal indicator flashes more rapidly than normal or refuses to flash at all, amalfunction of the turn signal system may exist. SB220B1-E Lane Change Signal To indicate an intention to change lanes, moving the lever slightly to- wards the direction of the relevant turnsignal will cause the turn signal lamps to flash. When the lever is released, it will return to the "off" position.
SB220C3-E LIGHTING SWITCH The vehicle sidelamps and headlamps are operated by rotating the end of the turn signal switch barrel. To operatethe sidelight, rotating the switch to the first detent with ignition switch at the "OFF" position will cause the lamps toilluminate. To operate the headlamps, the turn signal switch barrel should be rotated to the second detent. Theheadlamps will only operate when the ignition switch is at the "On" position. If the ignition switch is turned to the "Off"position, only the sidelight will func- tion.
HGK2079-E
HGK2074-E
Page 232 of 389
1CONTROLS AND EQUIPMENT
52
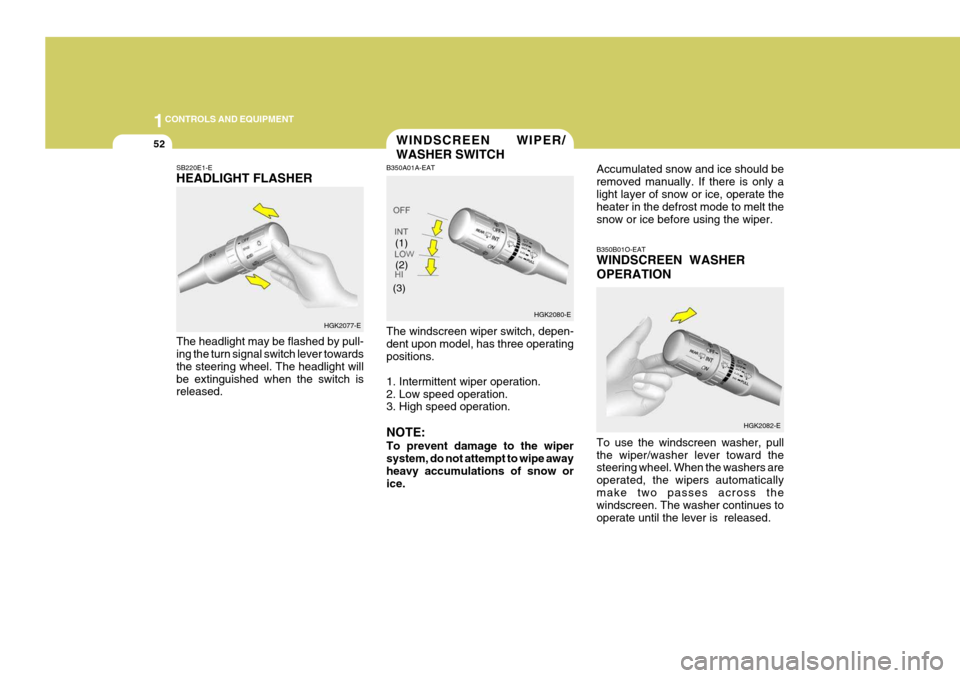
(2) B350B01O-EAT WINDSCREEN WASHER OPERATION To use the windscreen washer, pull the wiper/washer lever toward the steering wheel. When the washers are operated, the wipers automaticallymake two passes across the windscreen. The washer continues to operate until the lever is released.HGK2082-E
WINDSCREEN WIPER/ WASHER SWITCH
SB220E1-E HEADLIGHT FLASHER The headlight may be flashed by pull- ing the turn signal switch lever towards the steering wheel. The headlight willbe extinguished when the switch is released. B350A01A-EAT The windscreen wiper switch, depen- dent upon model, has three operatingpositions. 1. Intermittent wiper operation. 2. Low speed operation. 3. High speed operation. NOTE: To prevent damage to the wiper system, do not attempt to wipe away heavy accumulations of snow orice. Accumulated snow and ice should beremoved manually. If there is only alight layer of snow or ice, operate the heater in the defrost mode to melt the snow or ice before using the wiper.
HGK2077-E HGK2080-E
(1)
(3)
Page 235 of 389
1
CONTROLS AND EQUIPMENT
55HAZARD WARNING SYSTEM
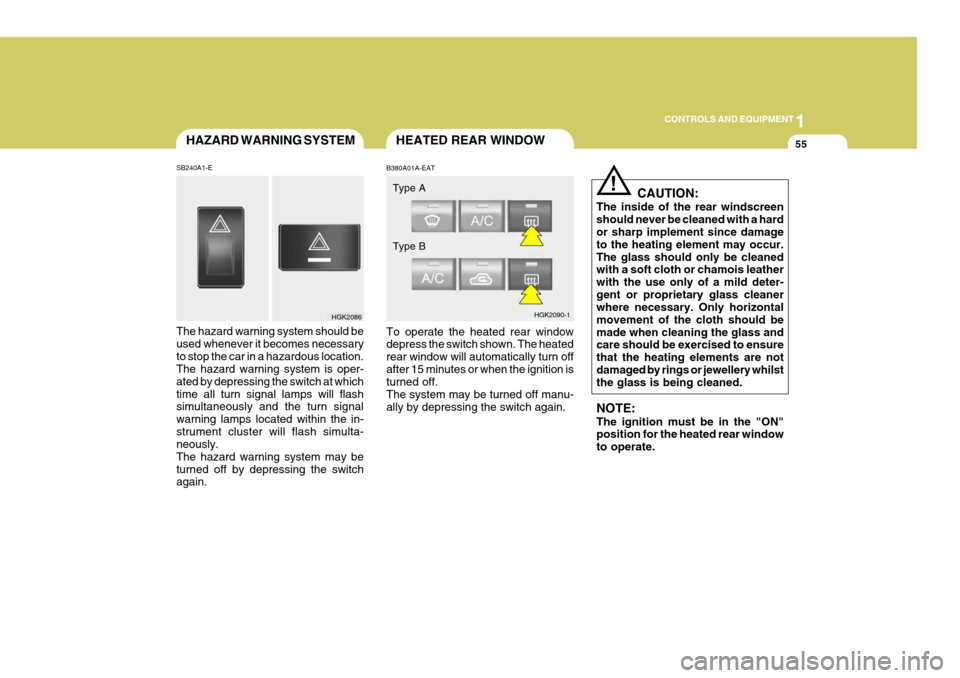
SB240A1-E The hazard warning system should be used whenever it becomes necessaryto stop the car in a hazardous location. The hazard warning system is oper- ated by depressing the switch at whichtime all turn signal lamps will flash simultaneously and the turn signal warning lamps located within the in-strument cluster will flash simulta- neously. The hazard warning system may beturned off by depressing the switch again.
HGK2086
HEATED REAR WINDOW
B380A01A-EAT To operate the heated rear window depress the switch shown. The heated rear window will automatically turn offafter 15 minutes or when the ignition is turned off. The system may be turned off manu-ally by depressing the switch again. Type A
HGK2090-1
Type B
!
CAUTION:
The inside of the rear windscreen should never be cleaned with a hard or sharp implement since damage to the heating element may occur.The glass should only be cleaned with a soft cloth or chamois leather with the use only of a mild deter-gent or proprietary glass cleaner where necessary. Only horizontal movement of the cloth should bemade when cleaning the glass and care should be exercised to ensure that the heating elements are not damaged by rings or jewellery whilst the glass is being cleaned. NOTE: The ignition must be in the "ON" position for the heated rear window to operate.
Page 276 of 389
1FEATURES OF YOUR HYUNDAI
96ANTENNA
o The playback head, capstan and pinch rollers will develop a coating of tape residue that can result in dete- rioration of sound quality, such as awavering sound. They should be cleaned monthly using a commer- cially available head cleaning tape orspecial solution available from audio specialty shops. Follow the supplier's directions carefully and never oil anypart of the tape player unit.
o Always be sure that the tape is tightly
wound on its reel before inserting inthe player. Rotate a pencil in the drive sprockets to wind up any slack. B860A03L
NOTE: Look at a tape before you insert it. If the tape is loose, tighten it by turning one of the hubs with a pencil or your finger.If the label is peeling off, do not put it in the player. It may cause the tape jam in the drive mechanism whenyou try to eject it. Do not leave tape sitting where they are exposed to hot warm or, highhumidity, such as on top of the dash- board or in the player. If a tape is exposed to excessivelyhot or cold, let it reach a moderate temperature before putting it in the player. B870A01A
!
Head
Cotton applicator B860A02L
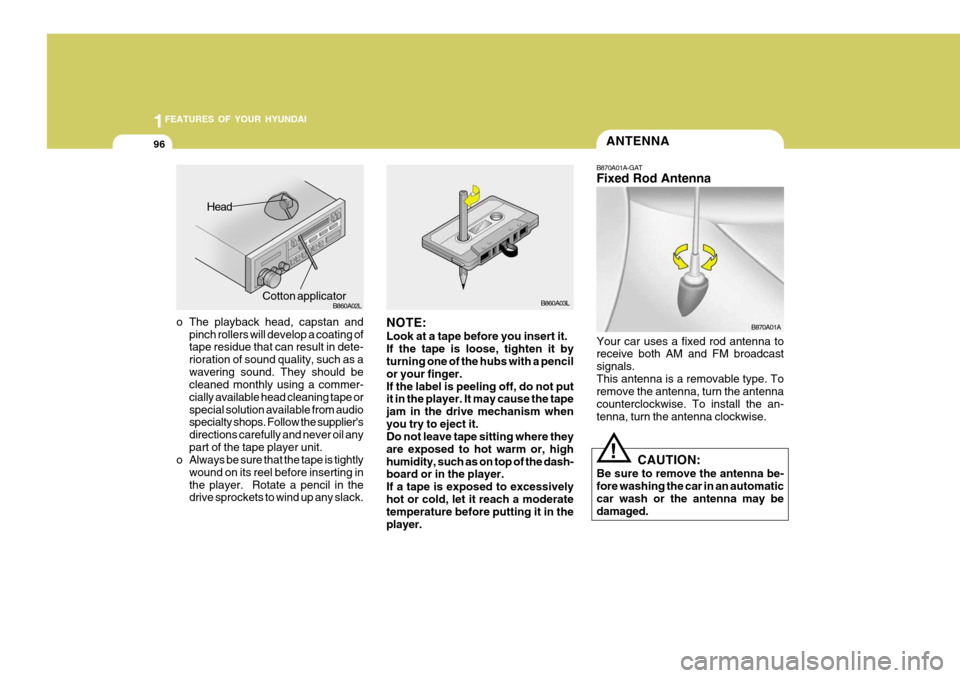
B870A01A-GAT Fixed Rod Antenna Your car uses a fixed rod antenna to receive both AM and FM broadcast signals.This antenna is a removable type. To remove the antenna, turn the antenna counterclockwise. To install the an-tenna, turn the antenna clockwise.
CAUTION:
Be sure to remove the antenna be- fore washing the car in an automatic car wash or the antenna may bedamaged.
Page 297 of 389
2
DRIVING YOUR HYUNDAI
21
!WARNING:
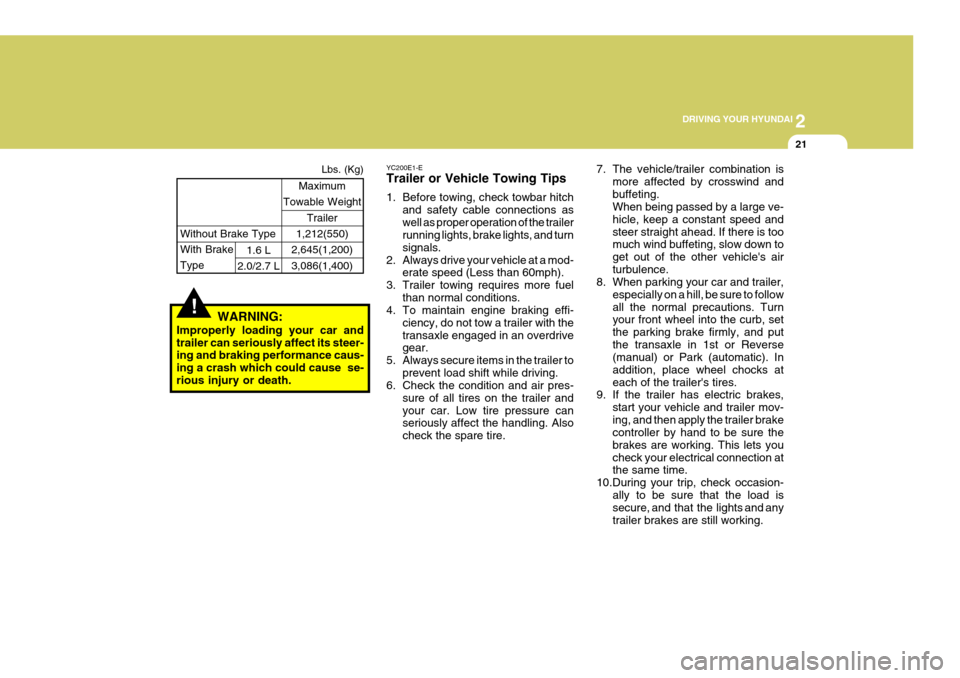
Improperly loading your car and trailer can seriously affect its steer- ing and braking performance caus- ing a crash which could cause se-rious injury or death. Without Brake Type
Maximum
Towable Weight
Trailer
1,212(550)
2,645(1,200) 3,086(1,400)
With Brake Type1.6 L
2.0/2.7 L Lbs. (Kg)
7. The vehicle/trailer combination is
more affected by crosswind and buffeting. When being passed by a large ve- hicle, keep a constant speed andsteer straight ahead. If there is too much wind buffeting, slow down to get out of the other vehicle's airturbulence.
8. When parking your car and trailer,
especially on a hill, be sure to followall the normal precautions. Turn your front wheel into the curb, set the parking brake firmly, and putthe transaxle in 1st or Reverse (manual) or Park (automatic). In addition, place wheel chocks ateach of the trailer's tires.
9. If the trailer has electric brakes,
start your vehicle and trailer mov-ing, and then apply the trailer brake controller by hand to be sure the brakes are working. This lets youcheck your electrical connection at the same time.
10.During your trip, check occasion- ally to be sure that the load issecure, and that the lights and any trailer brakes are still working.
YC200E1-E Trailer or Vehicle Towing Tips
1. Before towing, check towbar hitch
and safety cable connections as well as proper operation of the trailer running lights, brake lights, and turn signals.
2. Always drive your vehicle at a mod- erate speed (Less than 60mph).
3. Trailer towing requires more fuel than normal conditions.
4. To maintain engine braking effi-
ciency, do not tow a trailer with thetransaxle engaged in an overdrive gear.
5. Always secure items in the trailer to prevent load shift while driving.
6. Check the condition and air pres-
sure of all tires on the trailer and your car. Low tire pressure can seriously affect the handling. Also check the spare tire.