2004 Hyundai Coupe tires
[x] Cancel search: tiresPage 153 of 389

DO-IT-YOURSELF MAINTENANCE 6-21
G290A02GK-GAT
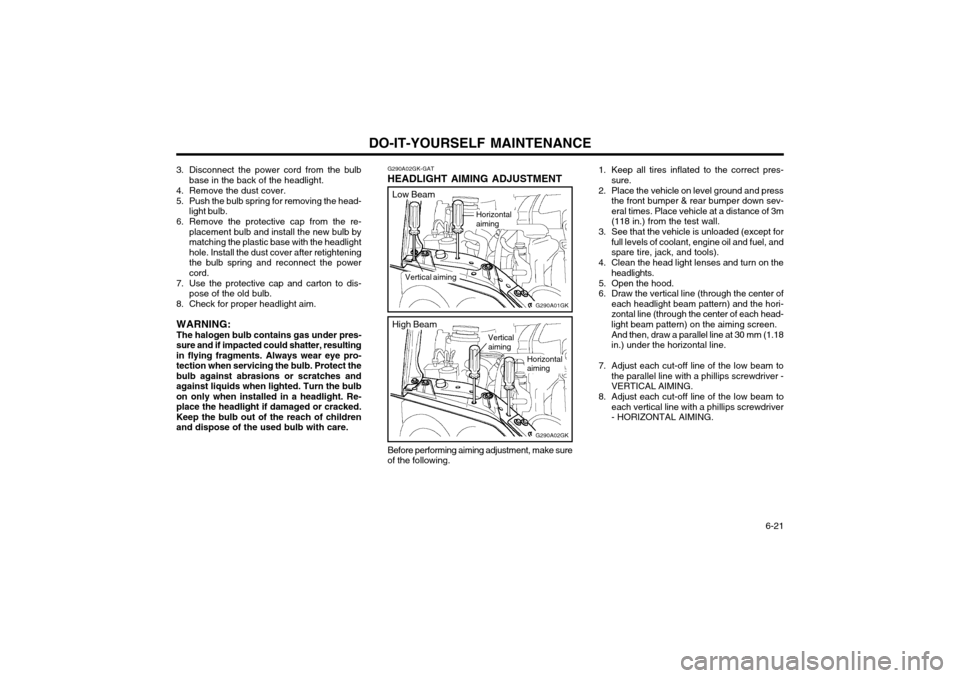
HEADLIGHT AIMING ADJUSTMENT
Horizontal aiming
G290A01GK
Vertical aiming
3. Disconnect the power cord from the bulb
base in the back of the headlight.
4. Remove the dust cover.
5. Push the bulb spring for removing the head- light bulb.
6. Remove the protective cap from the re- placement bulb and install the new bulb by matching the plastic base with the headlighthole. Install the dust cover after retighteningthe bulb spring and reconnect the powercord.
7. Use the protective cap and carton to dis- pose of the old bulb.
8. Check for proper headlight aim.
WARNING: The halogen bulb contains gas under pres-
sure and if impacted could shatter, resulting in flying fragments. Always wear eye pro-tection when servicing the bulb. Protect thebulb against abrasions or scratches andagainst liquids when lighted. Turn the bulbon only when installed in a headlight. Re-place the headlight if damaged or cracked.Keep the bulb out of the reach of childrenand dispose of the used bulb with care.
Before performing aiming adjustment, make sure
of the following.
Low Beam
G290A02GK
Vertical aiming
High Beam
Horizontal aiming1. Keep all tires inflated to the correct pres-
sure.
2. Place the vehicle on level ground and press the front bumper & rear bumper down sev- eral times. Place vehicle at a distance of 3m(118 in.) from the test wall.
3. See that the vehicle is unloaded (except for full levels of coolant, engine oil and fuel, andspare tire, jack, and tools).
4. Clean the head light lenses and turn on the headlights.
5. Open the hood.
6. Draw the vertical line (through the center of each headlight beam pattern) and the hori-zontal line (through the center of each head-light beam pattern) on the aiming screen. And then, draw a parallel line at 30 mm (1.18 in.) under the horizontal line.
7. Adjust each cut-off line of the low beam to the parallel line with a phillips screwdriver -VERTICAL AIMING.
8. Adjust each cut-off line of the low beam to each vertical line with a phillips screwdriver- HORIZONTAL AIMING.
Page 160 of 389

CONSUMER INFORMATION 8-1
8. CONSUMERINFORMATION
I010A01A-GAT
VEHICLE IDENTIFICATION
NUMBER (VIN) The vehicle identification number (VIN) is the
number used in registering your car and in all legal matters pertaining to its ownership, etc. It can be found on the identification plate at-
tached to the engine side of the firewall be-tween the engine and passenger compartment. I010B01A-AAT
Engine Number
I010B01GK
The engine number is stamped on the engine
block as shown in the drawing.
I020A01A-AAT TIRE INFORMATIONThe tires supplied on your new Hyundai are
chosen to provide the best performance for normal driving. I030A02GK-AAT
RECOMMENDED INFLATION PRES- SURES
The tire label located on the driver's side of the
center pillar outer panel gives the tire pressures recommended for your vehicle.
HGK220
HGK092
8
DOHC V6
These pressures were chosen to provide the
most satisfactory combination of ride comfort, tire wear and stability under normal conditions.Tire pressures should be checked at leastmonthly. Proper tire inflation pressures shouldbe maintained for these reasons: 6.0Jx156.5Jx16 7.0Jx17
4Tx16 TIRE
SIZE
RIM
SIZE PRESSURE, kPa (PSI)
195/65R15 205/55R16 215/45R17
T125/70R16 REAR
210(30)210(30)210(30)420(60) FRONT
210(30) 230(33) 240(35)420(60)
UP TO 2
PERSONS UP TO
MAX. LOAD
REAR
210(30) 230(33) 230(33)420(60)
FRONT210(30)210(30) 220(32) 420(60)
Page 161 of 389

CONSUMER INFORMATION
8-2
o Lower-than-recommended tire pressures
cause uneven tread wear and poor han- dling.
o Higher-than-recommended tire pressures increase the chance of damage from im-pacts and cause uneven tread wear.
CAUTION: Always observe the following:
o Check pressures when the tires are cold. That is, after the car has been parked for at least three hours and hasn't been driv-en more than 1.6 km or one mile sincestarting up.
o Check the pressure of your spare tire each time you check the pressure ofother tires. I050A02GK-GAT
TIRE CHAINS
Tire chains, if necessary, should be installed onthe front wheels. Be sure that the chains areinstalled in accordance with the manufacturer'sinstructions. Refer to the following information. I060A02GK-GAT
TIRE ROTATION
I040A01S-GAT
SNOW TIRES If you equip your car with snow tires, they should be the same size and have the sameload capacity as the original tires. Snow tiresshould be installed on all four wheels; other-wise, poor handling may result. Snow tires should carry 28 kPa (4 psi) more air pressure than the pressure recommended forthe standard tires on the tire label on the driveside center pillar outer panel, or up to themaximum pressure shown on the tire sidewall whichever is less. Do not drive faster than 120 km/h (75 mph)when your car is equipped with snow tires. Tires should be rotated every 10,000 km (6,000miles). If you notice that tires are wearing un-evenly between rotations, have the car checkedby a Hyundai dealer so the cause may becorrected.After rotating, adjust the tire pressures and besure to check wheel nut torque. WARNING: Do not mix bias-ply and radial-ply tires un- der any circumstances. This may cause dan-gerous handling characteristics.
I060A01GK
To minimize tire and chain wear, do not contin-ue to use tire chains when they are no longerneeded. WARNING:
o When driving on roads covered with snow or ice, drive at less than 30 km/h (20 mph).
o Use tire chains less than 10mm (0.39 in.) for 16" and 17" tires.
o Avoid sudden stop and turns.
o Tighten firmly to avoid contact with the verticle body, if you have noise caused by chaws contacting the body, removethe chains for damage protection. 15", 16" Tire
Tire size
195/65 R 15 205/55 R 16 215/45 R 17
Snow Chain Thickness Max. 15 mm Max. 10 mmMax. 10 mm
17" Tire
Page 162 of 389

CONSUMER INFORMATION 8-3
1.6 mm (0.06 in.)HGK248
I090A01S-GAT
WHEN TO REPLACE TIRES
Wear indicator
I070A01A-AAT
TIRE BALANCING A tire that is out of balance may affect handling
and tire wear. The tires on your Hyundai were balanced before the car was delivered but mayneed balancing again during the years you ownthe car.
Whenever a tire is dismounted for repair, it
should be rebalanced before being reinstalled
on the car. I080A01A-AAT
TIRE TRACTION
Tire traction can be reduced if you drive on
worn tires, tires that are improperly inflated oron slippery road surfaces. Tires should be re-placed when tread wear indicators appear. Toreduce the possibility of losing control, slowdown whenever there is rain, snow or ice on theroad.
The original tires on your car have tread wearindicators. The tread wear indicators appearwhen the tread depth is 1.6 mm (0.06 in.). Thetire should be replaced when these appear as asolid bar across two or more grooves of thetread. Always replace your tires with those ofthe recommended size. If you change wheels,the new wheel's rim width and offset must meetHyundai specification. I100A01FC-GAT
SPARE TIRE AND TOOLS
Your Hyundai is delivered with the following: Spare tire and wheel Wheel nut wrench, Wrench bar, Spanner, DriverJack
HGK189
I060A02GK
WARNING: When rotating the 215/45 R17 tires, the tires
must be mounted following the "ROTATION" direction marked on the sidewall of the tires.
If rotating the tires from the left side to the
right side and from the right side to the leftside, separate the wheel from the tire andthen remount them. WARNING:
o Driving on worn-out tires is dangerous! Worn-out tires can cause loss of brakingeffectiveness, steering control and trac-
tion. When replacing tires, never mix ra-dial and bias-ply tires on the same car. Ifyou replace radial tires with bias-ply tires,they must be installed in sets of four.
o Using tires and wheels of other than the recommended sizes may cause unusualhandling characteristics that may causedeath, serious injury or property dam-age.
Sidewall
Tire rotation direction
Page 169 of 389

INDEX
10-4
Tires
Balancing ........................................................................................ 8-3
Chains ............................................................................................ 8-2
Changing a flat tire ......................................................................... 3-4
If you have a fl at tire ...................................................................... 3-4
Information ...................................................................................... 8-1
Pressure ......................................................................................... 8-1
Replacement ................................................................................... 8-3
Rotation .......................................................................................... 8-2
Snow tires ....................................................................................... 8-2
Spare ti re ........................................................................................ 3-3
Traction ........................................................................................... 8-3
Towing Emergency ..................................................................................... 3-9
If your car must be towed .............................................................. 3-8
Trailer or vehicle towing ............................................................... 2-13
Transaxle Automatic ........................................................................................ 2-6
Automatic transaxle fluid checking ...............................................6-11
Manual ............................................................................................ 2-4
Manual transaxle oil checking ...................................................... 6-11
Trip Computer ................................................................................... 1-31
Trip Odometer ................................................................................... 1-30
V Vehicle Identificat ion Number (VIN) .................................................... 8-1
Vehicle Specification ........................................................................... 9-1Ventilation Center ventilator ........................................................................... 1-50
Side ventilator ............................................................................... 1-50WWasher fluid
...................................................................................... 6-10
Warning Lights ....................................................................... 1-28 ~ 1-29
Windows Glass ................................................................................... 1-7
Windshield Wiper and Washer ......................................................... 1-34
Windshield Wiper Blades .................................................................. 6-10
Page 279 of 389

2
DRIVING YOUR HYUNDAI
3TO START THE ENGINEBEFORE STARTING THE EN- GINE
SC030A1-E Before you start the engine, you should always:
1. Look around the vehicle to be sure
there are no flat tires, puddles of oil or water or other indications of pos- sible trouble.
2. After entering the car, check to be sure the parking brake is engaged.
3. Check that all windows, and lights
are clean.
4. Check that the interior and exterior mirrors are clean and in position.
5. Check your seat, seatback and head restraint to be sure they are intheir proper positions.
6. Close all the doors.
7. Fasten your seat belt and be sure that all other occupants have fas-tened theirs.
8. Turn off all lights and accessories that are not needed.
9. When you turn the ignition switch to "ON' check that all appropriate warning lights are operating and that you have sufficient fuel.
10.Check the operation of warning lights and all bulbs when key is inthe "ON" position. SC040A1-F COMBINATION IGNITION SWITCH AND STEERING LOCK
o If your Hyundai is equipped with a
manual transaxle, place the shift lever in neutral and depress the clutch pedal fully.
o If your Hyundai has an automatic
transaxle, place the shift lever in "P"(park).
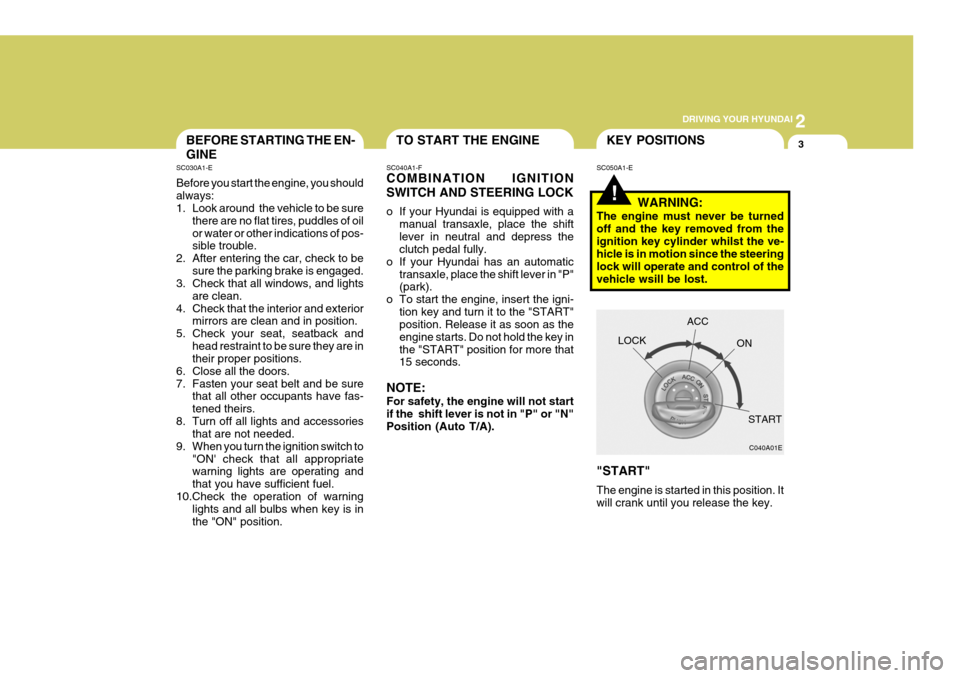
o To start the engine, insert the igni- tion key and turn it to the "START"position. Release it as soon as the engine starts. Do not hold the key inthe "START" position for more that 15 seconds.
NOTE: For safety, the engine will not start if the shift lever is not in "P" or "N" Position (Auto T/A).
!
SC050A1-E KEY POSITIONS
WARNING:
The engine must never be turned off and the key removed from theignition key cylinder whilst the ve- hicle is in motion since the steering lock will operate and control of thevehicle wsill be lost. "START" The engine is started in this position. It will crank until you release the key. LOCK
C040A01E
ACC
ON
START
Page 291 of 389

2
DRIVING YOUR HYUNDAI
15
o Don't "ride" the brake or clutch pedal. This can increase fuel consumption and also increase wear on these components. In addition, driving with your foot resting on the brake pedalmay cause the brakes to overheat, which reduces their effectiveness and may lead to more serious con-sequences.
o Take care of your tires. Keep them
inflated to the recommended pres-sure. Incorrect inflation, either too much or too little, results in unnec- essary tire wear. Check the tire pres-sures at least once a month.
o Be sure that the wheels are aligned
correctly. Improper alignment canresult from hitting curbs or driving too fast over irregular surfaces. Poor alignment causes faster tire wearand may also result in other prob- lems as well as greater fuel con- sumption.
o Keep your car in good condition. For better fuel economy and reducedmaintenance costs, maintain yourcar in accordance with the mainte- nance schedule in Section 5. If you drive your car in severe conditions, more frequent maintenance is re-quired (see Section 5 for details).
o Keep your car clean. For maximum service, your car should be keptclean and free of corrosive materi-als. It is especially important that mud, dirt, ice, etc. not be allowed to accumulate on the underside of thecar. This extra weight can result in increased fuel consumption and also contribute to corrosion.
o Travel lightly. Don't carry unneces- sary weight in your car. Weight is anenemy of good fuel economy.
o Don't let the engine idle longer than necessary. If you are waiting (andnot in traffic), turn off your engineand restart only when you're ready to go.
o Remember, your car does not re- quire extended warm-up. As soonas the engine is running smoothly, you can drive away. In very coldweather, however, give your engine a slightly longer warm-up period. o Don't "lug" or "over-rev" the engine.
Lugging is driving too slowly in too high a gear resulting in the engine bucking. If this happens to you, shift to a lower gear.Over-revving is racing the engine
beyond its safe limit. This can be avoided by shifting at the recom-mended speeds.
o Use your air conditioning sparingly.
The air conditioning system is
operated by the engine power so your fuel economy is reduced when you use it.
Page 297 of 389

2
DRIVING YOUR HYUNDAI
21
!WARNING:
Improperly loading your car and trailer can seriously affect its steer- ing and braking performance caus- ing a crash which could cause se-rious injury or death. Without Brake Type
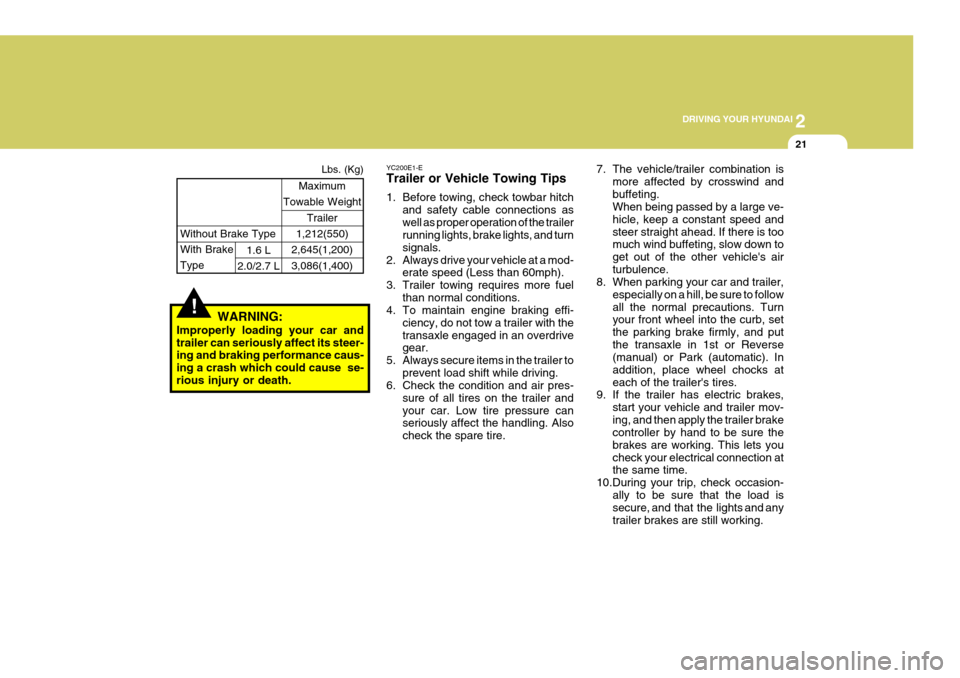
Maximum
Towable Weight
Trailer
1,212(550)
2,645(1,200) 3,086(1,400)
With Brake Type1.6 L
2.0/2.7 L Lbs. (Kg)
7. The vehicle/trailer combination is
more affected by crosswind and buffeting. When being passed by a large ve- hicle, keep a constant speed andsteer straight ahead. If there is too much wind buffeting, slow down to get out of the other vehicle's airturbulence.
8. When parking your car and trailer,
especially on a hill, be sure to followall the normal precautions. Turn your front wheel into the curb, set the parking brake firmly, and putthe transaxle in 1st or Reverse (manual) or Park (automatic). In addition, place wheel chocks ateach of the trailer's tires.
9. If the trailer has electric brakes,
start your vehicle and trailer mov-ing, and then apply the trailer brake controller by hand to be sure the brakes are working. This lets youcheck your electrical connection at the same time.
10.During your trip, check occasion- ally to be sure that the load issecure, and that the lights and any trailer brakes are still working.
YC200E1-E Trailer or Vehicle Towing Tips
1. Before towing, check towbar hitch
and safety cable connections as well as proper operation of the trailer running lights, brake lights, and turn signals.
2. Always drive your vehicle at a mod- erate speed (Less than 60mph).
3. Trailer towing requires more fuel than normal conditions.
4. To maintain engine braking effi-
ciency, do not tow a trailer with thetransaxle engaged in an overdrive gear.
5. Always secure items in the trailer to prevent load shift while driving.
6. Check the condition and air pres-
sure of all tires on the trailer and your car. Low tire pressure can seriously affect the handling. Also check the spare tire.