2004 Hyundai Coupe steering belt
[x] Cancel search: steering beltPage 129 of 389

VEHICLE MAINTENANCE REQUIREMENTS
5- 4 European Community Only Except European Community
ENGINE OIL AND FILTER AIR CLEANER FILTER SPARK PLUGSTIMING BELTBRAKE PADS, CALIPERS AND ROTORSREAR BRAKE DRUMS/LININGS/PADS, PARKING BRAKESTEERING GEAR BOX, LINKAGE& BOOTS/LOWER ARM BALL JOINTDRIVESHAFTS AND BOOTSMANUAL TRANSAXLE OILAUTOMATICTRANSAXLE FLUIDAIR CONDITIONER FILTER (FOR BLOWER UNIT)
F040A03GK-GAT
MAINTENANCE UNDER SEVERE USAGE CONDITIONS
The following items must be serviced more frequently on cars normally used under severe driving conditions. Refer to the chart below for the appropriate maintenance intervals. R : Replace I : Inspect and, after inspection, clean, adjust, repair or replace if necessary
DRIVING
CONDITIONMAINTENANCE INTERVALS
R R RR
II II
RRR
MAINTENANCE
OPERATION
MAINTENANCE ITEM
EVERY 7,500 KM OR 6 MONTHS EVERY 5,000 KM OR 6 MONTHSMORE FREQUENTLYMORE FREQUENTLYEVERY 60,000 KM OR 48 MONTHSMORE FREQUENTLYMORE FREQUENTLY MORE FREQUENTLYEVERY 15,000 KM OR 12 MONTHS EVERY 100,000 KMEVERY 45,000 KMEVERY 40,000 KMMORE FREQUENTLYA, B, C, F, H C, E B, HD, E, F, GC, D, G, HC, D, G, H C, D, E, FC, D, E, F, G A, C, D, E, F, G, H, I, J A, C, E, F, G, H, IC, E
SEVERE DRIVING CONDITIONS
A - Repeated short distance driving
B - Extensive idling
C - Driving in dusty, rough roads
D - Driving in areas using salt or other corrosive materials or in very cold weather
E - Driving in sandy areas F - More than 50% driving in heavy city traffic during hot weather
above 32°C (90°F)
G - Driving in mountainous areas
H - Towing a trailer
I - Driving as a patrol car, taxi, other commercial use car or vehicle towing
J - Driving over 170 km/h1.6 DOHC/2.7 V6 2.0 DOHC CVVT
Page 131 of 389

VEHICLE MAINTENANCE REQUIREMENTS
5- 6 F070D01A-AAT
o Manual Transaxle Oil Inspect the manual transaxle oil according to
the maintenance schedule. NOTE: If the oil level is low, check for possible
leaks before adding oil. Do not overfill.
F070E02A-AAT
o Automatic Transaxle Fluid
The fluid level should be in the "HOT" range of
the dipstick, after the engine and transaxle are at normal operating temperature. Check theautomatic transaxle fluid level with the enginerunning and the transaxle in neutral, with theparking brake properly applied. Use DIAMONDATF SP- III or SK ATF SP- III when adding or
changing fluid.
F070F01A-AAT
o Brake Hoses and Lines
Visually check for proper installation, chafing,
cracks, deterioration and any leakage. Replaceany deteriorated or damaged parts immediate-ly. F070G02A-AAT
o Brake Fluid
Check brake fluid level in the brake fluid reser-
voir. The level should be between "MIN" and"MAX" marks on the side of the reservoir. Useonly hydraulic brake fluid conforming to DOT 3or DOT 4.
F070H01A-AAT
o Rear Brake Drums/Linings,
Parking Brake
Check the rear brake drums and linings for
scoring, burning, leaking fluid, broken parts,and excessive wear. Inspect the parking brakesystem including the parking brake lever andcables. For detailed service procedures, refer to the Shop Manual.
F070J01A-AAT
o Brake Pads, Calipers and Rotors Check the pads for excessive wear, discs for run out and wear, and calipers for fluid leakage. F070K01A-AAT
o Exhaust Pipe and Muffler Visually inspect the exhaust pipes, muffler and hangers for cracks, deterioration, or damage.Start the engine and listen carefully for anyexhaust gas leakage. Tighten connections orreplace parts as necessary. F070L01A-AAT o Suspension Mounting Bolts Check the suspension connections for loose- ness or damage. Retighten to the specifiedtorque. F070M01A-AAT
o Steering Gear Box, Linkage & Boots/
Lower arm Ball Joint
With the vehicle stopped and engine off, check for excessive free-play in the steering wheel.Check the linkage for bends or damage. Checkthe dust boots and ball joints for deterioration,cracks, or damage. Replace any damaged parts. F070N01A-AAT
o Power Steering Pump, Belt and
Hoses
Check the power steering pump and hoses for leakage and damage. Replace any damaged orleaking parts immediately. Inspect the powersteering belt for evidence of cuts, cracks, ex-cessive wear, oiliness and proper tension. Re-place or adjust it if necessary. F070P01A-AAT
o Driveshafts and Boots Check the drive shafts, boots and clamps for cracks, deterioration, or damage. Replace anydamaged parts and, if necessary, repack thegrease.
F070C01A-AAT
o Coolant
The coolant should be changed at the
intervals specified in the maintenance sched-ule.
Page 136 of 389

DO-IT-YOURSELF MAINTENANCE
6-4 G020A01A-AAT
GENERAL CHECKS Engine Compartment
The following should be checked regularly:
o Engine oil level and condition
o Transaxle fluid level and condition
o Brake fluid level
o Clutch fluid level
o Engine coolant level
o Windshield washer fluid level
o Accessory drive belt condition
o Engine Coolant hose condition
o Fluid leaks (on or below components)
o Power steering fluid level
o Battery condition
o Air conditioner filter condition
G020B01A-AAT
Vehicle Exterior The following should be checked monthly:
o Overall appearance and condition
o Wheel condition and wheel nut torque
o Exhaust system condition
o Light condition and operation
o Windshield glass condition
o Wiper blade condition
o Paint condition and body corrosion
o Fluid leaks
o Door and hood lock condition
o Tire pressure and condition (including spare tire) G020C01A-AAT
Vehicle Interior
The following should be checked each time when the vehicle is driven:
o Lights operation
o Windshield wiper operation
o Horn operation
o Defroster, heating system operation (and air conditioning, if installed)
o Steering operation and condition
o Mirror condition and operation
o Turn signal operation
o Accelerator pedal operation
o Brake operation, including parking brake
o Manual transaxle operation, including clutch operation
o Automatic transaxle operation, including "Park" mechanism operation
o Seat control condition and operation
o Seat belt condition and operation
o Sunvisor operation
If you notice anything that does not operate correctly or appears to be functioning incorrect-ly, inspect it carefully and seek assistance fromyour Hyundai dealer if service is needed. G030A01A-AAT
CHECKING THE ENGINE OIL
Engine oil is essential to the performance andservice of the engine. It is suggested that youcheck the oil level at least once a week innormal use and more often if you are on a tripor driving in severe conditions. G030B02GK-GAT
Recommended Oil SH, SG or SG/CD (API) multi-grade and fuel efficient oil is recommended.
SSA6030B°C °F -25-13 20W-40 20W-50
15W-40 15W-50
10W-30
10W-40 10W-50
5W-40
5W-30
5W-2040
104
20 68
1050
032
-15 5 -10-14
1.6L (DOHC), 2.7 L (V6)
Page 149 of 389

DO-IT-YOURSELF MAINTENANCE 6-17
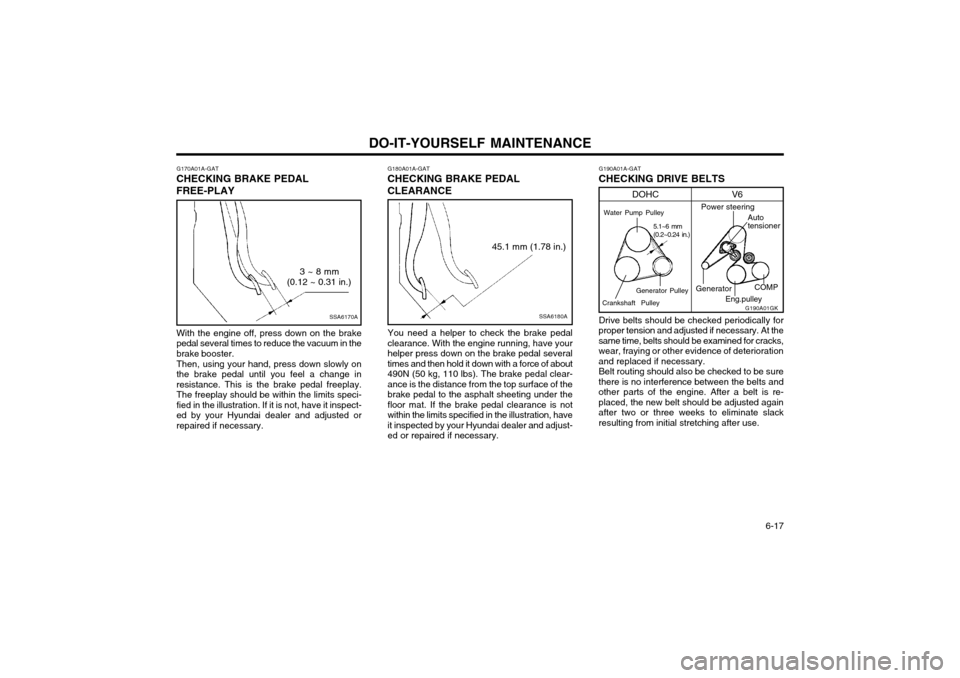
G180A01A-GAT
CHECKING BRAKE PEDAL CLEARANCE
You need a helper to check the brake pedal clearance. With the engine running, have yourhelper press down on the brake pedal severaltimes and then hold it down with a force of about490N (50 kg, 110 lbs). The brake pedal clear-ance is the distance from the top surface of thebrake pedal to the asphalt sheeting under thefloor mat. If the brake pedal clearance is notwithin the limits specified in the illustration, haveit inspected by your Hyundai dealer and adjust-ed or repaired if necessary.
SSA6180A
45.1 mm (1.78 in.)
G170A01A-GAT
CHECKING BRAKE PEDAL FREE-PLAY
With the engine off, press down on the brake pedal several times to reduce the vacuum in thebrake booster. Then, using your hand, press down slowly on the brake pedal until you feel a change inresistance. This is the brake pedal freeplay.The freeplay should be within the limits speci-fied in the illustration. If it is not, have it inspect-ed by your Hyundai dealer and adjusted orrepaired if necessary.
SSA6170A
3 ~ 8 mm
(0.12 ~ 0.31 in.) G190A01A-GAT
CHECKING DRIVE BELTS
Drive belts should be checked periodically for
proper tension and adjusted if necessary. At the same time, belts should be examined for cracks,wear, fraying or other evidence of deteriorationand replaced if necessary. Belt routing should also be checked to be sure
there is no interference between the belts andother parts of the engine. After a belt is re-placed, the new belt should be adjusted againafter two or three weeks to eliminate slackresulting from initial stretching after use.
G190A01GK
V6
DOHC
Water Pump Pulley
Generator Pulley
Crankshaft Pulley 5.1~6 mm (0.2~0.24 in.)
Power steering
Auto tensioner
GeneratorEng.pulleyCOMP
Page 168 of 389

INDEX10-3
R Rear Seats
Before Folding the Rear Seats ..................................................... 1-10
Fold down ..................................................................................... 1-10
Rear seat entry ............................................................................. 1-10
Rear Seat Pos itions ....................................................................... 1-9
Rear Window Defroster Switch ......................................................... 1-36
Rear Window Wiper and Switch .. ..................................................... 1-35
SSeat Belts 3-Point type .................................................................................. 1-13
Adjustable height .......................................................................... 1-13
Adjusting your seat belt ................................................................ 1-13
Care of seat belts ......................................................................... 1-12
Precautions ................................................................................... 1-11
Pre-tentioner Seat Belt ................................................................. 1-18
Spark Plugs ........................................................................................ 6-8
Spectacle Case ................................................................................. 1-40
Speedometer ..................................................................................... 1-30
Starting Procedures ............................................................................ 2-3Steering Wheel Free play ...................................................................................... 6-15
Tilt lever ........................................................................................ 1-47
Stereo Radio Operation (H250, H260) ....................................1-65, 1-72
Stereo Sound System ............................................................ 1-63 ~ 1-64Sun Visor .......................................................................................... 1-46
Sunroof .............................................................................................. 1-38
TTachometer ....................................................................................... 1-30
Tail Gate ........................................................................................... 1-45
TCS (Traction control system) .......................................................... 2-10
Theft Alarm System ............................................................................ 1-5
JJump Starting
...................................................................................... 3-1
K
Keys .................................................................................................. 1-2 If you lose your keys .................................................................... 3-10
Positions ......................................................................................... 2-2
L
Light Bulb Replacement .................................................................... 6-20
Lubrication Chart ................................................................................. 9-3
Luggage Net ...................................................................................... 1-47
M Maintenance Intervals Explanation of scheduled maintenance items ....................... 5-5 ~ 5-7
Maintenance under severe usage conditions ................................. 5-4
Scheduled maintenance ................................................................. 5-2
Service requirements ...................................................................... 5-1
Map Light .......................................................................................... 1-40
Mirros Day-night inside rearview ............................................................. 1-42
Outside rearview folding ............................................................... 1-42
Outsde rearview heating .............................................................. 1-41
Multi gauge ........................................................................................ 1-32
OOdometer .......................................................................................... 1-30
PParking Brake ................................................................................... 1-43
Power Steering Fluid Level ............................................................... 6-19
Page 210 of 389

1CONTROLS AND EQUIPMENT
30
o Improper handling of the pre-
tensioner seat belt assemblies, and failure to heed the warnings to not strike, modify, inspect, re-place, service or repair the pre- tensioner seat belt assemblies may lead to improper operationor inadvertent activation and se- rious injury.
o Always wear seat belts when driv- ing or riding in a motor vehicle.
SUPPLEMENTAL RESTRAINT (AIRBAG) SYSTEM (SRS)
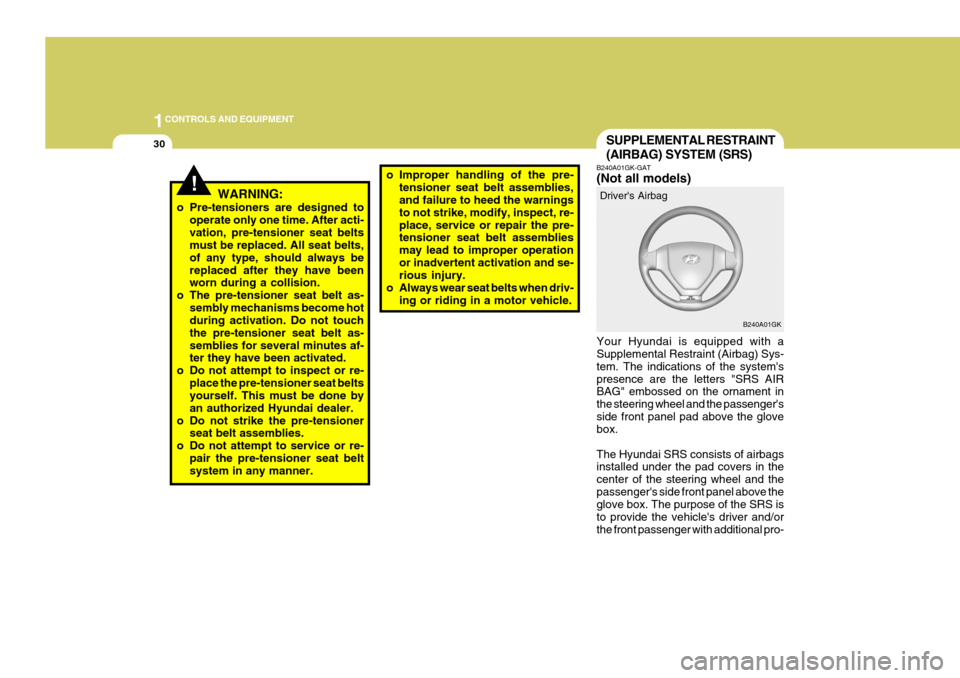
B240A01GK-GAT (Not all models) Your Hyundai is equipped with a Supplemental Restraint (Airbag) Sys- tem. The indications of the system'spresence are the letters "SRS AIR BAG" embossed on the ornament in the steering wheel and the passenger'sside front panel pad above the glove box. The Hyundai SRS consists of airbags installed under the pad covers in the center of the steering wheel and thepassenger's side front panel above the glove box. The purpose of the SRS is to provide the vehicle's driver and/orthe front passenger with additional pro- Driver's Airbag
B240A01GK
!WARNING:
o Pre-tensioners are designed to operate only one time. After acti- vation, pre-tensioner seat belts must be replaced. All seat belts, of any type, should always bereplaced after they have been worn during a collision.
o The pre-tensioner seat belt as- sembly mechanisms become hotduring activation. Do not touch the pre-tensioner seat belt as-semblies for several minutes af- ter they have been activated.
o Do not attempt to inspect or re- place the pre-tensioner seat beltsyourself. This must be done by an authorized Hyundai dealer.
o Do not strike the pre-tensioner seat belt assemblies.
o Do not attempt to service or re- pair the pre-tensioner seat belt system in any manner.
Page 211 of 389

1
CONTROLS AND EQUIPMENT
31
!
tection than that offered by the seat belt system alone, in case of a frontalimpact of sufficient severity. NOTE: Be sure to read information about the SRS on the labels provided onthe front side of the sun visor and in the glove box.
WARNING:
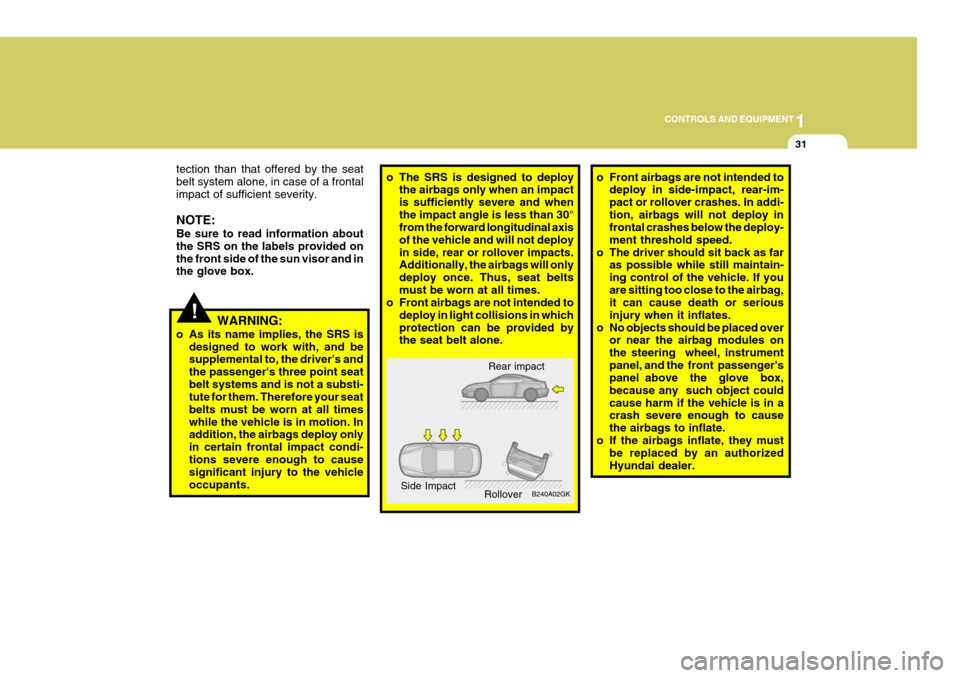
o As its name implies, the SRS is designed to work with, and besupplemental to, the driver's and the passenger's three point seatbelt systems and is not a substi- tute for them. Therefore your seat belts must be worn at all timeswhile the vehicle is in motion. In addition, the airbags deploy only in certain frontal impact condi-tions severe enough to cause significant injury to the vehicle occupants.o The SRS is designed to deploy the airbags only when an impact is sufficiently severe and whenthe impact angle is less than 30° from the forward longitudinal axis of the vehicle and will not deployin side, rear or rollover impacts. Additionally, the airbags will only deploy once. Thus, seat beltsmust be worn at all times.
o Front airbags are not intended to
deploy in light collisions in whichprotection can be provided by the seat belt alone. o Front airbags are not intended to
deploy in side-impact, rear-im- pact or rollover crashes. In addi-tion, airbags will not deploy in frontal crashes below the deploy- ment threshold speed.
o The driver should sit back as far as possible while still maintain-ing control of the vehicle. If youare sitting too close to the airbag, it can cause death or serious injury when it inflates.
o No objects should be placed over or near the airbag modules onthe steering wheel, instrumentpanel, and the front passenger's panel above the glove box, because any such object couldcause harm if the vehicle is in a crash severe enough to cause the airbags to inflate.
o If the airbags inflate, they must be replaced by an authorizedHyundai dealer.
Rear impact
B240A02GK
Side Impact
Rollover
Page 213 of 389

1
CONTROLS AND EQUIPMENT
33
The SRS service reminder indicator (SRI) on the instrument panel will comeon for about 6 seconds after the igni- tion key is turned to the "ON" position or after the engine is started, afterwhich the SRI should go out. The airbag modules are located both in the centre of the steering wheel and in the front passenger's panel above the glove box. When the SRSCM de-tects a considerable impact to the front of the vehicle, it will automatically de- ploy the airbags. B240B02L-R Passenger's Airbag
Upon deployment, tear seams moldeddirectly into the pad covers will sepa-rate under pressure from the expan- sion of the airbags. Further opening of the covers then allows full inflation ofthe airbags. A fully inflated airbag in combination with a properly worn seat belt slows the driver's or the passenger's forward motion, thus reducing the risk of headand chest injury. After complete inflation, the airbag immediately starts deflating, enabling the driver to maintain forward visibility. B240B03L-R
B240B01GK-E
!
CAUTION:
Do not install or place any accesso- ries (drink holder, cassette holder, sticker, etc) on the front passenger'spanel above the glove box in the vehicle with passenger's side air bag. Such objects may becomedangerous projectiles and cause injury if the passenger's side air bag inflates.