Page 155 of 296

�µ�µ�µ
�µ �µ
�µ
�Ý �Û
Pressthisbutton
to stop playing a DVD.
Some DVDs have menus that allow
you to select a dubbed language,
subtitles, a chapter list, previews, etc.
Themenucontentswillvaryfrom
DVD to DVD.
Usethe,,,and buttons to select the desired
menu option. Then press ENT to
enter your selection. Use the and buttons to change
pages. You can also use the
numbered buttons to enter the two-
digit number of a menu option. You
do not have to press ENT. Press the
button again to close the window. Many DVDs are recorded with
subtitles or dubbed in multiple
languages. To select subtitles, press
the SUBTITLE button. To select a
dif f erent language than the one
being heard, press the AUDIO
button. Continue to press and
release the SUBTITLE or AUDIO
button to scan through all available
languages.
To change the
color, contrast, aspect ratio, and
brightness of the video screen, press
the DISP button. The current setting
of one will be displayed on the
screen each time you press the
button. Use the and buttons to change the setting
as desired. The display will disappear
f rom the screen several seconds
af ter you stop adjusting the setting. On some DVDs,
the scenes are recorded by more
than one camera, giving different
viewpoints of the same scene. By
pressing the Angle button, you can
select a dif f erent viewpoint.
In the
MENU selection mode, pressing the
RETURN button for less than two
seconds changes the MENU display
to the previous page.
Pressing the RETURN button for
more than two seconds while a DVD
is playing brings the system into the
TITLE enter mode. When you enter
your selection, the DVD player will
start playing f rom the selected title.
Rear Entertainment System
Comf ort and Convenience Feat ures
STOP Button
MENU and TITLE Buttons SUBT IT L ES and A UDIO Buttons
DISP ButtonANGLE Button
RETURN (T/C) Button
152
Page 158 of 296
If you see an error message in the
display while operating the DVD
player,findthecauseinthechartto
the right. If you cannot clear the
message, take your vehicle to a
Honda dealer.Message Cause
Solution
FOCUS Error
Mechanical Error, or a
DVD has been loaded in
the CD player
High Temperature
Low Vehicle Battery
VoltagePress the EJECT button and pull out the DVD.
Check if it is inserted correctly in the DVD
Player.MakesuretheDVDisnotscratchedor
damaged.
Press the EJECT button and pull out the DVD.
Check it for damage or deformation.
If the DVD cannot be pulled out, or the error
message does not disappear after the DVD is
ejected, see a Honda dealer.
Do not try to force the DVD out of the player.
Will disappear when the temperature returns to
normal.
Run the engine to recharge the battery.
Rear Entertainment System
Comf ort and Convenience Feat ures
DVD Player Error Messages
155
Page 159 of 296

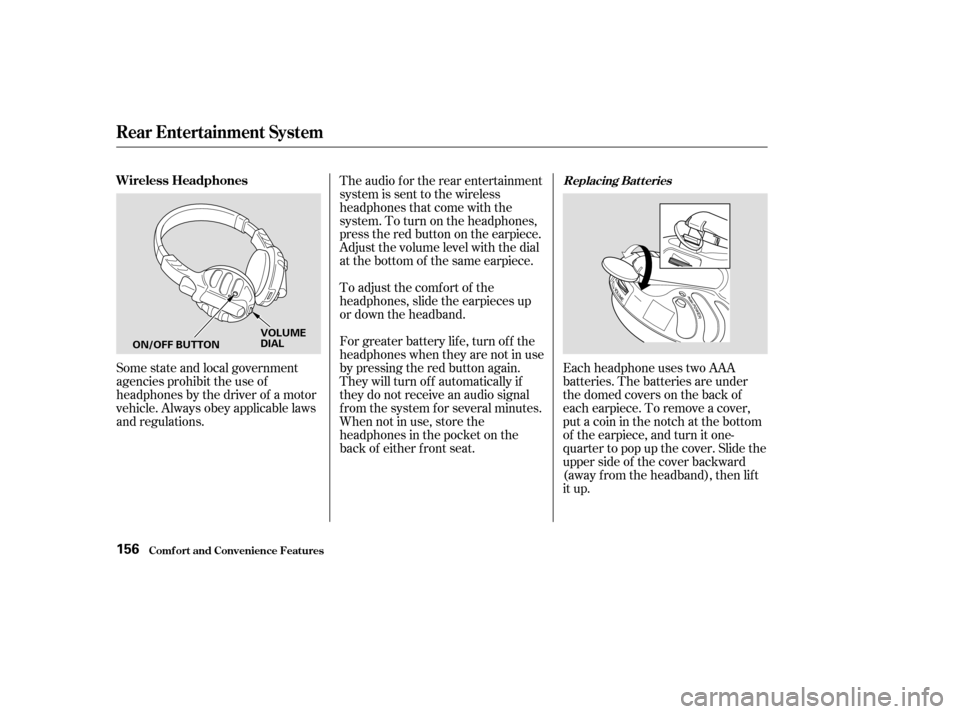
Some state and local government
agencies prohibit the use of
headphones by the driver of a motor
vehicle. Always obey applicable laws
and regulations.The audio f or the rear entertainment
system is sent to the wireless
headphones that come with the
system. To turn on the headphones,
presstheredbuttonontheearpiece.
Adjust the volume level with the dial
at the bottom of the same earpiece.
To adjust the comf ort of the
headphones, slide the earpieces up
or down the headband.
For greater battery lif e, turn of f the
headphones when they are not in use
by pressing the red button again.
They will turn of f automatically if
they do not receive an audio signal
f rom the system f or several minutes.
When not in use, store the
headphones in the pocket on the
back of either f ront seat.
Each headphone uses two AAA
batteries. The batteries are under
the domed covers on the back of
each earpiece. To remove a cover,
put a coin in the notch at the bottom
of the earpiece, and turn it one-
quarter to pop up the cover. Slide the
upper side of the cover backward
(away f rom the headband), then lif t
it up.
Rear Entertainment System
Comf ort and Convenience Feat ures
Wireless HeadphonesReplacing Bat t eries
156
ON/OFF BUTTON
VOLUME
DIAL
Page 163 of 296
Cruise control allows you to maintain
asetspeedabove25mph(40km/h)
without keeping your f oot on the
accelerator pedal. It should be used
f or cruising on straight, open
highways. It is not recommended f or
city driving, winding roads, slippery
roads, heavy rain, or bad weather.Push in the Cruise Control Master
Switch. The indicator in the switch
will come on.
Accelerate to the desired cruising
speedabove25mph(40km/h).Press and release the SET/decel
buttononthesteeringwheel.The
CRUISE CONTROL indicator on
the instrument panel comes on to
show the system is now activated.
1.
2. 3.
Using the Cruise Control
Cruise Control
Comf ort and Convenience Feat ures160
CRUISE CONTROL MASTER SWITCH
RESUME/accel
CANCEL
SET/decel
Improper use of the cruise
control can lead to a crash.
Use the cruise control only
when traveling on open
highways in good weather.
Page 164 of 296

Thecruisecontrolmaynotholdthe
set speed when you are going up and
down hills. If your speed increases
going down a hill, use the brakes to
slow down. This will cancel the
cruise control. To resume the set
speed, press the RESUME/accel
button. The CRUISE CONTROL
indicator on the instrument panel will
come back on.
When climbing a steep hill, the
automatic transmission may
downshif t to hold the set speed.You can increase the set cruising
speed in any of these ways:
Push on the accelerator pedal.
Accelerate to the desired cruising
speed and press the SET/decel
button.
To increase your speed in very
small amounts, tap the RESUME/
accel button. Each time you do
this, the vehicle will speed up
about 1 mph (1.6 km/h). You can decrease the set cruising
speed in any of these ways:
Press and hold the SET/decel
button. Release the button when
you reach the desired speed.
To slow down in very small
amounts, tap the SET/decel
button. Each time you do this,
your vehicle will slow down about
1 mph (1.6 km/h).
Tap the brake pedal lightly with
your f oot. The CRUISE
CONTROL indicator on the
instrument panel will go out.
When the vehicle slows to the
desired speed, press the SET/
decel button.
Press and hold the RESUME/
accel button. When you reach the
desired cruising speed, release the
button.
CONT INUED
Cruise Control
Comf ort and Convenience Feat ures
Changing the Set Speed
161
Page 165 of 296

Even with the cruise control turned
on, you can still use the accelerator
pedal to speed up f or passing. Af ter
completing the pass, take your foot
of f the accelerator pedal. The vehicle
will return to the set cruising speed.Youcancancelthecruisecontrolin
any of these ways:Tap the brake pedal.
Push the CANCEL button on the
steering wheel.
Press the Cruise Control Master
Switch. When you push the CANCEL button,
or tap the brake pedal, the system
will remember the previously set
cruising speed. To return to that
speed, accelerate to above 25 mph
(40 km/h) and then press and
release the RESUME/accel button.
The CRUISE CONTROL indicator
comes on. The vehicle will accelerate
to the same cruising speed as before.
Pressing the Cruise Control Master
Switch turns the system completely
of f and erases the previous cruising
speed.
Resting your f oot on the brake pedal
will cause the cruise control to
cancel.
Cruise Control
Comf ort and Convenience Feat ures
Cancelling the Cruise Control Resuming the Set Speed
162
CANCEL
BUTTON
Page 166 of 296

�µ
The HomeLinkUniversal
Transceiver built into your vehicle
canbeprogrammedtooperateupto
three remote controlled devices
around your home, such as garage
doors, lighting, or home security
systems.
If you are training HomeLink to
operate a garage door or gate, you
should unplug the motor f or that
device during training. Repeatedly
pressing the remote control button
could burn out the motor.
The HomeLink transceiver stores
the code in a permanent memory.
There should be no need to retrain
the transmitter if your vehicle’s
battery goes dead or is disconnected.
If your garage door opener was
manuf actured bef ore April 1982, you
may not be able to program
HomeLink to operate it. They do not have the safety feature that causes
the motor to stop and reverse if an
obstacle is detected during closing,
increasing the risk of injury.
HomeLink
is a registered
trademark of Johnson Controls . If you just
received your vehicle and have not
trained any of the buttons in
HomeLink bef ore, you should erase
any previously learned codes bef ore
training the first button.
Todothis,pressandholdthetwo
outside buttons on the HomeLink
transceiver for about 20 seconds, or
until the red light f lashes. Release
the buttons, then proceed to Step 1.
If you are training the second or
third buttons, go directly to Step 1.
Always ref er to the opening
instructions and saf ety inf ormation
that came with your garage door
opener or other equipment you
intend to operate with the HomeLink
Universal Transceiver. If you do not
have this inf ormation, you should
contact the manuf acturer of the
equipment.
CONT INUED
On EX and EX-L models
HomeL ink Universal T ransceiver
Comf ort and Convenience Feat ures
General Inf ormation T raining HomeL ink
Important Saf ety Precautions
Bef ore you begin
163
TM
Page 167 of 296

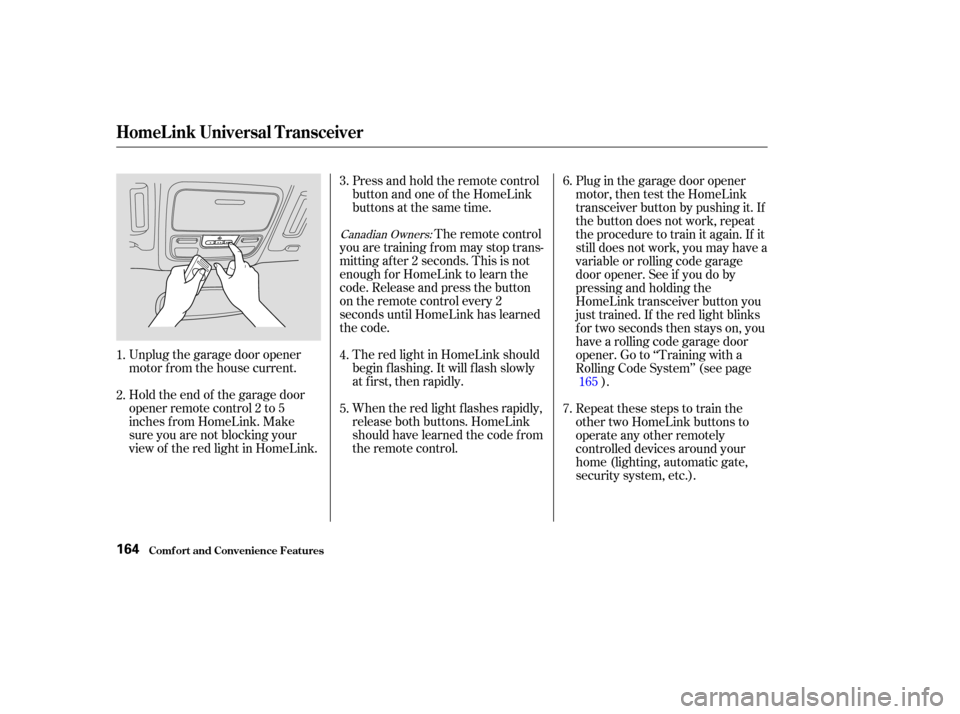
Unplug the garage door opener
motor f rom the house current.
Holdtheendof thegaragedoor
opener remote control 2 to 5
inches f rom HomeLink. Make
sure you are not blocking your
view of the red light in HomeLink.Press and hold the remote control
button and one of the HomeLink
buttons at the same time.
The remote control
you are training f rom may stop trans-
mitting after 2 seconds. This is not
enough f or HomeLink to learn the
code. Release and press the button
on the remote control every 2
seconds until HomeLink has learned
the code.
The red light in HomeLink should
begin f lashing. It will f lash slowly
at first, then rapidly.
When the red light f lashes rapidly,
release both buttons. HomeLink
should have learned the code from
the remote control. Plug in the garage door opener
motor, then test the HomeLink
transceiver button by pushing it. If
the button does not work, repeat
the procedure to train it again. If it
still does not work, you may have a
variable or rolling code garage
door opener. See if you do by
pressing and holding the
HomeLink transceiver button you
just trained. If the red light blinks
f or two seconds then stays on, you
have a rolling code garage door
opener. Go to ‘‘Training with a
Rolling Code System’’ (see page
).
Repeat these steps to train the
other two HomeLink buttons to
operate any other remotely
controlled devices around your
home (lighting, automatic gate,
security system, etc.).
2. 3.
1. 4.
5.7. 6.
165
Canadian Owners:
HomeL ink Universal T ransceiver
Comf ort and Convenience Feat ures164