Page 149 of 296

Your Honda is equipped with a Rear
Entertainment System that includes
a DVD player f or the enjoyment of
the rear passengers.
With this system, the rear
passengers can enjoy a dif f erent
entertainment source (radio, tape
player, CD player, or DVD player)
than the front seat occupants. The
audio is broadcast through the
supplied wireless headphones.
The ignition switch must be in the
ACCESSORY (I) or ON (II) position
to operate the Rear Entertainment
System.Press the REAR PWR button. To
turn on the rear controls (ceiling
panel or remote), press the RR
CTRL knob. The system’s icon
shows in the right side display. Your
passengers can then operate the rear
system with the control panel in the
ceiling or with the remote control.
Press the RR CTRL knob again to
turn the rear controls off. You will
seetheRearControlsOff iconinthe
right display.
The rear system selects the source it
waslastsetto.Ifthatsourcehas
been removed (the DVD has been
ejected f rom the player, f or example),
youwillsee‘‘____’’inthedisplay.
You must select another source.Whenyouturnonthesystem,the
rear speakers are automatically
turned off. You will see the Rear
Speakers Of f icon in the display. The
sound f or the rear system is sent to
the wireless headphones.
If youwanttoturntherearspeakers
on again, press and hold the REAR
PWR button until the Rear Speakers
Of f icon goes of f .
The rear speakers are
connected to the f ront system, so
they will always play the source that
the f ront system is set to.
Optional on EX-L model
Rear Entertainment System
Comf ort and Convenience Feat ures
To Turn On the System Rear Speakers
146
NOTE:
Page 153 of 296

�µ
�µ �µ
�µ
�µ
�Ý
�Û �Ý�Û
If aCDisloadedinthemainCD
player or CD changer, select it by
pressing the CD/CHG button. If the
CD is loaded in the DVD player,
press the DVD/AUX button.
Pressthe buttontoskiptothe
beginning of the next track. Press
the button to return to the
beginning of the current track. If the
changer is selected, use the and
buttons to change discs.
Press the RPT button
to continuously replay the current
track. You will see RPT in the display.
Press the button again to turn it off.
To play the tracks within a
CD in random order, press the RDM
button. You will see RDM in the
display. Press the button again to
cancel RDM. The video screen is f or use by rear
seat passengers only. The driver and
f ront seat passenger should not try
to view the screen while driving.
Open the overhead screen by
pushing the open button. The screen
will swing down partway. Pivot the
screen the rest of the way. If you
pivot the screen past the detent, the
display will turn of f . To close the
screen, pivot it up until it latches. Press
this button when you want to pause
the DVD. Press this button again to
go back to PLAY.
Press the
button to skip to the beginning
of the next chapter. Press the buttontoskipbacktothe
beginning of the current chapter.
To select the menu
on the DVD, press the MENU
button. Use the , , ,
and buttons to move to the
desired menu selection, then press
the ENT button to enter your
selection.
Rear Entertainment System
Comf ort and Convenience Feat ures
To Play a CD f rom the Rear
Control Panel
REPEAT
RDM To Play a DVD f rom the Rear
Control Panel
PLAY/PAUSE/PROG
SEEK /SK IP
MENU/ENT
150
REAR CONTROL
PANEL
BUTTON
OVERHEAD
SCREEN
Page 157 of 296
When you are not using the remote
control, store it in holder in the f ront
seat-back pocket.There are various types of DVDs
available. Some of them are not
compatible with your system.
The DVD player in your Rear
Entertainment System can play
DVDs and CDs bearing the above
marks on their packages or jackets.Those packages or jackets should
also bear the designation of ‘‘1’’ or
‘‘ALL’’. DVD-ROMs cannot be played
in this system.
The tips on how to handle and
protect DVDs are basically the same
as those f or compact discs. Ref er to
‘‘Protecting Your CDs’’ on page .
135
Rear Entertainment System
Comf ort and Convenience Feat ures
Storing the Remote Control Playable DVDs
Protecting DVDs
154
HOLDER
Page 159 of 296

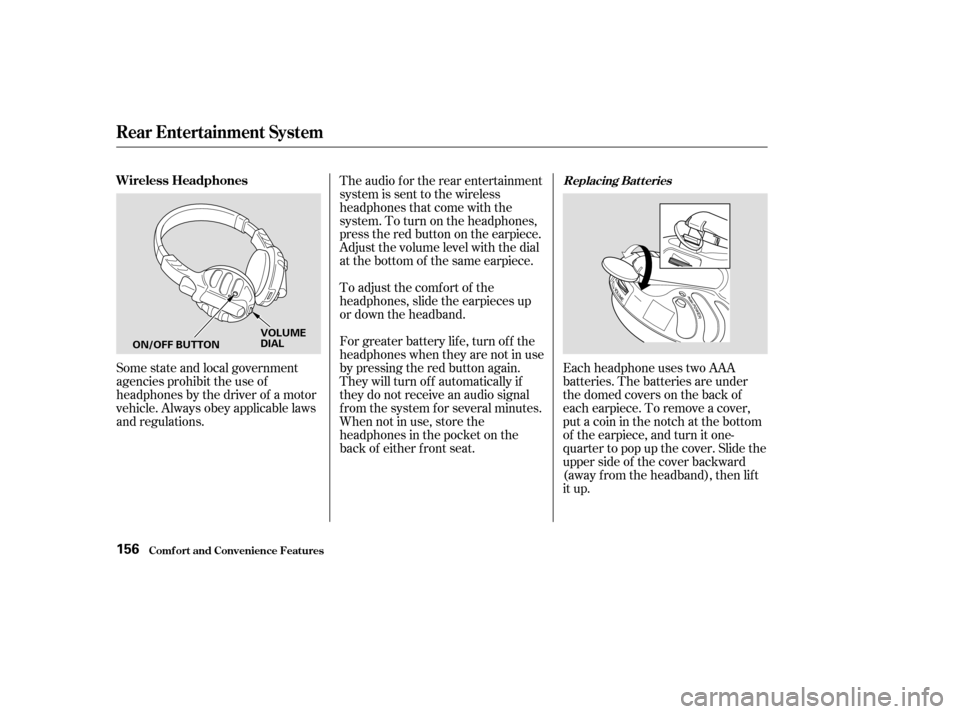
Some state and local government
agencies prohibit the use of
headphones by the driver of a motor
vehicle. Always obey applicable laws
and regulations.The audio f or the rear entertainment
system is sent to the wireless
headphones that come with the
system. To turn on the headphones,
presstheredbuttonontheearpiece.
Adjust the volume level with the dial
at the bottom of the same earpiece.
To adjust the comf ort of the
headphones, slide the earpieces up
or down the headband.
For greater battery lif e, turn of f the
headphones when they are not in use
by pressing the red button again.
They will turn of f automatically if
they do not receive an audio signal
f rom the system f or several minutes.
When not in use, store the
headphones in the pocket on the
back of either f ront seat.
Each headphone uses two AAA
batteries. The batteries are under
the domed covers on the back of
each earpiece. To remove a cover,
put a coin in the notch at the bottom
of the earpiece, and turn it one-
quarter to pop up the cover. Slide the
upper side of the cover backward
(away f rom the headband), then lif t
it up.
Rear Entertainment System
Comf ort and Convenience Feat ures
Wireless HeadphonesReplacing Bat t eries
156
ON/OFF BUTTON
VOLUME
DIAL
Page 160 of 296
Remove the batteries and note their
polarity. Install the new batteries in
the earpiece with the same polarity.
Set the cover in place, then slide it up
until it locks.Auxiliary input jacks and headphone
connectors f or the rear
entertainment system are under the
third seat armrest on the driver’s
side. To access these connectors,
open the cover by pulling up on the
lever.The system will accept auxiliary
inputs f rom standard video games
and video equipment.
Some video game power supplies
may cause poor picture quality.
V=Videojack
L = Lef t audio jack
R = Right audio jack
CONT INUED
Rear Entertainment System
Comf ort and Convenience Feat ures
Auxiliary Input Jacks
157
COVER
BATTERY ARMREST
LEVER
AUXILIARY INPUT JACKS
Page 161 of 296
There are three headphone
connectors f or the third seat
passengers. Each connector has its
own volume control.
Rear Entertainment System
Comf ort and Convenience Feat ures158
VOLUME DIALS
HEADPHONE CONNECTORS
Page 172 of 296

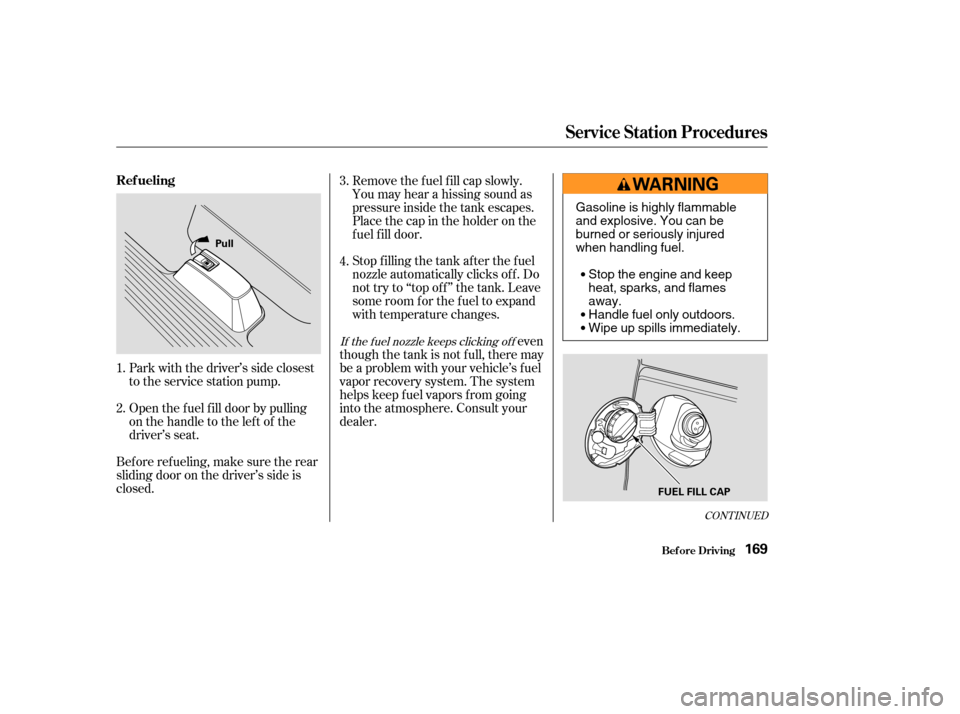
Open the f uel f ill door by pulling
onthehandletotheleftof the
driver’s seat.
Bef ore ref ueling, make sure the rear
sliding door on the driver’s side is
closed. Remove the f uel f ill cap slowly.
You may hear a hissing sound as
pressure inside the tank escapes.
Place the cap in the holder on the
fuel fill door.
Stop f illing the tank af ter the f uel
nozzle automatically clicks of f . Do
not try to ‘‘top off’’ the tank. Leave
some room f or the f uel to expand
with temperature changes.
even
though the tank is not full, there may
be a problem with your vehicle’s f uel
vapor recovery system. The system
helps keep f uel vapors f rom going
into the atmosphere. Consult your
dealer.
Park with the driver’s side closest
to the service station pump.
1.
2. 3.
4.
If the f uel nozzle keeps clicking of f
CONT INUED
Ref ueling
Bef ore Driving
Service Station Procedures
169
Pull
FUEL FILL CAP
Gasoline is highly flammable
and explosive. You can be
burned or seriously injured
when handling fuel.Stop the engine and keep
heat, sparks, and flames
away.
Handle fuel only outdoors.
Wipe up spills immediately.
Page 178 of 296

Removing parts f rom your vehicle,
or replacing components with non-
Honda (af termarket) components
could seriously af f ect your vehicle’s
handling, stability, and reliability.
Some examples are:Lowering the vehicle with an
aftermarket suspension kit that
signif icantly reduces ground
clearance can allow the
undercarriage to hit speed bumps
or other raised objects, which
could cause the airbags to deploy.
Raising your vehicle with an
af termarket suspension kit can
af f ect the handling and stability.
Af termarket wheels, because they
are a universal design, can cause
excessive stress on suspension
components. Larger or smaller wheels and tires
can interf ere with the operation of
your vehicle’s anti-lock brakes and
other systems.
Do not modif y your steering wheel
or any other part of your
Supplemental Restraint System.
Modif ications could make the
system inef f ective. See the saf ety
precautions on page .
If you plan to modif y your vehicle,
consult with your Honda dealer. Any object
attached to or placed on the covers
marked ‘‘SRS AIRBAG’’ in the
center of the steering wheel and
on top of the dashboard, could
interf ere with the proper operation
of the airbags. Or, if the airbags
inf late, the objects could be
propelled inside the vehicle and
hurt someone.
If a side airbag
inflates,acupholderorotherhard
object attached on or near the
door could be propelled inside the
vehicle and hurt someone.
This could prevent the
airbag from inflating properly.
34
Modif ications
Bef ore Driving
Modif ying Your Vehicle
Additional Saf ety Precautions
Do not at t ach or place object s on
the f ront airbag covers.
Do not at t ach hard object s on ornear a f ront door.
Do not place any object s over orreplacetheoutsideedgeof afrontseat -back.
175