Page 78 of 231

�µ
�µ
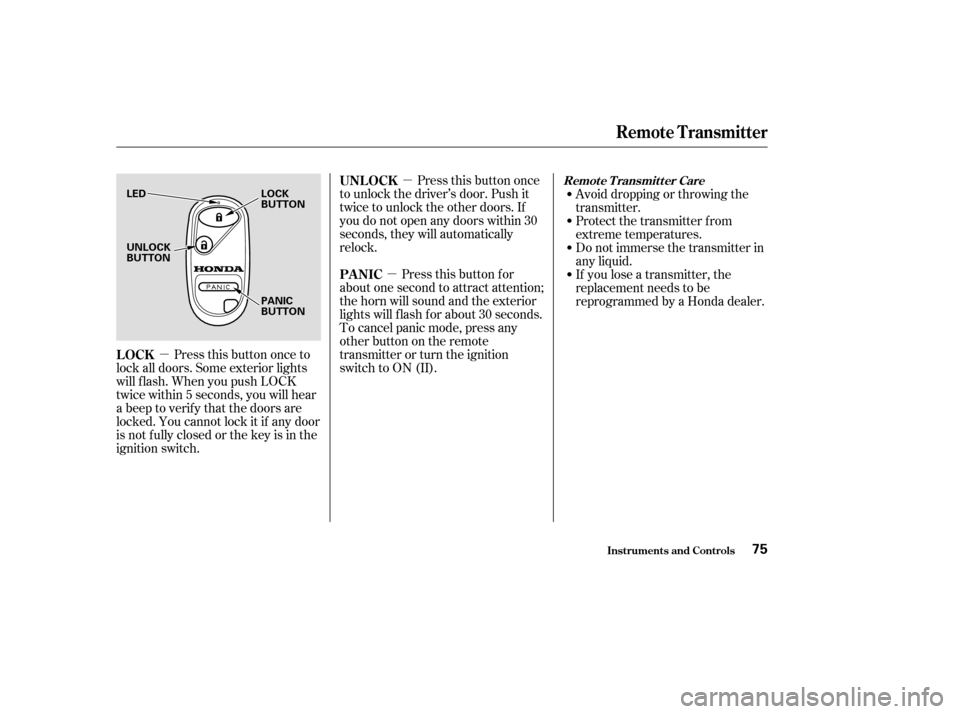
�µ Press this button once
to unlock the driver’s door. Push it
twice to unlock the other doors. If
you do not open any doors within 30
seconds, they will automatically
relock.
Pressthisbuttonfor
about one second to attract attention;
thehornwillsoundandtheexterior
lights will f lash f or about 30 seconds.
To cancel panic mode, press any
other button on the remote
transmitter or turn the ignition
switch to ON (II). Avoid dropping or throwing the
transmitter.
Protect the transmitter from
extreme temperatures.
Do not immerse the transmitter in
any liquid.
If you lose a transmitter, the
replacement needs to be
reprogrammed by a Honda dealer.
Press this button once to
lock all doors. Some exterior lights
will f lash. When you push LOCK
twice within 5 seconds, you will hear
a beep to verify that the doors are
locked. You cannot lock it if any door
is not f ully closed or the key is in the
ignition switch. UNL OCK
PA NIC
LOCKRemote Transmitter Care
Remote Transmitter
Inst rument s and Cont rols75
UNLOCK
BUTTON LED LOCK
BUTTON
PANIC
BUTTON
Page 82 of 231

�µ
The master control panel also con-
tains these extra features:
To open the driver’s
window f ully, push the window
switch f irmly down and release it.
The window automatically goes all
the way down. To stop the window
f rom going all the way down, pull
back on the window switch brief ly.
To open the driver’s window only
partially, push the window switch
down lightly and hold it. The window
will stop as soon as you release the
switch.
The AUTO f unction only works to
lower the driver’s window. To raise
the window, you must pull back on
the window switch and hold it until
the window reaches the desired
position.
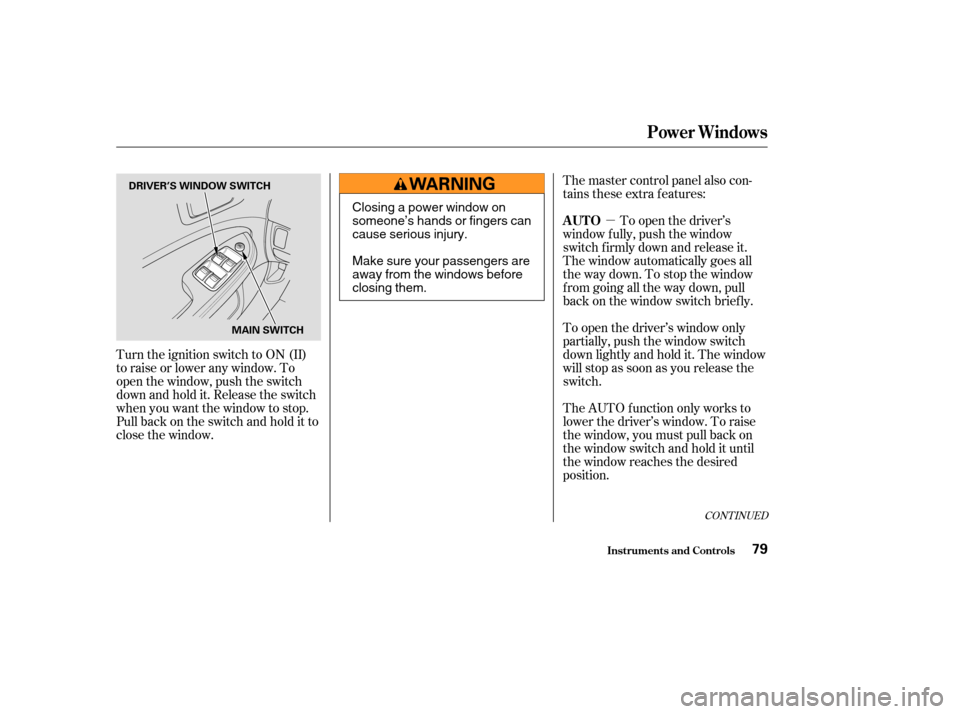
Turn the ignition switch to ON (II)
toraiseorloweranywindow.To
open the window, push the switch
downandholdit.Releasetheswitch
when you want the window to stop.
Pull back on the switch and hold it to
close the window.
CONT INUED
AUTO
Power Windows
Inst rument s and Cont rols79
DRIVER’S WINDOW SWITCH
MAIN SWITCH
Closing a power window on
someone’s hands or fingers can
cause serious injury.
Make sure your passengers are
away from the windows before
closing them.
Page 83 of 231
The light in the AUTO switch comes
on when you turn the ignition switch
to ON (II).
The MAIN switch controls power to
the passengers’ windows. When you
push in the MAIN switch, the
passengers’ windows cannot be
raised or lowered. The MAIN switch
does not af f ect the driver’s window.
To cancel this f eature, push on the
switch again to get it to pop out.
Keep the MAIN switch pushed in
whenyouhavechildreninthe
vehicle so they do not injure
themselves by operating the
windows unintentionally.
Power Windows
Inst rument s and Cont rols80
Page 84 of 231
Keeptheinsideandoutsidemirrors
clean and adjusted f or best visibility.
Be sure to adjust the mirrors bef ore
you start driving.
The inside mirror has day and night
positions. The night position reduces
glare f rom headlights behind you.
Flip the tab on the bottom edge of
the mirror to select the day or night
position.Move the selector switch to L
(driver’s side) or R (passenger’s
side).Push the appropriate edge of the
adjustment switch to move the
mirrorright,left,up,ordown.
When you f inish, move the
selector switch to the center (off)
position. This turns of f the
adjustment switch so you can’t
move a mirror out of position by
accidentally bumping the switch.
1. 2.
3.
CONT INUED
Mirrors
Inst rument s and Cont rols
Adjusting the Power Mirrors
81
SELECTOR SWITCH
TAB
ADJUSTMENT SWITCH
Page 85 of 231
The outside mirrors are heated to
remove fog and frost. With the
ignition switch in the ON (II)
position, turn on the heaters by
pressing the button. The indicator in
the button comes on as a reminder.
Press the button again to turn the
heaters off.To apply the parking brake, pull the
lever up f ully. To release it, pull up
slightly, push the button, and lower
the lever. The parking brake light on
the instrument panel should go out
when the parking brake is f ully
released (see page ).
54
On Canadian model
Parking Brake
Mirrors, Parking Brake
Inst rument s and Cont rols82
NOTICE:
PARKING BRAKE LEVER
HEATED MIRROR BUTTON
Driving the vehicle with the
parking brake applied can damage the
rear brakes and axles.
Page 86 of 231
The ceiling light has a three-position
switch; ON, Door Activated, and
OFF.
In the Door Activated (center)
position, the light comes on when
you:Open any door.
Remove the key from the ignition.
If you do not open a door, the light
f ades out in about 10 seconds.
Unlock the doors with the key or
remote transmitter. Push on the spotlight lenses to turn
the light on and of f . The lights around the ignition switch
come on when you open any door.
Af ter you close the door, the ignition
switch light stays on f or several
seconds.
Ceiling L ight
Individual Interior L ights
Interior Lights
Inst rument s and Cont rols83
DOOR ACTIVATED
OFF ON
FRONT
Page 93 of 231

The outside air intakes f or the
heating and cooling system are at
the base of the windshield. Keep this
area clear of leaves and other debris.
ThesystemshouldbeleftinFresh
Air mode under almost all conditions.
Keeping the system in Recirculation
mode, particularly with the A/C of f ,
can cause the windows to fog up.
Switch to Recirculation mode when
driving through dusty or smoky
conditions, then return to Fresh Air
mode.
This button turns the rear window
def ogger of f and on (see page ).
Use the mode control dial to select
the vents the air flow from. Some air
will f low f rom the dashboard vents in
all modes.Air flows from the center
and corner vents in the dashboard.
Air f low is divided between
the vents in the dashboard and the
f loor vents.
Air f lows f rom the f loor
vents. When you select , the
system automatically switches to
Fresh Air mode.
Air f low is divided between
the f loor vents and the def roster
vents at the base of the windshield.
Air f lows f rom the def roster
vents at the base of the windshield.
Turn this dial to control fan speed
and the air flow.
When the dial is set to AUTO, the
system controls the f an speed
automatically.
Turning this dial clockwise increases
the temperature of the airflow.
This button turns the air
conditioning on and of f . The light in
thebuttonisonwhentheA/Cison.
When the light in the button is on,
air f rom the vehicle’s interior is sent
throughout the system again. When
the light is of f , air is brought in f rom
the outside of the vehicle (Fresh Air
mode).
When you select or ,
the system automatically switches to
Fresh Air mode and turns on the
A/C and turns off the ECON mode.
68
Fan Control Dial
Rear Window Def ogger Button
Mode Control Dial
Air Conditioning (A/C) Button T emperature Control Dial
Recirculation Button
Comf ort and Convenience Feat ures
Vents, Heating, and A/C
90
Page 94 of 231

If the interior is very warm,you can
cool it down more rapidly by partially
opening the windows, turning on the
A/C, and setting the fan to
maximum speed in Fresh Air mode.
In AUTO mode, the system controls
the air f low direction automatically
between the dashboard vents and
the f loor vents.
The f low-through ventilation system
draws in outside air, circulates it
through the interior, then exhausts it
through vents near the rear side
panels.
Turn the temperature control dial
all the way to the lef t.
Make sure the A/C is of f .
Select and Fresh Air mode.
Set the f an to the desired speed.
The heater uses engine coolant to
warm the air. If the engine is cold, it
will be several minutes bef ore you
f eel warm air coming through the
system. Turn on the A/C by pressing the
button. The light in the button
comesonwhenafanspeedis
selected.
Make sure the temperature
control dial is all the way to the left.
Select .
If the outside air is humid, select
Recirculation mode. If the outside
air is dry, select Fresh Air mode.
Set the f an to the desired speed.
Air conditioning places an extra load
on the engine. Watch the engine
coolant temperature gauge (see page
). If it moves near the red zone,
turn of f the A/C until the gauge
reads normally. Select and Fresh Air mode.
Set the f an to the desired speed.
Adjust the warmth of the air with
the temperature control dial.
1.
2.
3.
4. 1.
2.
3.
4.
5. 2.
3. 1.
63
Ventilation
Using the Heater Using the A /C
Comf ort and Convenience Feat ures
Vents, Heating, and A/C
91