Page 69 of 231

�µ�µ�µ
Push down on the
lef t lever to signal a lef t turn and up
to signal a right turn. To signal a lane
change, push lightly on the lever and
hold it. The lever will return to
center when you release it or
complete a turn. To turn on, push
the lever f orward until you hear a
click. The blue high beam indicator
will light (see page ). Pull it back
to return to low beams. To flash the
high beams, pull the lever back
lightly, then release it. The high
beams will stay on as long as you
hold the lever back.
The headlights revert to normal
operation when you turn them on
with the switch.
Rotating switch
on the lef t lever controls to the
‘‘ ’’ position turns on the parking
lights, taillights, instrument panel
lights, side-marker lights, and rear
license plate lights. Turning the
switch to the ‘‘ ’’ position turns
on the headlights. If you leave the
lights on with the ignition switch in
ACCESSORY (I) or LOCK (0), you
will hear a reminder tone when you
open the driver’s door. With the headlight switch off, the
high beam headlights come on with
reduced brightness when you turn
the ignition switch to ON (II) and
release the parking brake. They
remain on until you turn the ignition
of f , even if you set the parking brake.
Turn Signal
Of f
Parking and interior lights
Headlight on
High beams
Flashhighbeams
1.
2.
3.
4.
5.
6. 56
Canadian models only
Turn Signal
High Beams
Daytime Running L ights
Headlights On
Turn Signal and Headlights
Inst rument s and Cont rols66
Page 73 of 231
Youshouldhavereceivedakey
number tag with your set of keys.
You will need this key number if you
ever have to get a key replaced. Use
only Honda-approved key blanks.These keys contain electronic
circuits that are activated by the
Immobilizer System. They will not
work to start the engine if the
circuits are damaged.
Protect the keys f rom direct
sunlight, high temperature, and
high humidity.
Donotdropthekeysorsetheavy
objects on them.
Keep the keys away f rom liquids.
If they get wet, dry them
immediately with a sof t cloth.
The keys do not contain batteries.
Do not try to take them apart.
The master key fits all the locks on
your vehicle.
The valet key works only in the
ignition and the door locks. You can
keep the trunk and trunk release
handle locked when you leave your
vehicle and the valet key at a parking
f acility.
Keys and Locks
Inst rument s and Cont rols70
MASTER
KEYS
(Black)
VALET
KEY
(Gray)
KEY
NUMBER
TAG
Page 75 of 231

�µ
�µ
�µ �µ
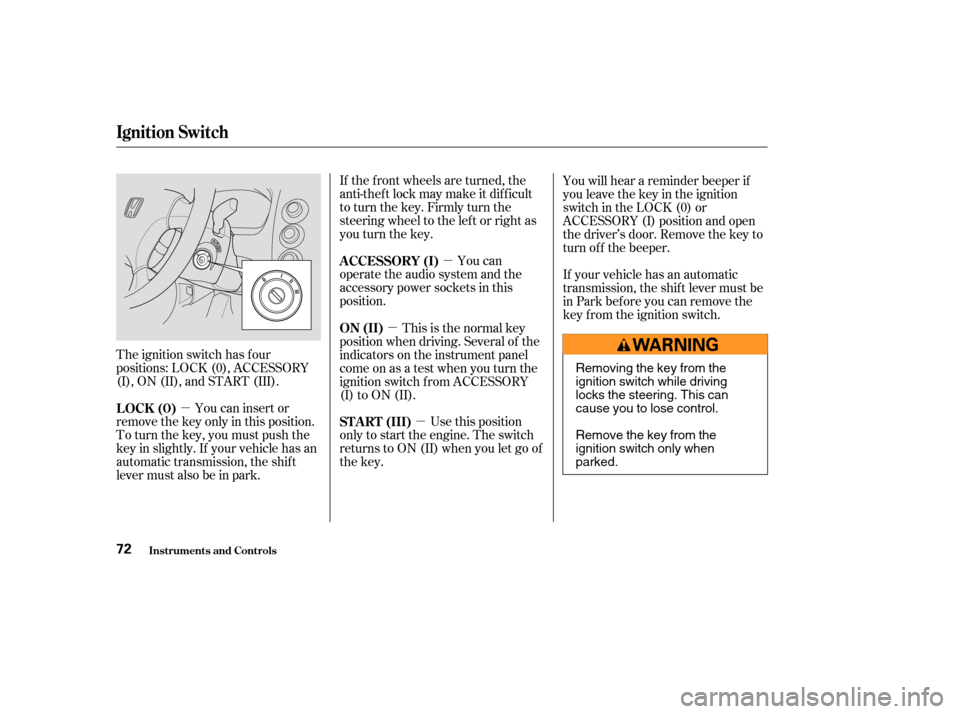
The ignition switch has f our
positions: LOCK (0), ACCESSORY
(I), ON (II), and START (III). If the f ront wheels are turned, the
anti-thef t lock may make it dif f icult
to turn the key. Firmly turn the
steering wheel to the lef t or right as
you turn the key.
You can
operate the audio system and the
accessory power sockets in this
position.
Use this position
only to start the engine. The switch
returns to ON (II) when you let go of
the key. You will hear a reminder beeper if
you leave the key in the ignition
switch in the LOCK (0) or
ACCESSORY (I) position and open
the driver’s door. Remove the key to
turn of f the beeper.
You can insert or
remove the key only in this position.
To turn the key, you must push the
key in slightly. If your vehicle has an
automatic transmission, the shif t
lever must also be in park. If your vehicle has an automatic
transmission, the shif t lever must be
in Park bef ore you can remove the
key f rom the ignition switch.
This is the normal key
position when driving. Several of the
indicators on the instrument panel
come on as a test when you turn the
ignition switch f rom ACCESSORY
(I) to ON (II). A CCESSORY (I)
ST A RT (III)
LOCK (0) ON (II)
Ignition Switch
Inst rument s and Cont rols72
Removing the key from the
ignition switch while driving
locks the steering. This can
cause you to lose control.
Remove the key from the
ignition switch only when
parked.
Page 76 of 231

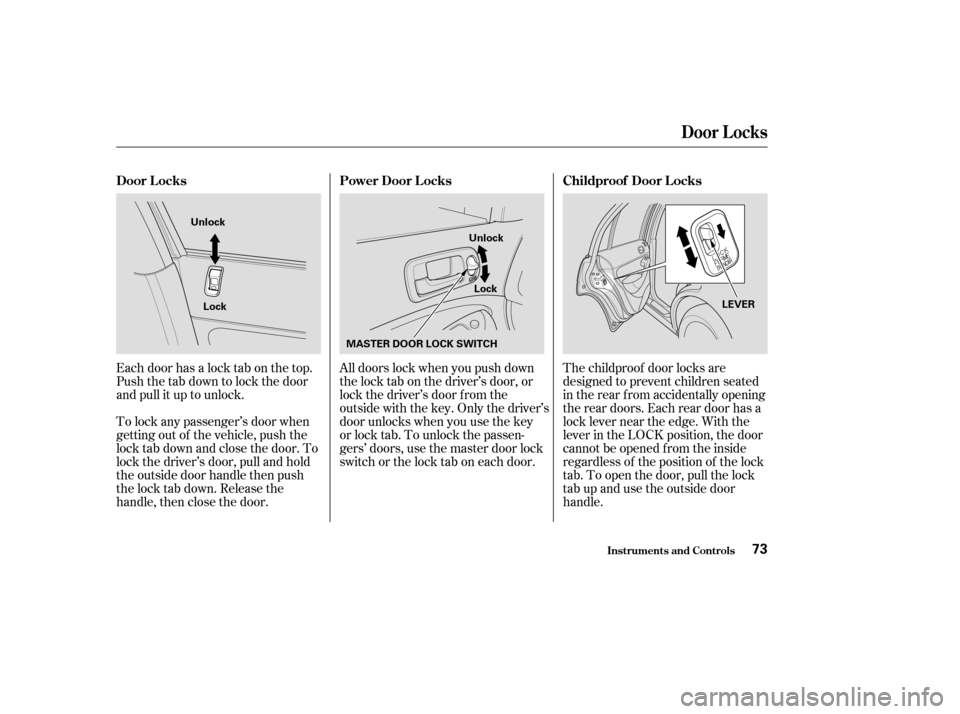
Each door has a lock tab on the top.
Push the tab down to lock the door
and pull it up to unlock.The childproof door locks are
designed to prevent children seated
in the rear f rom accidentally opening
the rear doors. Each rear door has a
lock lever near the edge. With the
lever in the LOCK position, the door
cannot be opened f rom the inside
regardless of the position of the lock
tab. To open the door, pull the lock
tab up and use the outside door
handle.
To lock any passenger’s door when
getting out of the vehicle, push the
lock tab down and close the door. To
lock the driver’s door, pull and hold
the outside door handle then push
the lock tab down. Release the
handle, then close the door. All doors lock when you push down
the lock tab on the driver’s door, or
lock the driver’s door f rom the
outside with the key. Only the driver’s
door unlocks when you use the key
or lock tab. To unlock the passen-
gers’ doors, use the master door lock
switch or the lock tab on each door.
Door L ocks
Power Door L ocks Childproof Door L ocks
Door L ocks
Inst rument s and Cont rols73
Unlock
Lock Unlock
Lock
MASTER DOOR LOCK SWITCH LEVER
Page 77 of 231
To open the trunk, pull the trunk
releasehandletotheleftof the
driver’s seat. To protect items in the
trunk when you need to give the key
to someone else, lock the trunk
releasehandlewiththemasterkey
and give the other person the valet
key.
To close the trunk, press down on
the trunk lid.You can also use the master key to
open the trunk lock.
Keep the trunk lid closed at all times
while driving to avoid damaging it
and to prevent exhaust gas from
getting into the interior. See Carbon
Monoxide Hazard, page .
Parents should decide if their
children should be shown how to use
this feature. As a saf ety f eature, your vehicle has
a release lever on the trunk latch so
the trunk can be opened f rom inside.
To open the trunk, push the release
lever to the lef t.
46
Trunk
Emergency Trunk Opener
Door L ocks
Inst rument s and Cont rols74
TRUNK RELEASE HANDLE
Pull
MASTER KEY
MASTER KEY
Page 78 of 231

�µ
�µ
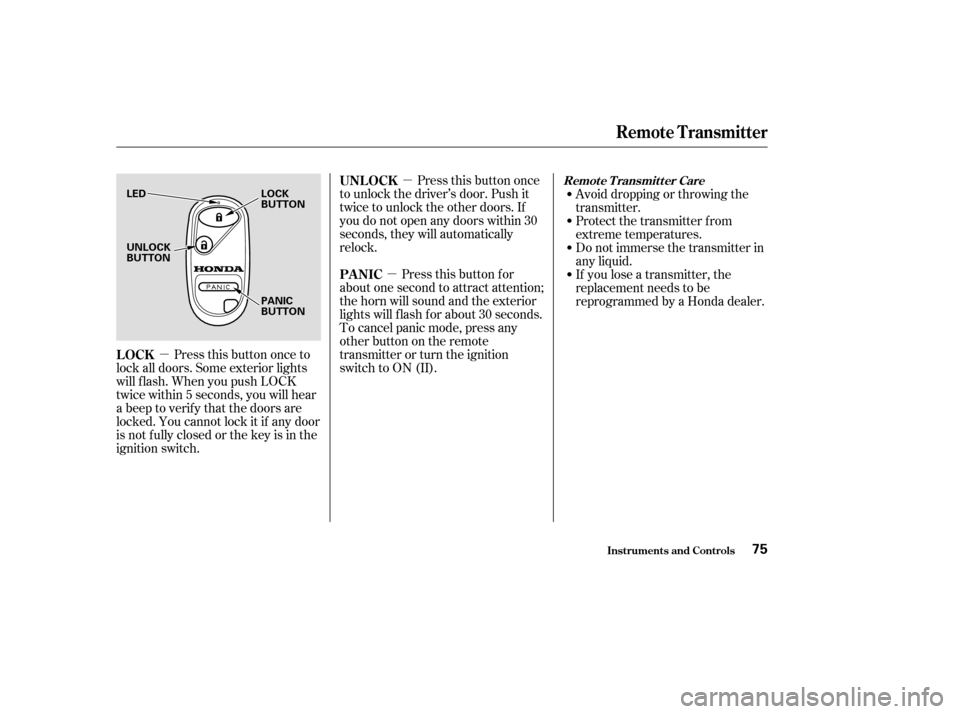
�µ Press this button once
to unlock the driver’s door. Push it
twice to unlock the other doors. If
you do not open any doors within 30
seconds, they will automatically
relock.
Pressthisbuttonfor
about one second to attract attention;
thehornwillsoundandtheexterior
lights will f lash f or about 30 seconds.
To cancel panic mode, press any
other button on the remote
transmitter or turn the ignition
switch to ON (II). Avoid dropping or throwing the
transmitter.
Protect the transmitter from
extreme temperatures.
Do not immerse the transmitter in
any liquid.
If you lose a transmitter, the
replacement needs to be
reprogrammed by a Honda dealer.
Press this button once to
lock all doors. Some exterior lights
will f lash. When you push LOCK
twice within 5 seconds, you will hear
a beep to verify that the doors are
locked. You cannot lock it if any door
is not f ully closed or the key is in the
ignition switch. UNL OCK
PA NIC
LOCKRemote Transmitter Care
Remote Transmitter
Inst rument s and Cont rols75
UNLOCK
BUTTON LED LOCK
BUTTON
PANIC
BUTTON
Page 79 of 231

�´
�Ü
�Õ
If it takes several pushes on the
button to lock or unlock the doors,
replace the battery as soon as
possible.
Battery type: CR2025 To replace the battery, move the
round cover on the back of the
transmitter by turning it
counterclockwise with a coin. Insert
a new battery with the side facing
up. Align the mark on the cover
with the mark on the
transmitter. Set the cover in place
andturnitclockwise.
As required by the FCC:
This device complies with Part 15 of theFCC rules. Operation is subject to thef ollowing two conditions: (1) This devicemay not cause harmf ul interf erence, and(2) this device must accept anyinterf erence received, includinginterf erence that may cause undesiredoperation.
Changes or modif ications not expresslyapproved by the party responsible f orcompliance could void the user’sauthority to operate the equipment.
This device complies with IndustryCanada Standard RSS-210.Operation is subject to the f ollowing twoconditions: (1) this device may not causeinterf erence, and (2) this device mustaccept any interf erence that may causeundesired operation of the device.Replacing the Transmitter
Battery
Remote Transmitter
Inst rument s and Cont rols76
ROUND
COVER
CUSHION
RING
BATTERY
Page 86 of 231
The ceiling light has a three-position
switch; ON, Door Activated, and
OFF.
In the Door Activated (center)
position, the light comes on when
you:Open any door.
Remove the key from the ignition.
If you do not open a door, the light
f ades out in about 10 seconds.
Unlock the doors with the key or
remote transmitter. Push on the spotlight lenses to turn
the light on and of f . The lights around the ignition switch
come on when you open any door.
Af ter you close the door, the ignition
switch light stays on f or several
seconds.
Ceiling L ight
Individual Interior L ights
Interior Lights
Inst rument s and Cont rols83
DOOR ACTIVATED
OFF ON
FRONT