Page 60 of 313

This indicator comes on f or a f ew
seconds when you turn the ignition
switch to ON (II). It will go of f if you
have inserted a properly-coded
ignition key. If it is not a properly-
coded key, the indicator will blink
and the engine will not start (see
page ).
This indicator also blinks several
times when you turn the ignition
switch f rom ON (II) to ACCESSORY
(I) or LOCK (0).The appropriate indicator comes on
in this display if the trunk or either
door is not closed tightly.
All the indicators in the monitor
display come on f or a f ew seconds
when you turn the ignition switch to
ON (II).The lef t or right turn signal indicator
blinks when you signal a lane change
or turn. If the indicators do not blink
or blink rapidly, it usually means one
of the turn signal bulbs is burned out
(see page ). Replace the bulb as
soon as possible, since other drivers
cannot see that you are signaling.
WhenyouturnontheHazard
Warning button, both turn signal
indicators blink. All turn signals on
the outside of the vehicle should
flash.
76
237
Instrument Panel Indicators
Inst rument s and Cont rols
Immobilizer System
IndicatorDoor and T runk Open Monitor T urn Signal and
Hazard Warning
Indicators
61
�����—�����—�����y�
����
�
������y���
�(���%���
���y���������y
Page 232 of 313

Theheadlightswereproperlyaimed
when your vehicle was new. If you
regularly carry heavy items in the
trunk or pull a trailer, readjustment
may be required. Adjustments
should be perf ormed by a Honda
dealer or other qualif ied mechanic.Your vehicle has two bulbs on each
side, f our in total. Make sure you are
replacing the bulb that is burned out.
Your vehicle uses halogen headlight
bulbs. When replacing a bulb, handle
it by its plastic case and protect the
glass from contact with your skin or
hard objects. If you touch the glass,
clean it with denatured alcohol and a
clean cloth.
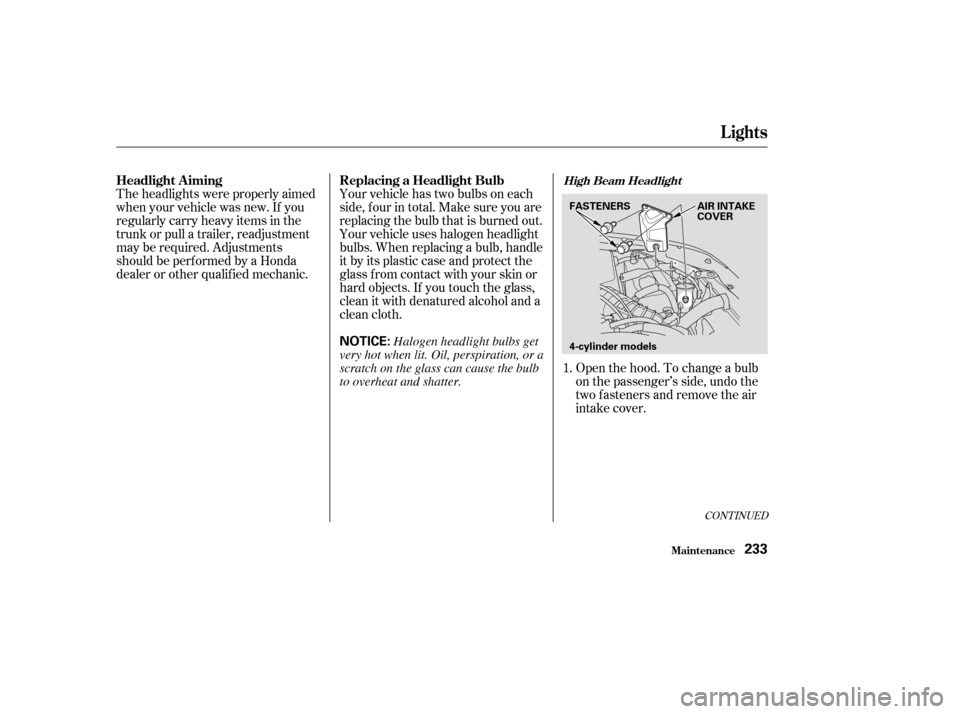
Open the hood. To change a bulb
on the passenger’s side, undo the
two fasteners and remove the air
intake cover.
1.
CONT INUED
Lights
Headlight A iming Replacing a Headlight BulbHigh Beam Headlight
Maint enance233
NOTICE:4-cylinder models
FASTENERS AIR INTAKE
COVERHalogen headlight bulbs get
very hot when lit. Oil, perspiration, or a
scratch on the glass can cause the bulb
to overheat and shatter.
�����—�����—�����y�
�����������
�y���
�(���%���
���y���������y
Page 233 of 313
Remove the electrical connector
f rom the bulb by squeezing the
connector to unlock the tab, then
slide the connector of f the bulb.
Remove the bulb by turning it
approximately one-quarter turn
counterclockwise.
Install the new bulb and turn it
one-quarter turn clockwise to lock
it in place.Push the electrical connector back
onto the bulb. Make sure it is on
all the way.
3.
2. 4. 5.
Lights
Maint enance234
6-cylinder modelsAIR INTAKE
COVER
FASTENERS
4-cylinder models 6-cylinder modelsTAB BULB
TABBULB
�����—�����—�����y�
���������
�
�y���
�(���%���
���y���������y
Page 234 of 313
Turn on the headlights to test the
new bulb.
(Passenger’s side)
Reinstall the air intake cover.
Reinstall the two fasteners and
secure them by pushing on the
heads until they lock.To change the passenger’s side
bulb, start the engine, turn the
steering wheel all the way to the
lef t, and turn of f the engine. To
change the driver’s side bulb, turn
the steering wheel to the right.Use a f lat-tipped screwdriver to
remove the two holding clips f rom
the inner f ender.
Pull the inner f ender cover away
f rom the f ender and bumper.
3.
1. 2.
6. 7.
CONT INUED
Lights
Maint enance
L ow Beam Headlight
235
HOLDING CLIPS
�����—�����—�����y�
�������������y���
�(���%���
���y���������y
Page 235 of 313
To change the low beam headlight
bulb on the driver’s side, remove
the air intake duct. You can reach
the air intake duct f rom the back
side of the inner f ender.Remove the electrical connector
f rom the bulb by squeezing the
connector to unlock the tab, then
slide the connector of f the bulb.
Remove the bulb by turning it
approximately one-quarter turn
counterclockwise.Install the new bulb and turn it
one-quarter turn clockwise to lock
it in place.
Push the electrical connector back
onto the bulb. Make sure it is on
all the way.
Turn on the headlights to test the
new bulb.
Reinstall the air intake duct
securely.
Put the inner f ender cover in place.
Install and lock each holding clip
bypushingonthecenter.
6.
5. 7. 8.9.
10. 11.
4.
On EX-V6 model with manual
transmission
On EX-V6 model with manual transmission
Lights
Maint enance236
AIR INTAKE DUCT
EX-V6 with M/T
�����—�����—�����y�
�������������y���
�(���%���
���y���������y
Page 236 of 313
To change the passenger’s side
bulb, start the engine, turn the
steering wheel all the way to the
lef t, and turn of f the engine. To
change the driver’s side bulb, turn
the steering wheel to the right.Use a f lat-tipped screwdriver to
remove the two holding clips f rom
the inner f ender.Pull the inner f ender cover away
f rom the f ender and bumper.
Remove the socket from the
headlight assembly by turning it
one-quarter turn counterclockwise.
1.
3.
2.
4.
CONT INUED
Lights
Maint enance
Replacing a Front T urn Signal/
Parking/Side Marker Light Bulb
237
HOLDING CLIPS
�����—�����—�����y�
�������������y���
�(���%���
���y���������y
Page 237 of 313

Remove the burned out bulb f rom
thesocketbypushingitinand
turning the bulb counterclockwise
until it unlocks.
Install the new bulb in the socket.
Turn it clockwise to lock it in place.
Insert the socket back into the
headlight assembly. Turn it
clockwise to lock it in place.
Turn on the lights to make sure
the new bulb is working.
Put the inner f ender cover in place.
Install and lock each holding clip
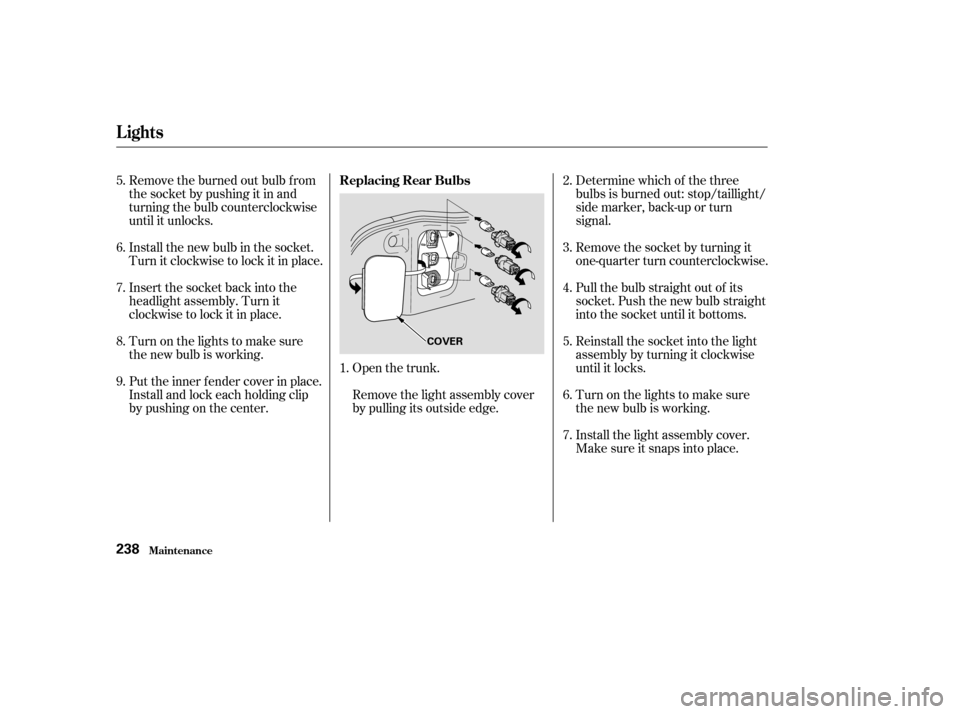
bypushingonthecenter.Open the trunk.
Remove the light assembly cover
by pulling its outside edge.Determine which of the three
bulbs is burned out: stop/taillight/
side marker, back-up or turn
signal.
Remove the socket by turning it
one-quarter turn counterclockwise.
Pull the bulb straight out of its
socket. Push the new bulb straight
into the socket until it bottoms.
Reinstall the socket into the light
assembly by turning it clockwise
until it locks.
Turn on the lights to make sure
the new bulb is working.
Install the light assembly cover.
Make sure it snaps into place.
1. 3.
2. 4. 5.6. 7.
5. 6. 7. 8. 9.
Lights
Maint enance
Replacing Rear Bulbs
238
COVER
�����—�����—�����y�
�������������y���
�(���%���
���y�������
�y
Page 238 of 313
Open the trunk and remove the
socket f rom the light assembly by
turning it one-quarter turn counter-
clockwise.
Remove the burned-out bulb by
pulling it straight out of the socket.
Install the new bulb into the
socket.Reinstall the socket. Turn it
clockwise until it locks.
Turn on the lights to make sure
the new bulb is working.
1. 2. 3. 4.
Lights
Maint enance
Replacing a High-mount Brake
Light Bulb
239
BULB
SOCKET
�����—�����—�����y�
�������������y���
�(���%���
���y���������y