Page 109 of 468

Power Windows
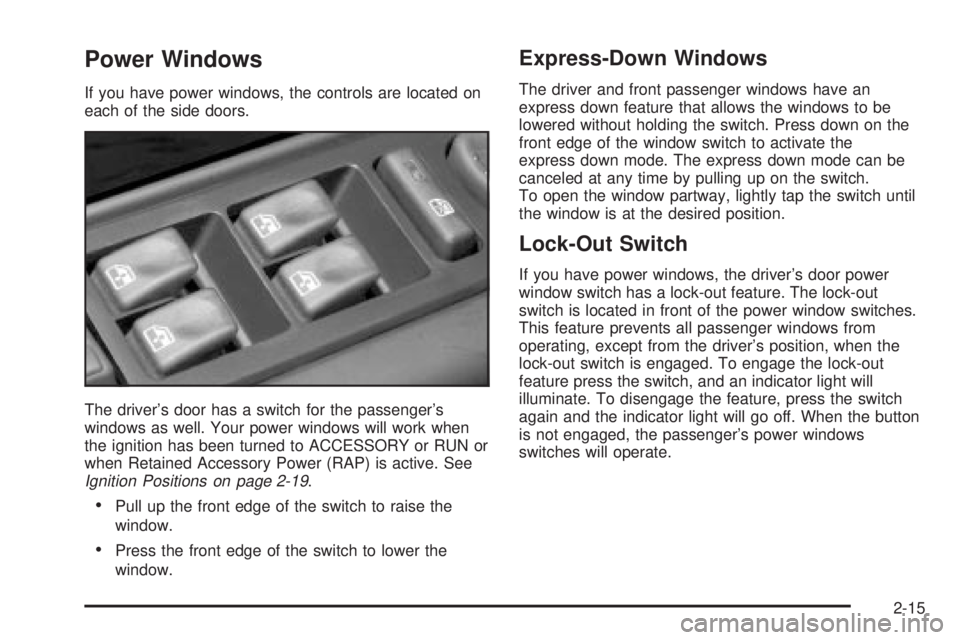
If you have power windows, the controls are located on
each of the side doors.
The driver's door has a switch for the passenger's
windows as well. Your power windows will work when
the ignition has been turned to ACCESSORY or RUN or
when Retained Accessory Power (RAP) is active. See
Ignition Positions on page 2-19.
·Pull up the front edge of the switch to raise the
window.
·Press the front edge of the switch to lower the
window.
Express-Down Windows
The driver and front passenger windows have an
express down feature that allows the windows to be
lowered without holding the switch. Press down on the
front edge of the window switch to activate the
express down mode. The express down mode can be
canceled at any time by pulling up on the switch.
To open the window partway, lightly tap the switch until
the window is at the desired position.
Lock-Out Switch
If you have power windows, the driver's door power
window switch has a lock-out feature. The lock-out
switch is located in front of the power window switches.
This feature prevents all passenger windows from
operating, except from the driver's position, when the
lock-out switch is engaged. To engage the lock-out
feature press the switch, and an indicator light will
illuminate. To disengage the feature, press the switch
again and the indicator light will go off. When the button
is not engaged, the passenger's power windows
switches will operate.
2-15
Page 110 of 468

Sun Visors
To block out glare, you can swing down the visors.
You can also swing them out to help block glare at the
front and side windows.
Illuminated Visor Vanity Mirrors
Pull the sunvisor down and lift the mirror cover to turn
on the lamps.
Theft-Deterrent Systems
Vehicle theft is big business, especially in some cities.
Although your vehicle has a number of theft-deterrent
features, we know that nothing we put on it can make it
impossible to steal.
Content Theft-Deterrent
Your vehicle is equipped with a content theft-deterrent
alarm system.
With this system, the
security light in the
instrument panel cluster will
¯ash as you open the door
if your ignition is off.
This light reminds you to activate the theft-deterrent
system. Here's how to do it:
1. Open the door.
2. Lock the door with the power door lock switch or
the remote keyless entry transmitter. The security
light should come on and stay on.
3. Close all doors. The security light should go off
after about 30 seconds. The alarm is not armed
until the security light goes off.
If a locked door is opened without the key or the remote
keyless entry transmitter, the alarm will go off. The
headlamps and parking lamps will ¯ash for two minutes,
and the horn will sound for 30 seconds, then will turn
2-16
Page 111 of 468

off to save the battery power. You can choose different
feedback options for the alarm. SeeDriver Information
Center (DIC) on page 3-46.
Remember, the theft-deterrent system won't activate if
you lock the doors with a key or use the manual
door lock. It activates only if you use a power door lock
switch with the door open, or with the remote keyless
entry transmitter. You should also remember that
you can start your vehicle with the correct ignition key if
the alarm has been set off.
Here's how to avoid setting off the alarm by accident:
·If you don't want to activate the theft-deterrent
system, the vehicle should be locked with the door
key
afterthe doors are closed.
·Always unlock a door with a key, or use the remote
keyless entry transmitter. Unlocking a door any
other way will set off the alarm.
If you set off the alarm by accident, unlock any door with
the key. You can also turn off the alarm by pressing
unlock on the remote keyless entry transmitter. The alarm
won't stop if you try to unlock a door any other way.
Testing the Alarm
The alarm can be tested by following these steps:
1. From inside the vehicle, lower the driver's window
and open the driver's door.
2. Activate the system by locking the doors with the
power door lock switch while the door is open, or
with the remote keyless entry transmitter.
3. Get out of the vehicle, close the door and wait for
the security light to go out.
4. Then reach in through the window, unlock the door
with the manual door lock and open the door. This
should set off the alarm.
While the alarm is set, the power door unlock switch is
not operational.
If the alarm does not sound when it should but the
headlamps ¯ash, check to see if the horn works. The
horn fuse may be blown. To replace the fuse, see
Fuses
and Circuit Breakers on page 5-103.
If the alarm does not sound or the headlamps do not
¯ash, the vehicle should be serviced by your dealer.
2-17
Page 113 of 468

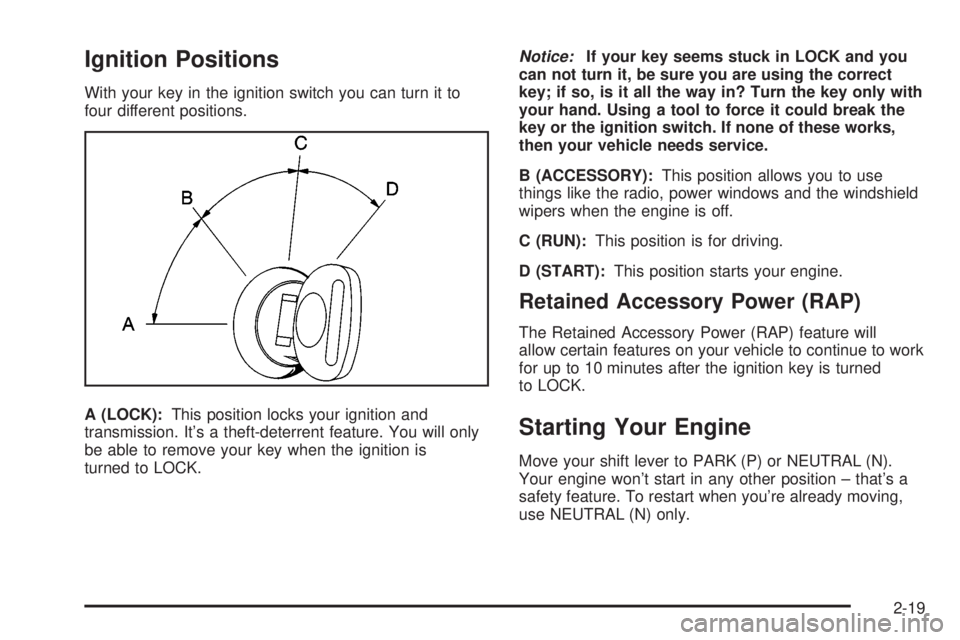
Ignition Positions
With your key in the ignition switch you can turn it to
four different positions.
A (LOCK):This position locks your ignition and
transmission. It's a theft-deterrent feature. You will only
be able to remove your key when the ignition is
turned to LOCK.
Notice:If your key seems stuck in LOCK and you
can not turn it, be sure you are using the correct
key; if so, is it all the way in? Turn the key only with
your hand. Using a tool to force it could break the
key or the ignition switch. If none of these works,
then your vehicle needs service.
B (ACCESSORY):This position allows you to use
things like the radio, power windows and the windshield
wipers when the engine is off.
C (RUN):This position is for driving.
D (START):This position starts your engine.
Retained Accessory Power (RAP)
The Retained Accessory Power (RAP) feature will
allow certain features on your vehicle to continue to work
for up to 10 minutes after the ignition key is turned
to LOCK.
Starting Your Engine
Move your shift lever to PARK (P) or NEUTRAL (N).
Your engine won't start in any other position ± that's a
safety feature. To restart when you're already moving,
use NEUTRAL (N) only.
2-19
Page 124 of 468
Parking Over Things That Burn
{CAUTION:
Things that can burn could touch hot exhaust
parts under your vehicle and ignite. Do not
park over papers, leaves, dry grass or other
things that can burn.
Engine Exhaust
{CAUTION:
Engine exhaust can kill. It contains the gas
carbon monoxide (CO), which you can not see
or smell. It can cause unconsciousness and
death.
You might have exhaust coming in if:
·Your exhaust system sounds strange or
different.
·Your vehicle gets rusty underneath.
·Your vehicle was damaged in a collision.
·Your vehicle was damaged when driving
over high points on the road or over road
debris.
·Repairs were not done correctly.
·Your vehicle or exhaust system had been
modi®ed improperly.
If you ever suspect exhaust is coming into your
vehicle:
·Drive it only with all the windows down to
blow out any CO; and
·Have your vehicle ®xed immediately.
2-30
Page 128 of 468

3. Keep pressing the on/off button until the desired
zone number appears in the display. Release the
button. After approximately four seconds of
inactivity, the new zone number will be locked in
and the compass/temperature display will return.
4. Calibrate the compass as described below.
Compass Calibration
The compass may need calibration if one of the
following occurs:
·After approximately ®ve seconds, the display does
not show a compass heading (N for North, for
example), there may be a strong magnetic ®eld
interfering with the compass. Such interference may
be caused by a magnetic antenna mount, magnetic
note pad holder or a similar magnetic item.
·The compass does not display the correct heading
and the compass zone variance is set correctly.In order to calibrate, CAL must be displayed in the
mirror compass windows. If CAL is not displayed, push
the on/off button for approximately 12 seconds or
until CAL is displayed.
The compass can be calibrated by driving the vehicle in
circles at 5 mph (8 km/h) or less until the display
reads a direction.
Passenger Air Bag Indicator
Your vehicle may be equipped with a passenger air bag
indicator, on the mirror glass, just above the buttons.
If your vehicle has this feature, the mirror will display the
word ON, or an air bag symbol in Canada, when the
passenger air bag is enabled. For more information, see
Passenger Sensing System on page 1-81.
Cleaning the Mirror
When cleaning the mirror, use a paper towel or similar
material dampened with glass cleaner. Do not spray
glass cleaner directly on the mirror as that may cause
the liquid cleaner to enter the mirror housing.
2-34
Page 130 of 468
Outside Convex Mirror
Your passenger's side mirror is convex. A convex
mirror's surface is curved so you can see more from the
driver's seat.
{CAUTION:
A convex mirror can make things (like other
vehicles) look farther away than they really are.
If you cut too sharply into the right lane, you
could hit a vehicle on your right. Check your
inside mirror or glance over your shoulder
before changing lanes.
Outside Heated Mirrors
Your vehicle may have this feature.
When you press this
button, a defogger warms
the heated driver's and
passenger's outside
rearview mirrors to help
clear them of ice,
snow and condensation.
If your vehicle has a rear window defogger, it will also
operate when you press this button. See ªRear Window
Defoggerº under
Dual Automatic Climate Control
System on page 3-20for more information.
2-36
Page 149 of 468

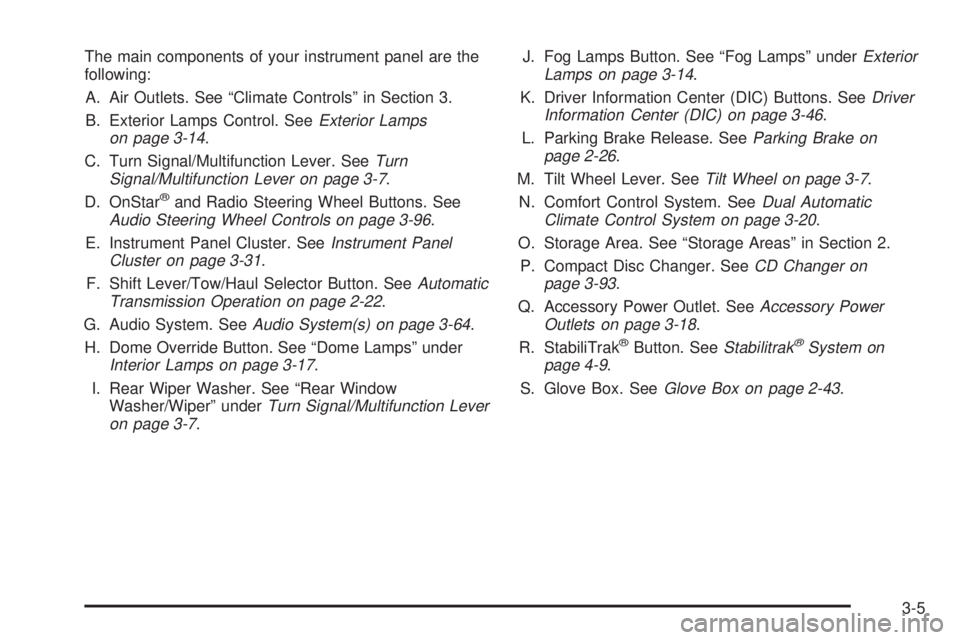
The main components of your instrument panel are the
following:
A. Air Outlets. See ªClimate Controlsº in Section 3.
B. Exterior Lamps Control. See
Exterior Lamps
on page 3-14.
C. Turn Signal/Multifunction Lever. See
Turn
Signal/Multifunction Lever on page 3-7.
D. OnStaržand Radio Steering Wheel Buttons. SeeAudio Steering Wheel Controls on page 3-96.
E. Instrument Panel Cluster. See
Instrument Panel
Cluster on page 3-31.
F. Shift Lever/Tow/Haul Selector Button. See
Automatic
Transmission Operation on page 2-22.
G. Audio System. See
Audio System(s) on page 3-64.
H. Dome Override Button. See ªDome Lampsº under
Interior Lamps on page 3-17.
I. Rear Wiper Washer. See ªRear Window
Washer/Wiperº under
Turn Signal/Multifunction Lever
on page 3-7.J. Fog Lamps Button. See ªFog Lampsº under
Exterior
Lamps on page 3-14.
K. Driver Information Center (DIC) Buttons. See
Driver
Information Center (DIC) on page 3-46.
L. Parking Brake Release. See
Parking Brake on
page 2-26.
M. Tilt Wheel Lever. See
Tilt Wheel on page 3-7.
N. Comfort Control System. See
Dual Automatic
Climate Control System on page 3-20.
O. Storage Area. See ªStorage Areasº in Section 2.
P. Compact Disc Changer. See
CD Changer on
page 3-93.
Q. Accessory Power Outlet. See
Accessory Power
Outlets on page 3-18.
R. StabiliTrakžButton. SeeStabilitrakžSystem on
page 4-9.
S. Glove Box. See
Glove Box on page 2-43.
3-5