2004 GMC SIERRA manual radio set
[x] Cancel search: manual radio setPage 244 of 588
AUTO EQ (Automatic Equalization):Press this button
to select customized equalization settings designed
for country/western, jazz, talk, pop, rock, and classical.
Selecting CUSTOM or changing bass or treble,
returns the EQ to the manual bass and treble settings.
The radio will save separate AUTO EQ settings for
each preset and source.
If you radio is equipped with the Bose audio system,
your equalization settings are either CUSTOM or TALK.
Adjusting the Speakers (Balance/Fade)
AUDIO:To adjust the balance to the right and the
left speakers, push and release the AUDIO knob until
BAL appears on the display. Turn the knob to move the
sound toward the right or the left speakers.
To adjust the fade to the front and the rear speakers,
push and release the AUDIO knob until FADE appears
on the display. Turn the knob to move the sound
toward the front or the rear speakers.
To adjust the balance and fade to the middle position,
push the AUDIO knob then push it again and hold it until
the radio produces one beep. The balance and fade
will be adjusted to the middle position and the display
will show the speaker balance.To adjust all tone and speaker controls to the middle
position, push and hold the AUDIO knob when no tone
or speaker control is displayed. ALL will appear on
the display, you will hear a beep and the display level
will be adjusted to the middle position.
Finding a Program Type (PTY) Station
(RDS and XMŸ)
To select and ®nd a desired PTY perform the following:
1. Turn the P-TYPE knob to activate program type
select mode. TYPE and a PTY will appear on the
display.
2. Turn the P-TYPE knob to select a PTY.
3. Once the desired PTY is displayed, press the
SEEK TYPE button or one of the SEEK arrows
to take you to the PTY's ®rst station.
4. If you want to go to another station within that PTY
and the PTY is displayed, press the SEEK TYPE
button once. If the PTY is not displayed, press
the SEEK TYPE button twice to display the PTY and
then to go to another station.
5. Press the P-TYPE knob to exit program type
select mode.
If PTY times out and is no longer on the display, go
back to Step 1.
3-80
Page 255 of 588
Setting the Tone (Bass/Treble)
AUDIO:Push and release the AUDIO knob until BASS
or TREB appears on the display. Turn the knob to
increase or to decrease. The display will show the bass
or treble level. If a station is weak or noisy, you may
want to decrease the treble.
To adjust the bass and treble to the middle position,
push and hold the AUDIO knob. The radio will produce
one beep and adjust the display level to the middle
position.
To adjust all tone and speaker controls to the middle
position, push and hold the AUDIO knob when no tone
or speaker control is displayed. ALL will appear on
the display, you will hear a beep and the display level
will be adjusted to the middle position.
AUTO EQ (Automatic Equalization):Press this button
to select customized equalization settings designed
for country/western, jazz, talk, pop, rock, and classical.
Selecting CUSTOM or changing bass or treble,
returns the EQ to the manual bass and treble settings.
The radio will save separate AUTO EQ settings for
each preset and source.
If you radio is equipped with the Bose audio system,
your equalization settings are either CUSTOM or TALK.
Adjusting the Speakers (Balance/Fade)
AUDIO:To adjust the balance between the right
and the left speakers, push and release the AUDIO
knob until BAL appears on the display. Turn the knob to
move the sound toward the right or the left speakers.
To adjust the fade between the front and the rear
speakers, push and release the AUDIO knob until FADE
appears on the display. Turn the knob to move the
sound toward the front or the rear speakers.
To adjust the balance and fade to the middle position,
push the AUDIO knob then push it again and hold it until
the radio produces one beep. The balance and fade
will be adjusted to the middle position and the display
will show the speaker balance.
To adjust all tone and speaker controls to the middle
position, push and hold the AUDIO knob when no tone
or speaker control is displayed. ALL will appear on
the display, you will hear a beep and the display level
will be adjusted to the middle position.
3-91
Page 268 of 588
sSCANt:Press and hold either SCAN arrow for
two seconds until SC appears on the display and
you hear a beep. The radio will go to a station, play for
a few seconds, then go on to the next station. Press
either SCAN arrow again to stop scanning.
To scan preset stations, press and hold either SCAN
arrow for more than four seconds. PRESET SCAN will
appear on the display and you will hear a double
beep. The radio will go to a preset station stored on
your pushbuttons, play for a few seconds, then go on to
the next preset station. Press either SCAN arrow
again to stop scanning presets.
The radio will scan only to stations that are in the
selected band and only to those with a strong signal.
Setting Preset Stations
The six numbered pushbuttons let you return to your
favorite stations. You can set up to 30 stations
(six FM1, six FM2, and six AM, six XM1 and six XM2
(48 contiguous US states, if equipped), by performing
the following steps:
1. Turn the radio on.
2. Press BAND to select FM1, FM2, AM, or XM1
or XM2.
3. Tune in the desired station.
4. Press AUTO EQ to select the equalization.5. Press and hold one of the six numbered
pushbuttons until you hear a beep. Whenever you
press that numbered pushbutton, the station
you set will return and the equalization that you
selected will be automatically stored for that
pushbutton.
6. Repeat the steps for each pushbutton.
Setting the Tone (Bass/Treble)
AUDIO:Push the AUDIO knob until BASS or TREB
appears on the display. Turn the knob to increase or to
decrease. If a station is weak or noisy, you may
want to decrease the treble.
To adjust bass or treble to the middle position, select
BASS or TREB and push and hold the AUDIO knob. The
radio will produce one beep and adjust the display
level to zero.
To adjust all tone and speaker controls to the middle
position, push and hold the AUDIO knob when no tone
or speaker control is displayed. CENTERED will
appear on the display and you will hear a beep.
AUTO EQ (Automatic Equalization):Press this button
to select customized equalization settings designed
for country/western, jazz, talk, pop, rock, and classical.
Selecting CUSTOM or changing bass or treble,
returns the EQ to the manual bass and treble settings.
3-104
Page 275 of 588

3. Once the light stops ¯ashing and turns green, load
a CD. Insert the CD partway into the slot, label side
up. The player will pull the CD in.
Once the CD is loaded, the light will begin ¯ashing
again. Once the light stops ¯ashing and turns green
you can load another CD. The CD player takes up to
six CDs. Do not try to load more than six.
To load more than one CD but less than six, complete
Steps 1 through 3. When you have ®nished loading
CDs, the radio will begin to play the last CD loaded.
When a CD is inserted, the CD symbol will appear on
the display. If more than one CD has been loaded,
a number for each CD will appear on the display. If you
select an equalization setting for your CD, it will be
activated each time you play a CD.
As each new track starts to play, the track number will
appear on the display.
Playing a Speci®c Loaded CD
For every CD loaded, a number will appear on the
display. To play a speci®c CD, ®rst press the CD AUX
button. Then press the numbered pushbutton that
corresponds to the CD you want to play. A small bar will
appear under the CD number that is playing, and the
track number will appear on the display.
If an error appears on the radio display, see ªCD
Messagesº later in this section.LOAD CD
Z(Eject):Press the CD eject side of this
button to eject a single CD or multiple CDs. To eject
the CD that is currently playing, press and release this
button. To eject multiple CDs, press and hold this
button for two seconds. You will hear a beep and the
light will ¯ash to let you know when a CD is being
ejected.
REMOVE CD will appear on the display. You can now
remove the CD. If the CD is not removed, after
25 seconds, the CD will be automatically pulled back
into the receiver. If you try to push the CD back into the
receiver, before the 25 second time period is complete,
the receiver will sense an error and will try to eject
the CD several times before stopping.
Do not repeatedly press the CD eject button to eject a
CD after you have tried to push it in manually. The
receivers 25-second eject timer will reset at each press
of eject, which will cause the receiver to not eject
the CD until the 25-second time period has elapsed.
Once the player stops and the CD is ejected, remove the
CD. After removing the CD, push the PWR knob off
and then on again. This will clear the CD-sensing feature
and enable CDs to be loaded into the player again.
3-111
Page 292 of 588
Audio Steering Wheel Controls
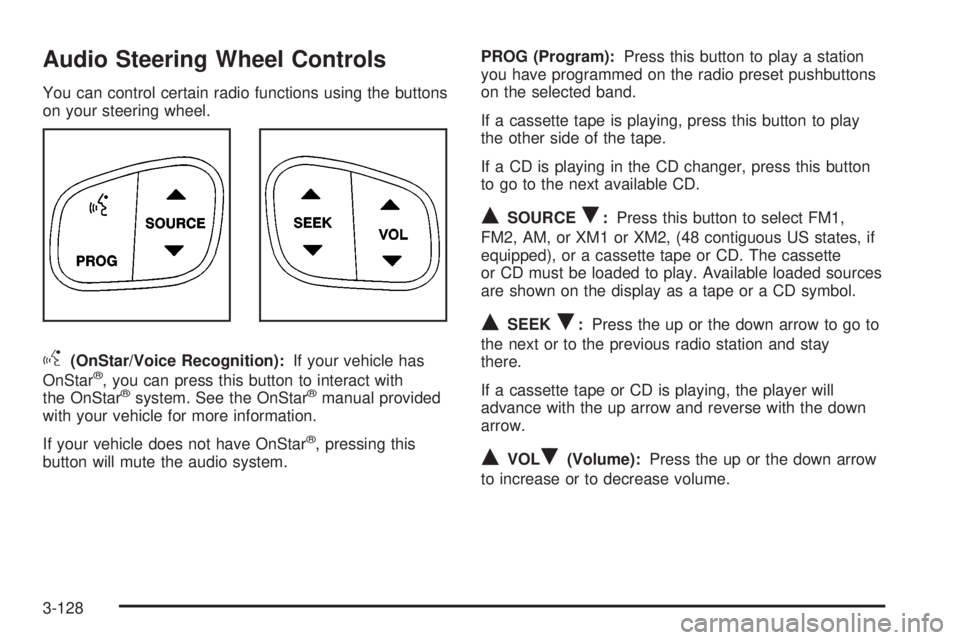
You can control certain radio functions using the buttons
on your steering wheel.
g(OnStar/Voice Recognition):If your vehicle has
OnStarž, you can press this button to interact with
the OnStaržsystem. See the OnStaržmanual provided
with your vehicle for more information.
If your vehicle does not have OnStar
ž, pressing this
button will mute the audio system.PROG (Program):Press this button to play a station
you have programmed on the radio preset pushbuttons
on the selected band.
If a cassette tape is playing, press this button to play
the other side of the tape.
If a CD is playing in the CD changer, press this button
to go to the next available CD.
QSOURCER:Press this button to select FM1,
FM2, AM, or XM1 or XM2, (48 contiguous US states, if
equipped), or a cassette tape or CD. The cassette
or CD must be loaded to play. Available loaded sources
are shown on the display as a tape or a CD symbol.
QSEEKR:Press the up or the down arrow to go to
the next or to the previous radio station and stay
there.
If a cassette tape or CD is playing, the player will
advance with the up arrow and reverse with the down
arrow.
QVOLR(Volume):Press the up or the down arrow
to increase or to decrease volume.
3-128
Page 307 of 588
The next time you start your vehicle, the TAS will not
automatically come on. You can restore the automatic
feature by repeating the same procedure. Whether
the TAS is set to come on automatically or not, you can
always turn the system on or off by pressing the TAS
on/off button.
Manual Selectable Ride
The main function of this system is to provide superior
ride comfort while trailering or fully loaded, as well
as for unloaded driving. This system also helps
to provide:
·Improved trailering stability
·Improved handling response when trailering or fully
loaded
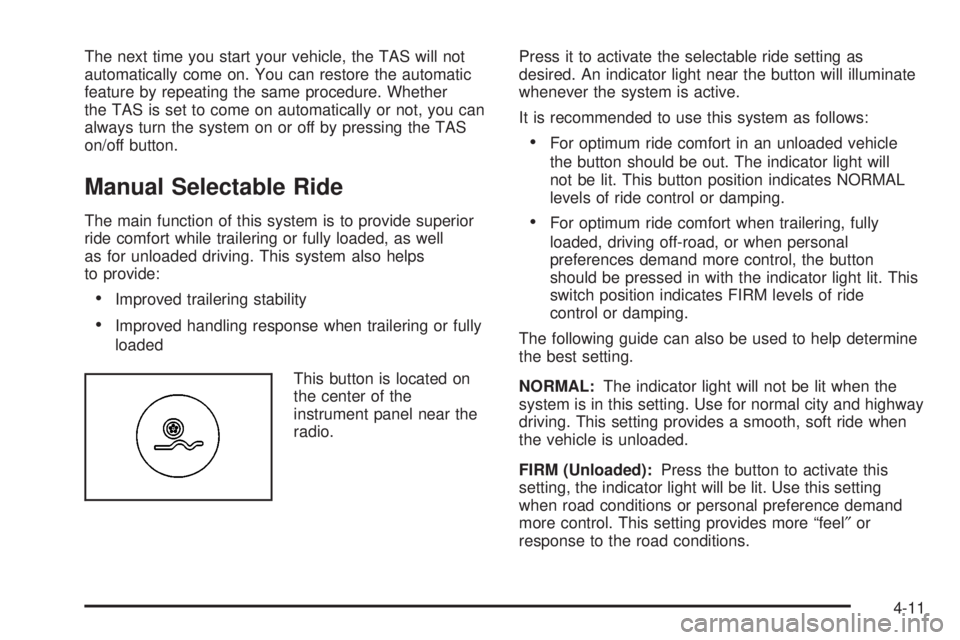
This button is located on
the center of the
instrument panel near the
radio.Press it to activate the selectable ride setting as
desired. An indicator light near the button will illuminate
whenever the system is active.
It is recommended to use this system as follows:
·For optimum ride comfort in an unloaded vehicle
the button should be out. The indicator light will
not be lit. This button position indicates NORMAL
levels of ride control or damping.
·For optimum ride comfort when trailering, fully
loaded, driving off-road, or when personal
preferences demand more control, the button
should be pressed in with the indicator light lit. This
switch position indicates FIRM levels of ride
control or damping.
The following guide can also be used to help determine
the best setting.
NORMAL:The indicator light will not be lit when the
system is in this setting. Use for normal city and highway
driving. This setting provides a smooth, soft ride when
the vehicle is unloaded.
FIRM (Unloaded):Press the button to activate this
setting, the indicator light will be lit. Use this setting
when road conditions or personal preference demand
more control. This setting provides more ªfeel²or
response to the road conditions.
4-11
Page 454 of 588
3. Get the vehicles close enough so the jumper cables
can reach, but be sure the vehicles aren't touching
each other. If they are, it could cause a ground
connection you don't want. You wouldn't be able to
start your vehicle, and the bad grounding could
damage the electrical systems.
To avoid the possibility of the vehicles rolling, set
the parking brake ®rmly on both vehicles involved in
the jump start procedure. Put an automatic
transmission in PARK (P) or a manual transmission
in NEUTRAL before setting the parking brake. If
you have a four-wheel-drive vehicle, be sure
the transfer case is in a drive gear not in NEUTRAL.
Notice:If you leave your radio or other accessories
on during the jump starting procedure, they could
be damaged. The repairs would not be covered
by your warranty. Always turn off your radio and
other accessories when jump starting your vehicle.
4. Turn off the ignition on both vehicles. Unplug
unnecessary accessories plugged into the cigarette
lighter or accessory power outlets. Turn off the
radio and all lamps that aren't needed. This
will avoid sparks and help save both batteries. And
it could save your radio!5. Open the hoods and locate the positive (+) and
negative (-) terminal locations of the other vehicle.
Your vehicle has a remote positive (+) jump
starting terminal and a remote negative (-) jump
starting terminal. You should always use these
remote terminals instead of the terminals on the
battery.
The remote positive (+) terminal is located behind a
red plastic cover, if equipped, near the engine
accessory drive bracket. To uncover the remote
positive (+) terminal, open the red plastic cover, if
equipped.
The remote negative (-) terminal is located on the
engine drive bracket on all V8 and diesel engines,
and on the thermostat housing on the 8.1L engine.
On V8 engines it is marked ªGND.º
On V6 engines the remote negative (-) terminal is
located on a tab attached to the engine accessory
drive bracket where it is marked ªGND.º
See
Engine Compartment Overview on page 5-12for more information on location.
5-54
Page 584 of 588
Safety Belts (cont.)
Driver Position............................................1-16
How to Wear Safety Belts Properly................1-16
Questions and Answers About Safety Belts.....1-15
Rear Safety Belt Comfort Guides for Children
and Small Adults......................................1-30
Rear Seat Passengers.................................1-27
Right Front Passenger Position......................1-25
Safety Belt Extender....................................1-32
Safety Belt Use During Pregnancy.................1-24
Safety Belts Are for Everyone.......................1-11
Safety Chains.................................................4-90
Safety Warnings and Symbols.............................. iii
Scanning the Terrain.......................................4-25
Scheduled Maintenance..................................... 6-4
Seatback Latches............................................. 1-8
Seats
Head Restraints............................................ 1-8
Heated Seats............................................... 1-6
Manual........................................................ 1-3
Memory.....................................................2-69
Power Lumbar.............................................. 1-5
Power Seats................................................. 1-4
Rear Seat Operation...................................... 1-9
Reclining Seatbacks...................................... 1-6
Seatback Latches.......................................... 1-8
Secondary Latch System................................5-112
Securing a Child Restraint
Center Front Seat Position............................1-60
Center Rear Seat Position............................1-58Securing a Child Restraint (cont.)
Designed for the LATCH System...........1-50, 1-51
Rear Outside Seat Position...........................1-55
Security While You Travel.................................. 7-6
Select Button.................................................3-66
Service........................................................... 5-3
Adding Equipment to the Outside of Your
Vehicle..................................................... 5-4
Doing Your Own Work................................... 5-3
Engine Soon Light.......................................3-49
Publications Ordering Information...................7-12
SERVICE 4 WHEEL STEER.............................3-71
SERVICE 4WD...............................................3-71
SERVICE AIRBAG..........................................3-70
SERVICE BRAKE BOOSTER...........................3-70
SERVICE BRAKE SYSTEM.............................3-70
Service Bulletins.............................................7-12
Service Manuals.............................................7-12
SERVICE RIDE CONTROL..............................3-71
Setting Preset PTYs (RDS Only).....3-81, 3-93, 3-106
Setting Preset Stations..........3-75, 3-79, 3-90, 3-104
Setting the Time
Radios with Radio Data Systems (RDS).........3-74
Radios without Radio Data Systems (RDS).....3-74
Setting the Tone
(Bass/Treble)....................3-75, 3-79, 3-91, 3-104
Sheet Metal Damage.....................................5-122
Shift Speeds..................................................2-34
Shifting Into Park (P).......................................2-49
Shifting Out of Park (P)...................................2-51
14