2004 GMC SIERRA steering
[x] Cancel search: steeringPage 223 of 588

Instant Fuel Economy
Press the fuel information button until INST ECON
appears in the display. Instant fuel economy is how
many miles per gallon your vehicle is getting at
the particular moment in time. The instant fuel economy
cannot be reset.
GM Oil Life System
Press the fuel information button until ENGINE OIL LIFE
appears in the display. The GM Oil Life System shows
an estimate of the oil's remaining useful life. It will show
100% when the system is reset after an oil change. It
will alert you to change your oil on a schedule consistent
with your driving conditions.
Always reset the engine oil life after an oil change. To
reset the Oil Life System use the fuel button to reach the
ENGINE OIL LIFE screen and then press and hold the
select button for ®ve seconds while ENGINE OIL LIFE is
displayed. OIL LIFE RESET will appear on the display for
10 seconds to let you know the system is reset.
The DIC does not replace the need to maintain your
vehicle as recommended in the Maintenance Schedule
in this manual. Also, the oil change reminder will not
detect dusty conditions or engine malfunctions that may
affect the oil. Also, the oil change reminder does not
measure how much oil you have in your engine. So, be
sure to check your oil level often. See
Engine Oil on
page 5-18.
Personalization Button
You can program certain features to a preferred setting
for up to two people. Press the personalization button
to scroll through the following personalization features.
All of the personalization options may not be available
on your vehicle. Only the options available will be
displayed on your DIC.
If your vehicle is not equipped with the DIC steering
wheel buttons you will not have any of the following
personalization options except for DISPLAY
LANGUAGE. See DISPLAY LANGUAGE later in this
section for more information.
·AUTOMATIC LOCKING
·AUTOMATIC UNLOCKING
·DELAYED LOCKING
·REMOTE LOCK FEEDBACK
·ALARM WARNING TYPE
·REMOTE UNLOCK FEEDBACK
·HEADLAMPS ON AT EXIT
·PERIMETER LIGHTING
·SEAT POSITION RECALL
·EASY EXIT DRIVER SEAT
·CURB VIEW ASSIST
3-59
Page 292 of 588
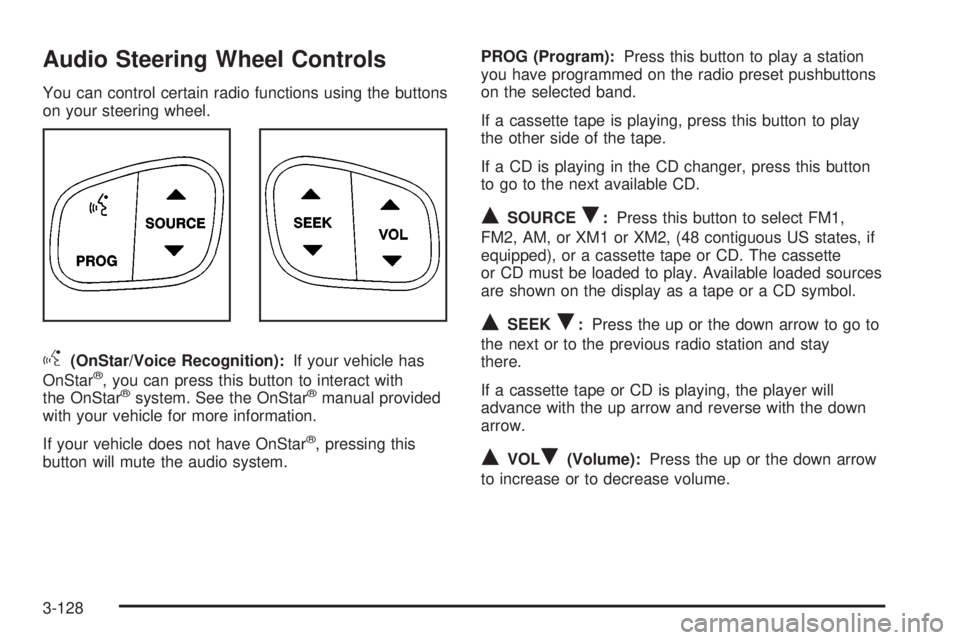
Audio Steering Wheel Controls
You can control certain radio functions using the buttons
on your steering wheel.
g(OnStar/Voice Recognition):If your vehicle has
OnStarž, you can press this button to interact with
the OnStaržsystem. See the OnStaržmanual provided
with your vehicle for more information.
If your vehicle does not have OnStar
ž, pressing this
button will mute the audio system.PROG (Program):Press this button to play a station
you have programmed on the radio preset pushbuttons
on the selected band.
If a cassette tape is playing, press this button to play
the other side of the tape.
If a CD is playing in the CD changer, press this button
to go to the next available CD.
QSOURCER:Press this button to select FM1,
FM2, AM, or XM1 or XM2, (48 contiguous US states, if
equipped), or a cassette tape or CD. The cassette
or CD must be loaded to play. Available loaded sources
are shown on the display as a tape or a CD symbol.
QSEEKR:Press the up or the down arrow to go to
the next or to the previous radio station and stay
there.
If a cassette tape or CD is playing, the player will
advance with the up arrow and reverse with the down
arrow.
QVOLR(Volume):Press the up or the down arrow
to increase or to decrease volume.
3-128
Page 297 of 588
Your Driving, the Road, and Your Vehicle..........4-2
Defensive Driving...........................................4-2
Drunken Driving.............................................4-2
Control of a Vehicle........................................4-5
Braking.........................................................4-6
Traction Assist System (TAS)...........................4-9
Manual Selectable Ride.................................4-11
Locking Rear Axle........................................4-12
Steering......................................................4-12
QUADRASTEERŸ........................................4-14
Off-Road Recovery.......................................4-17
Passing.......................................................4-17
Loss of Control.............................................4-18
Off-Road Driving with Your Four-Wheel-Drive
Vehicle....................................................4-20
Driving at Night............................................4-37
Driving in Rain and on Wet Roads..................4-39
City Driving..................................................4-42Freeway Driving...........................................4-43
Before Leaving on a Long Trip.......................4-44
Highway Hypnosis........................................4-44
Hill and Mountain Roads................................4-45
Winter Driving..............................................4-47
If You Are Stuck: In Sand, Mud, Ice or Snow . . .4-51
Towing..........................................................4-53
Towing Your Vehicle.....................................4-53
Recreational Vehicle Towing...........................4-54
Loading Your Vehicle....................................4-57
Adding a Snow Plow or Similar Equipment.......4-64
Truck-Camper Loading Information..................4-68
Trailer Recommendations...............................4-70
Pickup Conversion to Chassis Cab..................4-70
Towing a Trailer...........................................4-70
Power Take-Off (PTO).................................4-101
Section 4 Driving Your Vehicle
4-1
Page 301 of 588
{CAUTION:
Drinking and then driving is very dangerous.
Your re¯exes, perceptions, attentiveness and
judgment can be affected by even a small
amount of alcohol. You can have a serious Ð
or even fatal Ð collision if you drive after
drinking. Please do not drink and drive or ride
with a driver who has been drinking. Ride
home in a cab; or if you are with a group,
designate a driver who will not drink.
Control of a Vehicle
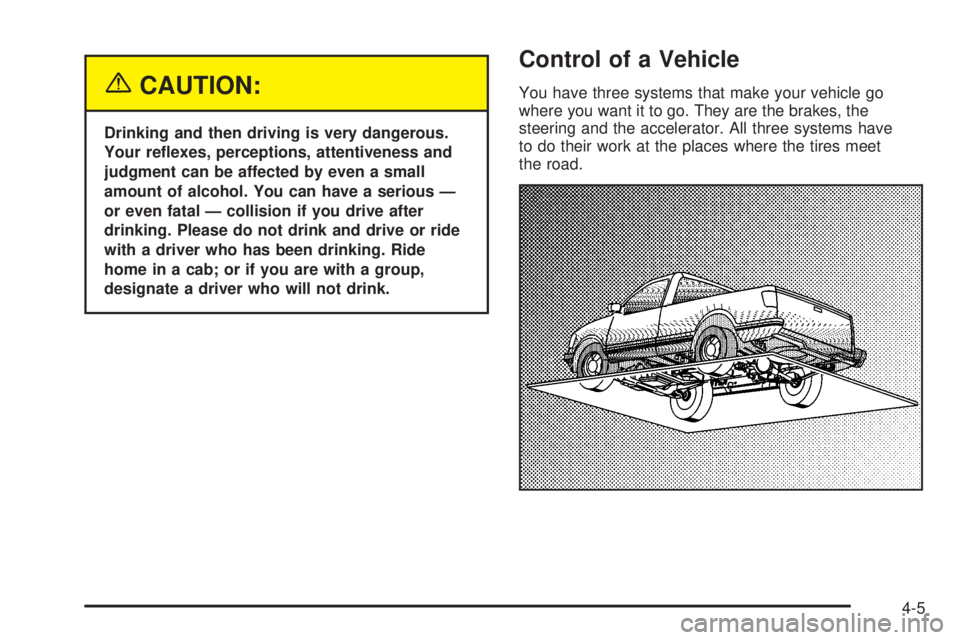
You have three systems that make your vehicle go
where you want it to go. They are the brakes, the
steering and the accelerator. All three systems have
to do their work at the places where the tires meet
the road.
4-5
Page 304 of 588
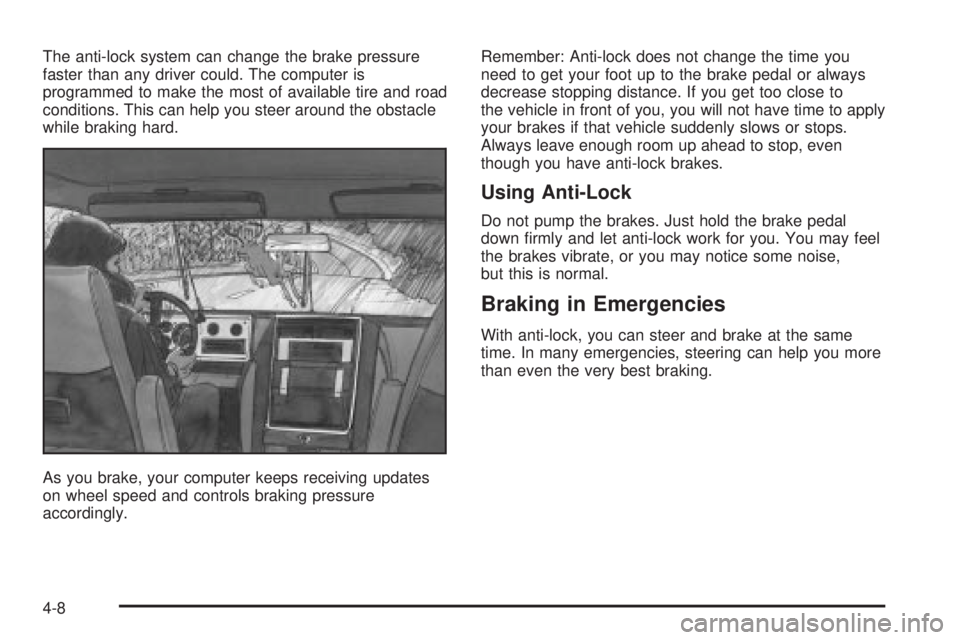
The anti-lock system can change the brake pressure
faster than any driver could. The computer is
programmed to make the most of available tire and road
conditions. This can help you steer around the obstacle
while braking hard.
As you brake, your computer keeps receiving updates
on wheel speed and controls braking pressure
accordingly.Remember: Anti-lock does not change the time you
need to get your foot up to the brake pedal or always
decrease stopping distance. If you get too close to
the vehicle in front of you, you will not have time to apply
your brakes if that vehicle suddenly slows or stops.
Always leave enough room up ahead to stop, even
though you have anti-lock brakes.
Using Anti-Lock
Do not pump the brakes. Just hold the brake pedal
down ®rmly and let anti-lock work for you. You may feel
the brakes vibrate, or you may notice some noise,
but this is normal.
Braking in Emergencies
With anti-lock, you can steer and brake at the same
time. In many emergencies, steering can help you more
than even the very best braking.
4-8
Page 308 of 588
FIRM (Loaded):Press the button to activate this
setting, the indicator light will be lit. Use this setting to
minimize trailer inputs to the vehicle or when the vehicle
is fully loaded. This setting is also appropriate for
off-road driving.
You can select a setting at any time based on road and
trailering conditions to provide the best ride and
handling. Select a new setting whenever driving
conditions change.
Locking Rear Axle
If your vehicle has this feature, your locking rear axle
can give you additional traction on snow, mud, ice, sand
or gravel. It works like a standard axle most of the
time, but when one of the rear wheels has no traction
and the other does, this feature will allow the wheel with
traction to move the vehicle.
Steering
Power Steering
If you lose power steering assist because the engine
stops or the system is not functioning, you can steer but
it will take much more effort.
Steering Tips
Driving on Curves
It is important to take curves at a reasonable speed.
A lot of the ªdriver lost controlº accidents mentioned on
the news happen on curves. Here is why:
Experienced driver or beginner, each of us is subject to
the same laws of physics when driving on curves.
The traction of the tires against the road surface makes
it possible for the vehicle to change its path when
you turn the front wheels. If there is no traction, inertia
will keep the vehicle going in the same direction. If
you have ever tried to steer a vehicle on wet ice, you
will understand this.
The traction you can get in a curve depends on the
condition of your tires and the road surface, the angle at
which the curve is banked, and your speed. While
you are in a curve, speed is the one factor you
can control.
Suppose you are steering through a sharp curve.
Then you suddenly accelerate. Both control
systems Ð steering and acceleration Ð have to do their
work where the tires meet the road. Adding the
sudden acceleration can demand too much of those
places. You can lose control. See
Traction Assist
System (TAS) on page 4-9.
4-12
Page 309 of 588
What should you do if this ever happens? Ease up on
the accelerator pedal, steer the vehicle the way you
want it to go, and slow down.
Speed limit signs near curves warn that you should
adjust your speed. Of course, the posted speeds
are based on good weather and road conditions. Under
less favorable conditions you will want to go slower.
If you need to reduce your speed as you approach
a curve, do it before you enter the curve, while your front
wheels are straight ahead.
Try to adjust your speed so you can ªdriveº through the
curve. Maintain a reasonable, steady speed. Wait to
accelerate until you are out of the curve, and then
accelerate gently into the straightaway.
Steering in Emergencies
There are times when steering can be more effective
than braking. For example, you come over a hill and ®nd
a truck stopped in your lane, or a car suddenly pulls
out from nowhere, or a child darts out from between
parked cars and stops right in front of you. You
can avoid these problems by braking Ð if you can stop
in time. But sometimes you can not; there is not
room. That is the time for evasive action Ð steering
around the problem.
Your vehicle can perform very well in emergencies like
these. First apply your brakes.See
Braking on page 4-6. It is better to remove as much
speed as you can from a possible collision. Then
steer around the problem, to the left or right depending
on the space available.
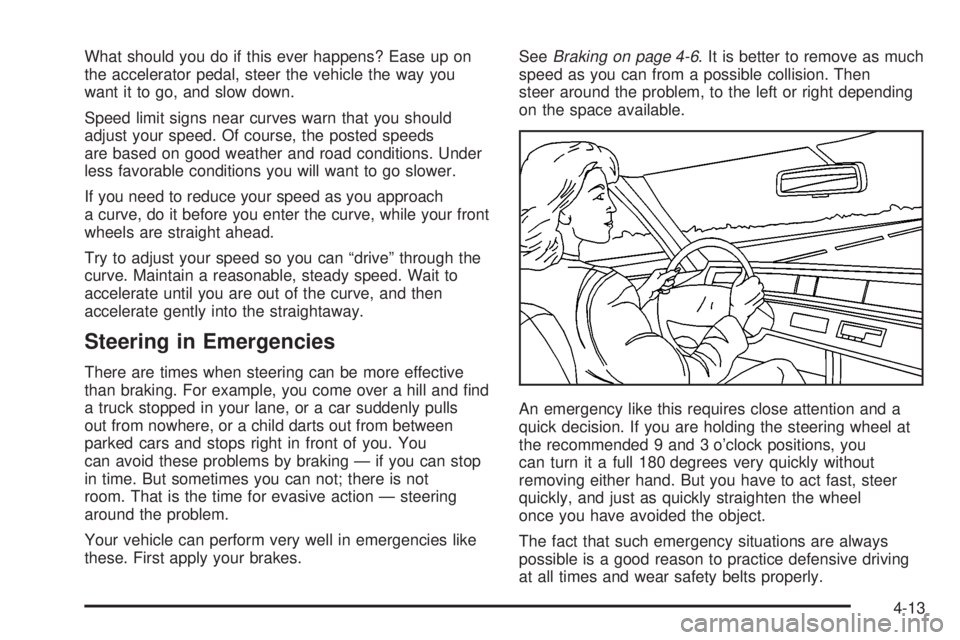
An emergency like this requires close attention and a
quick decision. If you are holding the steering wheel at
the recommended 9 and 3 o'clock positions, you
can turn it a full 180 degrees very quickly without
removing either hand. But you have to act fast, steer
quickly, and just as quickly straighten the wheel
once you have avoided the object.
The fact that such emergency situations are always
possible is a good reason to practice defensive driving
at all times and wear safety belts properly.
4-13
Page 310 of 588
QUADRASTEERŸ
The QUADRASTEERŸ System has a control and
diagnostic module that monitors and records current
system status and operational information.
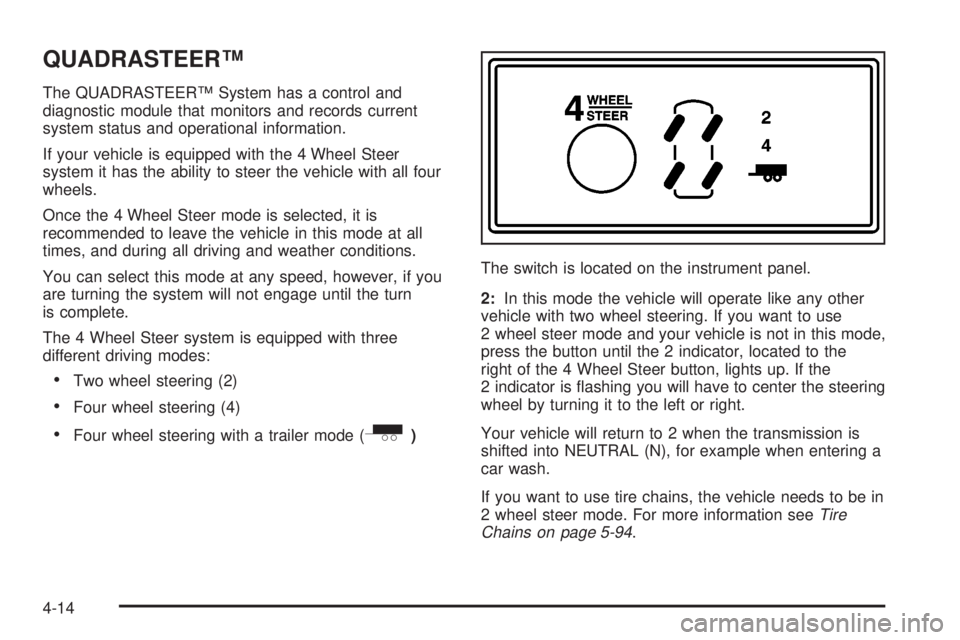
If your vehicle is equipped with the 4 Wheel Steer
system it has the ability to steer the vehicle with all four
wheels.
Once the 4 Wheel Steer mode is selected, it is
recommended to leave the vehicle in this mode at all
times, and during all driving and weather conditions.
You can select this mode at any speed, however, if you
are turning the system will not engage until the turn
is complete.
The 4 Wheel Steer system is equipped with three
different driving modes:
·Two wheel steering (2)
·Four wheel steering (4)
·Four wheel steering with a trailer mode (_)The switch is located on the instrument panel.
2:In this mode the vehicle will operate like any other
vehicle with two wheel steering. If you want to use
2 wheel steer mode and your vehicle is not in this mode,
press the button until the 2 indicator, located to the
right of the 4 Wheel Steer button, lights up. If the
2 indicator is ¯ashing you will have to center the steering
wheel by turning it to the left or right.
Your vehicle will return to 2 when the transmission is
shifted into NEUTRAL (N), for example when entering a
car wash.
If you want to use tire chains, the vehicle needs to be in
2 wheel steer mode. For more information see
Tire
Chains on page 5-94.
4-14