Page 351 of 588

Four-Wheel-Drive Vehicles Equipped with
Transfer Case (NP1, NP2 and NP8)
Use the following procedure to tow your vehicle:
1. Shift an automatic transmission to PARK (P), or a
manual transmission to FIRST (1).
2. Turn the engine off, but leave the ignition on.
3. Firmly set the parking brake.
4. Securely attach the vehicle being towed to the tow
vehicle.
{CAUTION:
Shifting a four-wheel-drive vehicle's transfer
case into NEUTRAL can cause your vehicle to
roll even if the transmission is in Park (P) for
an automatic transmission, or if your vehicle is
in gear, for a manual transmission. You or
others could be injured. Make sure the parking
brake is ®rmly set before you shift the transfer
case to NEUTRAL.5. Shift the transfer case to NEUTRAL. See
Four-Wheel Drive on page 2-35for the proper
procedure to select the neutral position for
your vehicle.
6. Release the parking brake only after the vehicle
being towed is ®rmly attached to the towing
vehicle.
7. Turn the ignition off and leave the steering column
unlocked.
4-55
Page 352 of 588

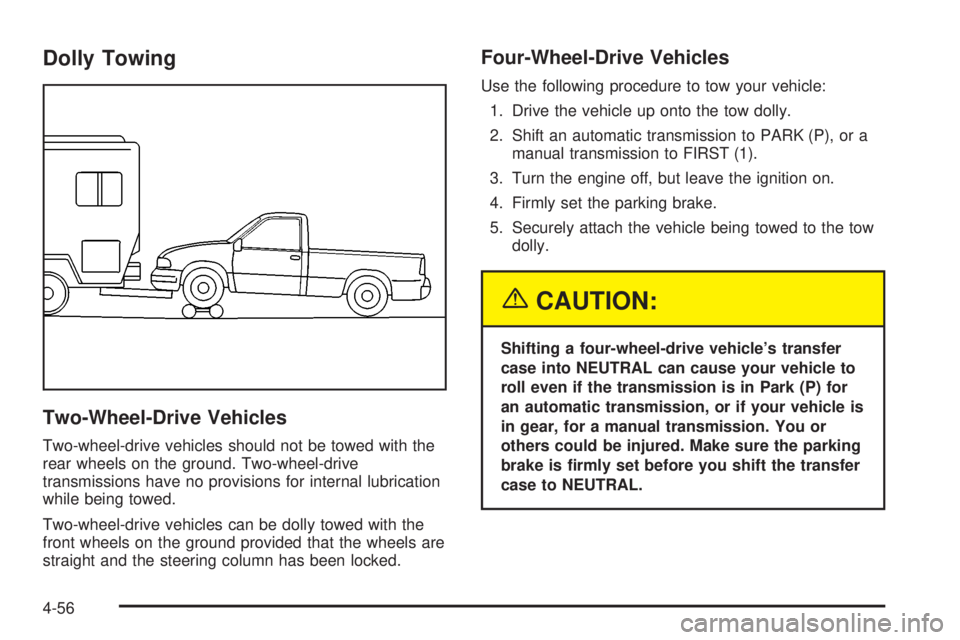
Dolly Towing
Two-Wheel-Drive Vehicles
Two-wheel-drive vehicles should not be towed with the
rear wheels on the ground. Two-wheel-drive
transmissions have no provisions for internal lubrication
while being towed.
Two-wheel-drive vehicles can be dolly towed with the
front wheels on the ground provided that the wheels are
straight and the steering column has been locked.
Four-Wheel-Drive Vehicles
Use the following procedure to tow your vehicle:
1. Drive the vehicle up onto the tow dolly.
2. Shift an automatic transmission to PARK (P), or a
manual transmission to FIRST (1).
3. Turn the engine off, but leave the ignition on.
4. Firmly set the parking brake.
5. Securely attach the vehicle being towed to the tow
dolly.
{CAUTION:
Shifting a four-wheel-drive vehicle's transfer
case into NEUTRAL can cause your vehicle to
roll even if the transmission is in Park (P) for
an automatic transmission, or if your vehicle is
in gear, for a manual transmission. You or
others could be injured. Make sure the parking
brake is ®rmly set before you shift the transfer
case to NEUTRAL.
4-56
Page 353 of 588
6. Shift the transfer case to NEUTRAL. SeeFour-Wheel Drive on page 2-35for the proper
procedure to select the neutral position for
your vehicle.
7. Release the parking brake only after the vehicle
being towed is ®rmly attached to the towing
vehicle.
8. Turn the ignition off and lock the steering column.
Loading Your Vehicle
It is very important to know how much weight your
vehicle can carry. This weight is called the vehicle
capacity weight and includes the weight of all occupants,
cargo and all nonfactory-installed options. Two labels
on your vehicle show how much weight it may properly
carry, the Tire and Loading Information label and the
Certi®cation/Tire label.
{CAUTION:
Do not load your vehicle any heavier than the
GVWR, or either the maximum front or rear
GAWR. If you do, parts on your vehicle can
break, and it can change the way your vehicle
handles. These could cause you to lose
control and crash. Also, overloading can
shorten the life of your vehicle.
4-57
Page 422 of 588

How to Reset the CHANGE ENGINE OIL
Message
The GM Oil Life System calculates when to change
your engine oil and ®lter based on vehicle use. Anytime
your oil is changed, reset the system so it can
calculate when the next oil change is required. If a
situation occurs where you change your oil prior to a
CHANGE ENGINE OIL message being turned on, reset
the system.
To reset the CHANGE ENGINE OIL message, see ªGM
Oil Life Systemº under
DIC Operation and Displays
on page 3-55for vehicles equipped with the DIC, or do
the following:
1. Turn the ignition key to RUN with the engine off.
2. Fully press and release the accelerator pedal three
times within ®ve seconds.
If the OIL LIFE RESET message ¯ashes for 10
seconds, the system is resetting.
3. Turn the key to LOCK.
If the CHANGE ENGINE OIL message comes back on
when you start your vehicle, the engine oil life system
has not reset. Repeat the procedure. If it still does
not reset, see your dealer for service.
What to Do with Used Oil
Used engine oil contains certain elements that may be
unhealthy for your skin and could even cause cancer.
Do not let used oil stay on your skin for very long. Clean
your skin and nails with soap and water, or a good
hand cleaner. Wash or properly dispose of clothing or
rags containing used engine oil. See the manufacturer's
warnings about the use and disposal of oil products.
Used oil can be a threat to the environment. If you
change your own oil, be sure to drain all the oil from the
®lter before disposal. Never dispose of oil by putting it in
the trash, pouring it on the ground, into sewers, or into
streams or bodies of water. Instead, recycle it by taking it
to a place that collects used oil. If you have a problem
properly disposing of your used oil, ask your dealer, a
service station or a local recycling center for help.
5-22
Page 446 of 588

How to Check Power Steering Fluid
Turn the key off, let the engine compartment cool down,
wipe the cap and the top of the reservoir clean, then
unscrew the cap and wipe the dipstick with a clean rag.
Replace the cap and completely tighten it. Then
remove the cap again and look at the ¯uid level on the
dipstick.
The level should be at the FULL COLD mark. If
necessary, add only enough ¯uid to bring the level up to
the mark.
What to Use
To determine what kind of ¯uid to use, seeRecommended Fluids and Lubricants on page 6-14.
Always use the proper ¯uid. Failure to use the proper
¯uid can cause leaks and damage hoses and seals.
Windshield Washer Fluid
What to Use
When you need windshield washer ¯uid, be sure to read
the manufacturer's instructions before use. If you will
be operating your vehicle in an area where the
temperature may fall below freezing, use a ¯uid that has
sufficient protection against freezing. See
Engine
Compartment Overview on page 5-12for reservoir
location.
Adding Washer Fluid
Your vehicle has a low washer ¯uid message that
comes on when the washer ¯uid is low. The message is
displayed for 15 seconds at the start of each ignition
cycle. When the CHECK WASHER FLUID message is
displayed, you will need to add washer ¯uid to the
windshield washer ¯uid reservoir.
5-46
Page 454 of 588

3. Get the vehicles close enough so the jumper cables
can reach, but be sure the vehicles aren't touching
each other. If they are, it could cause a ground
connection you don't want. You wouldn't be able to
start your vehicle, and the bad grounding could
damage the electrical systems.
To avoid the possibility of the vehicles rolling, set
the parking brake ®rmly on both vehicles involved in
the jump start procedure. Put an automatic
transmission in PARK (P) or a manual transmission
in NEUTRAL before setting the parking brake. If
you have a four-wheel-drive vehicle, be sure
the transfer case is in a drive gear not in NEUTRAL.
Notice:If you leave your radio or other accessories
on during the jump starting procedure, they could
be damaged. The repairs would not be covered
by your warranty. Always turn off your radio and
other accessories when jump starting your vehicle.
4. Turn off the ignition on both vehicles. Unplug
unnecessary accessories plugged into the cigarette
lighter or accessory power outlets. Turn off the
radio and all lamps that aren't needed. This
will avoid sparks and help save both batteries. And
it could save your radio!5. Open the hoods and locate the positive (+) and
negative (-) terminal locations of the other vehicle.
Your vehicle has a remote positive (+) jump
starting terminal and a remote negative (-) jump
starting terminal. You should always use these
remote terminals instead of the terminals on the
battery.
The remote positive (+) terminal is located behind a
red plastic cover, if equipped, near the engine
accessory drive bracket. To uncover the remote
positive (+) terminal, open the red plastic cover, if
equipped.
The remote negative (-) terminal is located on the
engine drive bracket on all V8 and diesel engines,
and on the thermostat housing on the 8.1L engine.
On V8 engines it is marked ªGND.º
On V6 engines the remote negative (-) terminal is
located on a tab attached to the engine accessory
drive bracket where it is marked ªGND.º
See
Engine Compartment Overview on page 5-12for more information on location.
5-54
Page 499 of 588
A. Spare Tire (Valve
Stem Pointed
Down)
B. Hoist Assembly
C. Hoist Cable
D. Tire Retainer
E. Hoist Shaft
F. Hoist End of
Extension ToolG. Hoist Shaft Access
Hole
H. Wheel Wrench
I. Jack Handle
Extensions
J. Hoist Lock (If
Equipped)1. If your vehicle is equipped with a hoist lock (J),
open the spare tire lock cover on the bumper
and use the ignition key to remove the lock.
2. Assemble the wheel wrench (H) and the two jack
handle extensions (I) as shown.
5-99
Page 527 of 588
Fuses Usage
RR Wiper Not Used
SEO ACCYSpecial Equipment Option
Accessory
WS WPR Windshield Wipers
TBC ACCYTruck Body Controller
Accessory
IGN 3 Ignition, Heated Seats
4WDFour-Wheel Drive System,
Auxiliary Battery
Fuses Usage
HTR A/C Climate Control System
LOCK (Relay)Power Door Lock Relay
(Lock Function)
HVAC 1 Climate Control System
L DOORDriver's Door Harness
Connection
CRUISECruise Control, Power Take
Off (PTO)
UNLOCK (Relay)Power Door Lock Relay
(Unlock Function)
RR FOG LP Not Used
BRAKE Anti-Lock Brake System
DRIVER UNLOCKPower Door Lock Relay
(Driver's Door Unlock
Function)
IGN 0 TCM
TBC IGN 0 Truck Body Controller
VEH CHMSLVehicle and Trailer High
Mounted Stoplamp
LT TRLR ST/TRN Left Turn Signal/Stop Trailer
LT TRNLeft Turn Signals and
Sidemarkers
VEH STOPVehicle Stoplamps, Brake
Module, Electronic Throttle
Control Module
RT TRLR ST/TRN Right Turn Signal/Stop Trailer
5-127