Page 10 of 588
Power SeatsIf your vehicle has a power seat, you can adjust it with
these controls located on the outboard sides of the
seats.
·Raise or lower the front of the seat cushion by
raising or lowering the forward edge of the
horizontal control.
·Move the seat forward or rearward by moving the
whole horizontal control forward or rearward.
·Raise or lower the rear of the seat cushion by
raising or lowering the rear edge of the horizontal
control.
·Moving the whole horizontal control up or down
raises or lowers the entire seat cushion.
If your vehicle has power reclining seats, you can use
the vertical control to adjust the angle of the seatback.
Move the reclining front seatback rearward or forward
by moving the control toward the rear or the front of the
vehicle. See
Reclining Seatbacks on page 1-6.
1-4
Page 12 of 588

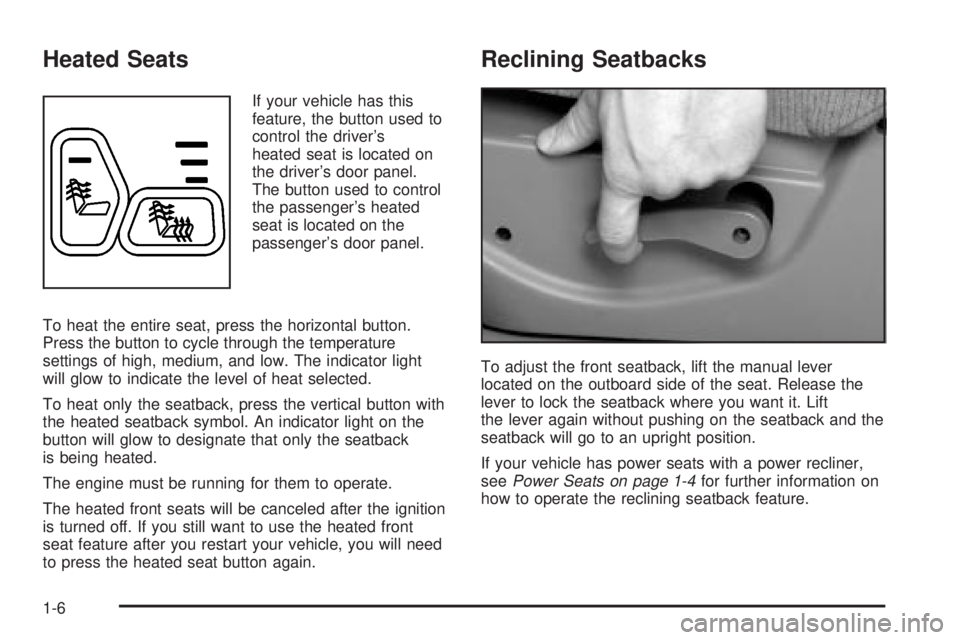
Heated Seats
If your vehicle has this
feature, the button used to
control the driver's
heated seat is located on
the driver's door panel.
The button used to control
the passenger's heated
seat is located on the
passenger's door panel.
To heat the entire seat, press the horizontal button.
Press the button to cycle through the temperature
settings of high, medium, and low. The indicator light
will glow to indicate the level of heat selected.
To heat only the seatback, press the vertical button with
the heated seatback symbol. An indicator light on the
button will glow to designate that only the seatback
is being heated.
The engine must be running for them to operate.
The heated front seats will be canceled after the ignition
is turned off. If you still want to use the heated front
seat feature after you restart your vehicle, you will need
to press the heated seat button again.
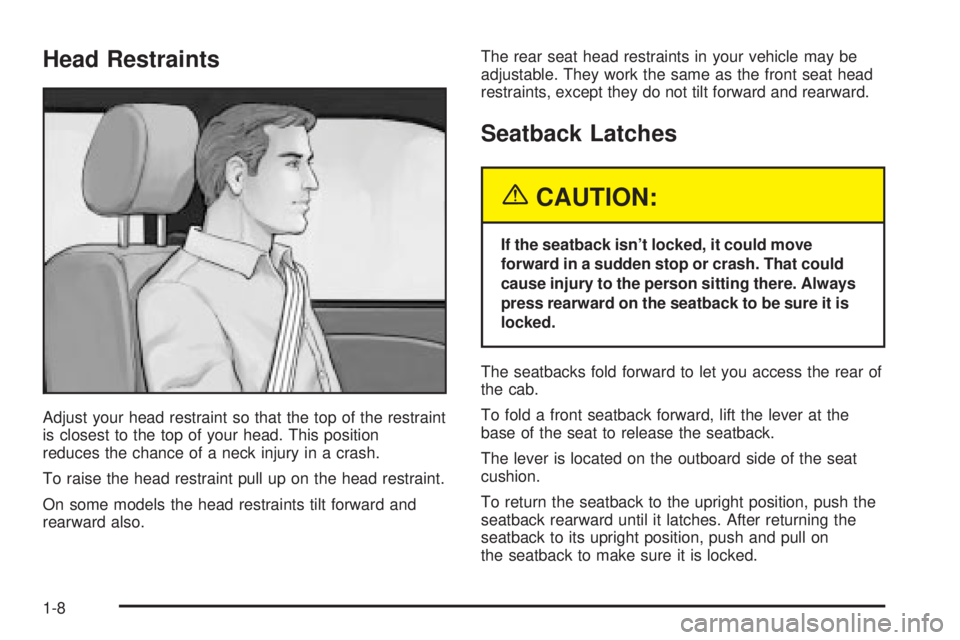
Reclining Seatbacks
To adjust the front seatback, lift the manual lever
located on the outboard side of the seat. Release the
lever to lock the seatback where you want it. Lift
the lever again without pushing on the seatback and the
seatback will go to an upright position.
If your vehicle has power seats with a power recliner,
see
Power Seats on page 1-4for further information on
how to operate the reclining seatback feature.
1-6
Page 14 of 588

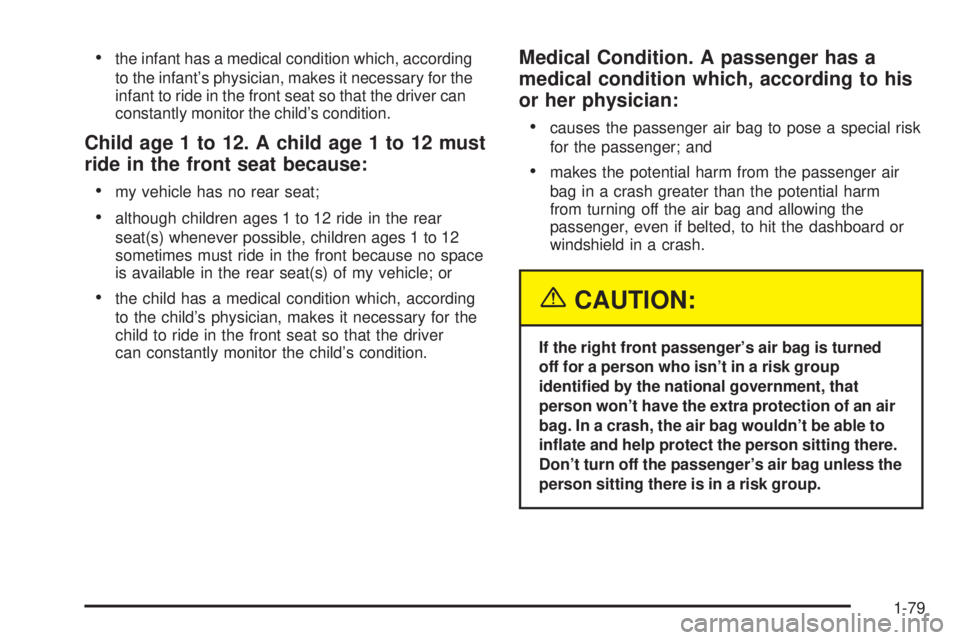
Head Restraints
Adjust your head restraint so that the top of the restraint
is closest to the top of your head. This position
reduces the chance of a neck injury in a crash.
To raise the head restraint pull up on the head restraint.
On some models the head restraints tilt forward and
rearward also.The rear seat head restraints in your vehicle may be
adjustable. They work the same as the front seat head
restraints, except they do not tilt forward and rearward.
Seatback Latches
{CAUTION:
If the seatback isn't locked, it could move
forward in a sudden stop or crash. That could
cause injury to the person sitting there. Always
press rearward on the seatback to be sure it is
locked.
The seatbacks fold forward to let you access the rear of
the cab.
To fold a front seatback forward, lift the lever at the
base of the seat to release the seatback.
The lever is located on the outboard side of the seat
cushion.
To return the seatback to the upright position, push the
seatback rearward until it latches. After returning the
seatback to its upright position, push and pull on
the seatback to make sure it is locked.
1-8
Page 16 of 588
To fold the rear seat, do the following:
1. Pull up on the strap
loop at the rear of the
seat cushion. Then,
pull the seat cushion up
and fold it forward.
2. After folding the seat cushion fully forward, pull the
seatback forward and fold the seatback down until it
is ¯at. If the seatback cannot fold ¯at because it
interferes with the cushion, try moving the front seat
forward and/or bringing the front seat more upright.
The lever at the base of the seat must be turned
rearward to release the seatback.To return the seat to the passenger position do the
following:
1. Lift the seatback up and push it rearward all
the way.
2. Lower the seat cushion until it latches into position.
3. Pull forward on the seatback and up on the seat
cushion to make sure the seat is securely in
place.
Check to see that the buckles on the driver's side
seatback are accessible to the outboard and center
occupant and are not under the seat cushions.
1-10
Page 52 of 588
Once you have the top strap anchored, you'll be ready to
secure the child restraint itself. Tighten the top strap
when and as the child restraint manufacturer's
instructions say.
Rear Seat Top Strap Anchors
(Extended Cab Models)
If your vehicle is an extended cab model, you'll ®nd the
top strap anchors for the rear seating positions near
the top of the seatback. In addition to the top strapanchors, each seating position has a fabric loop at the
top of the seatback that you'll use to route a top
strap through.
When using a child restraint with a top strap in either
rear outboard position, raise the head restraint and route
the top strap through the fabric loop on the seatback.
Then, attach the top strap to the anchor point at
the center rear seating position.
1-46
Page 53 of 588
When using a child restraint with a top strap in the
center rear position, route the top strap through
the fabric loop on the seatback. Then, raise the head
restraint and attach the top strap to the anchor
point located at the closest outboard position.
Once you have the top strap anchored, you'll be ready
to secure the child restrain itself. Tighten the top
strap when and as the child restraint manufacturer's
instructions say.
Rear Seat Top Strap Anchors
(Crew Cab Models)
If your vehicle is a Crew Cab model, you'll ®nd top strap
anchors for the rear seating positions located on the
back panel of your vehicle, behind the rear seat.
1-47
Page 85 of 588

·the infant has a medical condition which, according
to the infant's physician, makes it necessary for the
infant to ride in the front seat so that the driver can
constantly monitor the child's condition.
Child age 1 to 12. A child age 1 to 12 must
ride in the front seat because:
·
my vehicle has no rear seat;
·although children ages 1 to 12 ride in the rear
seat(s) whenever possible, children ages 1 to 12
sometimes must ride in the front because no space
is available in the rear seat(s) of my vehicle; or
·the child has a medical condition which, according
to the child's physician, makes it necessary for the
child to ride in the front seat so that the driver
can constantly monitor the child's condition.
Medical Condition. A passenger has a
medical condition which, according to his
or her physician:
·
causes the passenger air bag to pose a special risk
for the passenger; and
·makes the potential harm from the passenger air
bag in a crash greater than the potential harm
from turning off the air bag and allowing the
passenger, even if belted, to hit the dashboard or
windshield in a crash.
{CAUTION:
If the right front passenger's air bag is turned
off for a person who isn't in a risk group
identi®ed by the national government, that
person won't have the extra protection of an air
bag. In a crash, the air bag wouldn't be able to
in¯ate and help protect the person sitting there.
Don't turn off the passenger's air bag unless the
person sitting there is in a risk group.
1-79
Page 213 of 588

Malfunction Indicator Lamp
Check Engine Light
Your vehicle is equipped
with a computer which
monitors operation of the
fuel, ignition and emission
control systems.
This system is called OBD II (On-Board
Diagnostics-Second Generation) and is intended to
assure that emissions are at acceptable levels for the
life of the vehicle, helping to produce a cleaner
environment. The Check Engine light comes on to
indicate that there is a problem and service is required.
Malfunctions often will be indicated by the system
before any problem is apparent. This may prevent more
serious damage to your vehicle. This system is also
designed to assist your service technician in correctly
diagnosing any malfunction.
Notice:If you keep driving your vehicle with this
light on, after a while, your emission controls
may not work as well, your fuel economy may not
be as good and your engine may not run as
smoothly. This could lead to costly repairs that may
not be covered by your warranty.
Notice:Modi®cations made to the engine,
transmission, exhaust, intake or fuel system of your
vehicle or the replacement of the original tires
with other than those of the same Tire Performance
Criteria (TPC) can affect your vehicle's emission
controls and may cause this light to come on.
Modi®cations to these systems could lead to costly
repairs not covered by your warranty. This may
also result in a failure to pass a required Emission
Inspection/Maintenance test.
3-49