2004 FORD SUPER DUTY ECU
[x] Cancel search: ECUPage 81 of 304
Tips:
•Do not set a code that uses five of the same number.
•Do not use five numbers in sequential order.
•The factory set code will work even if you have set your own personal
code.
•If you set a second personal code it will erase your first personal code.
Erasing personal code
1. Enter the factory set 5–digit code.
2. Press and hold the 1•2 for three seconds. This must be done within
five seconds of completing step 1.
Your personal code is now erased and only the factory set 5–digit code
will work.
Anti-scan feature
If the wrong code has been entered 7 times (35 consecutive button
presses), the keypad is disabled for one minute and the keypad lamp will
flash during this time.Note:Pressing 7•8 and the 9•0 simultaneously
during this one minute period will still lock the vehicle.
The anti-scan feature will turn off after one minute of keypad inactivity.
Unlocking and locking the doors using keyless entry
To unlock the driver’s door,enter the factory set 5-digit code or your
personal code. Each number must be pressed within five seconds of each
other.
To unlock all doors,press the 3•4 control within three seconds of
entering a valid keypad code.
To lock all doors,press the 7•8 and the 9•0 at the same time. You
do notneed to enter the keypad code first.
To verify all doors are closed properly, press the 7•8 and the 9•0
again within three seconds. If the doors are closed, the horn will chirp
once; if any door is ajar, the horn will chirp twice.
Low battery warning
When the battery in the keypad is running low and needs to be changed,
the vehicle will provide you with a warning. After entering your factory
set or personal entry code into the keypad, instead of unlocking the
driver’s door, the vehicle will unlock the driver’s door, lock it, then unlock
it again.
2004 F250/350/450/550(f23)
Owners Guide (post-2002-fmt)
USA English(fus)
Locks and Security
81
Page 82 of 304

Replacing the batteries
The keyless entry keypad uses one coin-type three-volt lithium battery
(Service Part Number 3L2W-19G545–A). This replacement battery is only
available through your authorized dealer.
To replace the battery:
1. Use the largest flathead screwdriver that will insert into the slot on
the right side of the keypad. Gently twist the screwdriver to pry off the
top cover. Pull the cover off by pulling to the left and then up. The top
cover and the internal components of the keypad will come off the
vehicle and the back cover will remain mounted to the vehicle.
2. Remove the internal components of the keypad from the top cover
and place the top cover on a soft surface to avoid scratching the
decorative finish.Note:Donotremove the silicone rubber membrane
from the rest of the electronics.
3. Insert the screwdriver into one of the two slots on the metal battery
holder, located on either side of the (+) indicator. The battery will then
slide out enough to obtain with your fingers.
4. Remove the old battery from the
unit and replace it with a new
battery, ensuring that the (+)
indicator is properly aligned
properly and seated completely
inside the battery holder.
5. Replace the keypad internal
components back inside the top
cover.Note:Ensure the screwdriver
slot is located next to the 9•0
keypad.
6. Hold the top cover and the internal components together, align the
unit with the back cover mounted on the vehicle, and press the two
pieces together. Run your finger around the perimeter of the keypad to
ensure it is properly seated.
7. Press the 7•8 and the 9•0 controls simultaneously to lock the
vehicle and to verify the keypad is functioning properly.
Note:Replacement of the battery willnotcause the remote keyless
keypad to become deprogrammed from your vehicle. The remote keyless
keypad should operate normally after battery replacement.
2004 F250/350/450/550(f23)
Owners Guide (post-2002-fmt)
USA English(fus)
Locks and Security
82
Page 83 of 304
Replacing lost/damaged remote keyless entry keypad
If a keyless entry keypad has been lost or damaged, or you would like to
buy an additional keyless entry keypad, you can either reprogram them
yourself, or takeall keyless entry keypads and remote entry
transmittersto your authorized dealer for reprogramming.
How to program your remote keyless entry keypad
You must haveall keyless entry keypads and remote entry
transmitters(maximum of four) available before beginning this
procedure.
To program the keyless entry
keypads and remote entry
transmitters yourself:
1. Ensure the vehicle is
electronically unlocked.
2. Put the key in the ignition.
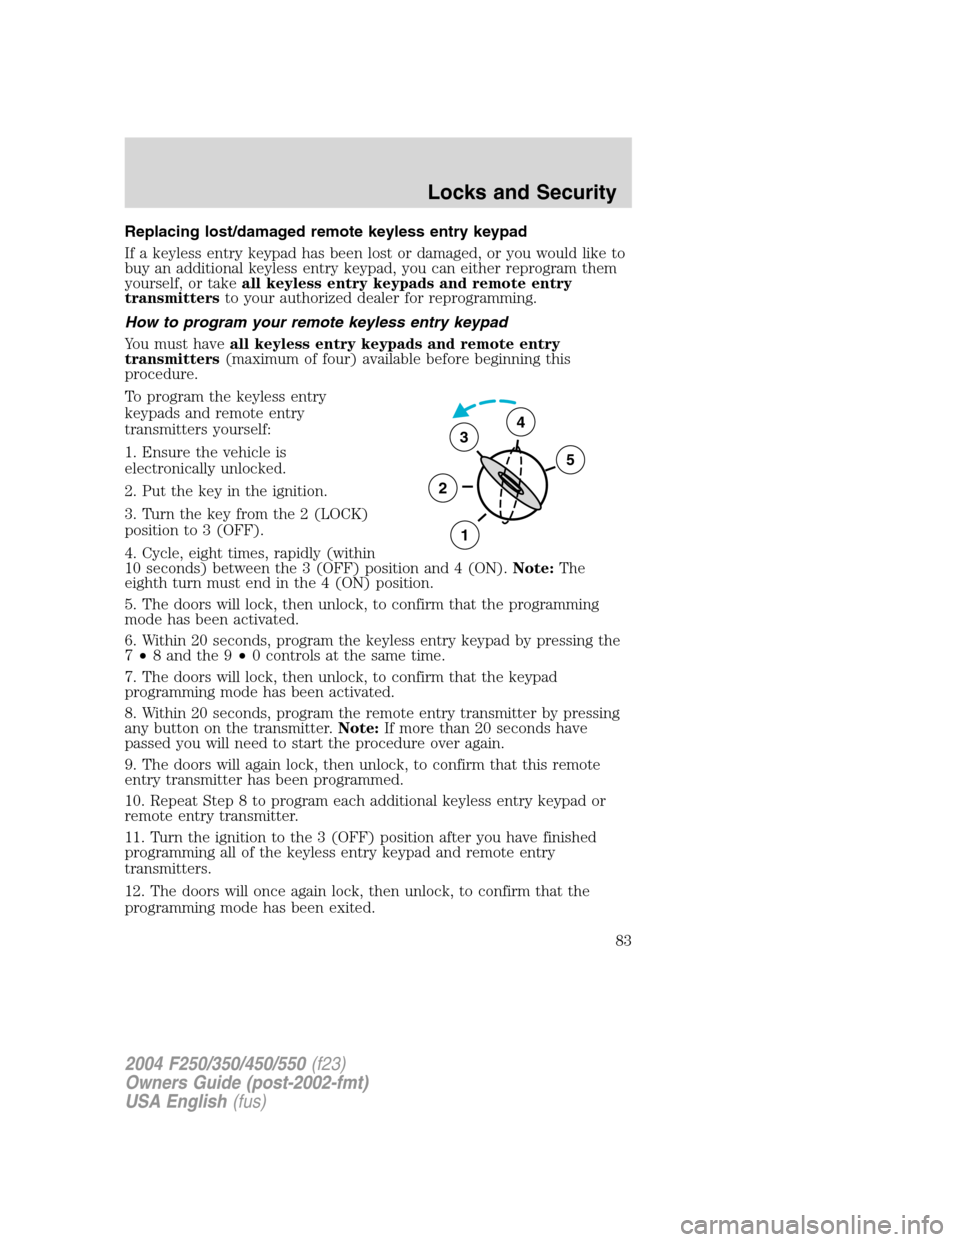
3. Turn the key from the 2 (LOCK)
position to 3 (OFF).
4. Cycle, eight times, rapidly (within
10 seconds) between the 3 (OFF) position and 4 (ON).Note:The
eighth turn must end in the 4 (ON) position.
5. The doors will lock, then unlock, to confirm that the programming
mode has been activated.
6. Within 20 seconds, program the keyless entry keypad by pressing the
7•8 and the 9•0 controls at the same time.
7. The doors will lock, then unlock, to confirm that the keypad
programming mode has been activated.
8. Within 20 seconds, program the remote entry transmitter by pressing
any button on the transmitter.Note:If more than 20 seconds have
passed you will need to start the procedure over again.
9. The doors will again lock, then unlock, to confirm that this remote
entry transmitter has been programmed.
10. Repeat Step 8 to program each additional keyless entry keypad or
remote entry transmitter.
11. Turn the ignition to the 3 (OFF) position after you have finished
programming all of the keyless entry keypad and remote entry
transmitters.
12. The doors will once again lock, then unlock, to confirm that the
programming mode has been exited.
3
2
1
5
4
2004 F250/350/450/550(f23)
Owners Guide (post-2002-fmt)
USA English(fus)
Locks and Security
83
Page 92 of 304
Each seating position in your vehicle has a specific safety belt
assembly which is made up of one buckle and one tongue that
are designed to be used as a pair. 1) Use the shoulder belt on the
outside shoulder only. Never wear the shoulder belt under the arm. 2)
Never swing the safety belt around your neck over the inside shoulder.
3) Never use a single belt for more than one person.
Always transport children 12 years old and under in the back
seat and always properly use appropriate child restraints.
Safety belts and seats can become hot in a vehicle that has been
closed up in sunny weather; they could burn a small child. Check
seat covers and buckles before you place a child anywhere near them.
Combination lap and shoulder belts
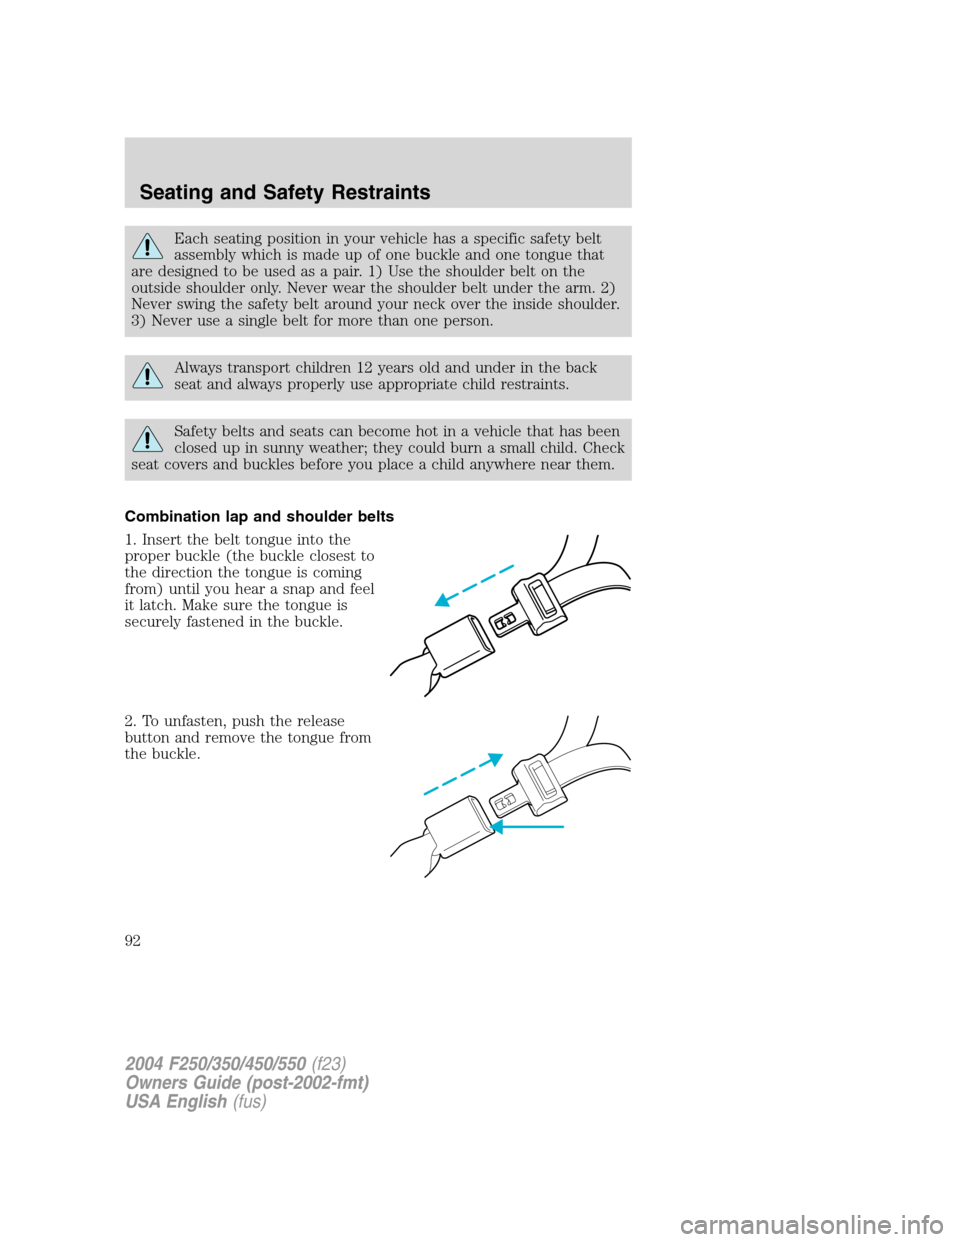
1. Insert the belt tongue into the
proper buckle (the buckle closest to
the direction the tongue is coming
from) until you hear a snap and feel
it latch. Make sure the tongue is
securely fastened in the buckle.
2. To unfasten, push the release
button and remove the tongue from
the buckle.
2004 F250/350/450/550(f23)
Owners Guide (post-2002-fmt)
USA English(fus)
Seating and Safety Restraints
92
Page 117 of 304
When installing a child safety seat:
•Review and follow the information
presented in theAir bag
supplemental restraint system
(SRS) section in this chapter.
•Use the correct safety belt buckle
for that seating position (the
buckle closest to the direction the
tongue is coming from).
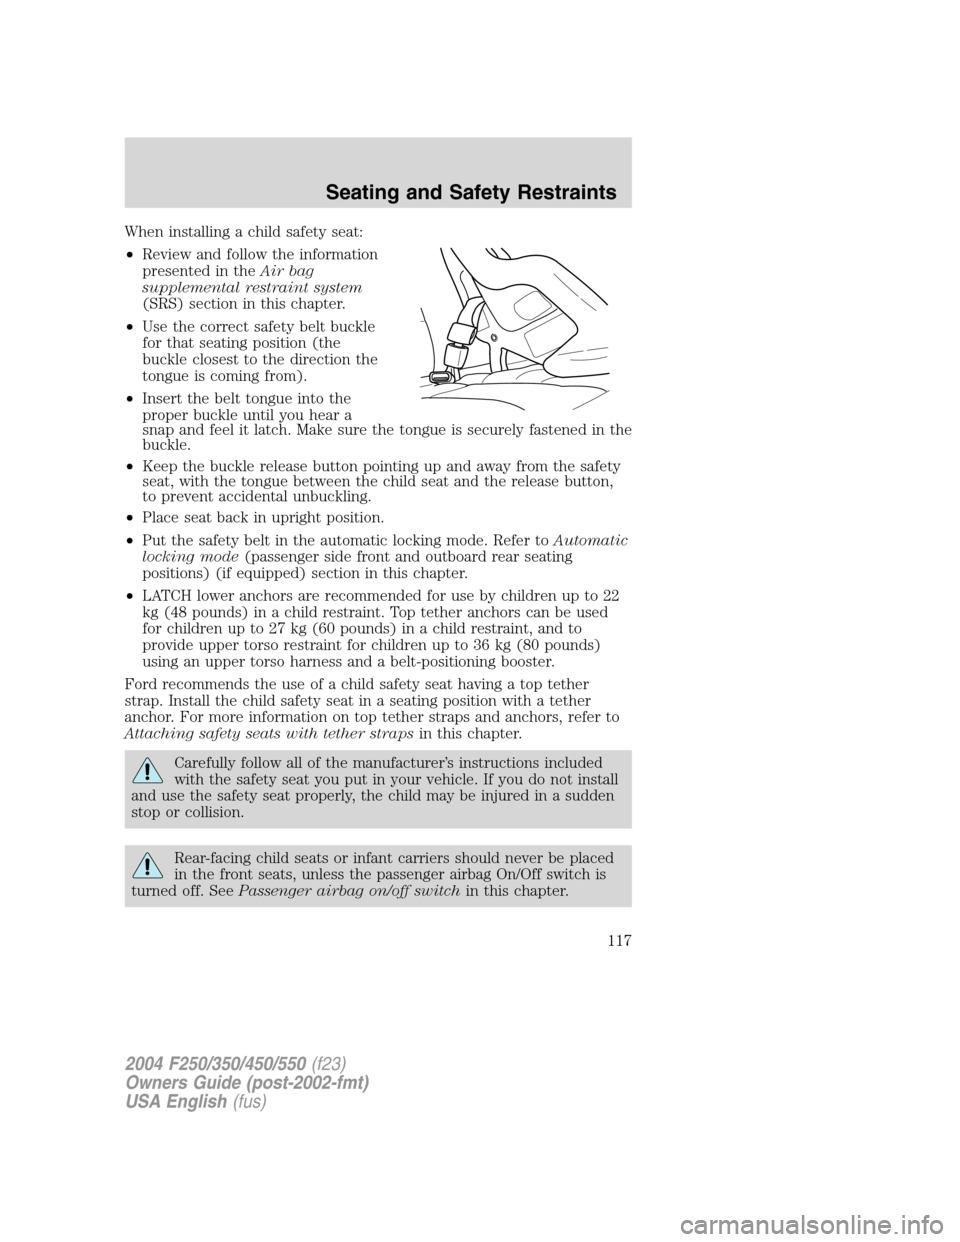
•Insert the belt tongue into the
proper buckle until you hear a
snap and feel it latch. Make sure the tongue is securely fastened in the
buckle.
•Keep the buckle release button pointing up and away from the safety
seat, with the tongue between the child seat and the release button,
to prevent accidental unbuckling.
•Place seat back in upright position.
•Put the safety belt in the automatic locking mode. Refer toAutomatic
locking mode(passenger side front and outboard rear seating
positions) (if equipped) section in this chapter.
•LATCH lower anchors are recommended for use by children up to 22
kg (48 pounds) in a child restraint. Top tether anchors can be used
for children up to 27 kg (60 pounds) in a child restraint, and to
provide upper torso restraint for children up to 36 kg (80 pounds)
using an upper torso harness and a belt-positioning booster.
Ford recommends the use of a child safety seat having a top tether
strap. Install the child safety seat in a seating position with a tether
anchor. For more information on top tether straps and anchors, refer to
Attaching safety seats with tether strapsin this chapter.
Carefully follow all of the manufacturer’s instructions included
with the safety seat you put in your vehicle. If you do not install
and use the safety seat properly, the child may be injured in a sudden
stop or collision.
Rear-facing child seats or infant carriers should never be placed
in the front seats, unless the passenger airbag On/Off switch is
turned off. SeePassenger airbag on/off switchin this chapter.
2004 F250/350/450/550(f23)
Owners Guide (post-2002-fmt)
USA English(fus)
Seating and Safety Restraints
117
Page 119 of 304
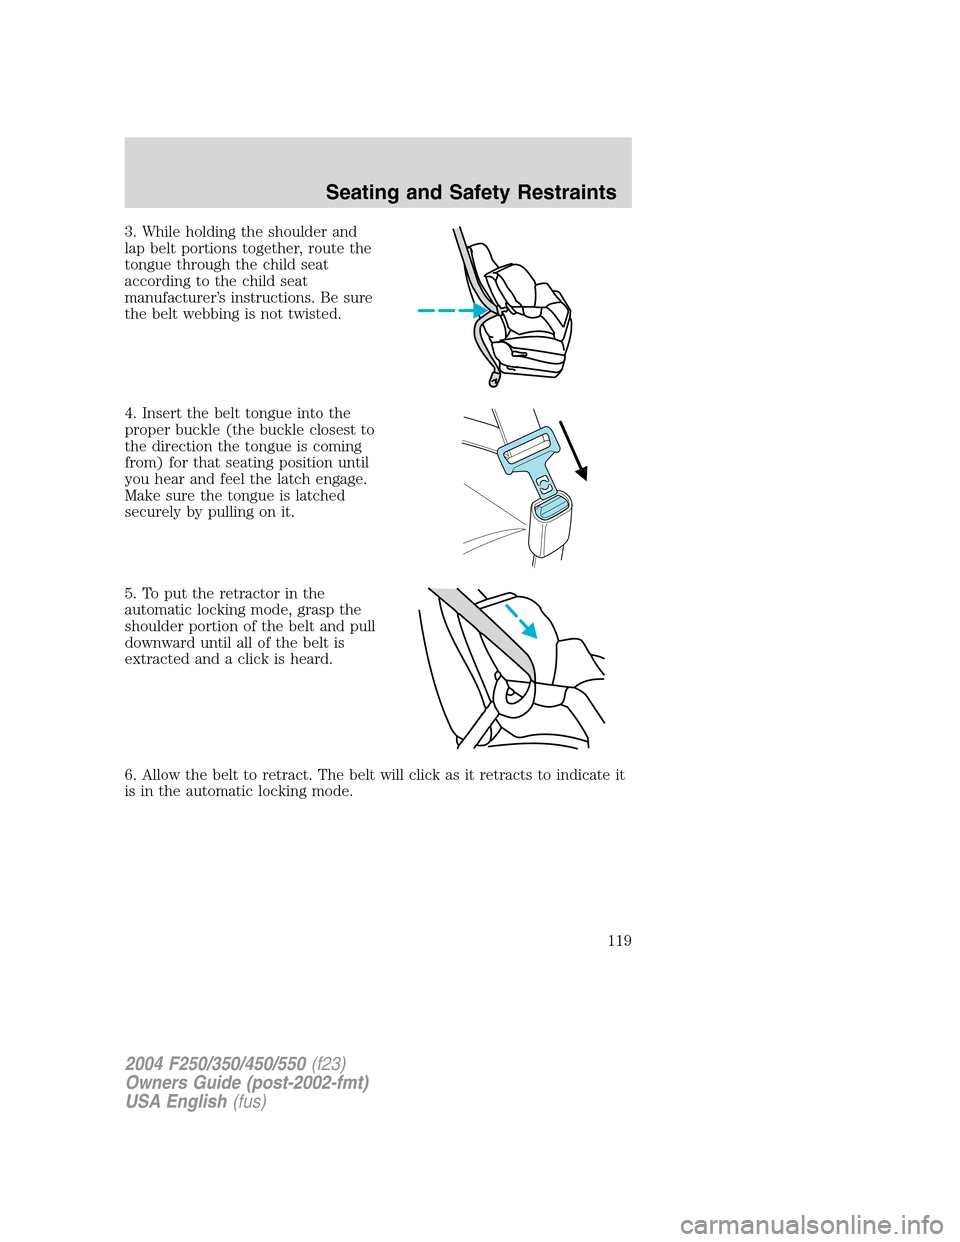
3. While holding the shoulder and
lap belt portions together, route the
tongue through the child seat
according to the child seat
manufacturer’s instructions. Be sure
the belt webbing is not twisted.
4. Insert the belt tongue into the
proper buckle (the buckle closest to
the direction the tongue is coming
from) for that seating position until
you hear and feel the latch engage.
Make sure the tongue is latched
securely by pulling on it.
5. To put the retractor in the
automatic locking mode, grasp the
shoulder portion of the belt and pull
downward until all of the belt is
extracted and a click is heard.
6. Allow the belt to retract. The belt will click as it retracts to indicate it
is in the automatic locking mode.
2004 F250/350/450/550(f23)
Owners Guide (post-2002-fmt)
USA English(fus)
Seating and Safety Restraints
119
Page 120 of 304
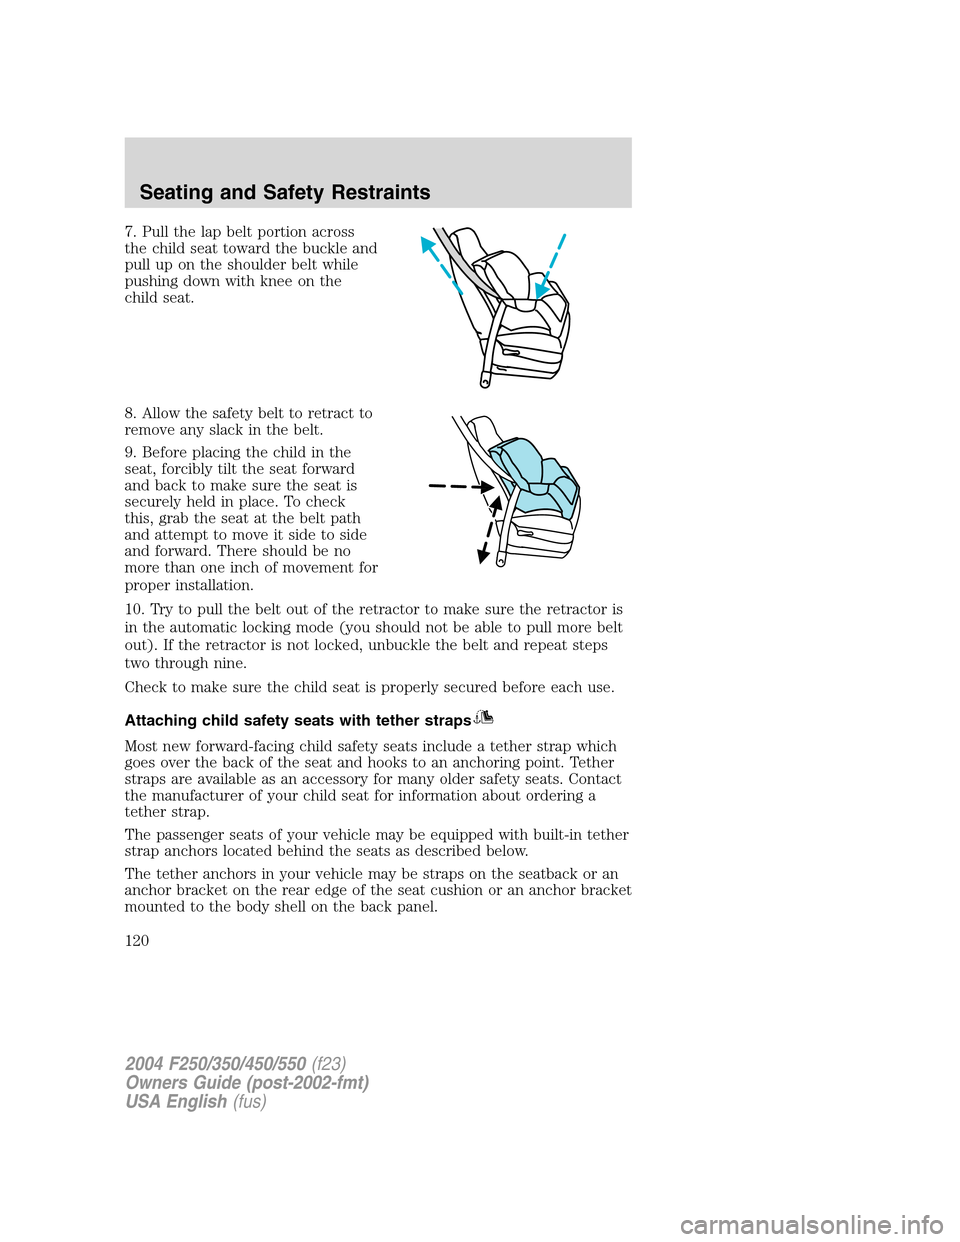
7. Pull the lap belt portion across
the child seat toward the buckle and
pull up on the shoulder belt while
pushing down with knee on the
child seat.
8. Allow the safety belt to retract to
remove any slack in the belt.
9. Before placing the child in the
seat, forcibly tilt the seat forward
and back to make sure the seat is
securely held in place. To check
this, grab the seat at the belt path
and attempt to move it side to side
and forward. There should be no
more than one inch of movement for
proper installation.
10. Try to pull the belt out of the retractor to make sure the retractor is
in the automatic locking mode (you should not be able to pull more belt
out). If the retractor is not locked, unbuckle the belt and repeat steps
two through nine.
Check to make sure the child seat is properly secured before each use.
Attaching child safety seats with tether straps
Most new forward-facing child safety seats include a tether strap which
goes over the back of the seat and hooks to an anchoring point. Tether
straps are available as an accessory for many older safety seats. Contact
the manufacturer of your child seat for information about ordering a
tether strap.
The passenger seats of your vehicle may be equipped with built-in tether
strap anchors located behind the seats as described below.
The tether anchors in your vehicle may be straps on the seatback or an
anchor bracket on the rear edge of the seat cushion or an anchor bracket
mounted to the body shell on the back panel.
2004 F250/350/450/550(f23)
Owners Guide (post-2002-fmt)
USA English(fus)
Seating and Safety Restraints
120
Page 122 of 304
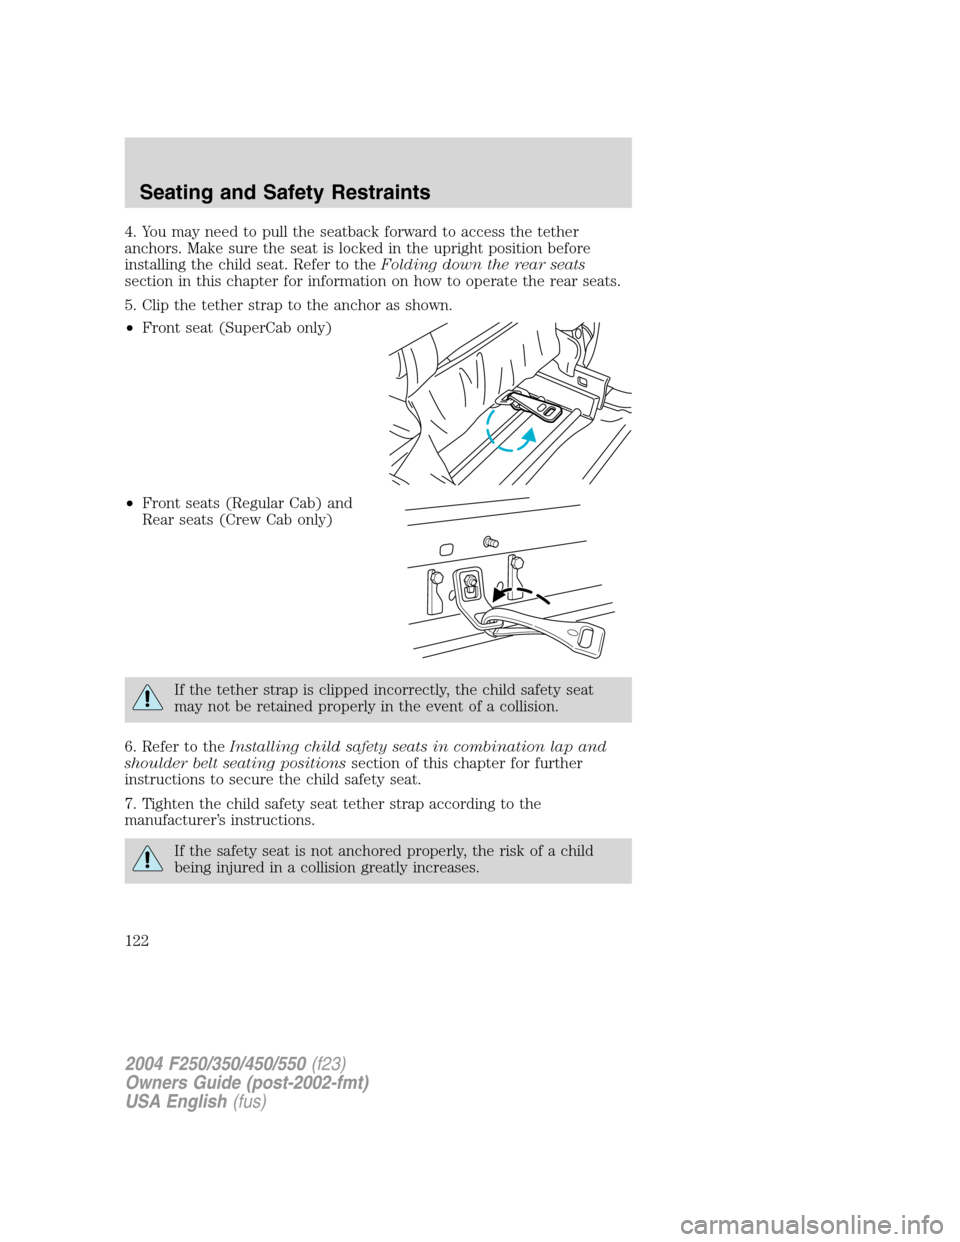
4. You may need to pull the seatback forward to access the tether
anchors. Make sure the seat is locked in the upright position before
installing the child seat. Refer to theFolding down the rear seats
section in this chapter for information on how to operate the rear seats.
5. Clip the tether strap to the anchor as shown.
•Front seat (SuperCab only)
•Front seats (Regular Cab) and
Rear seats (Crew Cab only)
If the tether strap is clipped incorrectly, the child safety seat
may not be retained properly in the event of a collision.
6. Refer to theInstalling child safety seats in combination lap and
shoulder belt seating positionssection of this chapter for further
instructions to secure the child safety seat.
7. Tighten the child safety seat tether strap according to the
manufacturer’s instructions.
If the safety seat is not anchored properly, the risk of a child
being injured in a collision greatly increases.
2004 F250/350/450/550(f23)
Owners Guide (post-2002-fmt)
USA English(fus)
Seating and Safety Restraints
122