Page 20 of 304
4.Memory preset buttons:To set
a station: Select frequency band
AM/FM; tune to a station, press and
hold a preset button until sound returns.
5.Power/volume:Press to turn
ON/OFF; turn to increase or
decrease volume levels.
6.Tone:Press TONE until the
desired level—Bass, Treble, Fade
appears on the display. Turn the
volume control to raise/lower the
levels, or to move the audio sound
from the right to left or the front to
back (if equipped).
7.CLK (Clock):To set the hour,
press and hold CLK until CLOCK
SET appears in the display. Press
SEEK to decrease
or
increase
the hours.
To set the minute, press and hold CLK until CLOCK set appears in the
display. Press TUNE to decrease
or increasethe minutes.
1234
TONE
CLK
VOL
PUSH
ON
TONE
CLK
2004 F250/350/450/550(f23)
Owners Guide (post-2002-fmt)
USA English(fus)
Entertainment Systems
20
Page 28 of 304
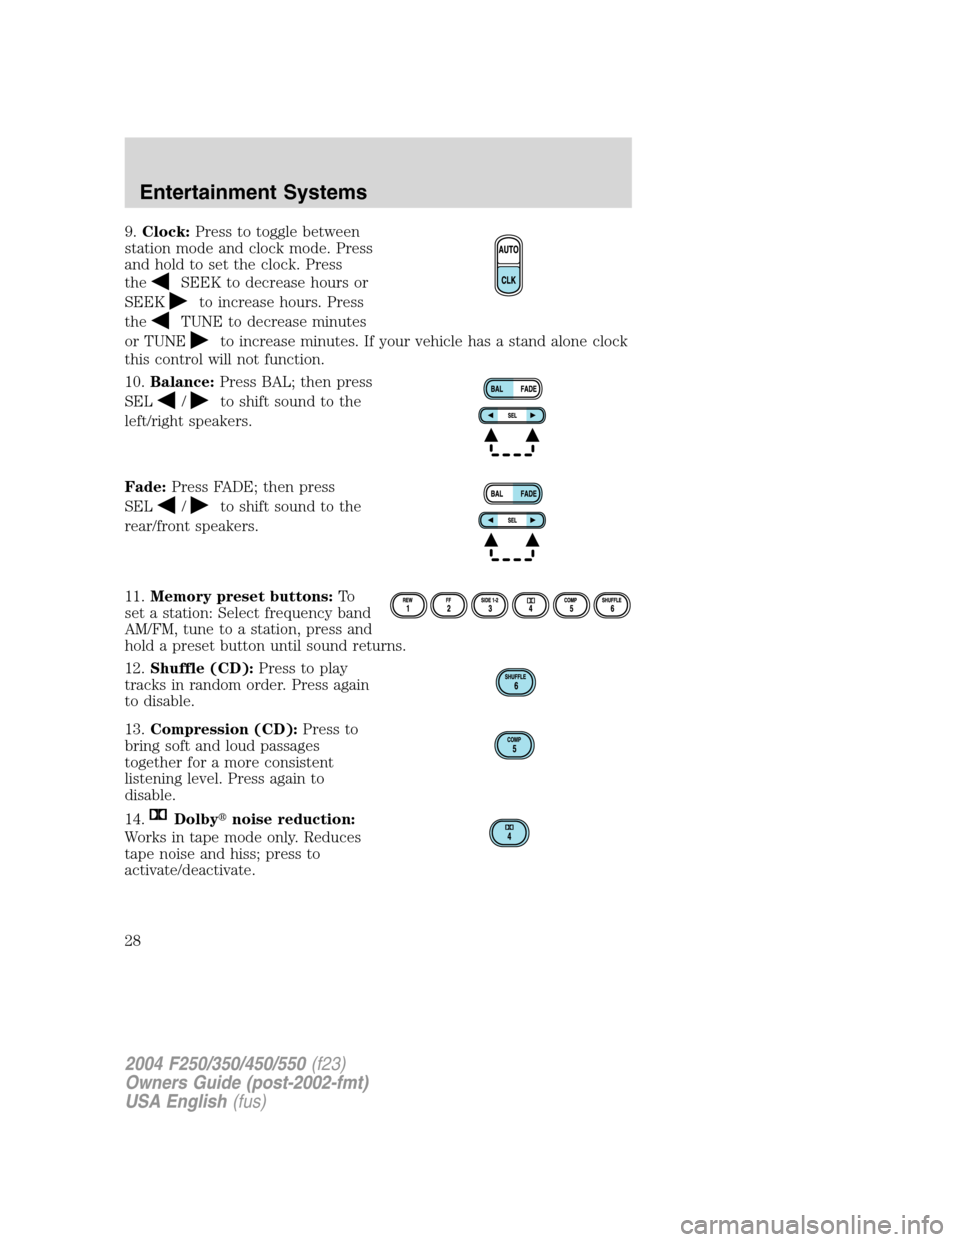
9.Clock:Press to toggle between
station mode and clock mode. Press
and hold to set the clock. Press
the
SEEK to decrease hours or
SEEK
to increase hours. Press
the
TUNE to decrease minutes
or TUNE
to increase minutes. If your vehicle has a stand alone clock
this control will not function.
10.Balance:Press BAL; then press
SEL
/to shift sound to the
left/right speakers.
Fade:Press FADE; then press
SEL
/to shift sound to the
rear/front speakers.
11.Memory preset buttons:To
set a station: Select frequency band
AM/FM, tune to a station, press and
hold a preset button until sound returns.
12.Shuffle (CD):Press to play
tracks in random order. Press again
to disable.
13.Compression (CD):Press to
bring soft and loud passages
together for a more consistent
listening level. Press again to
disable.
14.
Dolby�noise reduction:
Works in tape mode only. Reduces
tape noise and hiss; press to
activate/deactivate.
2004 F250/350/450/550(f23)
Owners Guide (post-2002-fmt)
USA English(fus)
Entertainment Systems
28
Page 31 of 304
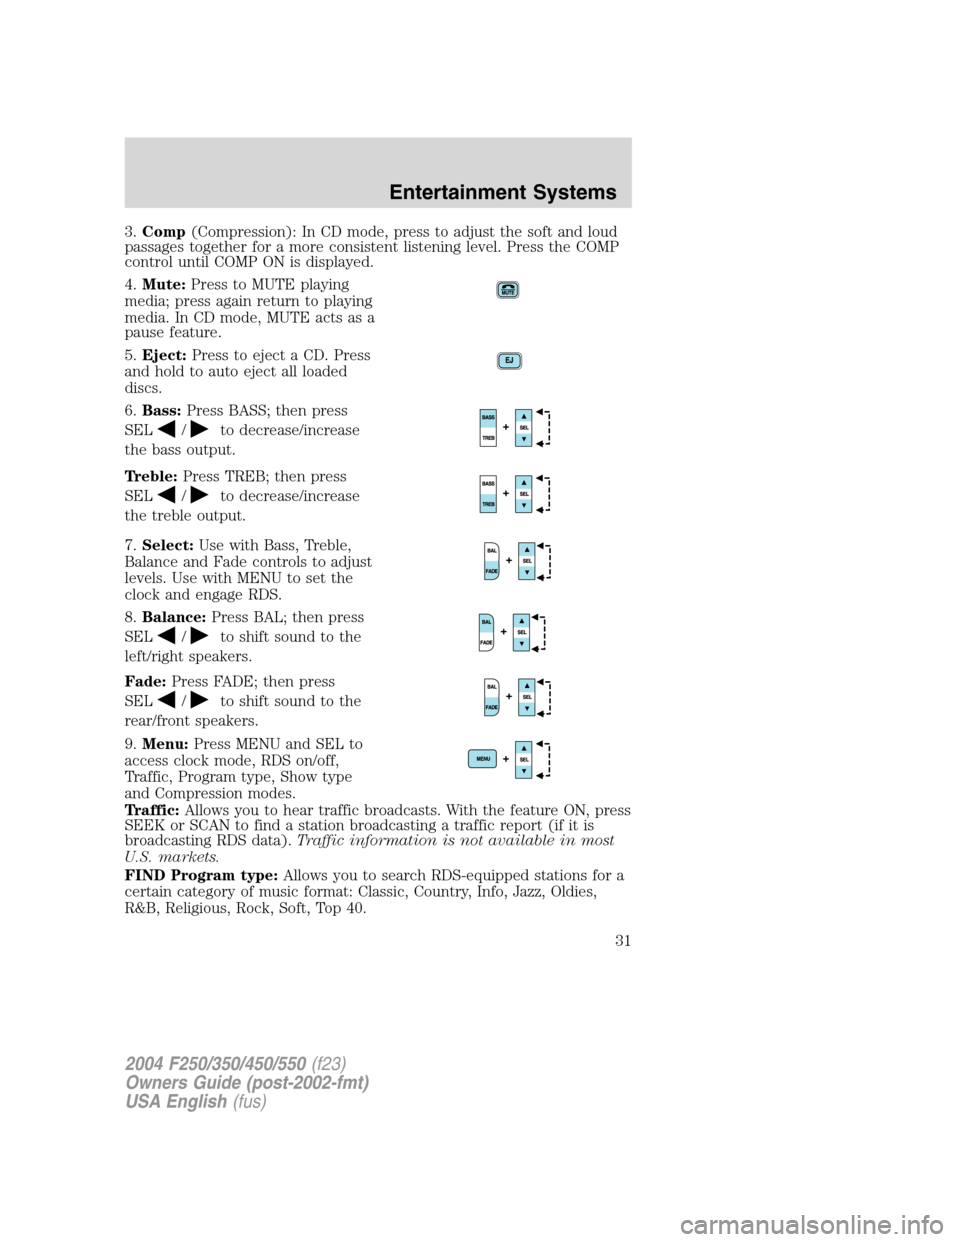
3.Comp(Compression): In CD mode, press to adjust the soft and loud
passages together for a more consistent listening level. Press the COMP
control until COMP ON is displayed.
4.Mute:Press to MUTE playing
media; press again return to playing
media. In CD mode, MUTE acts as a
pause feature.
5.Eject:Press to eject a CD. Press
and hold to auto eject all loaded
discs.
6.Bass:Press BASS; then press
SEL
/to decrease/increase
the bass output.
Treble:Press TREB; then press
SEL
/to decrease/increase
the treble output.
7.Select:Use with Bass, Treble,
Balance and Fade controls to adjust
levels. Use with MENU to set the
clock and engage RDS.
8.Balance:Press BAL; then press
SEL
/to shift sound to the
left/right speakers.
Fade:Press FADE; then press
SEL
/to shift sound to the
rear/front speakers.
9.Menu:Press MENU and SEL to
access clock mode, RDS on/off,
Traffic, Program type, Show type
and Compression modes.
Traffic:Allows you to hear traffic broadcasts. With the feature ON, press
SEEK or SCAN to find a station broadcasting a traffic report (if it is
broadcasting RDS data).Traffic information is not available in most
U.S. markets.
FIND Program type:Allows you to search RDS-equipped stations for a
certain category of music format: Classic, Country, Info, Jazz, Oldies,
R&B, Religious, Rock, Soft, Top 40.
2004 F250/350/450/550(f23)
Owners Guide (post-2002-fmt)
USA English(fus)
Entertainment Systems
31
Page 32 of 304
Show TYPE:Displays the station’s call letters and format.
Compression:Brings soft and loud CD passages together for a more
consistent listening level.
Setting the clock:Press MENU until SELECT HOUR or SELECT
MINUTE is displayed. Use SEL to manually increase (
) or decrease
(
) the hours/minutes. Press MENU again to disengage clock mode.
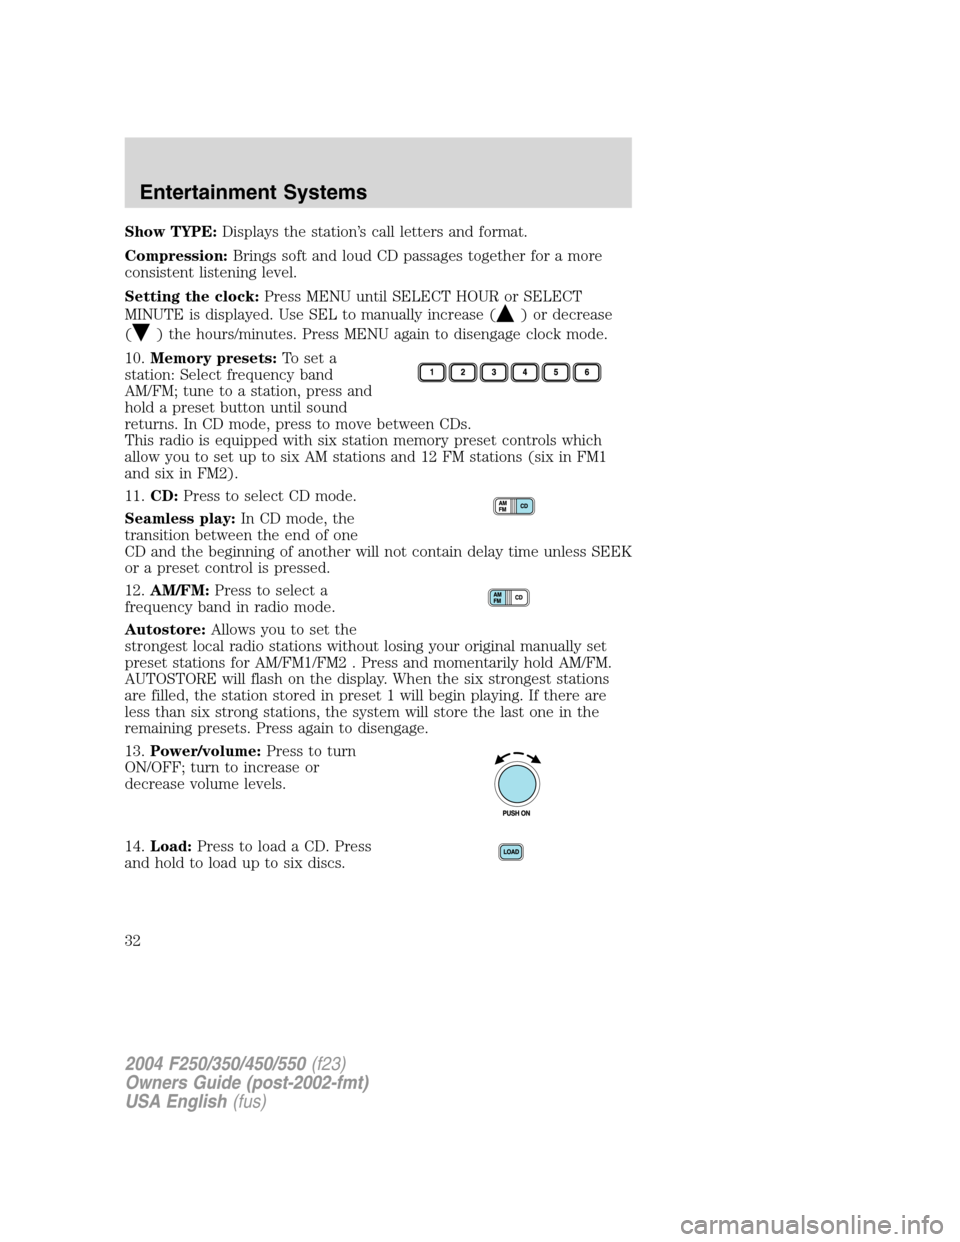
10.Memory presets:To set a
station: Select frequency band
AM/FM; tune to a station, press and
hold a preset button until sound
returns. In CD mode, press to move between CDs.
This radio is equipped with six station memory preset controls which
allow you to set up to six AM stations and 12 FM stations (six in FM1
and six in FM2).
11.CD:Press to select CD mode.
Seamless play:In CD mode, the
transition between the end of one
CD and the beginning of another will not contain delay time unless SEEK
or a preset control is pressed.
12.AM/FM:Press to select a
frequency band in radio mode.
Autostore:Allows you to set the
strongest local radio stations without losing your original manually set
preset stations for AM/FM1/FM2 . Press and momentarily hold AM/FM.
AUTOSTORE will flash on the display. When the six strongest stations
are filled, the station stored in preset 1 will begin playing. If there are
less than six strong stations, the system will store the last one in the
remaining presets. Press again to disengage.
13.Power/volume:Press to turn
ON/OFF; turn to increase or
decrease volume levels.
14.Load:Press to load a CD. Press
and hold to load up to six discs.
2004 F250/350/450/550(f23)
Owners Guide (post-2002-fmt)
USA English(fus)
Entertainment Systems
32
Page 45 of 304
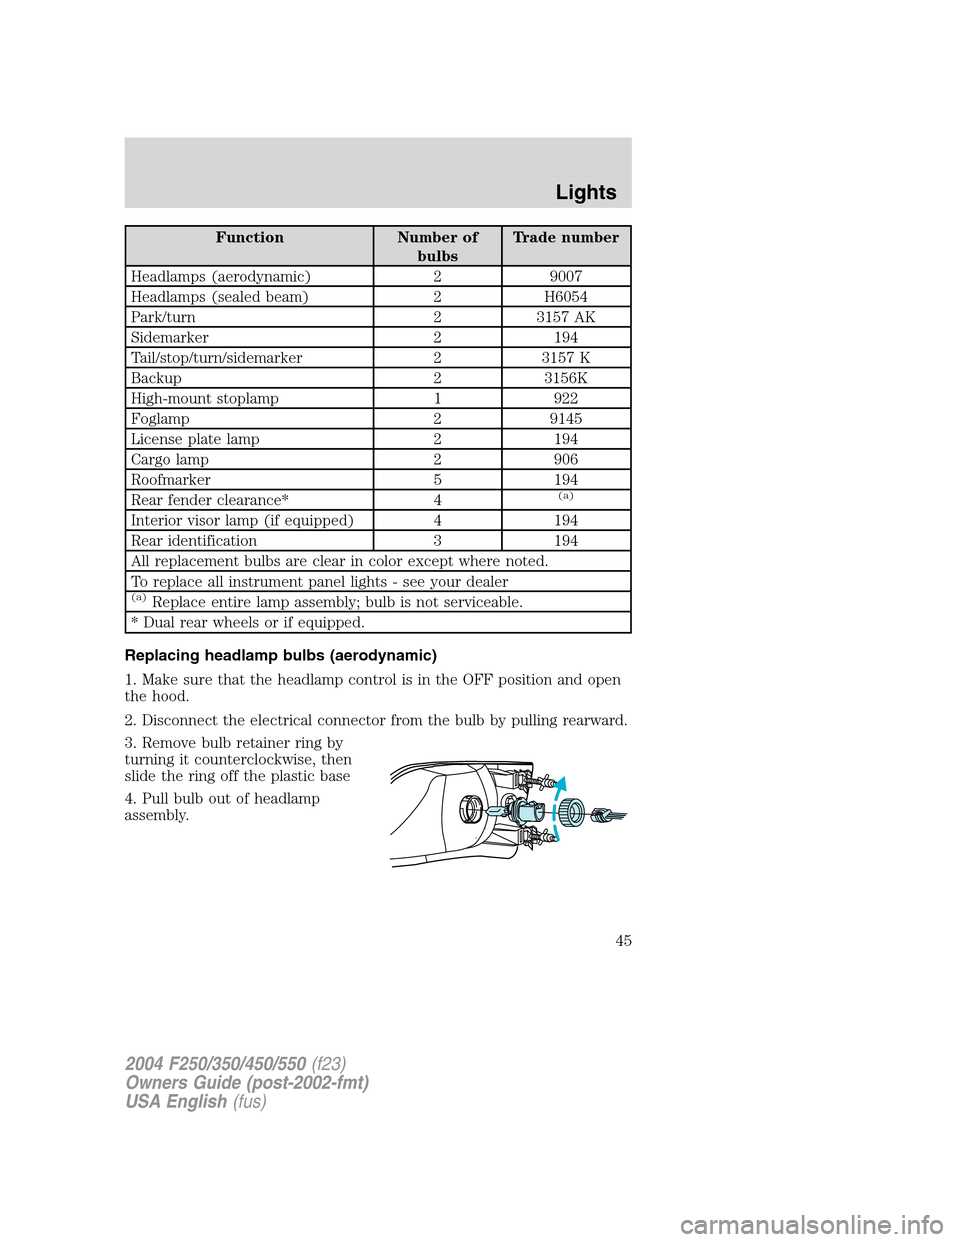
Function Number of
bulbsTrade number
Headlamps (aerodynamic) 2 9007
Headlamps (sealed beam) 2 H6054
Park/turn 2 3157 AK
Sidemarker 2 194
Tail/stop/turn/sidemarker 2 3157 K
Backup 2 3156K
High-mount stoplamp 1 922
Foglamp 2 9145
License plate lamp 2 194
Cargo lamp 2 906
Roofmarker 5 194
Rear fender clearance* 4
(a)
Interior visor lamp (if equipped) 4 194
Rear identification 3 194
All replacement bulbs are clear in color except where noted.
To replace all instrument panel lights - see your dealer
(a)Replace entire lamp assembly; bulb is not serviceable.
* Dual rear wheels or if equipped.
Replacing headlamp bulbs (aerodynamic)
1. Make sure that the headlamp control is in the OFF position and open
the hood.
2. Disconnect the electrical connector from the bulb by pulling rearward.
3. Remove bulb retainer ring by
turning it counterclockwise, then
slide the ring off the plastic base
4. Pull bulb out of headlamp
assembly.
2004 F250/350/450/550(f23)
Owners Guide (post-2002-fmt)
USA English(fus)
Lights
45
Page 47 of 304
Replacing front parking/turn signal bulbs
1. Make sure headlamp switch is in OFF position and open the hood.
2. Remove the two screws and
carefully disengage parking
lamp/turn signal assembly from the
vehicle.
3. Disconnect the electrical
connectors from the parking
lamp/side marker assembly and
remove.
4. Rotate bulb socket
counterclockwise and remove from
lamp assembly.
5. Carefully pull bulb straight out of
the socket and push in the new
bulb.
Install the new bulb(s) in reverse order.
Replacing tail lamp/turn/backup lamp bulbs — F250/F350 only
1. Make sure the headlamp switch is
in the OFF position and then open
the tailgate to expose the lamp
assemblies.
2. Remove the two bolts from the
tail lamp assembly and carefully pull
the lamp assembly from the tailgate
pillar by releasing the two retaining
tabs.
2004 F250/350/450/550(f23)
Owners Guide (post-2002-fmt)
USA English(fus)
Lights
47
Page 48 of 304
3. Rotate the bulb socket counterclockwise and remove from lamp
assembly.
4. Pull the bulb straight out of the socket.
Install the new bulb(s) in reverse order.
Replacing brake/tail/backup lamp bulbs—F450/F550 only
1. Make sure the headlamp switch is
in the OFF position.
2. Remove the four screws and the
lamp lens from lamp assembly.
3. Carefully pull the bulb straight
out of the socket and push in the
new bulb.
Replacing cargo lamp and high-mount brakelamp bulbs
1. Make sure the headlamp switch is
in the OFF position.
2. Remove the two screws and lamp
assembly from vehicle as wiring
permits.
3. Remove the bulb socket by
rotating counterclockwise.
4. Pull the bulb straight out of the
socket.
2004 F250/350/450/550(f23)
Owners Guide (post-2002-fmt)
USA English(fus)
Lights
48
Page 49 of 304
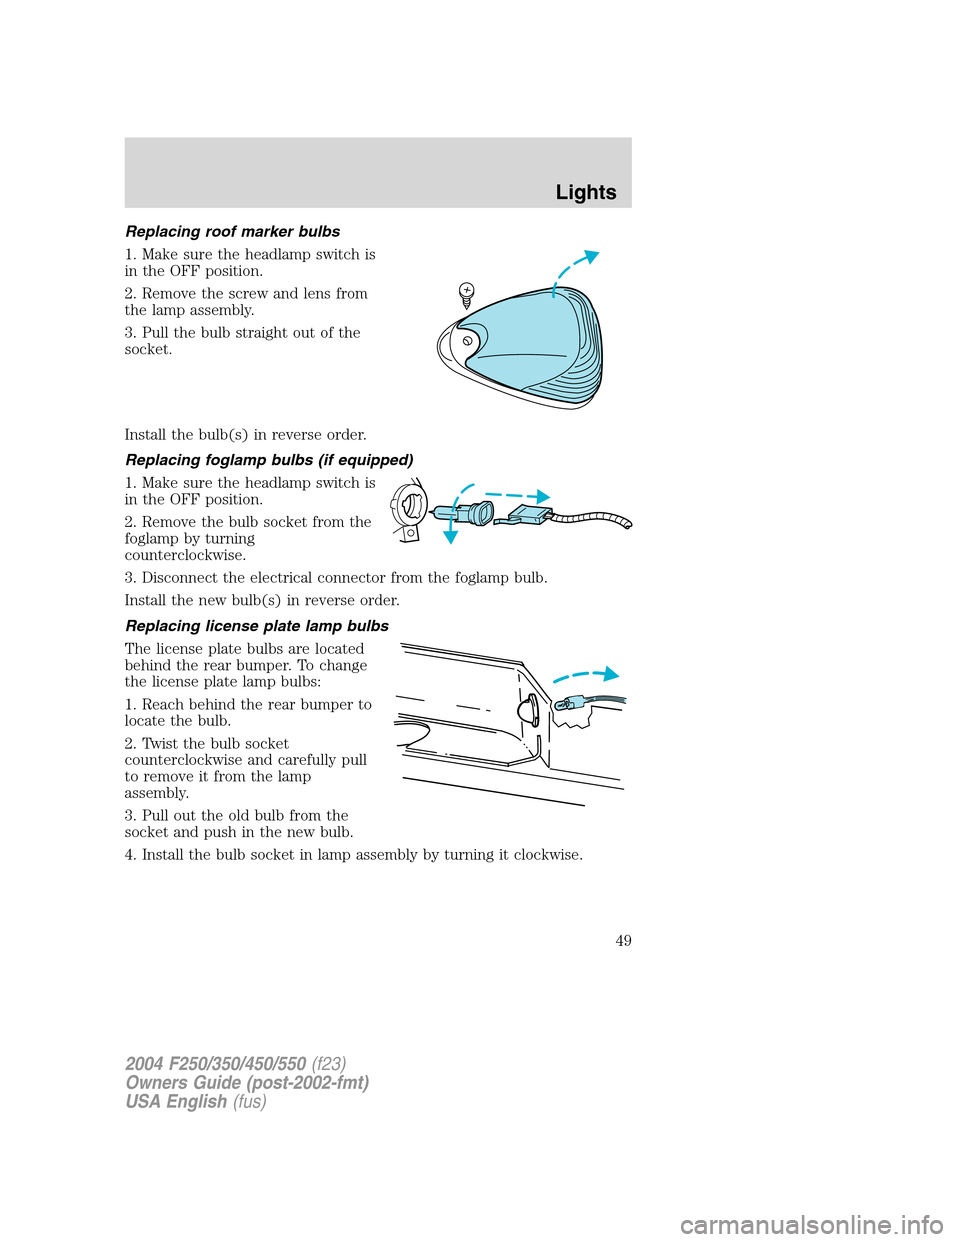
Replacing roof marker bulbs
1. Make sure the headlamp switch is
in the OFF position.
2. Remove the screw and lens from
the lamp assembly.
3. Pull the bulb straight out of the
socket.
Install the bulb(s) in reverse order.
Replacing foglamp bulbs (if equipped)
1. Make sure the headlamp switch is
in the OFF position.
2. Remove the bulb socket from the
foglamp by turning
counterclockwise.
3. Disconnect the electrical connector from the foglamp bulb.
Install the new bulb(s) in reverse order.
Replacing license plate lamp bulbs
The license plate bulbs are located
behind the rear bumper. To change
the license plate lamp bulbs:
1. Reach behind the rear bumper to
locate the bulb.
2. Twist the bulb socket
counterclockwise and carefully pull
to remove it from the lamp
assembly.
3. Pull out the old bulb from the
socket and push in the new bulb.
4. Install the bulb socket in lamp assembly by turning it clockwise.
2004 F250/350/450/550(f23)
Owners Guide (post-2002-fmt)
USA English(fus)
Lights
49