Page 36 of 120
Do not use replacement tires with lower load carrying capacities
than the originals because they may lower the vehicle’s GVWR
and GAWR limitations. Replacement tires with a higher limit than the
originals do not increase the GVWR and GAWR limitations.
Exceeding any vehicle weight rating limitation could result in
serious damage to the vehicle and/or personal injury.
TRAILER TOWING
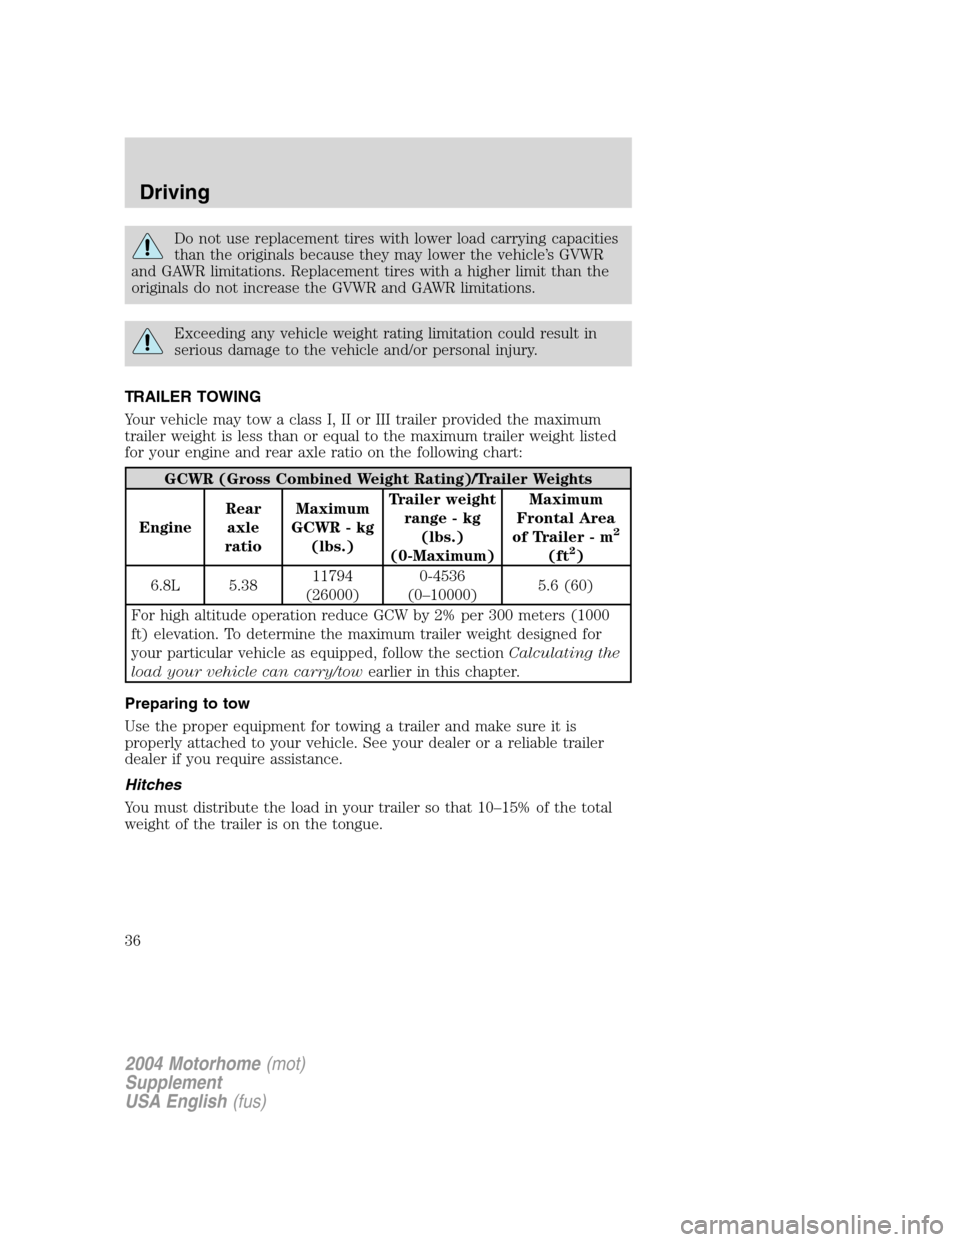
Your vehicle may tow a class I, II or III trailer provided the maximum
trailer weight is less than or equal to the maximum trailer weight listed
for your engine and rear axle ratio on the following chart:
GCWR (Gross Combined Weight Rating)/Trailer Weights
EngineRear
axle
ratioMaximum
GCWR - kg
(lbs.)Trailer weight
range - kg
(lbs.)
(0-Maximum)Maximum
Frontal Area
of Trailer - m
2
(ft2)
6.8L 5.3811794
(26000)0-4536
(0–10000)5.6 (60)
For high altitude operation reduce GCW by 2% per 300 meters (1000
ft) elevation. To determine the maximum trailer weight designed for
your particular vehicle as equipped, follow the sectionCalculating the
load your vehicle can carry/towearlier in this chapter.
Preparing to tow
Use the proper equipment for towing a trailer and make sure it is
properly attached to your vehicle. See your dealer or a reliable trailer
dealer if you require assistance.
Hitches
You must distribute the load in your trailer so that 10–15% of the total
weight of the trailer is on the tongue.
2004 Motorhome(mot)
Supplement
USA English(fus)
Driving
36
Page 38 of 120
Trailer lamps
Trailer lamps are required on most towed vehicles. Make sure all running
lights, brake lights, turn signals and hazard lights are working. See your
dealer or trailer rental agency for proper instructions and equipment for
hooking up trailer lamps.
Driving while you tow
When towing a trailer:
•Turn off the speed control. The speed control may shut off
automatically when you are towing on long, steep grades.
•Consult your local motor vehicle speed regulations for towing a trailer.
•To eliminate excessive shifting, use a lower gear. This will also assist
in transmission cooling.
•Anticipate stops and brake gradually.
Servicing after towing
If you tow a trailer for long distances, your vehicle will require more
frequent service intervals. Refer to your scheduled maintenance guide for
more information.
Trailer towing tips
•Practice turning, stopping and backing up before starting on a trip to
get the feel of the vehicle trailer combination. When turning, make
wider turns so the trailer wheels will clear curbs and other obstacles.
•Allow more distance for stopping with a trailer attached.
•If you are driving down a long or steep hill, shift to a lower gear. Do
not apply the brakes continuously, as they may overheat and become
less effective.
•The trailer tongue weight should be 10–15% of the loaded trailer
weight.
•After you have traveled 80 km (50 miles), thoroughly check your
hitch, electrical connections and trailer wheel lug nuts.
•To aid in engine/transmission cooling and A/C efficiency during hot
weather while stopped in traffic, place the gearshift lever in P (Park).
•Vehicles with trailers should not be parked on a grade. If you must
park on a grade, place wheel chocks under the trailer’s wheels.
2004 Motorhome(mot)
Supplement
USA English(fus)
Driving
38
Page 40 of 120
HAZARD LIGHTS CONTROL
Use only in an emergency to warn traffic of vehicle breakdown,
approaching danger, etc. The hazard flashers can be operated when the
ignition is off.
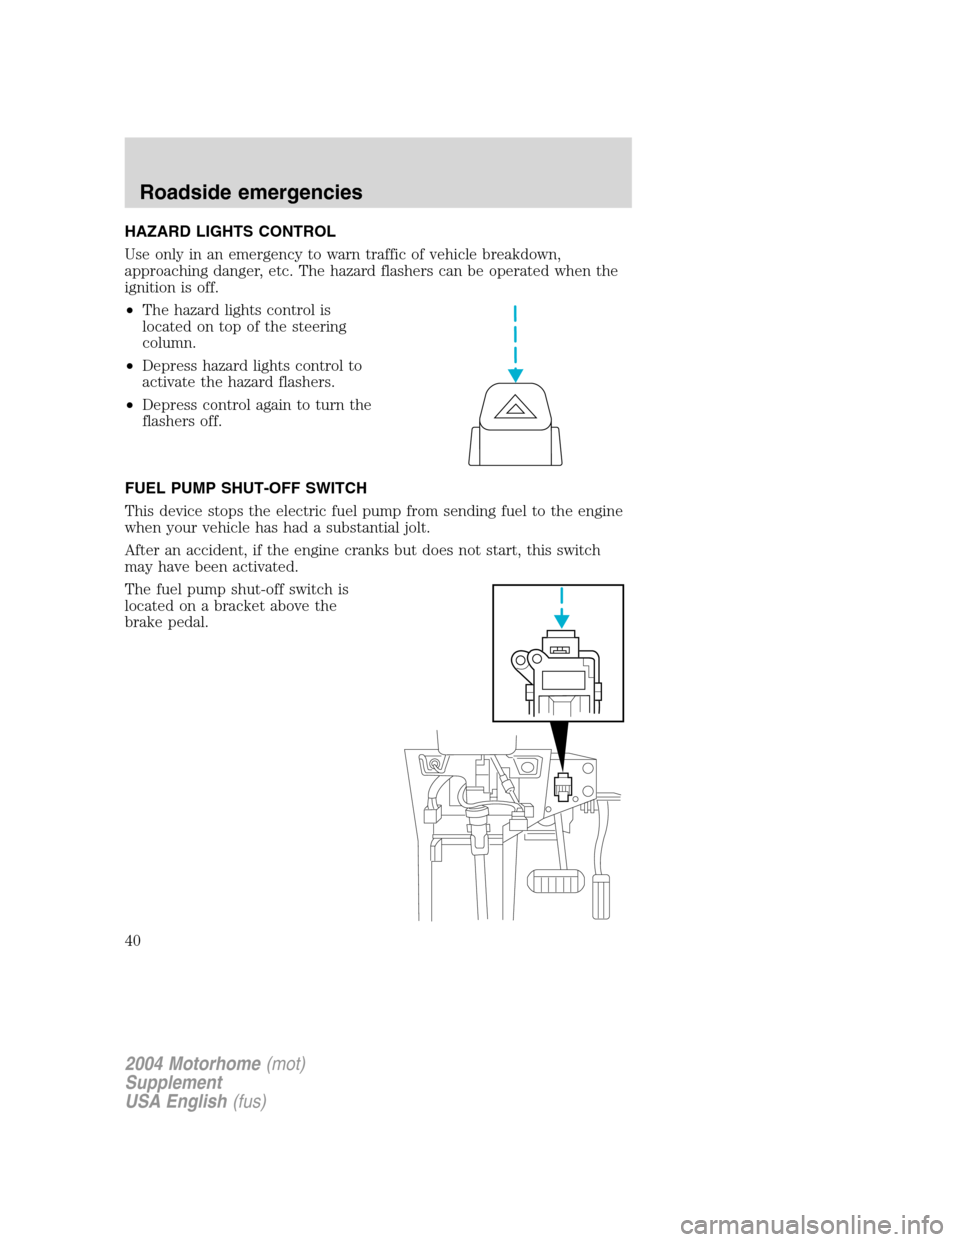
•The hazard lights control is
located on top of the steering
column.
•Depress hazard lights control to
activate the hazard flashers.
•Depress control again to turn the
flashers off.
FUEL PUMP SHUT-OFF SWITCH
This device stops the electric fuel pump from sending fuel to the engine
when your vehicle has had a substantial jolt.
After an accident, if the engine cranks but does not start, this switch
may have been activated.
The fuel pump shut-off switch is
located on a bracket above the
brake pedal.
2004 Motorhome(mot)
Supplement
USA English(fus)
Roadside emergencies
40
Page 45 of 120
Power distribution box
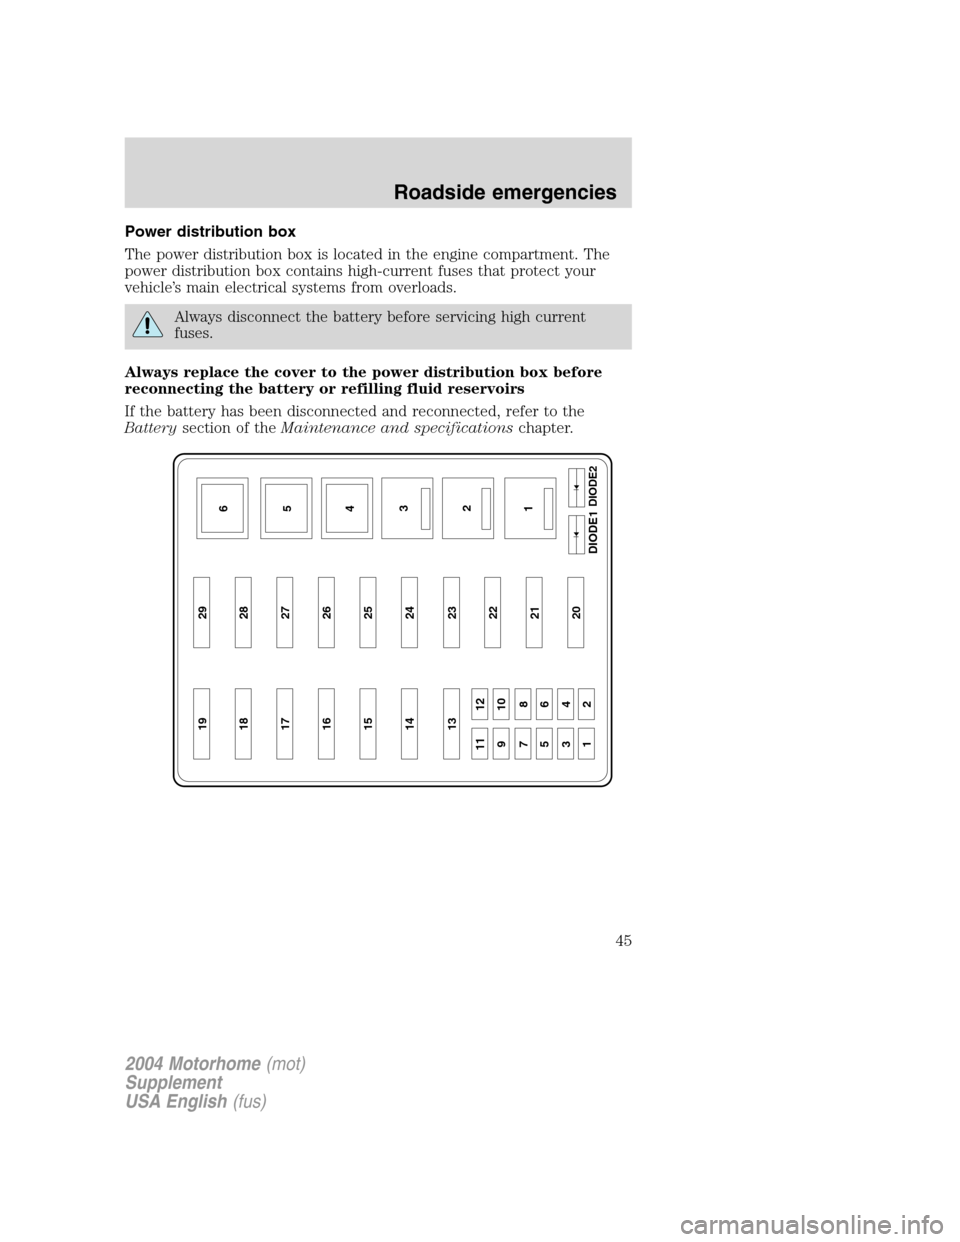
The power distribution box is located in the engine compartment. The
power distribution box contains high-current fuses that protect your
vehicle’s main electrical systems from overloads.
Always disconnect the battery before servicing high current
fuses.
Always replace the cover to the power distribution box before
reconnecting the battery or refilling fluid reservoirs
If the battery has been disconnected and reconnected, refer to the
Batterysection of theMaintenance and specificationschapter.
19 29
18 28
17 27
16 26
15 25
14 24
13
11 12
910
78
56
34
1223
22
21
20
6
5
4
3
2
1DIODE2
DIODE1
2004 Motorhome(mot)
Supplement
USA English(fus)
Roadside emergencies
45
Page 48 of 120
Relay module
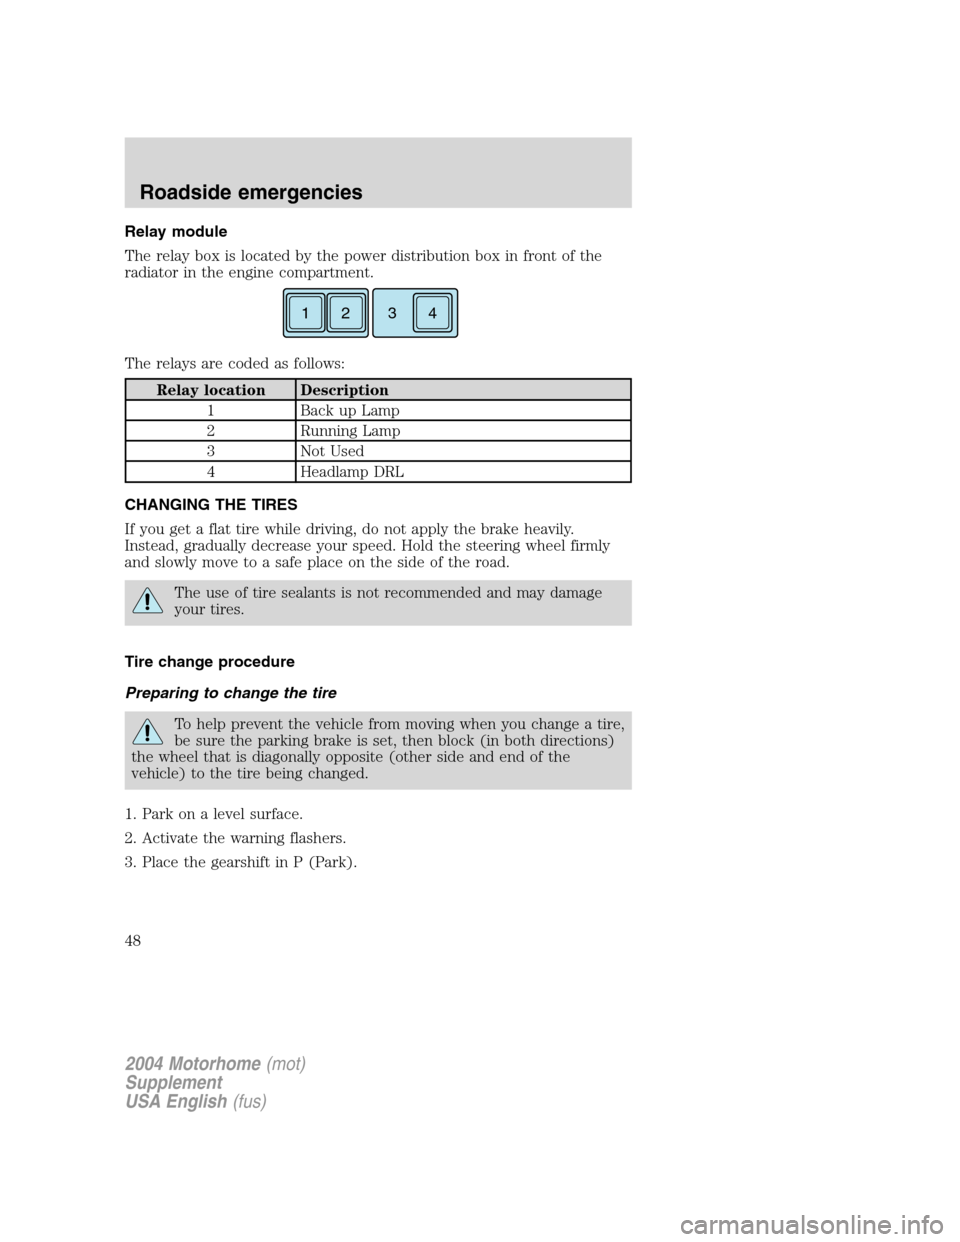
The relay box is located by the power distribution box in front of the
radiator in the engine compartment.
The relays are coded as follows:
Relay location Description
1 Back up Lamp
2 Running Lamp
3 Not Used
4 Headlamp DRL
CHANGING THE TIRES
If you get a flat tire while driving, do not apply the brake heavily.
Instead, gradually decrease your speed. Hold the steering wheel firmly
and slowly move to a safe place on the side of the road.
The use of tire sealants is not recommended and may damage
your tires.
Tire change procedure
Preparing to change the tire
To help prevent the vehicle from moving when you change a tire,
be sure the parking brake is set, then block (in both directions)
the wheel that is diagonally opposite (other side and end of the
vehicle) to the tire being changed.
1. Park on a level surface.
2. Activate the warning flashers.
3. Place the gearshift in P (Park).
12 43
2004 Motorhome(mot)
Supplement
USA English(fus)
Roadside emergencies
48
Page 49 of 120
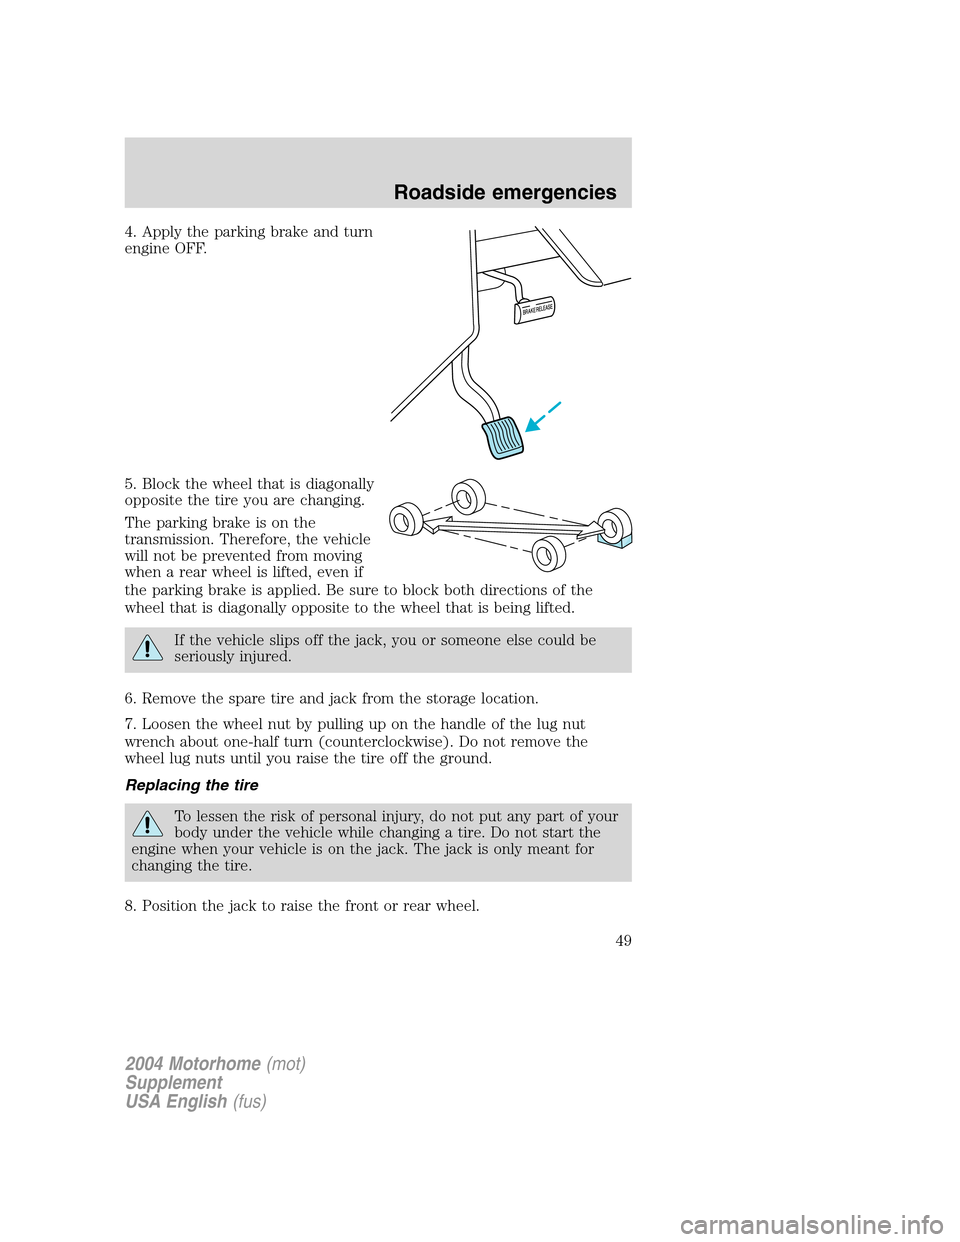
4. Apply the parking brake and turn
engine OFF.
5. Block the wheel that is diagonally
opposite the tire you are changing.
The parking brake is on the
transmission. Therefore, the vehicle
will not be prevented from moving
when a rear wheel is lifted, even if
the parking brake is applied. Be sure to block both directions of the
wheel that is diagonally opposite to the wheel that is being lifted.
If the vehicle slips off the jack, you or someone else could be
seriously injured.
6. Remove the spare tire and jack from the storage location.
7. Loosen the wheel nut by pulling up on the handle of the lug nut
wrench about one-half turn (counterclockwise). Do not remove the
wheel lug nuts until you raise the tire off the ground.
Replacing the tire
To lessen the risk of personal injury, do not put any part of your
body under the vehicle while changing a tire. Do not start the
engine when your vehicle is on the jack. The jack is only meant for
changing the tire.
8. Position the jack to raise the front or rear wheel.
2004 Motorhome(mot)
Supplement
USA English(fus)
Roadside emergencies
49
Page 53 of 120
3. Park the booster vehicle close to the hood of the disabled vehicle
making sure the two vehiclesdo nottouch. Set the parking brake on
both vehicles and stay clear of the engine cooling fan and other moving
parts.
4. Check all battery terminals and remove any excessive corrosion before
you attach the battery cables. Ensure that vent caps are tight and level.
5. Turn the heater fan on in both vehicles to protect any electrical
surges. Turn all other accessories off.
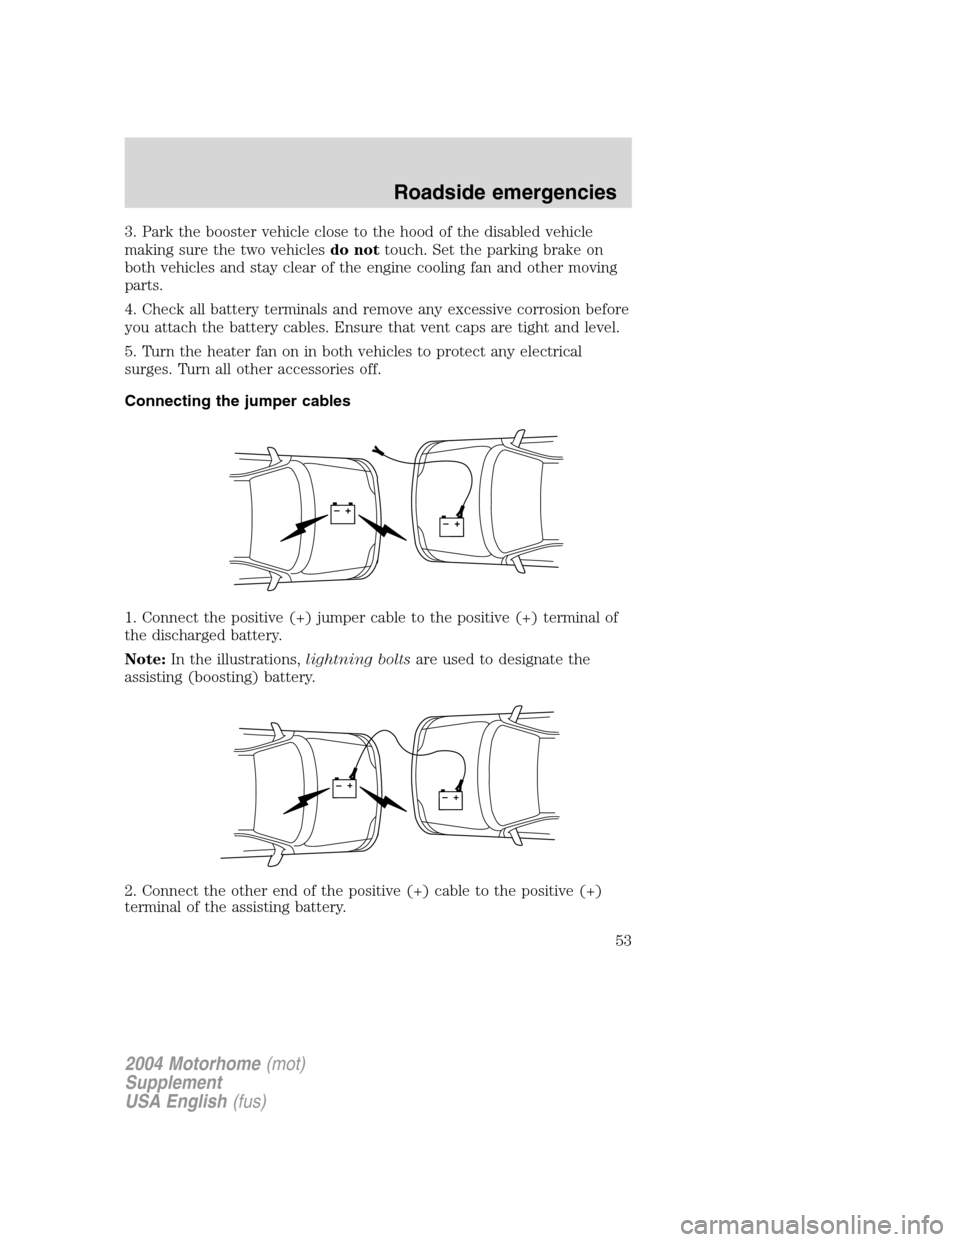
Connecting the jumper cables
1. Connect the positive (+) jumper cable to the positive (+) terminal of
the discharged battery.
Note:In the illustrations,lightning boltsare used to designate the
assisting (boosting) battery.
2. Connect the other end of the positive (+) cable to the positive (+)
terminal of the assisting battery.
+–+–
+–+–
2004 Motorhome(mot)
Supplement
USA English(fus)
Roadside emergencies
53
Page 54 of 120
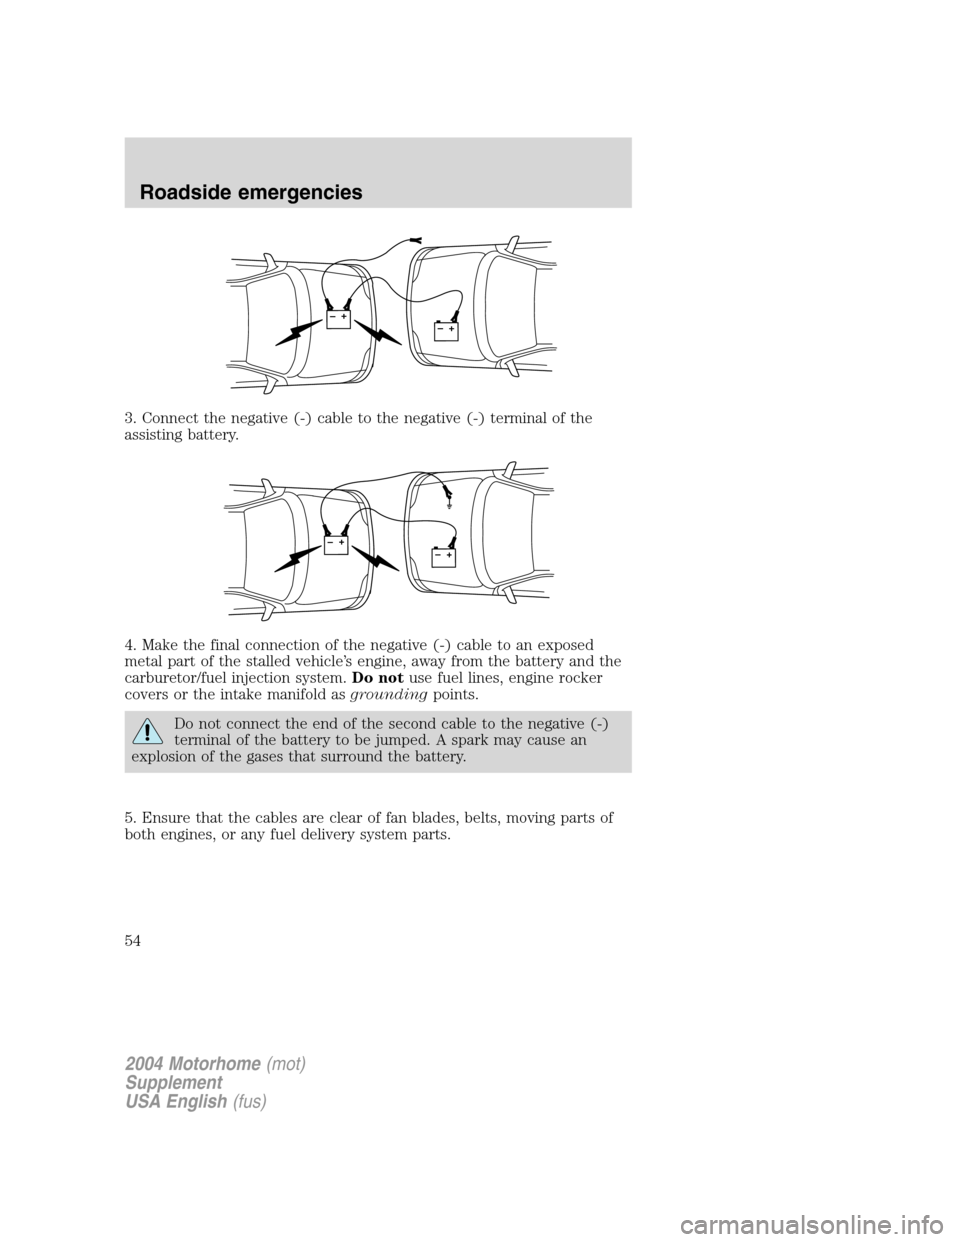
3. Connect the negative (-) cable to the negative (-) terminal of the
assisting battery.
4. Make the final connection of the negative (-) cable to an exposed
metal part of the stalled vehicle’s engine, away from the battery and the
carburetor/fuel injection system.Do notuse fuel lines, engine rocker
covers or the intake manifold asgroundingpoints.
Do not connect the end of the second cable to the negative (-)
terminal of the battery to be jumped. A spark may cause an
explosion of the gases that surround the battery.
5. Ensure that the cables are clear of fan blades, belts, moving parts of
both engines, or any fuel delivery system parts.
+–+–
+–+–
2004 Motorhome(mot)
Supplement
USA English(fus)
Roadside emergencies
54