Page 2 of 296
Seating and Safety Restraints 94
Seating 94
Safety restraints 103
Air bags 116
Child restraints 124
Driving 137
Starting 137
Brakes 140
Traction control/AdvanceTrac 143
Transmission operation 147
Vehicle loading 171
Trailer towing 175
Roadside Emergencies 181
Getting roadside assistance 181
Hazard flasher switch 182
Fuel pump shut-off switch 182
Fuses and relays 183
Changing tires 194
Jump starting 203
Wrecker towing 209
Customer Assistance 210
Reporting safety defects (U.S. only) 218
Cleaning 219
2004 Explorer(exp)
Owners Guide (post-2002-fmt)
USA English(fus)
Table of Contents
2
Page 6 of 296

SPECIAL NOTICES
Emission warranty
The New Vehicle Limited Warranty includes Bumper-to-Bumper
Coverage, Safety Restraint Coverage, Corrosion Coverage, and 6.0L
Power Stroke Diesel Engine Coverage. In addition, your vehicle is eligible
for Emissions Defect and Emissions Performance Warranties. For a
detailed description of what is covered and what is not covered, refer to
theWarranty Guidethat is provided to you along with your Owner’s
Guide.
Special instructions
For your added safety, your vehicle is fitted with sophisticated electronic
controls.
Please read the sectionSupplemental Restraint System (SRS)
in theSeating and Safety Restraintschapter. Failure to follow
the specific warnings and instructions could result in personal injury.
Front seat mounted rear facing child or infant seats should
NEVERbe used in front of a passenger side air bag unless the
air bag can be and is turned OFF.
Data Recording
Computers in your vehicle are capable of recording detailed data
potentially including but not limited to information such as:
•the use of restraint systems including seat belts by the driver and
passengers,
•information about the performance of various systems and modules in
the vehicle, and
•information related to engine, throttle, steering, brake or other system
status.
Any of this information could potentially include information regarding
how the driver operates the vehicle, potentially including but not limited
to information regarding vehicle speed, brake or accelerator application,
or steering input. This information may be stored during regular
operation or in a crash or near crash event.
2004 Explorer(exp)
Owners Guide (post-2002-fmt)
USA English(fus)
Introduction
6
Page 8 of 296
These are some of the symbols you may see on your vehicle.
Vehicle Symbol Glossary
Safety Alert
See Owner’s Guide
Fasten Safety BeltAir Bag-Front
Air Bag-SideChild Seat
Child Seat Installation
WarningChild Seat Lower
Anchor
Child Seat Tether
AnchorBrake System
Anti-Lock Brake SystemBrake Fluid -
Non-Petroleum Based
Traction ControlAdvanceTrac�
Master Lighting SwitchHazard Warning Flasher
Fog Lamps-FrontFuse Compartment
Fuel Pump ResetWindshield Wash/Wipe
Windshield
Defrost/DemistRear Window
Defrost/Demist
2004 Explorer(exp)
Owners Guide (post-2002-fmt)
USA English(fus)
Introduction
8
Page 11 of 296

On board diagnostics (OBD-II)in theMaintenance and Specifications
chapter. If the light is blinking, engine misfire is occurring which could
damage your catalytic converter. Drive in a moderate fashion (avoid
heavy acceleration and deceleration) and have your vehicle serviced
immediately.
Under engine misfire conditions, excessive exhaust temperatures
could damage the catalytic converter, the fuel system, interior
floor coverings or other vehicle components, possibly causing a fire.
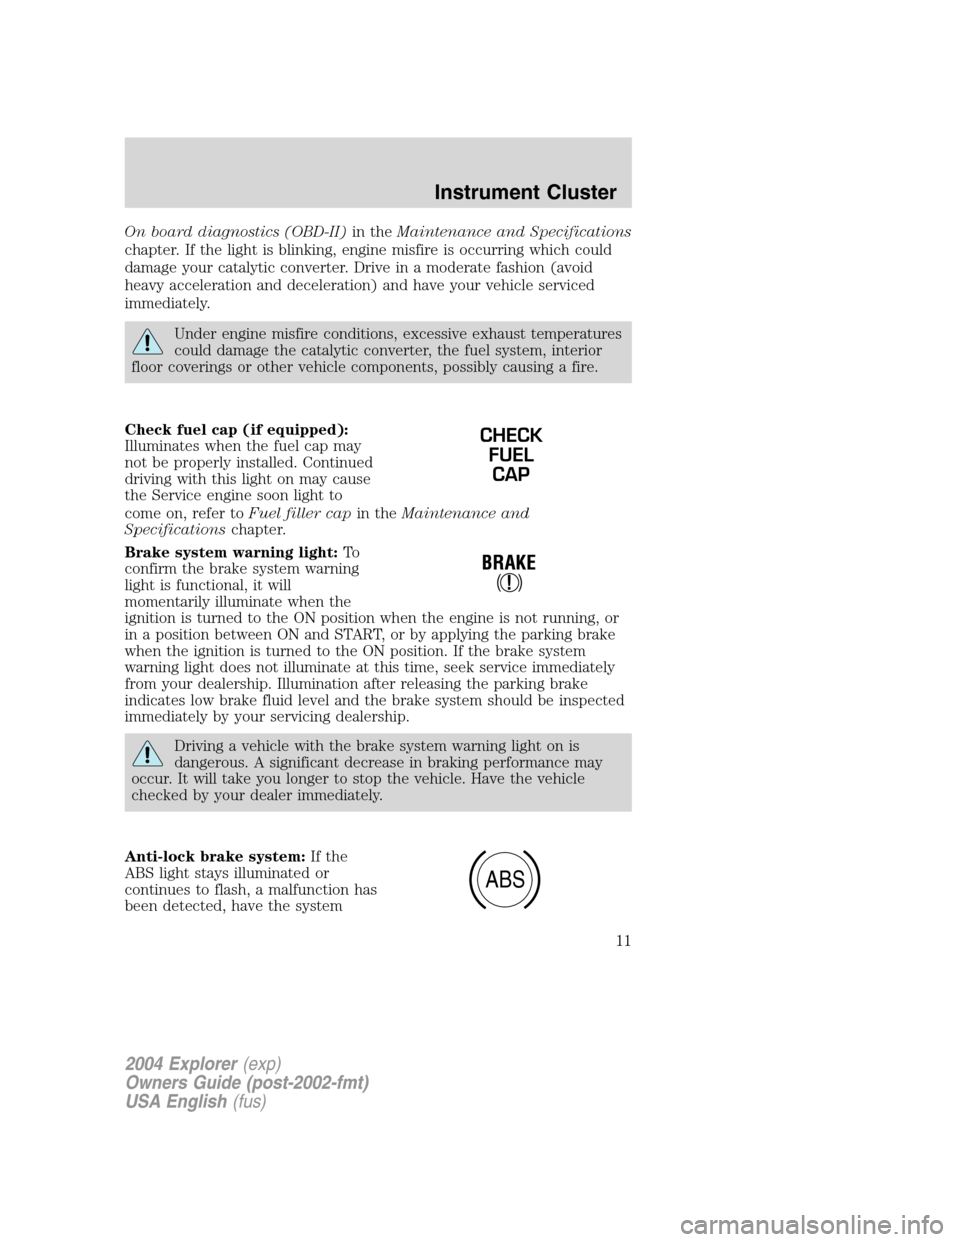
Check fuel cap (if equipped):
Illuminates when the fuel cap may
not be properly installed. Continued
driving with this light on may cause
the Service engine soon light to
come on, refer toFuel filler capin theMaintenance and
Specificationschapter.
Brake system warning light:To
confirm the brake system warning
light is functional, it will
momentarily illuminate when the
ignition is turned to the ON position when the engine is not running, or
in a position between ON and START, or by applying the parking brake
when the ignition is turned to the ON position. If the brake system
warning light does not illuminate at this time, seek service immediately
from your dealership. Illumination after releasing the parking brake
indicates low brake fluid level and the brake system should be inspected
immediately by your servicing dealership.
Driving a vehicle with the brake system warning light on is
dangerous. A significant decrease in braking performance may
occur. It will take you longer to stop the vehicle. Have the vehicle
checked by your dealer immediately.
Anti-lock brake system:If the
ABS light stays illuminated or
continues to flash, a malfunction has
been detected, have the system
CHECK
FUEL
CAP
ABS
2004 Explorer(exp)
Owners Guide (post-2002-fmt)
USA English(fus)
Instrument Cluster
11
Page 12 of 296

serviced immediately. Normal braking is still functional unless the brake
warning light also is illuminated.
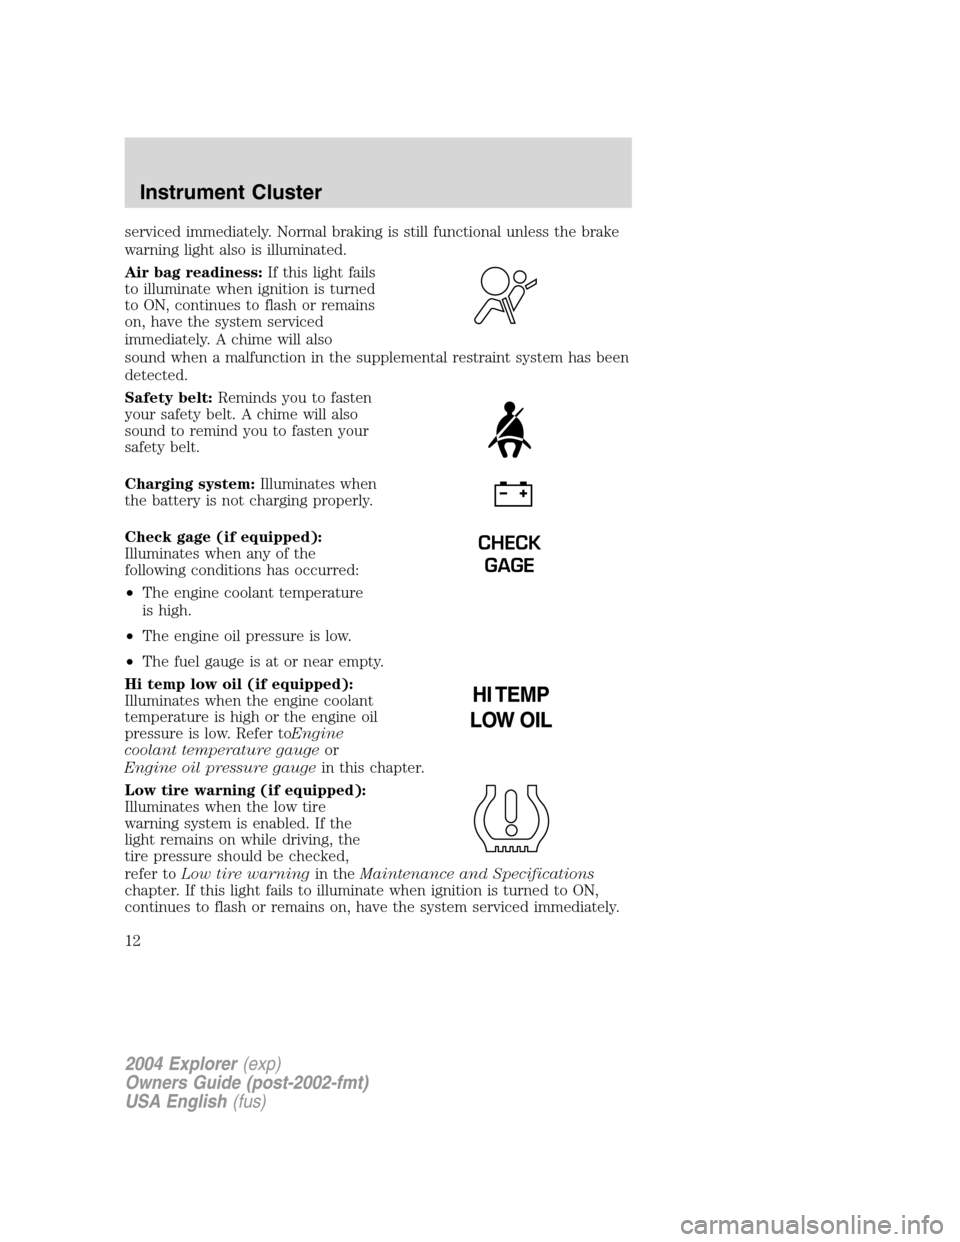
Air bag readiness:If this light fails
to illuminate when ignition is turned
to ON, continues to flash or remains
on, have the system serviced
immediately. A chime will also
sound when a malfunction in the supplemental restraint system has been
detected.
Safety belt:Reminds you to fasten
your safety belt. A chime will also
sound to remind you to fasten your
safety belt.
Charging system:Illuminates when
the battery is not charging properly.
Check gage (if equipped):
Illuminates when any of the
following conditions has occurred:
•The engine coolant temperature
is high.
•The engine oil pressure is low.
•The fuel gauge is at or near empty.
Hi temp low oil (if equipped):
Illuminates when the engine coolant
temperature is high or the engine oil
pressure is low. Refer toEngine
coolant temperature gaugeor
Engine oil pressure gaugein this chapter.
Low tire warning (if equipped):
Illuminates when the low tire
warning system is enabled. If the
light remains on while driving, the
tire pressure should be checked,
refer toLow tire warningin theMaintenance and Specifications
chapter. If this light fails to illuminate when ignition is turned to ON,
continues to flash or remains on, have the system serviced immediately.
CHECK
GAGE
2004 Explorer(exp)
Owners Guide (post-2002-fmt)
USA English(fus)
Instrument Cluster
12
Page 37 of 296

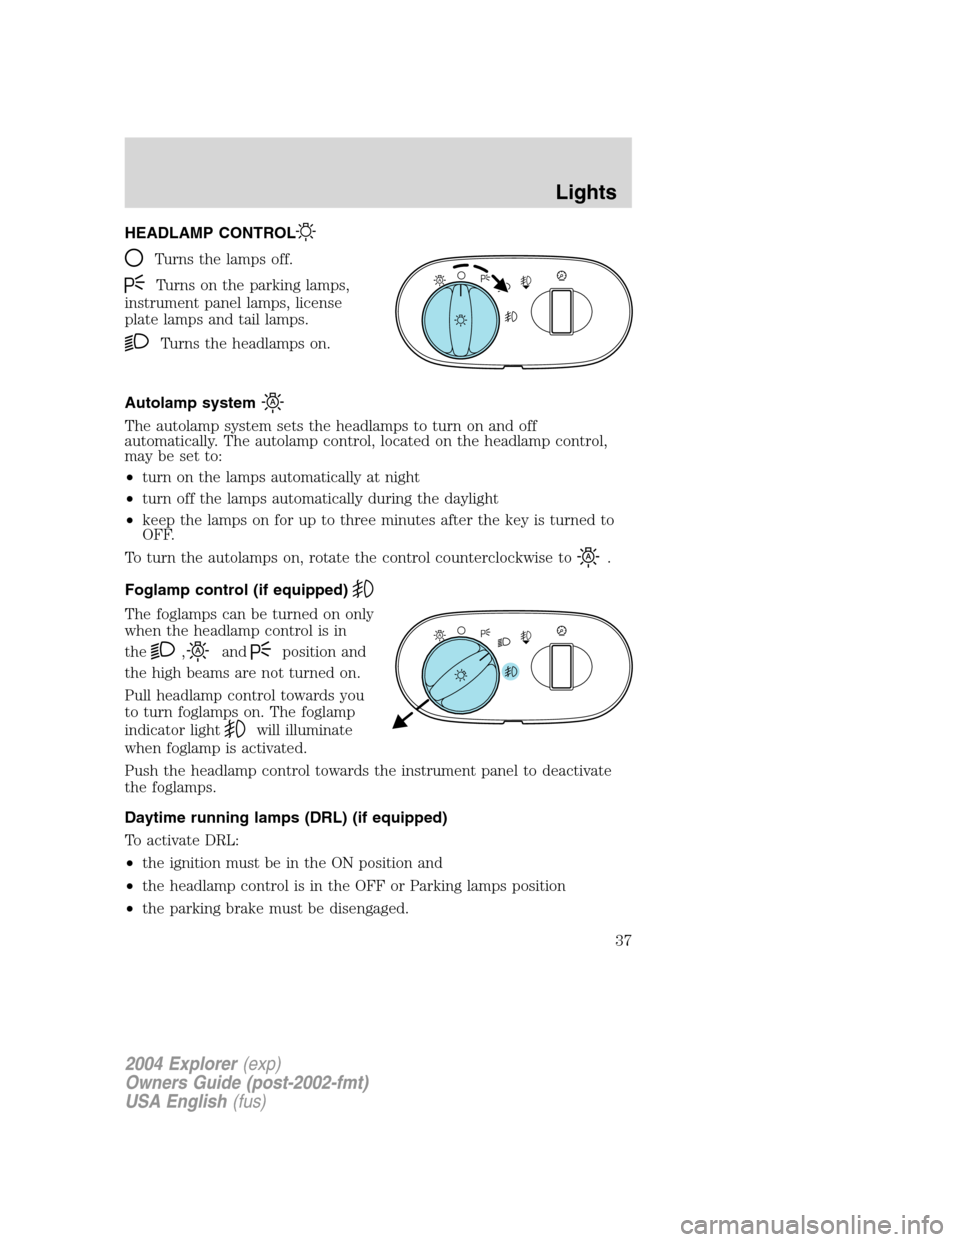
HEADLAMP CONTROL
Turns the lamps off.
Turns on the parking lamps,
instrument panel lamps, license
plate lamps and tail lamps.
Turns the headlamps on.
Autolamp system
The autolamp system sets the headlamps to turn on and off
automatically. The autolamp control, located on the headlamp control,
may be set to:
•turn on the lamps automatically at night
•turn off the lamps automatically during the daylight
•keep the lamps on for up to three minutes after the key is turned to
OFF.
To turn the autolamps on, rotate the control counterclockwise to
.
Foglamp control (if equipped)
The foglamps can be turned on only
when the headlamp control is in
the
,andposition and
the high beams are not turned on.
Pull headlamp control towards you
to turn foglamps on. The foglamp
indicator light
will illuminate
when foglamp is activated.
Push the headlamp control towards the instrument panel to deactivate
the foglamps.
Daytime running lamps (DRL) (if equipped)
To activate DRL:
•the ignition must be in the ON position and
•the headlamp control is in the OFF or Parking lamps position
•the parking brake must be disengaged.
A
A
2004 Explorer(exp)
Owners Guide (post-2002-fmt)
USA English(fus)
Lights
Lights
37
Page 44 of 296

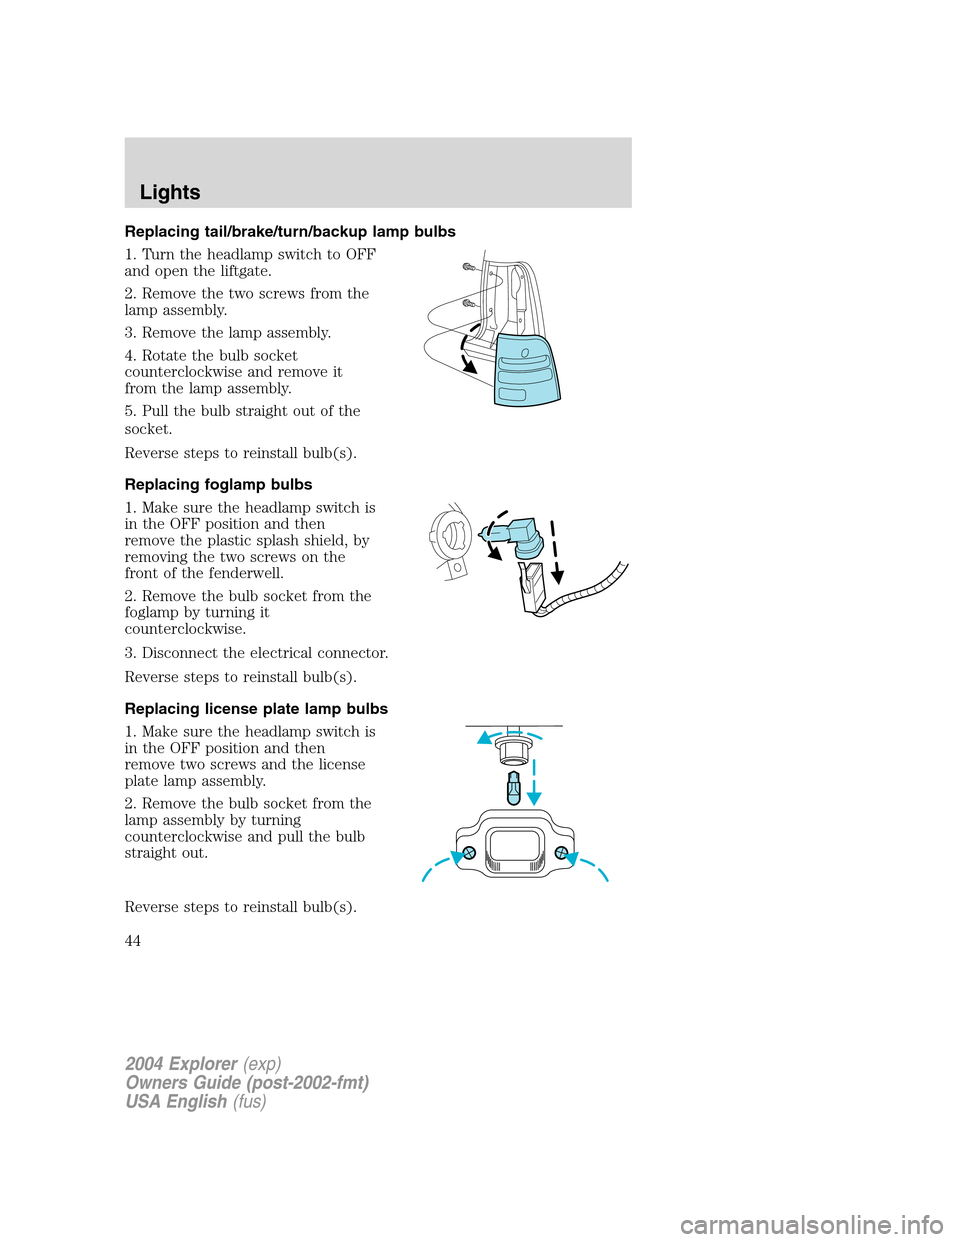
Replacing tail/brake/turn/backup lamp bulbs
1. Turn the headlamp switch to OFF
and open the liftgate.
2. Remove the two screws from the
lamp assembly.
3. Remove the lamp assembly.
4. Rotate the bulb socket
counterclockwise and remove it
from the lamp assembly.
5. Pull the bulb straight out of the
socket.
Reverse steps to reinstall bulb(s).
Replacing foglamp bulbs
1. Make sure the headlamp switch is
in the OFF position and then
remove the plastic splash shield, by
removing the two screws on the
front of the fenderwell.
2. Remove the bulb socket from the
foglamp by turning it
counterclockwise.
3. Disconnect the electrical connector.
Reverse steps to reinstall bulb(s).
Replacing license plate lamp bulbs
1. Make sure the headlamp switch is
in the OFF position and then
remove two screws and the license
plate lamp assembly.
2. Remove the bulb socket from the
lamp assembly by turning
counterclockwise and pull the bulb
straight out.
Reverse steps to reinstall bulb(s).
2004 Explorer(exp)
Owners Guide (post-2002-fmt)
USA English(fus)
Lights
44
Page 45 of 296
Replacing high-mount brakelamp bulb
1. Remove the two screws and lamp
assembly from vehicle.
2. Remove the bulb socket from the
lamp assembly by depressing the
snaps and pull the bulb straight out.
Reverse steps to reinstall bulb(s).
2004 Explorer(exp)
Owners Guide (post-2002-fmt)
USA English(fus)
Lights
45