2004 FORD EXPEDITION lock
[x] Cancel search: lockPage 287 of 344
2. If the engine oil level is not within the normal range, add only certified
engine oil of the recommended viscosity. Remove the engine oil filler cap
and use a funnel to pour the engine oil into the opening.
3. Recheck the engine oil level. Make sure the oil level is not above the
MAX mark on the engine oil level indicator (dipstick).
4. Install the indicator and ensure it is fully seated.
5. Fully install the engine oil filler cap by turning the filler cap clockwise
1/4 of a turn until the cap is fully seated.
To avoid possible oil loss, DO NOT operate the vehicle with the
engine oil level indicator and/or the engine oil filler cap removed.
Engine oil and filter recommendations
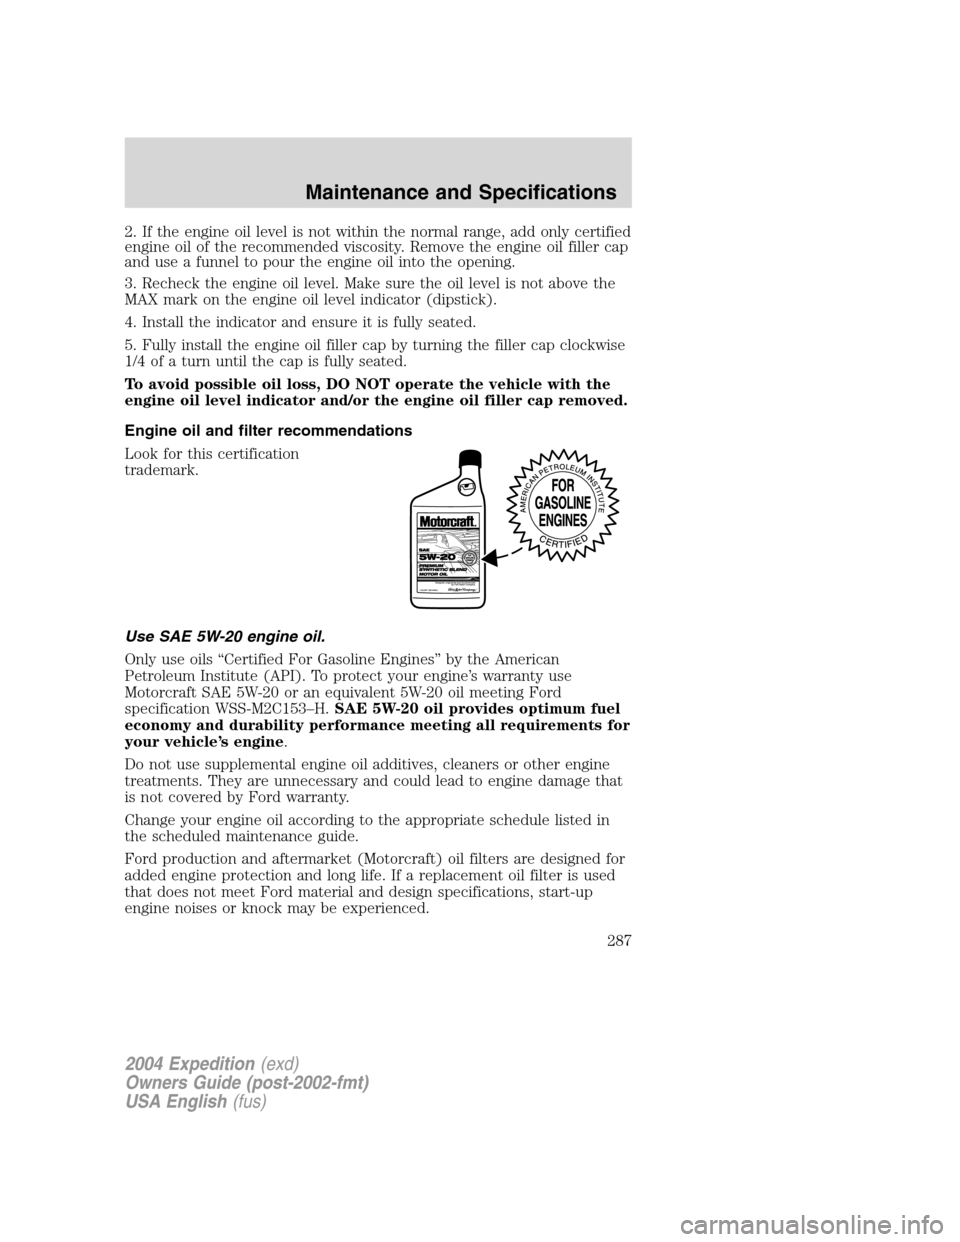
Look for this certification
trademark.
Use SAE 5W-20 engine oil.
Only use oils“Certified For Gasoline Engines”by the American
Petroleum Institute (API). To protect your engine’s warranty use
Motorcraft SAE 5W-20 or an equivalent 5W-20 oil meeting Ford
specification WSS-M2C153–H.SAE 5W-20 oil provides optimum fuel
economy and durability performance meeting all requirements for
your vehicle’s engine.
Do not use supplemental engine oil additives, cleaners or other engine
treatments. They are unnecessary and could lead to engine damage that
is not covered by Ford warranty.
Change your engine oil according to the appropriate schedule listed in
the scheduled maintenance guide.
Ford production and aftermarket (Motorcraft) oil filters are designed for
added engine protection and long life. If a replacement oil filter is used
that does not meet Ford material and design specifications, start-up
engine noises or knock may be experienced.
2004 Expedition(exd)
Owners Guide (post-2002-fmt)
USA English(fus)
Maintenance and Specifications
287
Page 290 of 344

battery. When the battery is disconnected or a new battery is installed,
the engine must relearn its idle and fuel trim strategy for optimum
driveability and performance. To begin this process:
1. With the vehicle at a complete stop, set the parking brake.
2. Put the gearshift in P (Park), turn off all accessories and start the
engine.
3. Run the engine until it reaches normal operating temperature.
4. Allow the engine to idle for at least one minute.
5. Turn the A/C on and allow the engine to idle for at least one minute.
6. With your foot on the brake pedal and with the A/C on, put the
vehicle in D (Drive) and allow the engine to idle for at least one minute.
7. Drive the vehicle to complete the relearning process.
•The vehicle may need to be driven 16 km (10 miles) or more to
relearn the idle and fuel trim strategy.
•If you do not allow the engine to relearn its idle trim, the idle
quality of your vehicle may be adversely affected until the idle
trim is eventually relearned.
If the battery has been disconnected or a new battery has been installed,
the clock and the preset radio stations must be reset once the battery is
reconnected.
•Always dispose of automotive
batteries in a responsible manner.
Follow your local authorized
standards for disposal. Call your
local authorized recycling center
to find out more about recycling
automotive batteries.
ENGINE COOLANT
Checking engine coolant
The concentration and level of engine coolant should be checked at the
mileage intervals listed in the scheduled maintenance guide. The coolant
concentration should be maintained at 50/50 coolant and distilled water,
which equates to a freeze point of -36°C (-34°F). Coolant concentration
LEAD
RETURN
RECYCLE
2004 Expedition(exd)
Owners Guide (post-2002-fmt)
USA English(fus)
Maintenance and Specifications
290
Page 293 of 344
•Do not use alcohol, methanol, brine or any engine coolants
mixed with alcohol or methanol antifreeze (coolant).Alcohol
and other liquids can cause engine damage from overheating or
freezing.
•Do not add extra inhibitors or additives to the coolant.These
can be harmful and compromise the corrosion protection of the engine
coolant.
For vehicles with overflow coolant systems with a non-pressurized cap
on the coolant recovery system, add coolant to the coolant recovery
reservoir when the engine is cool. Add the proper mixture of coolant and
water to the“cold full”level. For all other vehicles, which have a coolant
degas system with a pressurized cap, or if it is necessary to remove the
coolant pressure relief cap on the radiator of a vehicle with an overflow
system, follow these steps to add engine coolant.
To reduce the risk of personal injury, make sure the engine is
cool before unscrewing the coolant pressure relief cap. The
cooling system is under pressure; steam and hot liquid can come out
forcefully when the cap is loosened slightly.
1. Before you begin, turn the engine off and let it cool.
2. When the engine is cool, wrap a thick cloth around the coolant
pressure relief cap on the coolant reservoir (a translucent plastic bottle).
Slowly turn cap counterclockwise (left) until pressure begins to release.
3. Step back while the pressure releases.
4. When you are sure that all the pressure has been released, use the
cloth to turn it counterclockwise and remove the cap.
5. Fill the coolant reservoir slowly with the proper coolant mixture (see
above), to within the“cold fill range”or the“cold full”level on the
reservoir. If you removed the radiator cap in an overflow system, fill the
radiator until the coolant is visible and radiator is almost full.
6. Replace the cap. Turn until tightly installed. (Cap must be tightly
installed to prevent coolant loss.)
After any coolant has been added, check the coolant concentration, refer
toChecking Engine Coolantsection. If the concentration is not 50/50
(protection to–34°F/–36°C), drain some coolant and adjust the
concentration. It may take several drains and additions to obtain a 50/50
coolant concentration.
Whenever coolant has been added, the coolant level in the coolant
reservoir should be checked the next few times you drive the vehicle. If
2004 Expedition(exd)
Owners Guide (post-2002-fmt)
USA English(fus)
Maintenance and Specifications
293
Page 298 of 344
When refueling always shut the engine off and never allow
sparks or open flames near the filler neck. Never smoke while
refueling. Fuel vapor is extremely hazardous under certain conditions.
Care should be taken to avoid inhaling excess fumes.
The flow of fuel through a fuel pump nozzle can produce static
electricity, which can cause a fire if fuel is pumped into an
ungrounded fuel container.
Use the following guidelines to avoid static build-up when filling an
ungrounded fuel container:
•Place approved fuel container on the ground.
•DO NOT fill a fuel container while it is in the vehicle (including the
cargo area).
•Keep the fuel pump nozzle in contact with the fuel container while
filling.
•DO NOT use a device that would hold the fuel pump handle in the fill
position.
Fuel Filler Cap
Your fuel tank filler cap has an indexed design with a 1/8 turn on/off
feature.
When fueling your vehicle:
1. Turn the engine off.
2. Carefully turn the filler cap counterclockwise 1/8 of a turn until it
stops.
3. Pull to remove the cap from the fuel filler pipe.
4. To install the cap, align the tabs on the cap with the notches on the
filler pipe.
5. Turn the filler cap clockwise 1/8 of a turn until it stops.
If”Check fuel cap”displays in the message center or the”Service Engine
Soon”indicator (vehicle without message center) comes on and stays on
after you start the engine, the fuel filler cap may not be properly
installed. Turn off the engine, remove the fuel filler cap, align the cap
properly and reinstall it.
If you must replace the fuel filler cap, replace it with a fuel filler
cap that is designed for your vehicle. The customer warranty may
2004 Expedition(exd)
Owners Guide (post-2002-fmt)
USA English(fus)
Maintenance and Specifications
298
Page 328 of 344
of transmission fluid and fluid level should be set by the indication on
the dipstick’s normal operating range.
3Add the coolant type originally equipped in your vehicle.
4Your vehicle’s rear axle is filled with a synthetic rear axle lubricant and
is considered lubricated for life. These lubricants are not to be checked
or changed unless a leak is suspected, service is required or the axle has
been submerged in water. The axle lubricant should be changed any time
the axle has been submerged in water.
Service refill capacities are determined by filling the rear axle 23mm
(0.9 inch) below the bottom of the filler hole.
5Add 118 ml (4 oz.) of Additive Friction Modifier XL-3 (or equivalent)
meeting Ford specification EST-M2C118–A for complete refill of Limited
Slip axles. For complete refills, fill using the Additive Friction Modifier
first.
6Use of synthetic or synthetic blend motor oil is not mandatory. Engine
oil need only meet the requirements of Ford specification
WSS-M2C153–H and the API Certification mark.
LUBRICANT SPECIFICATIONS
ItemFord part
nameFord part
numberFord
specification
Hinges, latches,
striker plates
and rotors, seat
tracks, fuel filler
door hinge and
springMulti-Purpose
GreaseXG-4 or XL-5 ESR-M1C159-A
or ESB-M1C93-B
Lock cylinders,
swing-away
spare tire carrier
padlockPenetrating and
Lock LubricantMotorcraft XL-1 none
Brake fluid Motorcraft High
Performance
DOT 3 Motor
Vehicle Brake
FluidPM-1 ESA-M6C25-A
and DOT 3
2004 Expedition(exd)
Owners Guide (post-2002-fmt)
USA English(fus)
Maintenance and Specifications
328
Page 333 of 344
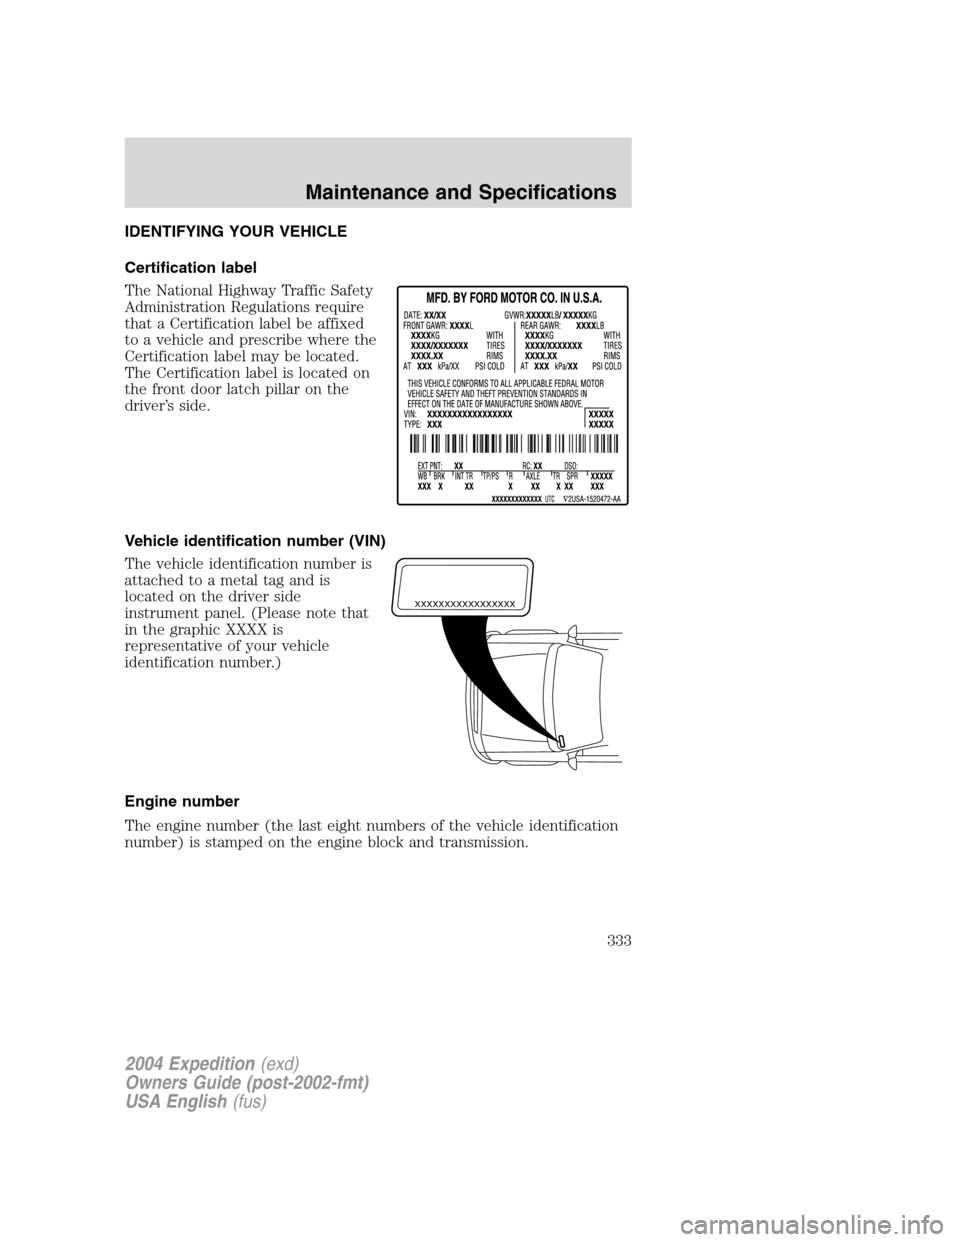
IDENTIFYING YOUR VEHICLE
Certification label
The National Highway Traffic Safety
Administration Regulations require
that a Certification label be affixed
to a vehicle and prescribe where the
Certification label may be located.
The Certification label is located on
the front door latch pillar on the
driver’s side.
Vehicle identification number (VIN)
The vehicle identification number is
attached to a metal tag and is
located on the driver side
instrument panel. (Please note that
in the graphic XXXX is
representative of your vehicle
identification number.)
Engine number
The engine number (the last eight numbers of the vehicle identification
number) is stamped on the engine block and transmission.
XXXXXXXXXXXXXXXXX
2004 Expedition(exd)
Owners Guide (post-2002-fmt)
USA English(fus)
Maintenance and Specifications
333
Page 337 of 344
Interior style
Cell phone holders
Electrochromatic compass/temperature interior mirrors
Floor mats
Interior trim kits
Leather wrapped steering wheels
Scuff plates
Lifestyle
Bike racks
Cargo organization and management
Engine block heaters and blankets
Rear seat entertainment systems
Towing mirrors
Trailer hitches, wiring harnesses and accessories
Peace of mind
Airbag anti-theft locks
First aid and safety kits
Full vehicle covers
Locking gas cap
Navigation systems
Remote start
Vehicle security systems
For maximum vehicle performance, keep the following information in
mind when adding accessories or equipment to your vehicle:
•When adding accessories, equipment, passengers and luggage to your
vehicle, do not exceed the total weight capacity of the vehicle or of
the front or rear axle (GVWR or GAWR as indicated on the Safety
Compliance Certification label). Consult your dealer for specific weight
information.
•The Federal Communications Commission (FCC) and Canadian Radio
Telecommunications Commission (CRTC) regulate the use of mobile
communications systems—such as two-way radios, telephones and
theft alarms - that are equipped with radio transmitters. Any such
2004 Expedition(exd)
Owners Guide (post-2002-fmt)
USA English(fus)
Accessories
337
Page 339 of 344
A
ABS (see Brakes) .....................201
Accessory delay ........................106
Air bag supplemental restraint
system ........................174–175, 179
and child safety seats ............176
description ......................175, 179
disposal ....................................182
driver air bag ..................177, 180
indicator light .................178, 182
operation .........................177, 180
passenger air bag ...........177, 180
Air cleaner filter .......309–310, 325
Air conditioning
auxiliary heater and air
conditioner ................................85
Air suspension ...........................204
description ..............................204
Antifreeze
(see Engine coolant) ................290
Anti-lock brake system
(see Brakes) ......................201–202
Armrests ....................................146
Audio system (see Radio) .........17
Automatic transmission
driving an automatic
overdrive .................................211
fluid, adding ............................307
fluid, checking ........................307
fluid, refill capacities ..............325
fluid, specification ..................331
Auxiliary power point ...............103
Axle
lubricant specifications ..328, 331
refill capacities ........................325
B
Battery .......................................288acid, treating emergencies .....288
jumping a disabled battery ....258
maintenance-free ....................288
replacement, specifications ...325
servicing ..................................288
BeltMinder .................................170
Brakes ........................................201
anti-lock ...........................201–202
anti-lock brake system
(ABS) warning light ...............202
fluid, checking and adding ....307
fluid, refill capacities ..............325
fluid, specifications .........328, 331
lubricant specifications ..328, 331
parking ....................................202
shift interlock ..........................210
Bulbs ............................................91
C
Calculating load ........................231
Capacities for refilling fluids ....325
CD-single premium .....................17
Cell phone use ..........................129
Certification Label ....................333
Changing a tire .........................253
Child safety restraints ..............183
child safety belts ....................183
Child safety seats ......................186
in front seat ............................187
in rear seat ......................187, 190
Cleaning your vehicle
engine compartment ..............276
instrument panel ....................278
interior .............................278–279
plastic parts ............................277
safety belts ..............................278
washing ....................................275
2004 Expedition(exd)
Owners Guide (post-2002-fmt)
USA English(fus)
Index
Index
339