Page 35 of 240

If you will not be using the remote control for a considerably long time,
remove the batteries.
AutoVision�controls
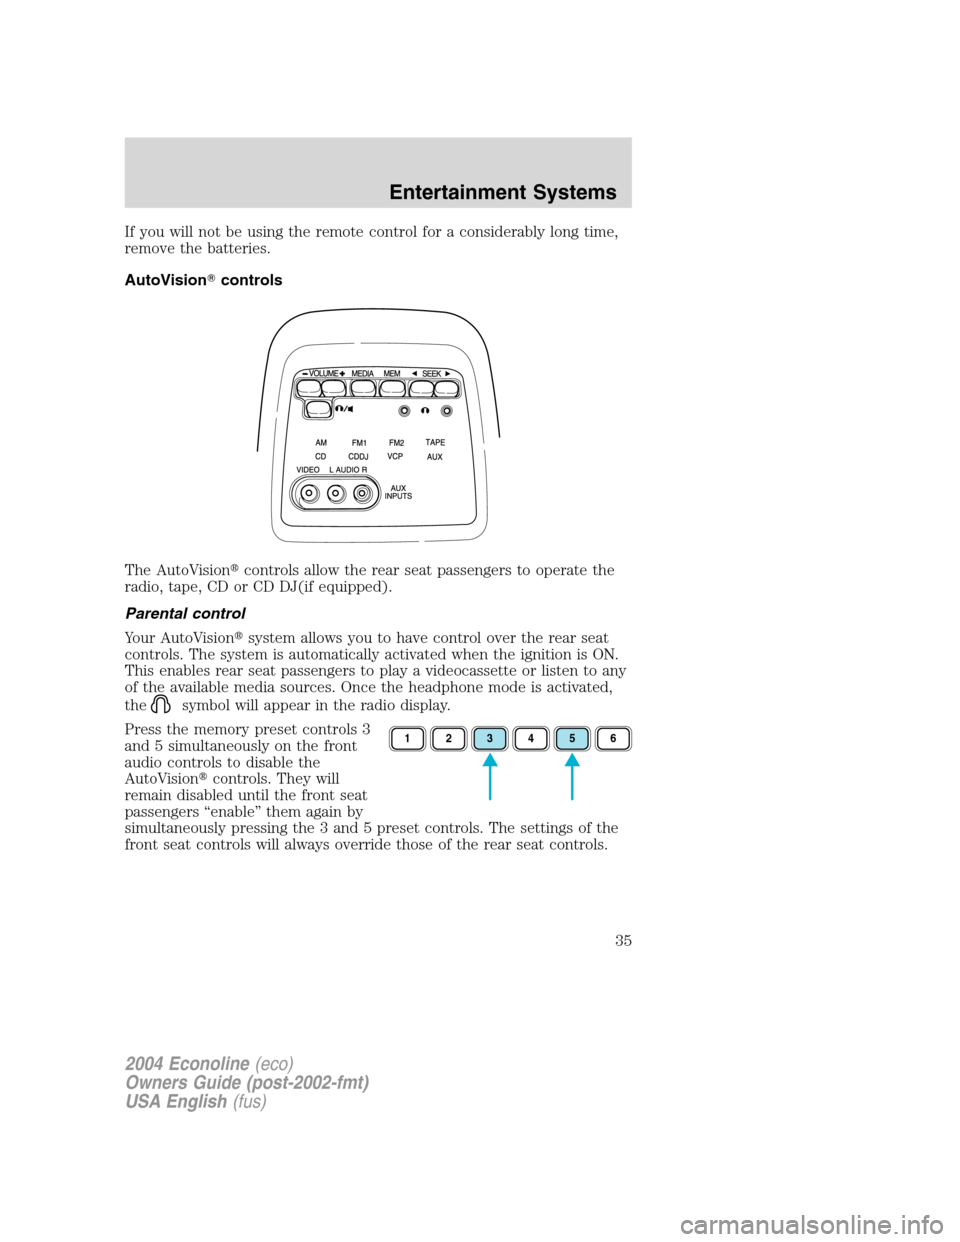
The AutoVision�controls allow the rear seat passengers to operate the
radio, tape, CD or CD DJ(if equipped).
Parental control
Your AutoVision�system allows you to have control over the rear seat
controls. The system is automatically activated when the ignition is ON.
This enables rear seat passengers to play a videocassette or listen to any
of the available media sources. Once the headphone mode is activated,
the
symbol will appear in the radio display.
Press the memory preset controls 3
and 5 simultaneously on the front
audio controls to disable the
AutoVision�controls. They will
remain disabled until the front seat
passengers“enable”them again by
simultaneously pressing the 3 and 5 preset controls. The settings of the
front seat controls will always override those of the rear seat controls.
123456
2004 Econoline(eco)
Owners Guide (post-2002-fmt)
USA English(fus)
Entertainment Systems
35
Page 39 of 240
Flip-down screens
The screens rotate down to view and up into the housing to store when
not in use. Ensure that the screens are latched into the housing when
being stored.
1. 6.4”(diagonal) color liquid crystal display (LCD) screen.
2. Screen housing.
3. Dimmer switch. Rotate to increase/decrease the brightness of the
screen.
General operation
•When the engine is not running, use the system sparingly otherwise it
will run the battery down.
•Do not leave the videocassette in the VCP overnight or for long
periods of time.
•When the ignition is turned ON, audio is through the headphones as
LOW volume. Press the (+) control to increase volume. To listen
through the vehicle’s speaker system, press the speaker button (
)
on the media control panel.
13
2
2004 Econoline(eco)
Owners Guide (post-2002-fmt)
USA English(fus)
Entertainment Systems
39
Page 43 of 240

AutoPlay feature
Your AutoVision�system is equipped with an AutoPlay Feature. When a
video cassette is inserted into the player, video and audio sources are
automatically switched to VCP. This will override any other selections
currently made.
Indications on the VCP
The operation and status of the VCP can be checked by the indications
appearing on the LED display.
1. ThePower indicatorflashes on
during POWER ON and will blink
when in emergency mode.
2. TheHI-FI indicatorilluminates
when a HI-FI tape is loaded.
3. TheHP1 indicatorilluminates
when the headphone jack 1 is
plugged in.
4. TheHP2 indicatorilluminates
when the headphone jack 2 is
plugged in.
5. TheOperation indicatorsilluminate when the system is powered
ON, a HIFI tape is being played, or headphones are being used.
The following are some possible messages that may illuminate on your
LED display and their meanings.
Illuminates when there is a
videocassette in the system during
power off.
Illuminates when there is a
videocassette in the system during
power on.
Illuminates when a videocassette is
ejected from the system.
43
215
2004 Econoline(eco)
Owners Guide (post-2002-fmt)
USA English(fus)
Entertainment Systems
43
Page 45 of 240

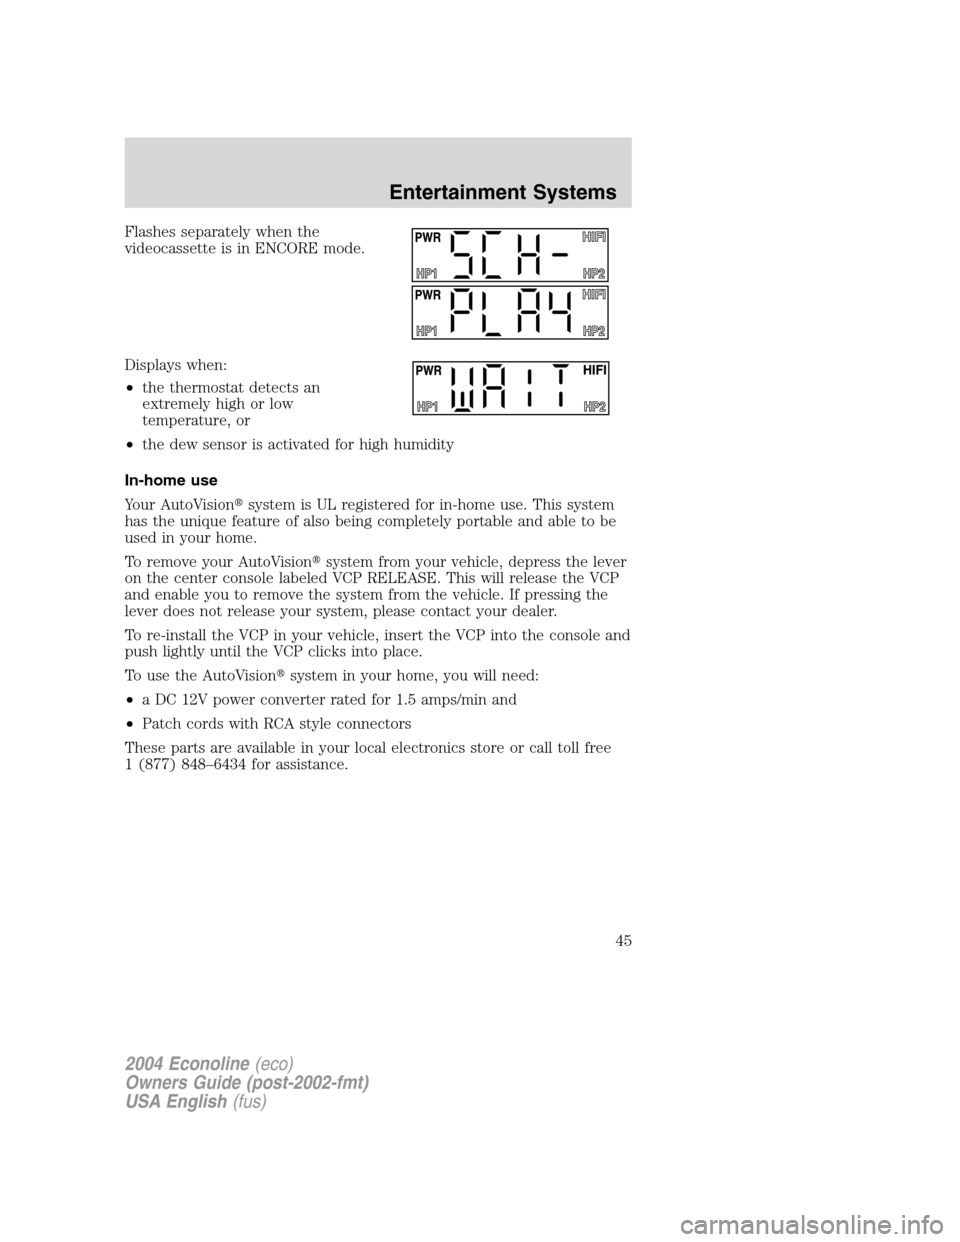
Flashes separately when the
videocassette is in ENCORE mode.
Displays when:
•the thermostat detects an
extremely high or low
temperature, or
•the dew sensor is activated for high humidity
In-home use
Your AutoVision�system is UL registered for in-home use. This system
has the unique feature of also being completely portable and able to be
used in your home.
To remove your AutoVision�system from your vehicle, depress the lever
on the center console labeled VCP RELEASE. This will release the VCP
and enable you to remove the system from the vehicle. If pressing the
lever does not release your system, please contact your dealer.
To re-install the VCP in your vehicle, insert the VCP into the console and
push lightly until the VCP clicks into place.
To use the AutoVision�system in your home, you will need:
•a DC 12V power converter rated for 1.5 amps/min and
•Patch cords with RCA style connectors
These parts are available in your local electronics store or call toll free
1 (877) 848–6434 for assistance.
2004 Econoline(eco)
Owners Guide (post-2002-fmt)
USA English(fus)
Entertainment Systems
45
Page 46 of 240
Auxiliary jacks for home use
1.VIDEO OUT
Connect this terminal to the
VIDEO IN terminal of your display
(LCD, TV).
2.DC jack in
Connect this jack to the DC
source (DC 12V).
3.AUDIO OUT LR
Connect these terminal(s) to the
AUDIO IN terminals of your
display (LCD, TV).
1.VIDEO IN
Connect this terminal to the
AUDIO OUT terminal of your
other apparatus (DVD, game
machine, etc.).
2.AUDIO IN LR
Connect these terminal(s) to the
AUDIO OUT terminals of your
other apparatus (DVD, game
machine, etc.).
3.
Plug headphones into these jacks.
2
1
3
2004 Econoline(eco)
Owners Guide (post-2002-fmt)
USA English(fus)
Entertainment Systems
46
Page 50 of 240

HEADLAMP CONTROL
•The first position turns on the
parking, tail, license plate and
side marker lamps.
•The outer position turns on the
headlamps.
Battery saver
The battery saver will turn off the courtesy lamps in 10 minutes if a door
is left open and the key is not in the ignition. The battery saver will also
shut off the demand interior lamps 30 minutes after the ignition control
has been turned off and key removed.
The battery saver can be programmed to turn all the interior lamps off
after two minutes. - Have all doors closed before starting the procedure:
1. Put key into the RUN position (Do not start the vehicle).
2. After the odometer is displayed, press and release the rest button 10
times. (Step 2 must be completed in 60 seconds)
3. The words’Battery Saver’will be displayed.
4. Press the reset button to select/toggle between’2 minutes’or’30
minutes’duration.
5. Once your time choice is displayed, wait until the odometer is
displayed (approximately 30 minutes).
6. The battery saver feature will not work with the new time duration.
Note:The vehicle comes from the factory set at 2 minutes. The vehicle
will automatically change to 30 minutes, regardless of its current
duration, once the odometer reads over 50 miles.
Daytime running lamps (DRL) (if equipped)
Turns the headlamps on with a reduced output.
To activate:
•the ignition must be in the ON position and
•the headlamp control is in the OFF or parking lamp.
2004 Econoline(eco)
Owners Guide (post-2002-fmt)
USA English(fus)
Lights
Lights
50
Page 60 of 240

1. Place Velcro hook onto side of
aftermarket transmitter opposite of
actuator control.
2. Place the transmitter into storage
compartment, control down.
3. Place the provided height
adaptors onto the back of the
GARAGE control as needed.
4. Press the GARAGE control to
activate the transmitter.
Electronic compass/temperature display (if equipped)
Outside air temperature
The outside temperature display is
contained in the overhead console.
The temperature display can be
turned off and on by pressing the
SELECT control on the overhead
console. The temperature can be
displayed in Centigrade or
Fahrenheit by pressing the SELECT
control.
If the outside temperature falls
below 3°C (38°F), the display will alternate from“ICE”to the outside
temperature at a two second rate for one minute.
Compass
The compass display is contained in the overhead console. The vehicle
heading is displayed as one of N, NE, E, SE, S, SW, W and NW.
73˚ NW
2004 Econoline(eco)
Owners Guide (post-2002-fmt)
USA English(fus)
Driver Controls
60
Page 61 of 240

The compass reading may be affected when you drive near large
buildings, bridges, power lines and powerful broadcast antenna. Magnetic
or metallic objects placed in or on the vehicle may also affect compass
accuracy. Adjustments may need to be made to the zone and calibration
of the compass.
Compass zone adjustment
1. Determine which magnetic zone
you are in by referring to the zone
map.
2. Turn the ignition to the ON
position.
3. Press and hold the SELECT
control until VAR appears in the
display, then release. The display
should show the current zone
number.
4. Press the SELECT control until
the desired zone number appears.
The display will flash and then
return to normal operation. The zone is now updated.
Compass calibration adjustment
Perform this adjustment in an open
area free from steel structures and
high voltage lines:
•Press and hold the SELECT
control until CAL appears in the
display (approximately eight
seconds) and release.
•Drive the vehicle slowly (less
than 5 km/h [3 mph]) in circles until CAL indicator turns off in about
2–3 complete circles.
•The compass is now calibrated.
1 2 3
4
5
6 7 8 9 101112 13 14 15
9 VAR
CAL
2004 Econoline(eco)
Owners Guide (post-2002-fmt)
USA English(fus)
Driver Controls
61