Page 2526 of 2643
2–6 PREPARATIONS OF BODYWORK NUBIRA/LACETTI
4. MEASURING SYSTEMS (WITHOUT
SMALL DAMAGE)
S Whenever possible, make judgements and conclusions
based on measurement. Measure the wheel align-
ment(see pages 2–2, 2–3) so as to prevent any future
trouble like unsymmetrical wear of the tires or catchingof the steering wheel.
S If there are any deviations, use a tram tracking gauge
and measure parts of the body.(Below Fig. 5–1)
S If there is any twisting to the body, measure using a
frame centering gauge.(Below Fig. 5–2)
S When measuring body dimensions, use a universal tram
gauge.(Below Fig. 5–3)
.
Fig. 5–1
Fig. 5–2
Fig. 5–3
Fig. 5
Page 2555 of 2643

NUBIRA/LACETTI ROOF, BACK PANEL AND REAR FLOOR PANEL 5–3
1–2. REPAIR PROCEDURE
1. Remove the related parts.
S Room lamp, door weatherstrip and pillar trims.
S Headlining and wiring harness.
S Wiper, cowl and windshield.
S Rear glass and others.
2. Pull out and straighten the damaged area to approxi-
mately the original shape.
Note : Use heat–resistant protective cover for protect
painting areas, seats, carpets and other parts.
S Attach the car to the frame straightener by tightening the
underbody clamps at the horizontal pinch welds.
S Before cutting off the roof panel, pull them out so that
they are restored to the original shape.
S Do not pull out more than necessary.
S Pull out and straighten the related damaged parts to
approximately their original shape.
Note : Make sure that the right and left pillars are parallel
with the windshield surface. Check the door for proper
opening and closing.
3. Keep the body, level.
S Jack up the body, and place safety stands at the four
designated places of the frame door opening.
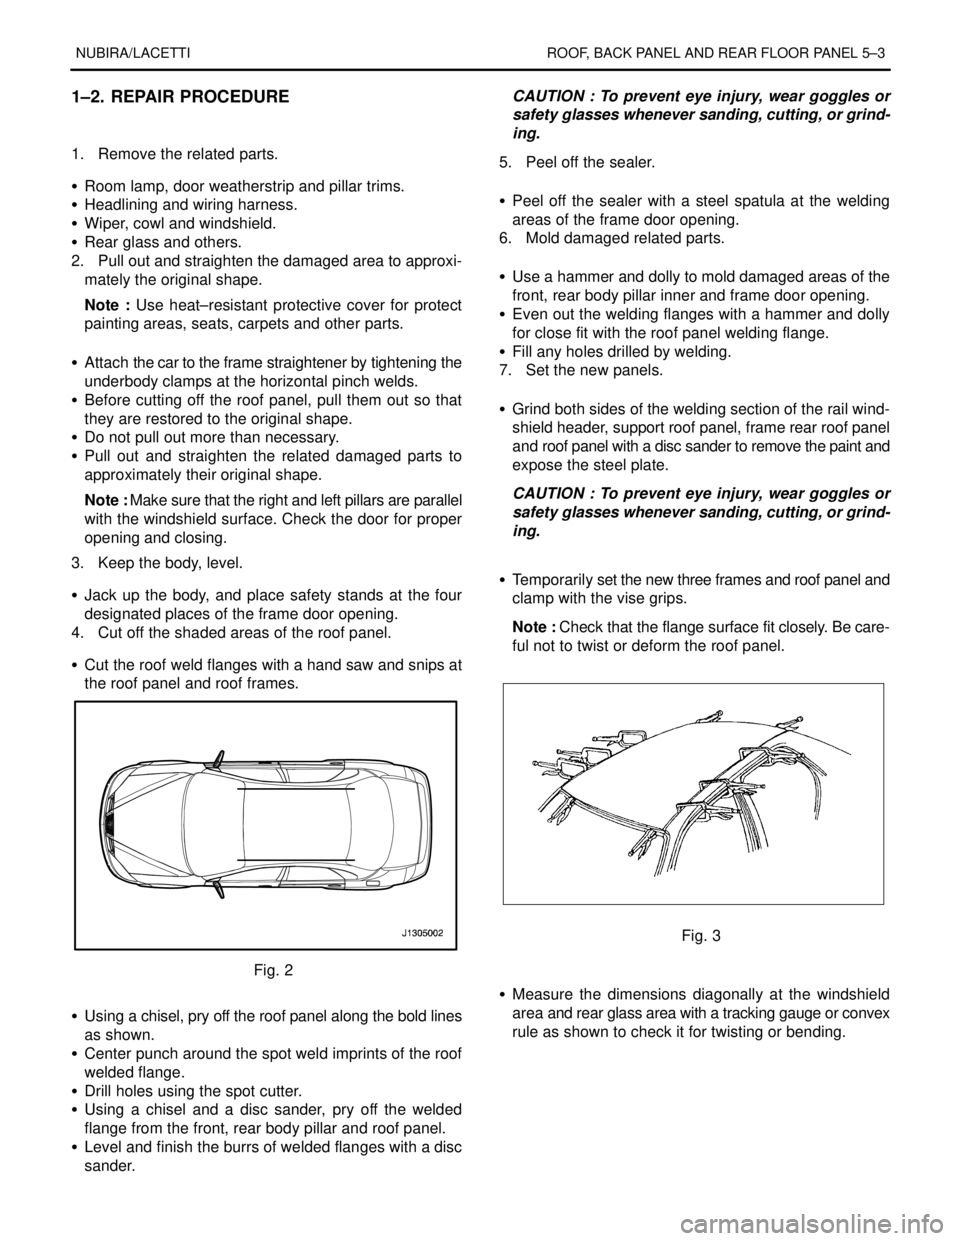
4. Cut off the shaded areas of the roof panel.
S Cut the roof weld flanges with a hand saw and snips at
the roof panel and roof frames.
Fig. 2
S Using a chisel, pry off the roof panel along the bold lines
as shown.
S Center punch around the spot weld imprints of the roof
welded flange.
S Drill holes using the spot cutter.
S Using a chisel and a disc sander, pry off the welded
flange from the front, rear body pillar and roof panel.
S Level and finish the burrs of welded flanges with a disc
sander.CAUTION : To prevent eye injury, wear goggles or
safety glasses whenever sanding, cutting, or grind-
ing.
5. Peel off the sealer.
S Peel off the sealer with a steel spatula at the welding
areas of the frame door opening.
6. Mold damaged related parts.
S Use a hammer and dolly to mold damaged areas of the
front, rear body pillar inner and frame door opening.
S Even out the welding flanges with a hammer and dolly
for close fit with the roof panel welding flange.
S Fill any holes drilled by welding.
7. Set the new panels.
S Grind both sides of the welding section of the rail wind-
shield header, support roof panel, frame rear roof panel
and roof panel with a disc sander to remove the paint and
expose the steel plate.
CAUTION : To prevent eye injury, wear goggles or
safety glasses whenever sanding, cutting, or grind-
ing.
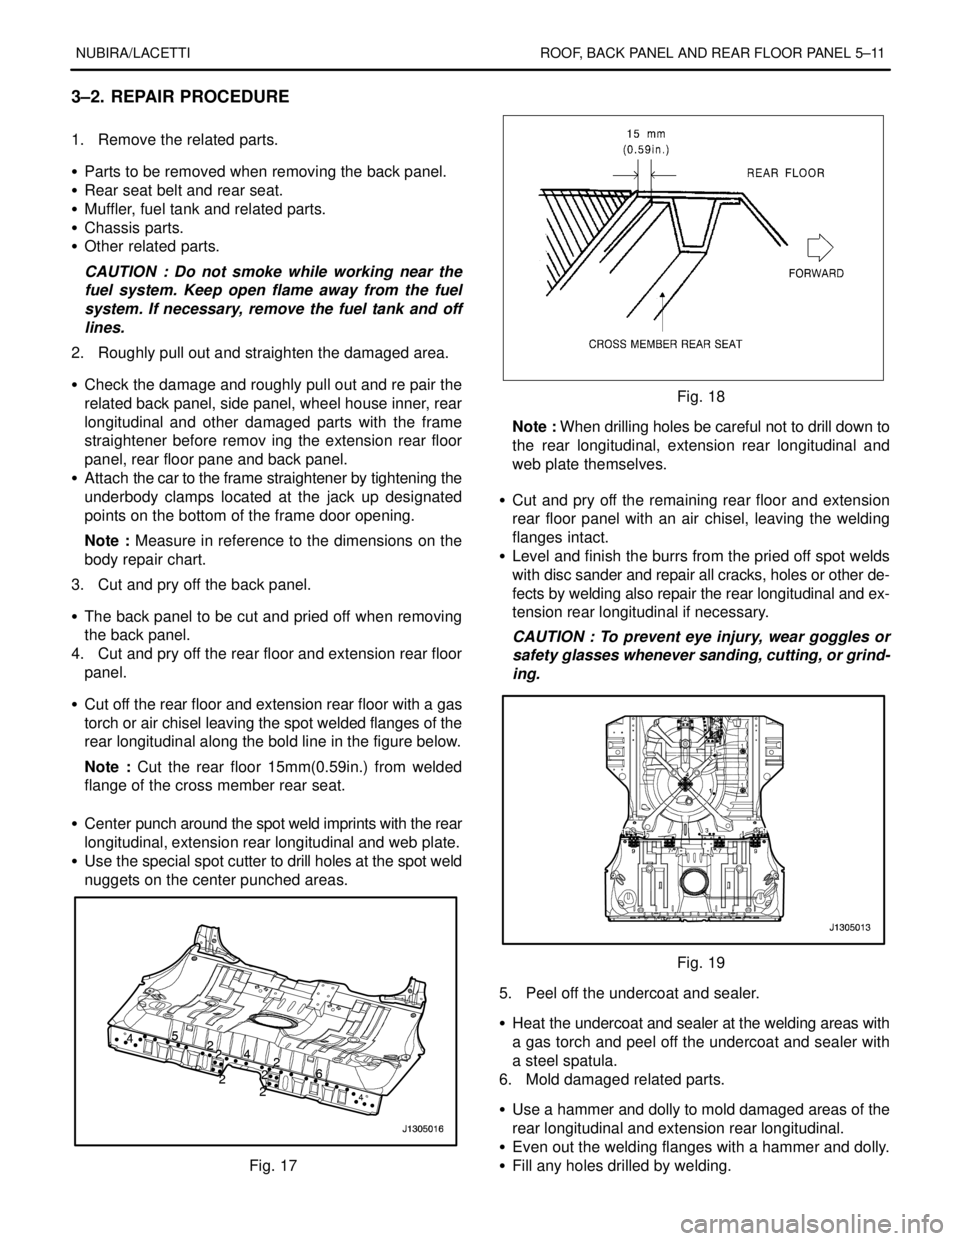
S Temporarily set the new three frames and roof panel and
clamp with the vise grips.
Note : Check that the flange surface fit closely. Be care-
ful not to twist or deform the roof panel.
Fig. 3
S Measure the dimensions diagonally at the windshield
area and rear glass area with a tracking gauge or convex
rule as shown to check it for twisting or bending.
Page 2563 of 2643

NUBIRA/LACETTI ROOF, BACK PANEL AND REAR FLOOR PANEL 5–11
3–2. REPAIR PROCEDURE
1. Remove the related parts.
S Parts to be removed when removing the back panel.
S Rear seat belt and rear seat.
S Muffler, fuel tank and related parts.
S Chassis parts.
S Other related parts.
CAUTION : Do not smoke while working near the
fuel system. Keep open flame away from the fuel
system. If necessary, remove the fuel tank and off
lines.
2. Roughly pull out and straighten the damaged area.
S Check the damage and roughly pull out and re pair the
related back panel, side panel, wheel house inner, rear
longitudinal and other damaged parts with the frame
straightener before remov ing the extension rear floor
panel, rear floor pane and back panel.
S Attach the car to the frame straightener by tightening the
underbody clamps located at the jack up designated
points on the bottom of the frame door opening.
Note : Measure in reference to the dimensions on the
body repair chart.
3. Cut and pry off the back panel.
S The back panel to be cut and pried off when removing
the back panel.
4. Cut and pry off the rear floor and extension rear floor
panel.
S Cut off the rear floor and extension rear floor with a gas
torch or air chisel leaving the spot welded flanges of the
rear longitudinal along the bold line in the figure below.
Note : Cut the rear floor 15mm(0.59in.) from welded
flange of the cross member rear seat.
S Center punch around the spot weld imprints with the rear
longitudinal, extension rear longitudinal and web plate.
S Use the special spot cutter to drill holes at the spot weld
nuggets on the center punched areas.
Fig. 17
Fig. 18
Note : When drilling holes be careful not to drill down to
the rear longitudinal, extension rear longitudinal and
web plate themselves.
S Cut and pry off the remaining rear floor and extension
rear floor panel with an air chisel, leaving the welding
flanges intact.
S Level and finish the burrs from the pried off spot welds
with disc sander and repair all cracks, holes or other de-
fects by welding also repair the rear longitudinal and ex-
tension rear longitudinal if necessary.
CAUTION : To prevent eye injury, wear goggles or
safety glasses whenever sanding, cutting, or grind-
ing.
Fig. 19
5. Peel off the undercoat and sealer.
S Heat the undercoat and sealer at the welding areas with
a gas torch and peel off the undercoat and sealer with
a steel spatula.
6. Mold damaged related parts.
S Use a hammer and dolly to mold damaged areas of the
rear longitudinal and extension rear longitudinal.
S Even out the welding flanges with a hammer and dolly.
S Fill any holes drilled by welding.