2004 CHRYSLER VOYAGER stop start
[x] Cancel search: stop startPage 639 of 2585

DOOR LOCK INHIBIT
When the key is in the ignition (in any switch posi-
tion) and either front door is opened, the door lock
switches LOCK functions are disabled. The
UN-LOCK functions are still functional. This protects
against locking the vehicle with the key still in the
ignition. The RKE key fob will still lock the doors.
After the key is removed from the ignition or the
doors are closed, the power door locks will operate
normally.
REMOTE KEYLESS ENTRY
The Remote Keyless Entry (RKE) system allows
the use of a remote battery-powered radio transmit-
ter to communicate with the BCM to actuate the
power lock system. The RKE transmitters are also equipped with a
Panic button. If the Panic button on the RKE trans-
mitter is depressed, the horn will sound and the
exterior lights will flash on the vehicle for about
three minutes, or until the Panic button is depressed
a second time. Pressing the Panic button also acti-
vates the courtesy lamps. Pressing the Panic button
again stops the exterior lamps from flashing and the
horn from sounding. However, the courtesy lamps
will remain illuminated until either the BCM times
out lamp operation or until the turning of the igni-
tion. The panic feature will operate if the ignition is
ON, but only if the Panic button is pressed prior to
starting the vehicle. A vehicle speed of about 25.7
km/h (15 miles-per-hour) will also cancel the panic
event. The RKE system can also perform other functions
on this vehicle. If the vehicle is equipped with the
optional Vehicle Theft Security System (VTSS), the
RKE transmitter will arm the VTSS when the Lock
button is depressed, and disarm the VTSS when the
Unlock button is depressed. The RKE system includes two transmitters when
the vehicle is shipped from the factory, but the sys-
tem can retain the vehicle access codes of up to a
total of eight transmitters. If an RKE transmitter is
inoperative or lost, new transmitter vehicle access
codes can be programmed into the system using a
DRB III tscan tool.
This vehicle also offers several customer program-
mable features, which allows the selection of several
optional electronic features to suit individual prefer-
ences. Customer programmable feature options
affecting the RKE system include: ² Automatic Door Lock - Customer programma-
ble feature that allows the BCM to perform an auto-
matic door lock if the vehicle speed is above 25.7
km/h (15 miles-per-hour). ² Automatic Door Unlock On Exit - Customer
programmable feature that allows the BCM to per- form an automatic door unlock if the vehicle speed is
0, vehicle in park and driver door is opened.
² Flash Lights with Lock and Unlock - Allows
the option of having the park lamps flash as an opti-
cal verification that the RKE system received a valid
Lock request or Unlock request from the RKE trans-
mitter, or having no optical verification. ² Programming Additional Transmitters -
Allows up to a total of four transmitter vehicle access
codes to be stored. ² Remote Unlock Sequence - Allows the option
of having only the driver side front door unlock when
the RKE transmitter Unlock button is depressed the
first time. The remaining doors unlock when the but-
ton is depressed a second time within 5 seconds of
the first unlock press. Another option is having all
doors unlock upon the first depression of the RKE
transmitter Unlock button. ² Sound Horn on Lock - Allows the option of
having the horn sound a short chirp as an audible
verification that the RKE system received a valid
Lock request from the RKE transmitter, or having no
audible verification.
OPERATION
POWER LOCKS
The Body Control Module (BCM) locks or unlocks
the doors when an actuation input signal from a door
lock switch, Central Lock key cylinder or Remote
Keyless Entry (RKE) is received. The BCM turns on
the output drivers and provides a voltage level to the
door lock motor for a specified time.
REMOTE KEYLESS ENTRY
The RKE transmitter uses radio frequency signals
to communicate with the SKREEM module. The
SKREEM is on the PCI bus. When the operator
presses a button on the transmitter, it sends a spe-
cific request to the SKREEM. In turn, the SKREEM
sends the appropriate request over the PCI bus to
the following: ² Integrated Power Module (IPM) - to activate
the park lamps, the headlamps and the horn for the
horn chirp. ² Power Liftgate Module (PLGM) - to control
the liftgate lock and unlock functions. After pressing the lock button on the RKE trans-
mitter, all of the door locks will lock, the illuminated
entry will turn off (if all doors are closed) and the
vehicle theft security system (if equipped) will arm. Pressing the unlock button one time will unlock
the driver door, or all doors based on the customer
programmable feature enabled, the illuminated entry
will turn on the courtesy lamps and the vehicle theft
security system (if equipped) will disarm. Pressing
8Ns - 2 POWER LOCKSRS
POWER LOCKS (Continued)
Page 686 of 2585

²(Learned Key in Ignition(is displayed if the
key in the ignition has already been programmed
into that vehicle's SKREEM.
²(Eight Keys Already Learned (At The Maxi-
mum) Programming Not Done(is displayed if
eight keys have already been programmed into the
SKREEM. In this case, if a new key needs to be
added due to a lost or defective key, the9Erase All
Keys9command (which requires entering the Secured
Access Mode) has to be performed. Following the
9Erase All Keys9command, all keys that will be used
to operate the vehicleMUSTbe reprogrammed to
the SKREEM.
²(Programming Not Attempted(is displayed
after an9Erase All Keys9function is executed.
²(Programming Key Failed(is displayed if fur-
ther diagnosis is required.
To learn additional keys, turn the ignition OFF,
remove the learned key, insert the next new blank
key, and repeat the steps from the beginning.
ªCUSTOMER LEARNº MODE
This feature is only available on domestic vehicles
or those which have a U.S. country code designator.
This procedure requires access to at least two valid
Sentry Keys. If two valid Sentry Keys are not avail-
able, Sentry Key programming will require the use of
a DRBIIItscan tool.
The steps required to program Sentry Keys with
two valid Sentry Keys follows:
(1) Obtain the blank Sentry Key(s) that need to be
programmed. Cut the keys to match the ignition lock
cylinder mechanical key codes.
(2) Insert one of the two valid Sentry Keys into the
ignition switch and turn the ignition switch to the
ON position.
(3) After the ignition switch has been in the ON
position for longer than three seconds, but no more
than fifteen seconds, cycle the ignition switch back to
the OFF position. Replace the first valid Sentry Key
in the ignition lock cylinder with the second valid
Sentry Key and turn the ignition switch back to the
ON position. The second valid Sentry Key must be
inserted within 15 seconds of removing the first valid
Sentry key.
(4) About ten seconds after the completion of Step
3, the indicator light will start to flash and a single
audible chime tone will sound to indicate that the
system has entered the9Customer Learn9program-
ming mode.
(5) Within sixty seconds of entering the9Customer
Learn9programming mode, turn the ignition switch
to the OFF position, replace the valid Sentry Key
with a blank Sentry Key transponder, and turn the
ignition switch back to the ON position.(6) About ten seconds after the completion of Step
5, a single audible chime tone will sound and the
indicator light will stop flashing and stay on solid for
three seconds and then turn off to indicate that the
blank Sentry Key has been successfully programmed.
The SKREES will immediately exit the9Customer
Learn9programming mode and the vehicle may be
started using the newly programmed Sentry Key.
NOTE: The Remote Keyless Entry (RKE) Transmitter
will also be programmed during this procedure.
These steps must be completed in their entirety for
each additional Sentry Key to be programmed. If any
of the above steps are not completed in the given
sequence, or within the allotted time, the SKREES
will exit the9Customer Learn9programming mode
and the programming will be unsuccessful. The
SKREES will also automatically exit the9Customer
Learn9programming mode if:
²It sees a non-blank Sentry Key when it should
see a blank.
²If it has already programmed four (4) valid Sen-
try Keys.
²If the ignition switch is turned to the OFF posi-
tion for more than about fifty (50) seconds.
NOTE: If you attempt to start the vehicle while in
ªCustomer Learnº mode (LED flashing), the vehicle
will behave as though an invalid key is being used
(i.e. the engine will stall after two (2) seconds of
running). No faults will be logged.
NOTE: Once a Sentry Key has been programmed to
a particular vehicle, it cannot be used on any other
vehicle.
VTSS/SKIS INDICATOR LAMP
DESCRIPTION
The Sentry Key Remote Entry System (SKREES)
uses an indicator light to convey information on the
status of the system to the customer. This light is
shared with the Vehicle Theft Security System
(VTSS). The light is located in the Mechanical
Instrument Cluster (MIC). The VTSS status is con-
trolled by the Body Control Module (BCM), via Pro-
grammable Communication Interface (PCI) data bus
communication with the MIC, based upon messages
it receives from the Sentry Key Remote Entry Mod-
ule (SKREEM) on the PCI data bus.
RSVEHICLE THEFT SECURITY8Q-7
TRANSPONDER KEY (Continued)
Page 834 of 2585

8W-30 FUEL/IGNITION SYSTEM
Component Page
A/C Compressor Clutch.............. 8W-30-24
A/C Compressor Clutch Relay........ 8W-30-4, 24
A/C Pressure Sensor........... 8W-30-14, 19, 31
Accelerator Pedal Position Sensor...... 8W-30-38
Adjustable Pedals Module............ 8W-30-23
Adjustable Pedals Motor.............. 8W-30-23
Adjustable Pedals Relay.............. 8W-30-22
Adjustable Pedals Sensor............. 8W-30-23
Adjustable Pedals Switch............. 8W-30-22
Ambient Temperature Sensor........... 8W-30-8
Auto Shut Down Relay.... 8W-30-4, 12, 15, 17, 20
Battery........... 8W-30-2, 6, 10, 16, 21, 24, 32
Battery Temperature Sensor......... 8W-30-8, 31
Body Control Module.............. 8W-30-5, 25
Boost Pressure Sensor............... 8W-30-31
Brake Lamp Switch............ 8W-30-7, 27, 37
Cabin Heater Assist................. 8W-30-28
Camshaft Position Sensor........... 8W-30-8, 30
Clockspring................... 8W-30-5, 29, 36
Clutch Pedal Interlock Switch.......... 8W-30-4
Clutch Pedal Upstop Switch........... 8W-30-36
Crank Case Ventilation Heater......... 8W-30-25
Crankshaft Position Sensor...... 8W-30-13, 18, 30
Data Link Connector.............. 8W-30-3, 28
Dosing Pump...................... 8W-30-28
ECM/PCM Relay........ 8W-30-24, 26, 30, 32, 34
EGR Solenoid................... 8W-30-16, 34
Engine Control Module . . . 8W-30-24, 25, 26, 27, 28,
29, 30, 31, 32, 33, 34, 35, 36, 37, 38
Engine Coolant Temp Sensor.... 8W-30-14, 19, 31
Engine Oil Pressure Sensor........... 8W-30-27
Engine Oil Pressure Switch............ 8W-30-7
EVAP/Purge Solenoid................. 8W-30-4
Front Control Module...... 8W-30-2, 5, 22, 28, 36
Fuel Heater....................... 8W-30-35
Fuel Heater Relay................ 8W-30-25, 35
Fuel Injector No. 1............ 8W-30-15, 20, 33
Fuel Injector No. 2............ 8W-30-15, 20, 33
Fuel Injector No. 3............ 8W-30-15, 20, 33
Fuel Injector No. 4............ 8W-30-15, 20, 33
Fuel Injector No. 5.................. 8W-30-20
Fuel Injector No. 6.................. 8W-30-20
Fuel Pressure Sensor................ 8W-30-37
Fuel Pressure Solenoid............... 8W-30-26
Fuel Pump Module................ 8W-30-5, 25
Fuel Pump Relay.................... 8W-30-5
Fuse 14........................... 8W-30-22
Fuse 15..................... 8W-30-21, 28, 35
Fuse 16 . . 8W-30-4, 12, 15, 17, 20, 24, 26, 30, 32, 34
Fuse 17.................... 8W-30-2, 5, 25, 35
Fuse 18........................ 8W-30-22, 24
Fuse 26........................... 8W-30-37Component Page
Fuselink.......................... 8W-30-32
G100................... 8W-30-2, 6, 16, 21, 25
G101.............. 8W-30-2, 6, 7, 10, 16, 21, 24
G103....................... 8W-30-24, 25, 28
G200............................. 8W-30-22
G300................... 8W-30-4, 7, 23, 27, 36
G302........................ 8W-30-5, 25, 35
Generator....................... 8W-30-4, 25
Glow Plug No. 1.................... 8W-30-32
Glow Plug No. 2.................... 8W-30-32
Glow Plug No. 3.................... 8W-30-32
Glow Plug No. 4.................... 8W-30-32
Glow Plug Relay.................... 8W-30-32
Idle Air Control Motor................ 8W-30-9
Ignition Coil.................... 8W-30-12, 17
Ignition Switch..................... 8W-30-10
Inlet Air Temperature Sensor....... 8W-30-13, 18
Input Speed Sensor................. 8W-30-21
Integrated Power Module . . 8W-30-2, 3, 4, 5, 10, 12,
15, 17, 20, 21, 22, 24, 25,
26, 28, 30, 32, 34, 35, 36, 37
Knock Sensor....................... 8W-30-9
Left Speed Control Switch.......... 8W-30-5, 29
Lift Pump Motor.................... 8W-30-35
Lift Pump Relay.................... 8W-30-35
Manifold Absolute Pressure Sensor . . . 8W-30-14, 19
Mass Air Flow Sensor................ 8W-30-26
Memory Seat/Mirror Module.......... 8W-30-22
Natural Vacuum Leak Detection
Assembly....................... 8W-30-10
Output Speed Sensor................ 8W-30-21
Oxygen Sensor 1/1 Upstream........... 8W-30-6
Oxygen Sensor 1/2 Downstream......... 8W-30-6
Powertrain Control Module . . 8W-30-2, 3, 4, 5, 6, 7,
8, 9, 10, 11, 12, 13, 14, 15,
16, 17, 18, 19, 20, 21
Radiator Fan Relay............... 8W-30-12, 17
Radiator Fan Relay No. 1............. 8W-30-37
Radiator Fan Relay No. 2............. 8W-30-37
Radiator Fan Relay No. 3............. 8W-30-37
Right Speed Control Switch......... 8W-30-5, 29
Speed Control Servo.................. 8W-30-7
Starter Motor Relay............... 8W-30-5, 25
Throttle Position Sensor........... 8W-30-13, 18
Transmission Control Relay........... 8W-30-21
Transmission Range Sensor........... 8W-30-11
Transmission Solenoid/Pressure Switch
Assembly..................... 8W-30-11, 21
Vehicle Speed Sensor.............. 8W-30-9, 34
Water In Fuel Sensor................ 8W-30-36
RS8W-30 FUEL/IGNITION SYSTEM8W-30-1
Page 1305 of 2585
CONDITION POSSIBLE CAUSES CORRECTION
OIL CONSUMPTION OR SPARK
PLUGS FOULED1. PCV system malfunction. 1. Check system and repair as
necessary. (Refer to 25 -
EMISSIONS CONTROL/
EVAPORATIVE EMISSIONS/PCV
VALVE - DIAGNOSIS AND
TESTING)
2. Worn, scuffed or broken rings. 2. Hone cylinder bores. Install new
rings.
3. Carbon in oil ring slots. 3. Install new rings.
4. Rings fitted too tightly in grooves. 4. Remove rings and check
grooves. If groove is not proper
width, replace piston.
5. Worn valve guide(s). 5. Replace cylinder head assembly.
6. Valve stem seal(s) worn or
damaged.6. Replace seal(s).
DIAGNOSIS AND TESTING - ENGINE OIL LEAK
INSPECTION
Begin with a thorough visual inspection of the
engine, particularly at the area of the suspected leak.
If an oil leak source is not readily identifiable, the
following steps should be followed:
(1) Do not clean or degrease the engine at this
time because some solvents may cause rubber to
swell, temporarily stopping the leak.
(2) Add an oil soluble dye (use as recommended by
manufacturer). Start the engine and let idle for
approximately 15 minutes. Check the oil dipstick to
make sure the dye is thoroughly mixed as indicated
with a bright yellow color under a black light.
(3) Using a black light, inspect the entire engine
for fluorescent dye, particularly at the suspected area
of oil leak. If the oil leak is found and identified,
repair as necessary.
(4) If dye is not observed, drive the vehicle at var-
ious speeds for approximately 24 km (15 miles), and
repeat inspection.
(5)If the oil leak source is not positively
identified at this time, proceed with the air leak
detection test method as follows:
²Disconnect the fresh air hose (make-up air) at
the cylinder head cover and plug or cap the nipple on
the cover.
²Remove the PCV valve hose from the cylinder
head cover. Cap or plug the PCV valve nipple on the
cover.
²Attach an air hose with pressure gauge and reg-
ulator to the dipstick tube.
CAUTION: Do not subject the engine assembly to
more than 20.6 kpa (3 PSI) of test pressure.²Gradually apply air pressure from 1 psi to 2.5
psi maximum while applying soapy water at the sus-
pected source. Adjust the regulator to the suitable
test pressure that provides the best bubbles which
will pinpoint the leak source. If the oil leak is
detected and identified, repair per service manual
procedures.
²If the leakage occurs at the crankshaft rear oil
seal area, refer to the section, Inspection for Rear
Seal Area Leak.
(6) If no leaks are detected, turn off the air supply.
Remove the air hose, all plugs, and caps. Install the
PCV valve and fresh air hose (make-up air). Proceed
to next step.
(7) Clean the oil off the suspect oil leak area using
a suitable solvent. Drive the vehicle at various
speeds approximately 24 km (15 miles). Inspect the
engine for signs of an oil leak by using a black light.
NOTE: If oil leakage is observed at the dipstick tube
to block location; remove the tube, clean and reseal
using MoparTStud & Bearing Mount (press fit tube
applications only), and for O-ring style tubes,
remove tube and replace the O-ring seal.
INSPECTION FOR REAR SEAL AREA LEAKS
Since it is sometimes difficult to determine the
source of an oil leak in the rear seal area of the
engine, a more involved inspection is necessary. The
following steps should be followed to help pinpoint
the source of the leak.
If the leakage occurs at the crankshaft rear oil seal
area:
(1) Disconnect the battery.
(2) Raise the vehicle.
9 - 8 ENGINE 2.4LRS
ENGINE 2.4L (Continued)
Page 1350 of 2585
OIL
STANDARD PROCEDURE
ENGINE OIL LEVEL CHECK
The best time to check engine oil level is after it
has sat overnight, or if the engine has been running,
allow the engine to be shut off for at least 5 minutes
before checking oil level.
Checking the oil while the vehicle is on level
ground will improve the accuracy of the oil level
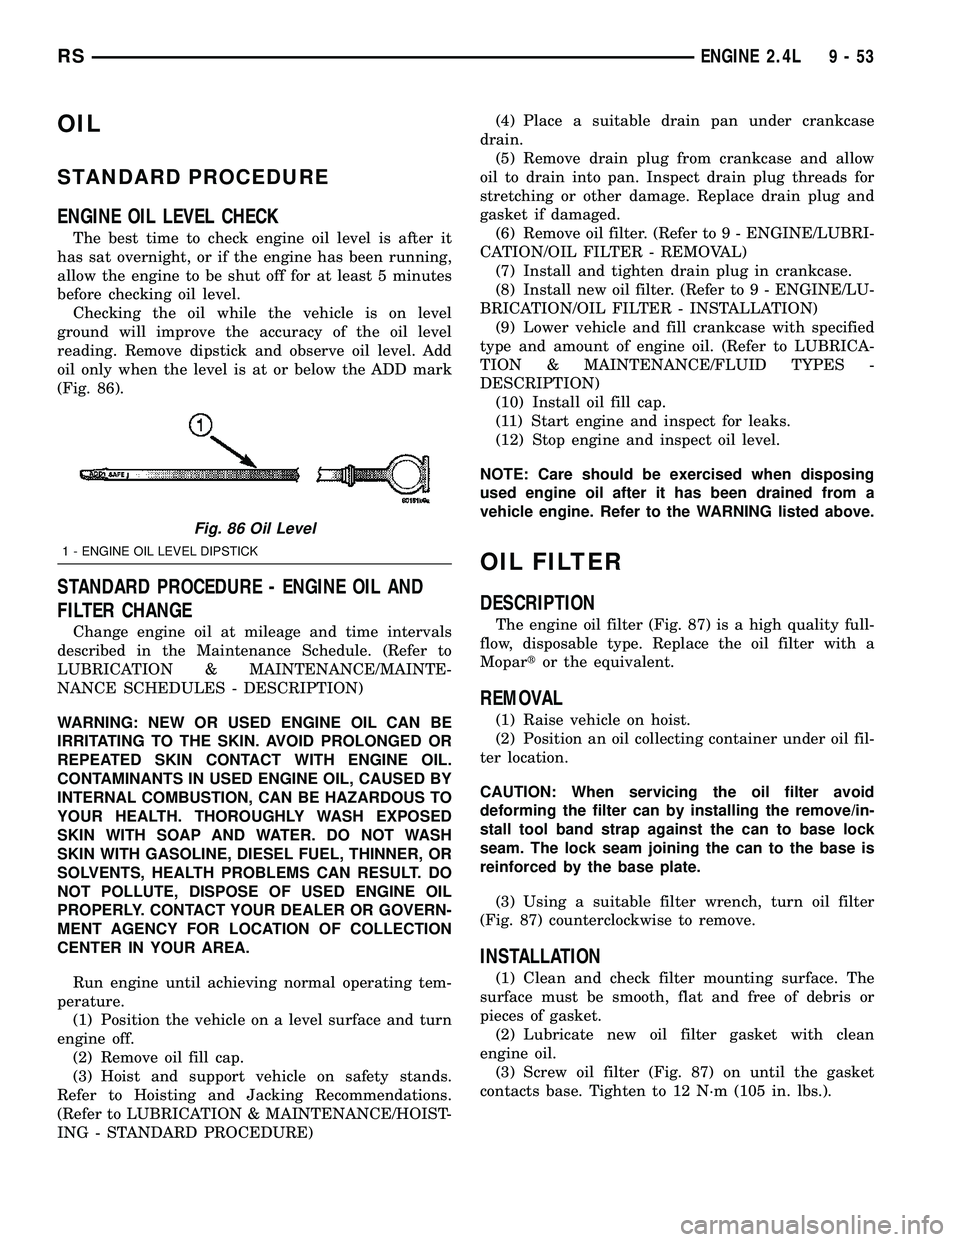
reading. Remove dipstick and observe oil level. Add
oil only when the level is at or below the ADD mark
(Fig. 86).
STANDARD PROCEDURE - ENGINE OIL AND
FILTER CHANGE
Change engine oil at mileage and time intervals
described in the Maintenance Schedule. (Refer to
LUBRICATION & MAINTENANCE/MAINTE-
NANCE SCHEDULES - DESCRIPTION)
WARNING: NEW OR USED ENGINE OIL CAN BE
IRRITATING TO THE SKIN. AVOID PROLONGED OR
REPEATED SKIN CONTACT WITH ENGINE OIL.
CONTAMINANTS IN USED ENGINE OIL, CAUSED BY
INTERNAL COMBUSTION, CAN BE HAZARDOUS TO
YOUR HEALTH. THOROUGHLY WASH EXPOSED
SKIN WITH SOAP AND WATER. DO NOT WASH
SKIN WITH GASOLINE, DIESEL FUEL, THINNER, OR
SOLVENTS, HEALTH PROBLEMS CAN RESULT. DO
NOT POLLUTE, DISPOSE OF USED ENGINE OIL
PROPERLY. CONTACT YOUR DEALER OR GOVERN-
MENT AGENCY FOR LOCATION OF COLLECTION
CENTER IN YOUR AREA.
Run engine until achieving normal operating tem-
perature.
(1) Position the vehicle on a level surface and turn
engine off.
(2) Remove oil fill cap.
(3) Hoist and support vehicle on safety stands.
Refer to Hoisting and Jacking Recommendations.
(Refer to LUBRICATION & MAINTENANCE/HOIST-
ING - STANDARD PROCEDURE)(4) Place a suitable drain pan under crankcase
drain.
(5) Remove drain plug from crankcase and allow
oil to drain into pan. Inspect drain plug threads for
stretching or other damage. Replace drain plug and
gasket if damaged.
(6) Remove oil filter. (Refer to 9 - ENGINE/LUBRI-
CATION/OIL FILTER - REMOVAL)
(7) Install and tighten drain plug in crankcase.
(8) Install new oil filter. (Refer to 9 - ENGINE/LU-
BRICATION/OIL FILTER - INSTALLATION)
(9) Lower vehicle and fill crankcase with specified
type and amount of engine oil. (Refer to LUBRICA-
TION & MAINTENANCE/FLUID TYPES -
DESCRIPTION)
(10) Install oil fill cap.
(11) Start engine and inspect for leaks.
(12) Stop engine and inspect oil level.
NOTE: Care should be exercised when disposing
used engine oil after it has been drained from a
vehicle engine. Refer to the WARNING listed above.
OIL FILTER
DESCRIPTION
The engine oil filter (Fig. 87) is a high quality full-
flow, disposable type. Replace the oil filter with a
Mopartor the equivalent.
REMOVAL
(1) Raise vehicle on hoist.
(2) Position an oil collecting container under oil fil-
ter location.
CAUTION: When servicing the oil filter avoid
deforming the filter can by installing the remove/in-
stall tool band strap against the can to base lock
seam. The lock seam joining the can to the base is
reinforced by the base plate.
(3) Using a suitable filter wrench, turn oil filter
(Fig. 87) counterclockwise to remove.
INSTALLATION
(1) Clean and check filter mounting surface. The
surface must be smooth, flat and free of debris or
pieces of gasket.
(2) Lubricate new oil filter gasket with clean
engine oil.
(3) Screw oil filter (Fig. 87) on until the gasket
contacts base. Tighten to 12 N´m (105 in. lbs.).
Fig. 86 Oil Level
1 - ENGINE OIL LEVEL DIPSTICK
RSENGINE 2.4L9-53
Page 1379 of 2585
CONDITION POSSIBLE CAUSES CORRECTION
OIL CONSUMPTION OR SPARK
PLUGS FOULED1. PCV system malfunction. 1. Check system and repair as
necessary. (Refer to 25 -
EMISSIONS CONTROL/
EVAPORATIVE EMISSIONS/PCV
VALVE - DIAGNOSIS AND
TESTING)
2. Worn, scuffed or broken rings. 2. Hone cylinder bores. Install new
rings.
3. Carbon in oil ring slots. 3. Install new rings.
4. Rings fitted too tightly in grooves. 4. Remove rings and check
grooves. If groove is not proper
width, replace piston.
5. Worn valve guide(s). 5. Replace cylinder head assembly.
6. Valve stem seal(s) worn or
damaged.6. Replace seal(s).
DIAGNOSIS AND TESTING - ENGINE OIL LEAK
INSPECTION
Begin with a thorough visual inspection of the
engine, particularly at the area of the suspected leak.
If an oil leak source is not readily identifiable, the
following steps should be followed:
(1) Do not clean or degrease the engine at this
time because some solvents may cause rubber to
swell, temporarily stopping the leak.
(2) Add an oil soluble dye (use as recommended by
manufacturer). Start the engine and let idle for
approximately 15 minutes. Check the oil dipstick to
make sure the dye is thoroughly mixed as indicated
with a bright yellow color under a black light.
(3) Using a black light, inspect the entire engine
for fluorescent dye, particularly at the suspected area
of oil leak. If the oil leak is found and identified,
repair as necessary.
(4) If dye is not observed, drive the vehicle at var-
ious speeds for approximately 24 km (15 miles), and
repeat inspection.
(5)If the oil leak source is not positively
identified at this time, proceed with the air leak
detection test method as follows:
²Disconnect the fresh air hose (make-up air) at
the cylinder head cover and plug or cap the nipple on
the cover.
²Remove the PCV valve hose from the cylinder
head cover. Cap or plug the PCV valve nipple on the
cover.
²Attach an air hose with pressure gauge and reg-
ulator to the dipstick tube.
CAUTION: Do not subject the engine assembly to
more than 20.6 kpa (3 PSI) of test pressure.²Gradually apply air pressure from 1 psi to 2.5
psi maximum while applying soapy water at the sus-
pected source. Adjust the regulator to the suitable
test pressure that provides the best bubbles which
will pinpoint the leak source. If the oil leak is
detected and identified, repair per service manual
procedures.
²If the leakage occurs at the crankshaft rear oil
seal area, refer to the section, Inspection for Rear
Seal Area Leak.
(6) If no leaks are detected, turn off the air supply.
Remove the air hose, all plugs, and caps. Install the
PCV valve and fresh air hose (make-up air). Proceed
to next step.
(7) Clean the oil off the suspect oil leak area using
a suitable solvent. Drive the vehicle at various
speeds approximately 24 km (15 miles). Inspect the
engine for signs of an oil leak by using a black light.
NOTE: If oil leakage is observed at the dipstick tube
to block location; remove the tube, clean and reseal
using MoparTStud & Bearing Mount (press fit tube
applications only), and for O-ring style tubes,
remove tube and replace the O-ring seal.
INSPECTION FOR REAR SEAL AREA LEAKS
Since it is sometimes difficult to determine the
source of an oil leak in the rear seal area of the
engine, a more involved inspection is necessary. The
following steps should be followed to help pinpoint
the source of the leak.
If the leakage occurs at the crankshaft rear oil seal
area:
(1) Disconnect the battery.
(2) Raise the vehicle.
9 - 82 ENGINE 3.3/3.8LRS
ENGINE 3.3/3.8L (Continued)
Page 1434 of 2585
OIL
STANDARD PROCEDURE
STANDARD PROCEDURE - ENGINE OIL AND
FILTER CHANGE
Change engine oil at mileage and time intervals
described in the Maintenance Schedule. (Refer to
LUBRICATION & MAINTENANCE/MAINTE-
NANCE SCHEDULES - DESCRIPTION)
WARNING: NEW OR USED ENGINE OIL CAN BE
IRRITATING TO THE SKIN. AVOID PROLONGED OR
REPEATED SKIN CONTACT WITH ENGINE OIL.
CONTAMINANTS IN USED ENGINE OIL, CAUSED BY
INTERNAL COMBUSTION, CAN BE HAZARDOUS TO
YOUR HEALTH. THOROUGHLY WASH EXPOSED
SKIN WITH SOAP AND WATER. DO NOT WASH
SKIN WITH GASOLINE, DIESEL FUEL, THINNER, OR
SOLVENTS, HEALTH PROBLEMS CAN RESULT. DO
NOT POLLUTE, DISPOSE OF USED ENGINE OIL
PROPERLY. CONTACT YOUR DEALER OR GOVERN-
MENT AGENCY FOR LOCATION OF COLLECTION
CENTER IN YOUR AREA.
Run engine until achieving normal operating tem-
perature.
(1) Position the vehicle on a level surface and turn
engine off.
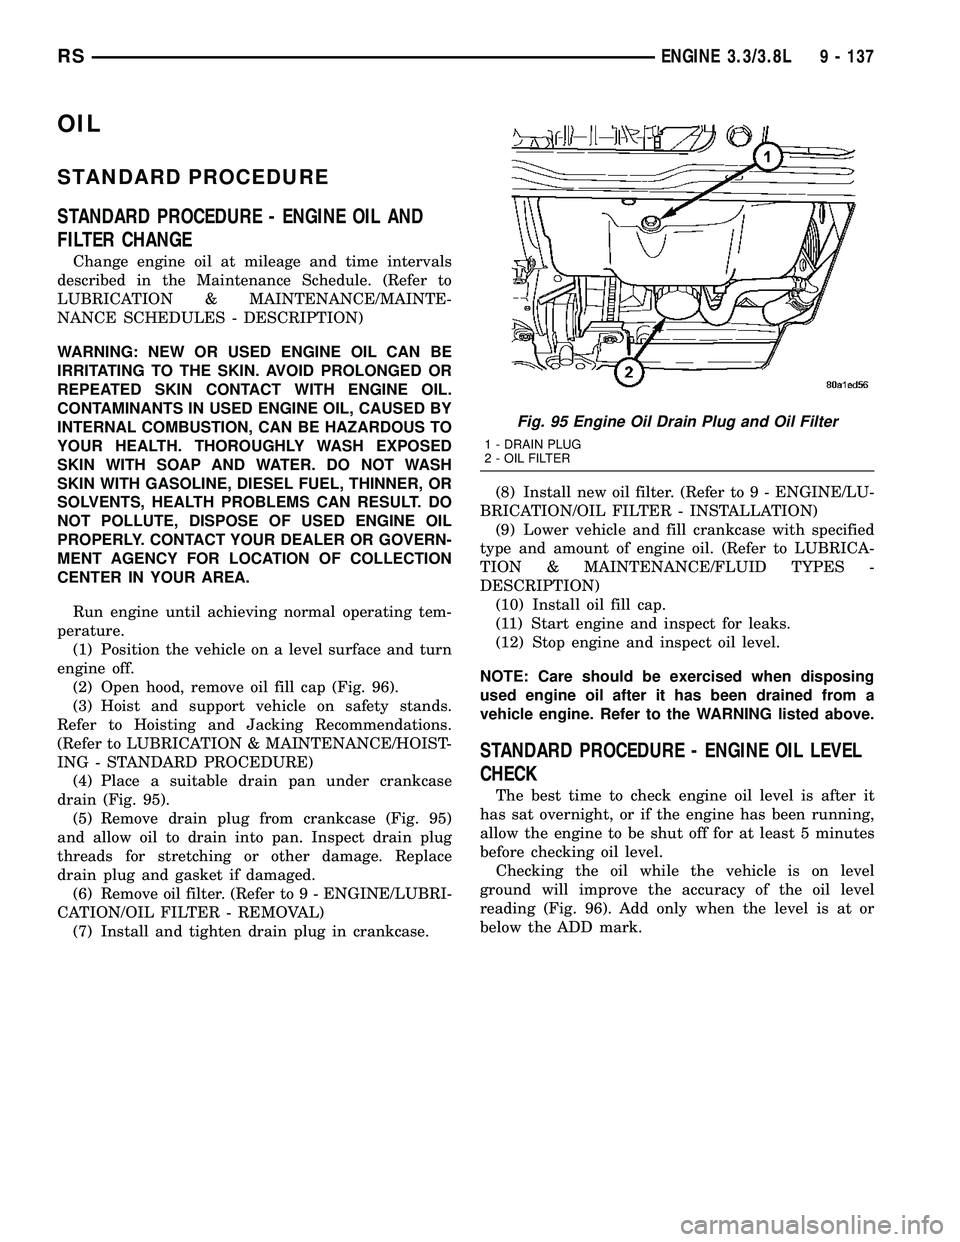
(2) Open hood, remove oil fill cap (Fig. 96).
(3) Hoist and support vehicle on safety stands.
Refer to Hoisting and Jacking Recommendations.
(Refer to LUBRICATION & MAINTENANCE/HOIST-
ING - STANDARD PROCEDURE)
(4) Place a suitable drain pan under crankcase
drain (Fig. 95).
(5) Remove drain plug from crankcase (Fig. 95)
and allow oil to drain into pan. Inspect drain plug
threads for stretching or other damage. Replace
drain plug and gasket if damaged.
(6) Remove oil filter. (Refer to 9 - ENGINE/LUBRI-
CATION/OIL FILTER - REMOVAL)
(7) Install and tighten drain plug in crankcase.(8) Install new oil filter. (Refer to 9 - ENGINE/LU-
BRICATION/OIL FILTER - INSTALLATION)
(9) Lower vehicle and fill crankcase with specified
type and amount of engine oil. (Refer to LUBRICA-
TION & MAINTENANCE/FLUID TYPES -
DESCRIPTION)
(10) Install oil fill cap.
(11) Start engine and inspect for leaks.
(12) Stop engine and inspect oil level.
NOTE: Care should be exercised when disposing
used engine oil after it has been drained from a
vehicle engine. Refer to the WARNING listed above.
STANDARD PROCEDURE - ENGINE OIL LEVEL
CHECK
The best time to check engine oil level is after it
has sat overnight, or if the engine has been running,
allow the engine to be shut off for at least 5 minutes
before checking oil level.
Checking the oil while the vehicle is on level
ground will improve the accuracy of the oil level
reading (Fig. 96). Add only when the level is at or
below the ADD mark.
Fig. 95 Engine Oil Drain Plug and Oil Filter
1 - DRAIN PLUG
2 - OIL FILTER
RSENGINE 3.3/3.8L9 - 137
Page 1548 of 2585
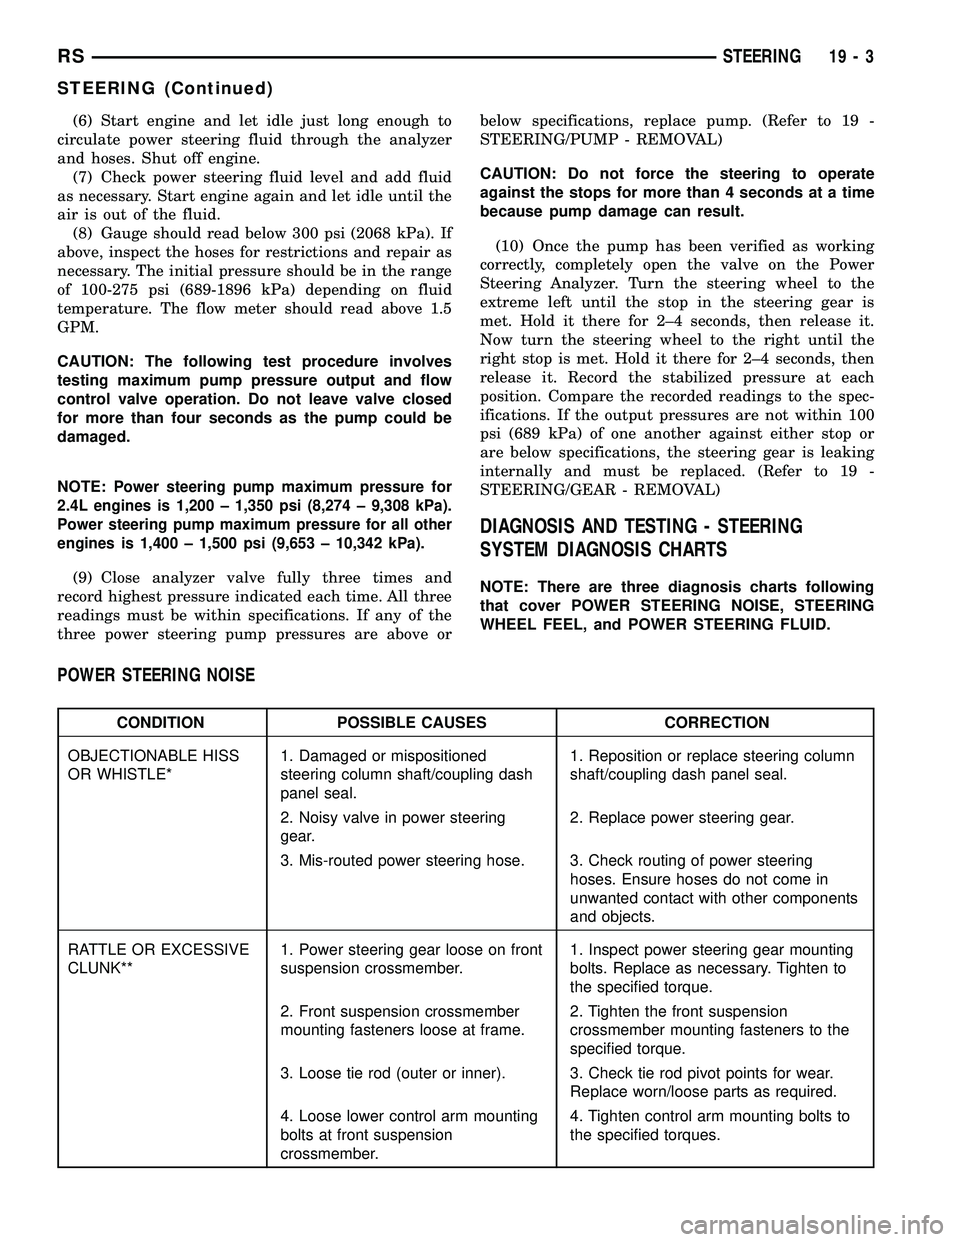
(6) Start engine and let idle just long enough to
circulate power steering fluid through the analyzer
and hoses. Shut off engine.
(7) Check power steering fluid level and add fluid
as necessary. Start engine again and let idle until the
air is out of the fluid.
(8) Gauge should read below 300 psi (2068 kPa). If
above, inspect the hoses for restrictions and repair as
necessary. The initial pressure should be in the range
of 100-275 psi (689-1896 kPa) depending on fluid
temperature. The flow meter should read above 1.5
GPM.
CAUTION: The following test procedure involves
testing maximum pump pressure output and flow
control valve operation. Do not leave valve closed
for more than four seconds as the pump could be
damaged.
NOTE:
Power steering pump maximum pressure for
2.4L engines is 1,200 ± 1,350 psi (8,274 ± 9,308 kPa).
Power steering pump maximum pressure for all other
engines is 1,400 ± 1,500 psi (9,653 ± 10,342 kPa).
(9) Close analyzer valve fully three times and
record highest pressure indicated each time. All three
readings must be within specifications. If any of the
three power steering pump pressures are above orbelow specifications, replace pump. (Refer to 19 -
STEERING/PUMP - REMOVAL)
CAUTION: Do not force the steering to operate
against the stops for more than 4 seconds at a time
because pump damage can result.
(10) Once the pump has been verified as working
correctly, completely open the valve on the Power
Steering Analyzer. Turn the steering wheel to the
extreme left until the stop in the steering gear is
met. Hold it there for 2±4 seconds, then release it.
Now turn the steering wheel to the right until the
right stop is met. Hold it there for 2±4 seconds, then
release it. Record the stabilized pressure at each
position. Compare the recorded readings to the spec-
ifications. If the output pressures are not within 100
psi (689 kPa) of one another against either stop or
are below specifications, the steering gear is leaking
internally and must be replaced. (Refer to 19 -
STEERING/GEAR - REMOVAL)
DIAGNOSIS AND TESTING - STEERING
SYSTEM DIAGNOSIS CHARTS
NOTE: There are three diagnosis charts following
that cover POWER STEERING NOISE, STEERING
WHEEL FEEL, and POWER STEERING FLUID.
POWER STEERING NOISE
CONDITION POSSIBLE CAUSES CORRECTION
OBJECTIONABLE HISS
OR WHISTLE*1. Damaged or mispositioned
steering column shaft/coupling dash
panel seal.1. Reposition or replace steering column
shaft/coupling dash panel seal.
2. Noisy valve in power steering
gear.2. Replace power steering gear.
3. Mis-routed power steering hose. 3. Check routing of power steering
hoses. Ensure hoses do not come in
unwanted contact with other components
and objects.
RATTLE OR EXCESSIVE
CLUNK**1. Power steering gear loose on front
suspension crossmember.1. Inspect power steering gear mounting
bolts. Replace as necessary. Tighten to
the specified torque.
2. Front suspension crossmember
mounting fasteners loose at frame.2. Tighten the front suspension
crossmember mounting fasteners to the
specified torque.
3. Loose tie rod (outer or inner). 3. Check tie rod pivot points for wear.
Replace worn/loose parts as required.
4. Loose lower control arm mounting
bolts at front suspension
crossmember.4. Tighten control arm mounting bolts to
the specified torques.
RSSTEERING19-3
STEERING (Continued)