Page 122 of 277
Tone Control
Slide the Bass and/or Treble controls up or down to
adjust the sound for the desired tone. The treble, and bass
will be displayed and continuously updated while the
slide is moved.
AM/FM Selection
Press the AM/FM button to change from AM to FM. The
operating mode will be displayed next to the station
frequency. The display will show ST when a stereo
station is received.
Scan Button
Pressing the SCAN button causes the tuner to search for
the next station, in either AM or FM, pausing for 5
seconds at each listenable station before continuing to the
next.
Pressing the AM/FM button continues the search in the
alternate frequency band.
To stop the search, press SCAN a second time.
To Set The Radio Push-button Memory
When you are receiving a station that you wish to
commit to push-button memory, press the SET button.
SET 1 will show in the display window. Select the
push-button you wish to lock onto this station and press
and release that button. If a station is not selected within
5 seconds after pressing the SET button, the station will
continue to play but will not be locked into push-button
memory.
You may add a second station to each push-button by
repeating the above procedure with this exception: Press
the SET button twice and SET 2 will show in the display
window. Each button can be set for SET 1 and SET 2 in
both AM and FM. This allows a total of 10 AM and 10 FM
stations to be locked into memory. You can recall the
stations stored in SET 2 memory by pressing the push-
button twice.
To Change From Clock To Radio Mode
Press the Time button to change the display between
radio frequency and time.
122 UNDERSTANDING YOUR INSTRUMENT PANEL
Page 132 of 277
SALES CODE RBK—AM/ FM STEREO RADIO
WITH CD PLAYER AND CD CHANGER
CONTROLS
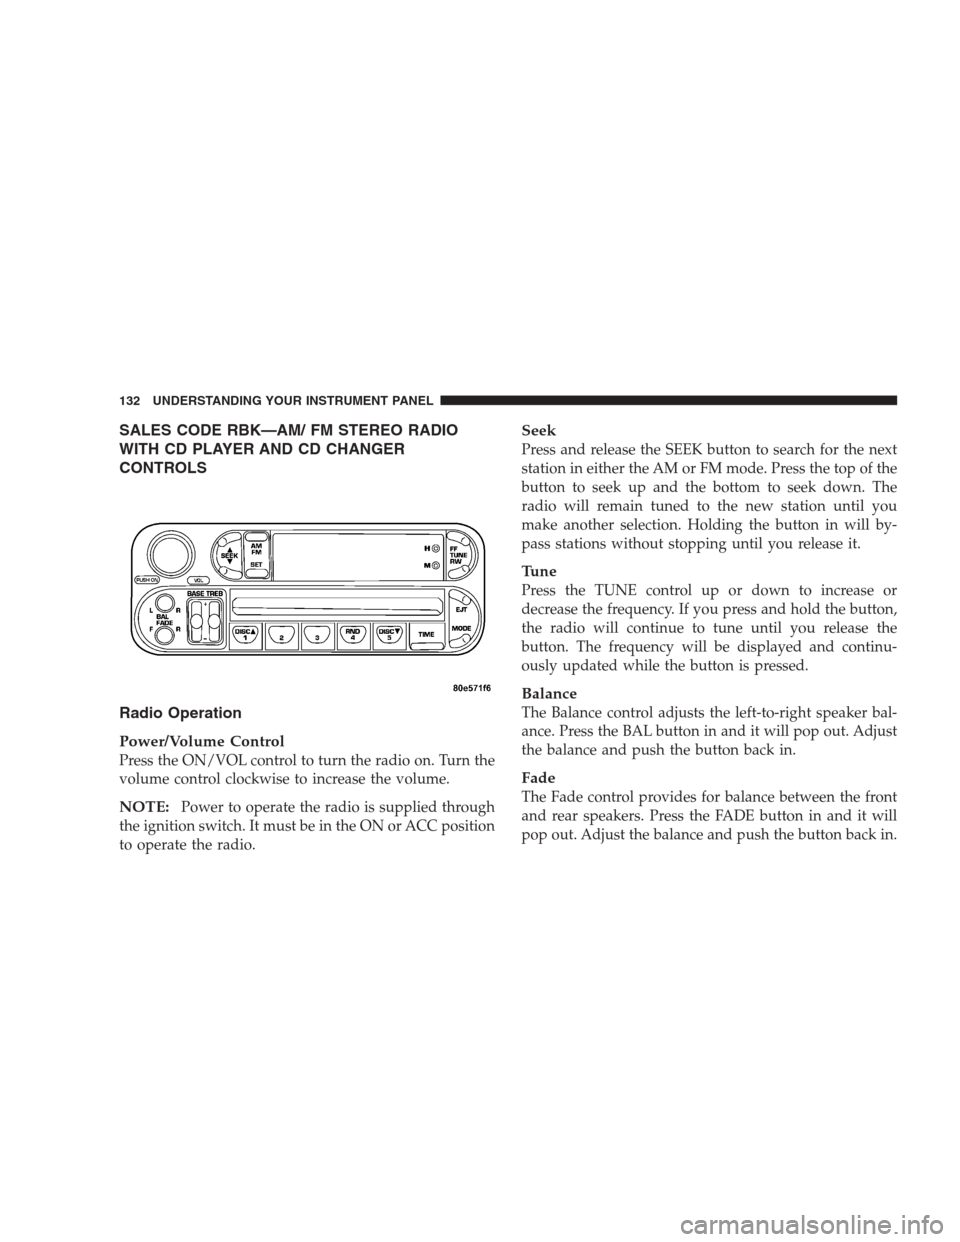
Radio Operation
Power/Volume Control
Press the ON/VOL control to turn the radio on. Turn the
volume control clockwise to increase the volume.
NOTE:Power to operate the radio is supplied through
the ignition switch. It must be in the ON or ACC position
to operate the radio.
Seek
Press and release the SEEK button to search for the next
station in either the AM or FM mode. Press the top of the
button to seek up and the bottom to seek down. The
radio will remain tuned to the new station until you
make another selection. Holding the button in will by-
pass stations without stopping until you release it.
Tune
Press the TUNE control up or down to increase or
decrease the frequency. If you press and hold the button,
the radio will continue to tune until you release the
button. The frequency will be displayed and continu-
ously updated while the button is pressed.
Balance
The Balance control adjusts the left-to-right speaker bal-
ance. Press the BAL button in and it will pop out. Adjust
the balance and push the button back in.
Fade
The Fade control provides for balance between the front
and rear speakers. Press the FADE button in and it will
pop out. Adjust the balance and push the button back in.
132 UNDERSTANDING YOUR INSTRUMENT PANEL
Page 147 of 277
Fan Control
Use this control to regulate the amount of air forced
through the system in any mode you select. Turn the
control clockwise to increase fan speed.
In ambient temperatures below 70°F (21°C), fan opera-
tion is delayed when the engine is first started. The fan
will automatically start when the engine coolant is warm
enough to heat the air. This feature can be defeated by
turning the fan control.
AUTO Control
Press the top of the button to turn the ATC system On.
Press the lower portion of the button to turn the entire
system Off.
Comfort Control
Use this control to regulate the comfort inside the pas-
senger compartment. Press the top of the switch to raise
the temperature selection and the bottom of the switch to
lower it. The comfort setting range is from Lo, 60, 61,....to
89,90, Hi, for automatic temperature control. You can
select a very hot or cold comfort setting by holding the
comfort control until it reaches its highest or lowest
levels.The system adjusts to bring the interior temperature to
the desired comfort level. All comfort settings are auto-
matic; even Hi and Low.
NOTE:You can change the display from U.S. to metric
units by pressing the Mix and Panel mode buttons
simultaneously or by pressing the English/Metric button
on the overhead console.
Air Conditioning Button
Press this button to turn on the air conditioning
compressor. A snow flake symbol in the display
shows that the compressor is on. Compressor
operation is automatic when you press the Auto button.
The compressor can operate at any temperature above
32°F (0°C).
With the compressor off and the temperature set at Lo, air
entering the vehicle will be slightly warmer than the air
outside the vehicle.
NOTE:The compressor will not engage until the engine
has been running for several seconds. Slight changes in
UNDERSTANDING YOUR INSTRUMENT PANEL 147
4
Page 185 of 277
3. Before raising the vehicle, use the lug wrench to loosen
the lug nuts of the flat tire.4. Turn the jack screw clockwise to firmly engage the jack
saddle with the lift area of the sill flange, use the lift area
closest to the flat tire.
WHAT TO DO IN EMERGENCIES 185
6
Page 187 of 277
WARNING!
Death or serious injury can occur if magnetically
sensitive devices are exposed to this magnet. Mag-
nets can affect pacemakers.
7. Mount the spare tire. For vehicles equipped with
wheel covers, see the wheel cover installation instruc-
tions. Do not attempt to install a wheel cover on a
compact spare.
8. Tighten all the lug nuts on the mounting studs.
9. Lower the vehicle to the ground by turning the jack
handle counterclockwise.
10. Fully tighten the lug nuts. Torque the wheel lug nuts
to 100 ft/lb. (135N. m).
11. Store the flat tire, jack and tools.
WARNING!
Raising the vehicle higher than necessary can make
the vehicle less stable. It could slip off the jack and
hurt someone near it. Raise the vehicle only enough
to remove the tire.
WARNING!
A loose tire or jack thrown forward in a collision or
hard stop could endanger the occupants of the ve-
hicle. Always stow the jack parts and the spare tire in
the places provided.
WHAT TO DO IN EMERGENCIES 187
6
Page 233 of 277
6. Lift and prop the crossmember above the headlamp on
the side being serviced, and remove the electrical con-
nectors from the headlamp.
7. Pull headlamp up and under crossmember to remove
it from the vehicle.
8. Remove the bulb retaining ring by turning it counter-
clockwise. Pull the bulb and socket assembly from the
housing and pull the bulb from the socket.
9. Install a new headlight bulb in the socket, reinstall the
bulb and socket assembly and tighten the retaining ring.
CAUTION!
Do not touch the new bulb with your fingers. Oil
contamination will severely shorten bulb life.
If the bulb comes into contact with any oily surface,
clean the bulbs with rubbing alcohol.
10. Reinstall the headlight assembly, replace the electri-
cal connectors from the headlamp and lower the cross-
member back on the headlamp.11. Reinstall the upper crossmember attachments, head-
lamp jackscrews, windshield filler neck screw and speed
control servo screw.
Front Park, Turn Signal and Front Sidemarker
Light
1. Reach up under the front fascia and turn the bulb and
socket assembly counterclockwise to remove it from the
light housing.
2. Pull the bulb from the socket, install the new bulb, and
reinstall the bulb and socket assembly.
Fog Light
1.Remove the screw securing the fog light to the fascia
and pull the light away from the vehicle to expose the bulb.
2. Remove the bulb by turning counter-clockwise. Pull
the bulb out of the light housing.
3. Remove the wiring connector from the bulb.
4. Insert the new bulb and turn clockwise.
5. Connect the wiring connector to the new bulb and
reinstall the assembly.
MAINTAINING YOUR VEHICLE 233
7
Page 234 of 277
Center Stop Light
1. Open the trunk and remove the trunk lid cover.
2. Turn the bulb socket counterclockwise and remove it
from the housing.
3. Pull the bulb from the socket and replace the bulb.
4. Reinstall the bulb and socket assembly.
Tail, Stop, Back Up, and Turn Signal Lights
1. Open the trunk and remove the fasteners securing the
light housing to the body.
2. Pull the light housing from the body to expose the
wiring socket.
3. Turn the bulb socket counterclockwise to remove from
the housing. Pull the bulb out of the socket and remove
the bulb.
4. Replace the bulb, reinstall the bulb and socket assem-
bly and reattach the light housing.
234 MAINTAINING YOUR VEHICLE
Page 268 of 277
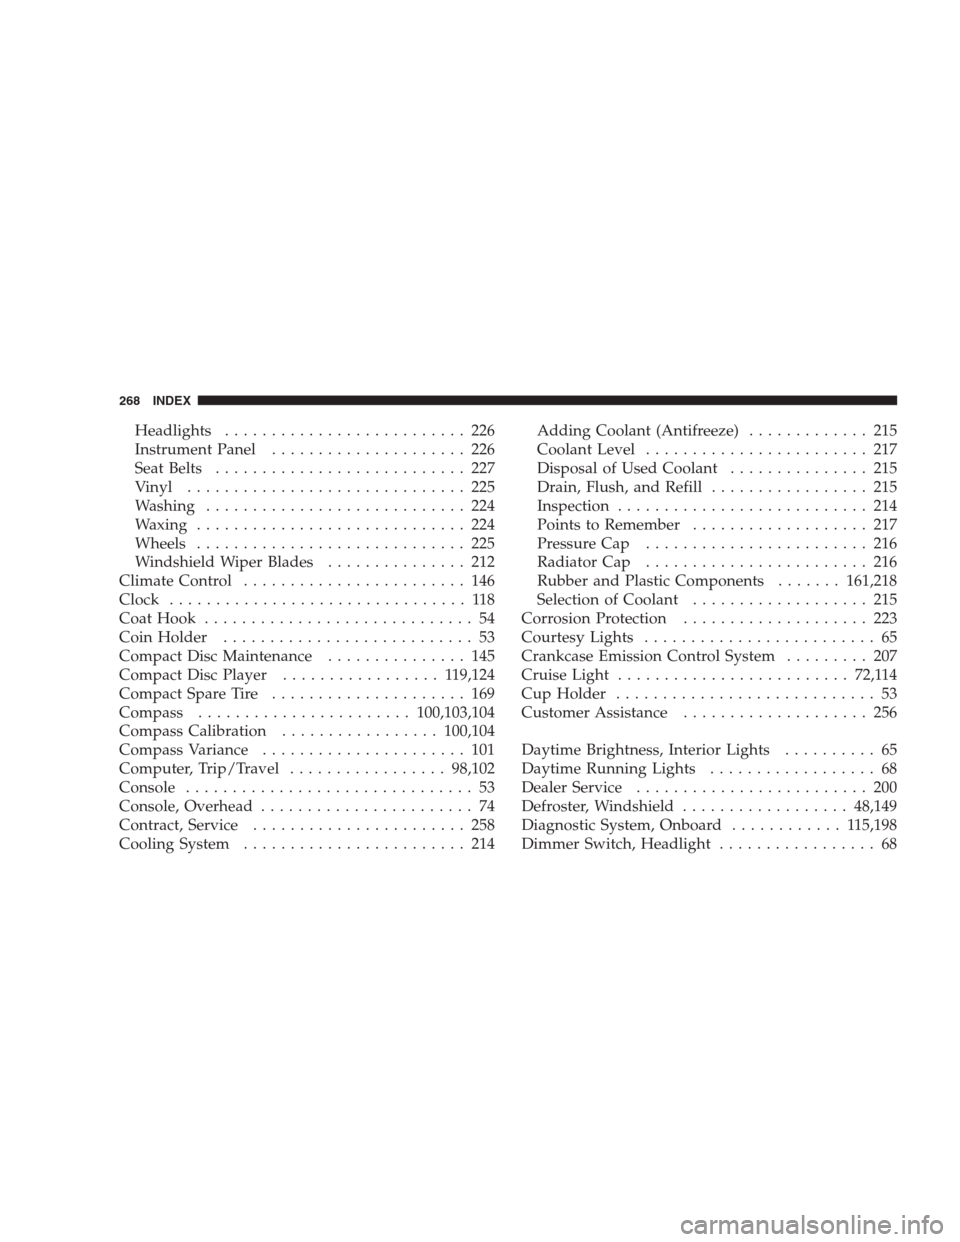
Headlights.......................... 226
Instrument Panel..................... 226
Seat Belts........................... 227
Vinyl.............................. 225
Washing............................ 224
Waxing............................. 224
Wheels............................. 225
Windshield Wiper Blades............... 212
Climate Control........................ 146
Clock................................ 118
Coat Hook............................. 54
Coin Holder........................... 53
Compact Disc Maintenance............... 145
Compact Disc Player................. 119,124
Compact Spare Tire..................... 169
Compass.......................100,103,104
Compass Calibration.................100,104
Compass Variance...................... 101
Computer, Trip/Travel.................98,102
Console............................... 53
Console, Overhead....................... 74
Contract, Service....................... 258
Cooling System........................ 214Adding Coolant (Antifreeze)............. 215
Coolant Level........................ 217
Disposal of Used Coolant............... 215
Drain, Flush, and Refill................. 215
Inspection........................... 214
Points to Remember................... 217
Pressure Cap........................ 216
Radiator Cap........................ 216
Rubber and Plastic Components.......161,218
Selection of Coolant................... 215
Corrosion Protection.................... 223
Courtesy Lights......................... 65
Crankcase Emission Control System......... 207
Cruise Light.........................72,114
Cup Holder............................ 53
Customer Assistance.................... 256
Daytime Brightness, Interior Lights.......... 65
Daytime Running Lights.................. 68
Dealer Service......................... 200
Defroster, Windshield..................48,149
Diagnostic System, Onboard............ 115,198
Dimmer Switch, Headlight................. 68
268 INDEX