2004 CHEVROLET VENTURE lights
[x] Cancel search: lightsPage 205 of 516

{CAUTION:
Even with the Ultrasonic Rear Park Assist
system, the driver must check carefully before
backing up. The system does not operate above
typical backing speeds of 3 mph (5 km/h) while
parking. And, the system does not detect
objects that are more than 5 feet (1.5 meters)
behind the vehicle.
So, unless you check carefully behind you
before and when you back up, you could strike
children, pedestrians, bicyclists or pets behind
you, and they could be injured or killed.
Whether or not you are using rear park assist,
always check carefully behind your vehicle
before you back up and then watch closely as
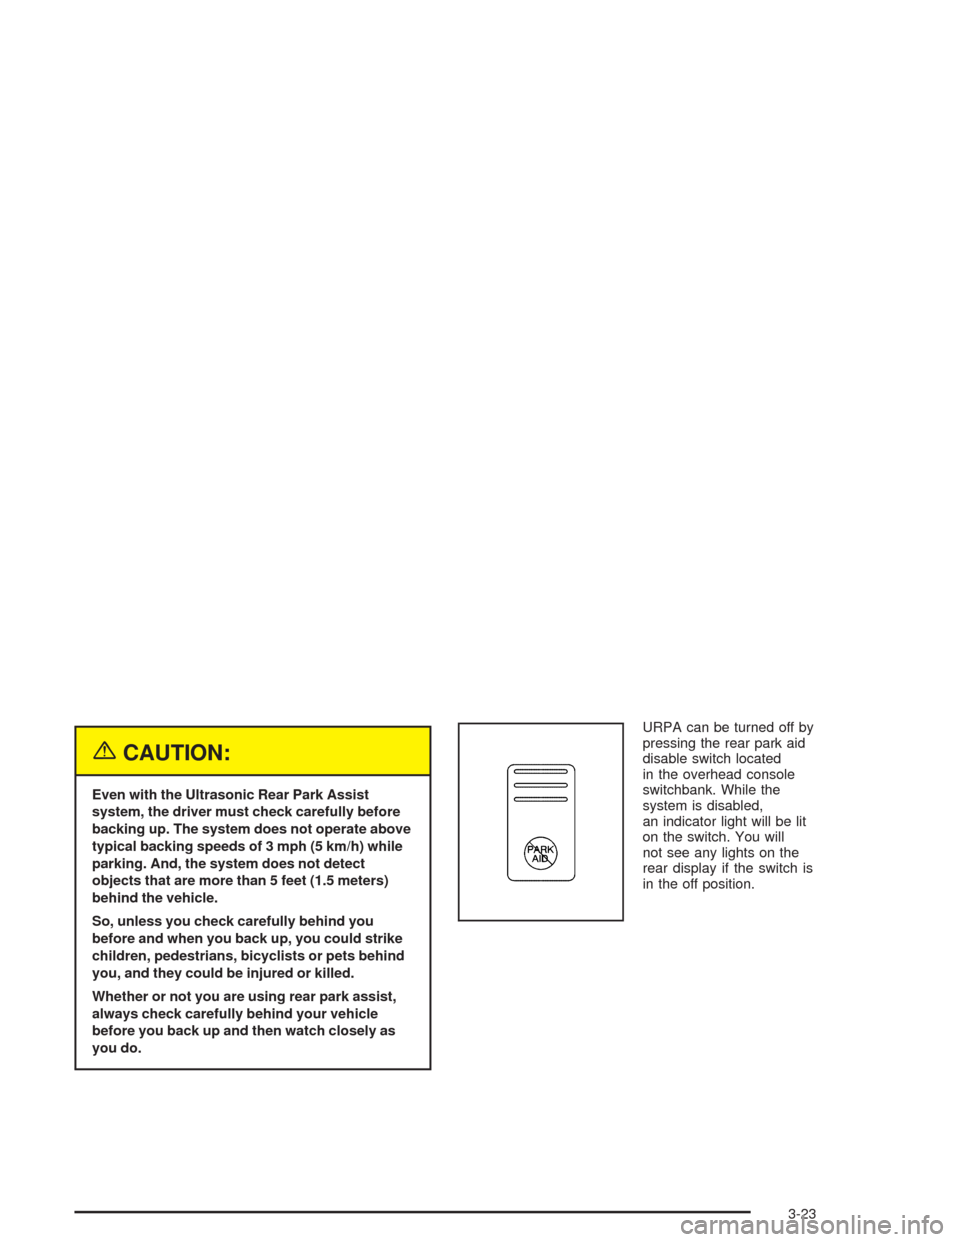
you do.URPA can be turned off by
pressing the rear park aid
disable switch located
in the overhead console
switchbank. While the
system is disabled,
an indicator light will be lit
on the switch. You will
not see any lights on the
rear display if the switch is
in the off position.
3-23
Page 206 of 516

How the System Works
Unless disabled, the URPA will turn on automatically
when the shift lever is moved into REVERSE (R). When
the system turns on, the three lights on the display will
illuminate for one and a half seconds to let you know that
the system is working. If your vehicle is moving in
REVERSE (R) at a speed greater than 3 mph (5 km/h),
the red light will �ash to remind you that the system does
not work at speed greater than 3 mph (5 km/h).
If an object is detected at a REVERSE (R) speed of
less than 3 mph (5 km/h), one of the following will occur:
Description English Metric
amber light 5 ft. 1.5 m
amber/amber lights 40 in. 1.0 m
amber/amber/red lights &
continuous chime20 in. 0.5 m
amber/amber/red lights
�ashing & continuous
chime1 ft 0.3 m
A chime will sound the �rst time an object is detected
between 20 inches (0.5 m) and 5 feet (1.5 m) away.
URPA cannot detect objects that are above liftgate level.
In order for the rear sensors to recognize an object, it
must be within detection range behind the vehicle.
When the System Does Not Seem to Work
Properly
The light may �ash red when the vehicle is in
REVERSE (R) if the ultrasonic sensors are not kept
clean. So be sure to keep your rear bumper free of mud,
dirt, snow, ice and slush. Other conditions that may affect
system performance include things like the vibrations
from a jackhammer or the compression of air brakes on a
very large truck. If after cleaning the rear bumper and
then driving forward at least 15 mph (25 km/h), the
display continues to �ash red, see your dealer.
If a trailer was attached to your vehicle, or a bicycle or an
object was on the back of, or hanging out of your liftgate
during your last drive cycle, the light may also �ash red.
The light will continue to �ash whenever in REVERSE (R)
until your vehicle is driven forward at least 15 mph
(25 km/h) without any obstructions behind the vehicle.
For cleaning instructions, seeCleaning the Outside of
Your Vehicle on page 5-100.
3-24
Page 218 of 516

Warning Lights, Gages, and
Indicators
This part describes the warning lights and gages that may
be on your vehicle. The pictures will help you locate them.
Warning lights and gages can signal that something is
wrong before it becomes serious enough to cause
an expensive repair or replacement. Paying attention to
your warning lights and gages could also save you
or others from injury.
Warning lights come on when there may be or is a
problem with one of your vehicle’s functions. As you will
see in the details on the next few pages, some
warning lights come on brie�y when you start the
engine just to let you know they’re working. If you are
familiar with this section, you should not be alarmed
when this happens.Gages can indicate when there may be or is a problem
with one of your vehicle’s functions. Often gages
and warning lights work together to let you know when
there’s a problem with your vehicle.
When one of the warning lights comes on and stays on
when you are driving, or when one of the gages shows
there may be a problem, check the section that tells you
what to do about it. Please follow this manual’s advice.
Waiting to do repairs can be costly – and even
dangerous. So please get to know your warning lights
and gages. They’re a big help.
Your vehicle also has a message center that works
along with the warning lights and gages. SeeMessage
Center on page 3-50.
3-36
Page 219 of 516

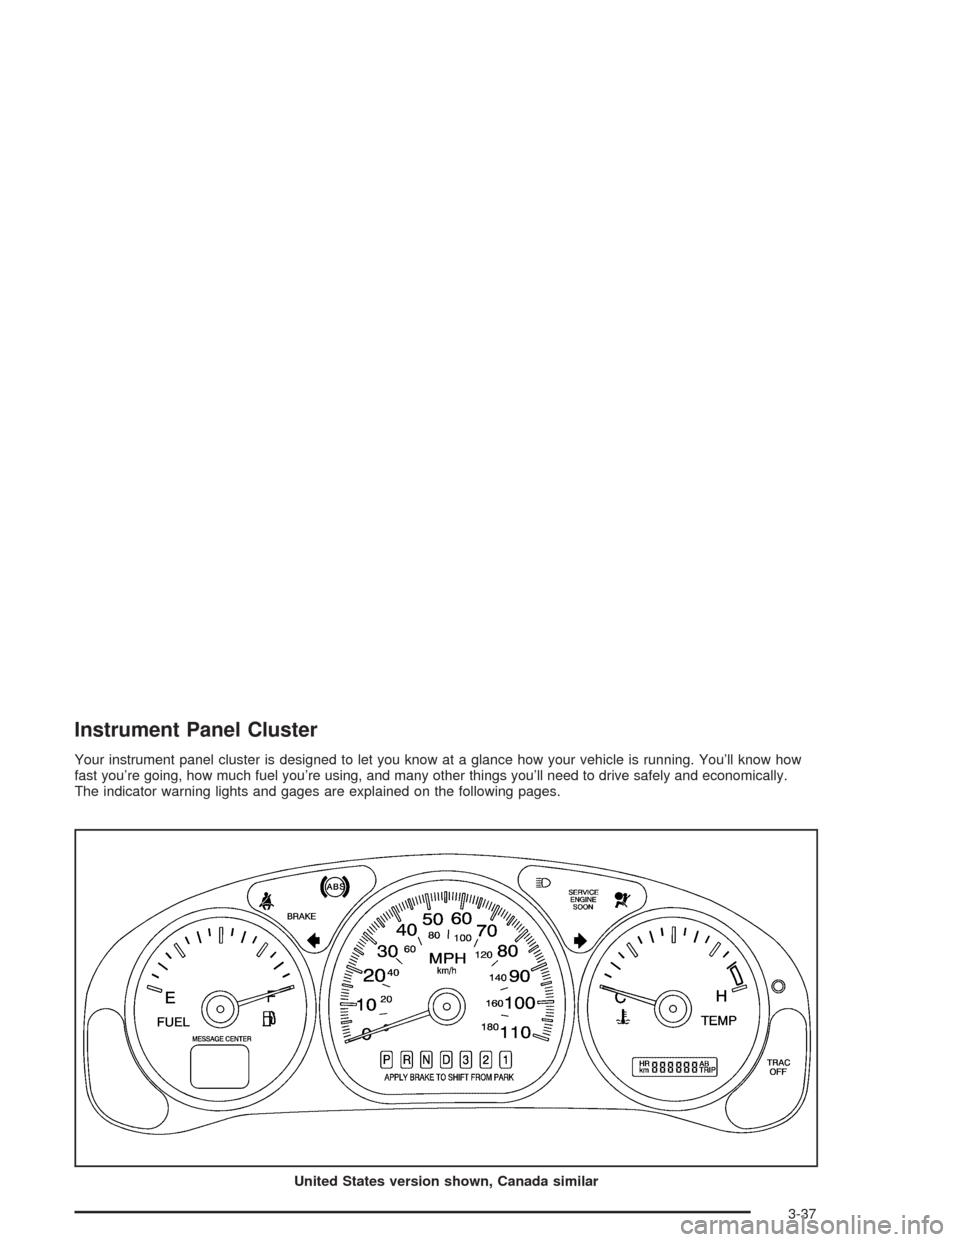
Instrument Panel Cluster
Your instrument panel cluster is designed to let you know at a glance how your vehicle is running. You’ll know how
fast you’re going, how much fuel you’re using, and many other things you’ll need to drive safely and economically.
The indicator warning lights and gages are explained on the following pages.
United States version shown, Canada similar
3-37
Page 322 of 516

Here are some tips on night driving.
Drive defensively.
Do not drink and drive.
Adjust your inside rearview mirror to reduce the
glare from headlamps behind you.
Since you can not see as well, you may need to
slow down and keep more space between you
and other vehicles.
Slow down, especially on higher speed roads. Your
headlamps can light up only so much road ahead.
In remote areas, watch for animals.
If you are tired, pull off the road in a safe place
and rest.
No one can see as well at night as in the daytime. But
as we get older these differences increase. A
50-year-old driver may require at least twice as much
light to see the same thing at night as a 20-year-old.
What you do in the daytime can also affect your
night vision. For example, if you spend the day in bright
sunshine you are wise to wear sunglasses. Your
eyes will have less trouble adjusting to night. But if you
are driving, do not wear sunglasses at night. They
may cut down on glare from headlamps, but they also
make a lot of things invisible.You can be temporarily blinded by approaching
headlamps. It can take a second or two, or even several
seconds, for your eyes to readjust to the dark. When
you are faced with severe glare (as from a driver
who does not lower the high beams, or a vehicle with
misaimed headlamps), slow down a little. Avoid
staring directly into the approaching headlamps.
Keep your windshield and all the glass on your vehicle
clean — inside and out. Glare at night is made much
worse by dirt on the glass. Even the inside of the glass
can build up a �lm caused by dust. Dirty glass makes
lights dazzle and �ash more than clean glass would,
making the pupils of your eyes contract repeatedly.
Remember that your headlamps light up far less of a
roadway when you are in a turn or curve. Keep
your eyes moving; that way, it is easier to pick out dimly
lighted objects. Just as your headlamps should be
checked regularly for proper aim, so should your eyes
be examined regularly. Some drivers suffer from
night blindness — the inability to see in dim light — and
are not even aware of it.
4-18
Page 459 of 516

Instrument Panel Fuse Block
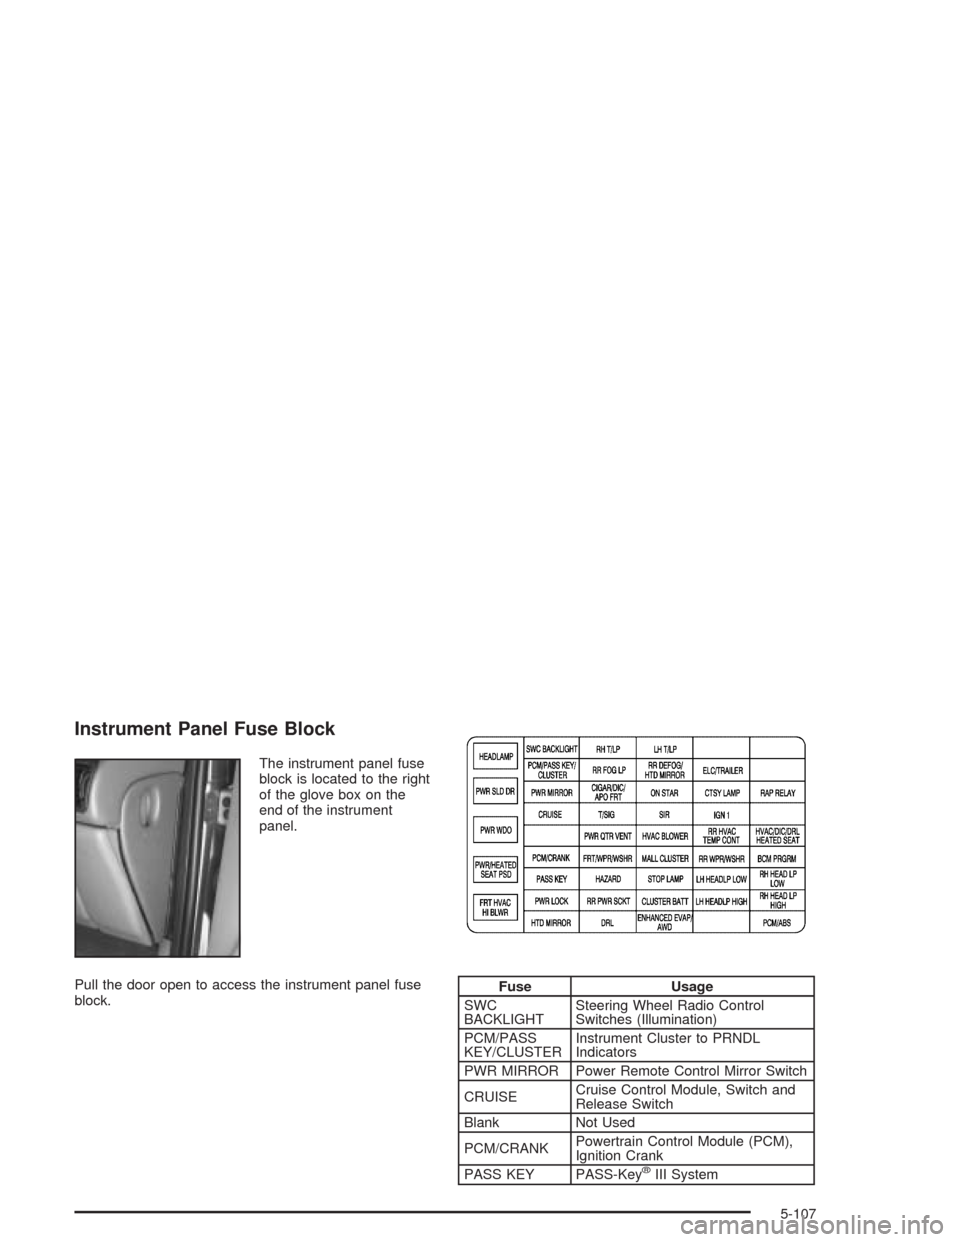
The instrument panel fuse
block is located to the right
of the glove box on the
end of the instrument
panel.
Pull the door open to access the instrument panel fuse
block.
Fuse Usage
SWC
BACKLIGHTSteering Wheel Radio Control
Switches (Illumination)
PCM/PASS
KEY/CLUSTERInstrument Cluster to PRNDL
Indicators
PWR MIRROR Power Remote Control Mirror Switch
CRUISECruise Control Module, Switch and
Release Switch
Blank Not Used
PCM/CRANKPowertrain Control Module (PCM),
Ignition Crank
PASS KEY PASS-Key
®III System
5-107
Page 516 of 516

W
Warm-Up Shift................................................2-38
Warning Lights, Gages and Indicators................3-36
Warnings
Hazard Warning Flashers............................... 3-6
Other Warning Devices.................................. 3-7
Safety and Symbols......................................... iii
Vehicle Damage.............................................. iv
Washing Your Vehicle....................................5-100
Weight of the Trailer........................................4-42
Weight of the Trailer Tongue.............................4-43
What Engine Coolant to Use............................5-23
What Kind of Engine Oil to Use........................5-15
What Power Steering Fluid to Use....................5-37
What to Do with Used Oil................................5-18
What Washer Fluid to Use...............................5-38
Wheels
Alignment and Tire Balance..........................5-74
Replacement...............................................5-74
When to Add Engine Oil..................................5-14
When to Change Engine Oil
(GM Oil Life System)...................................5-17
When to Check..............................................5-69
When to Check and Change Automatic Transaxle
Fluid..........................................................5-20
When to Check Power Steering Fluid................5-37
When to Inspect the Engine Air Cleaner/Filter.....5-18When You Are Ready to Leave After Parking
on a Hill.....................................................4-48
Where to Put the Restraint...............................1-63
Why Safety Belts Work....................................1-28
Windows.......................................................2-24
Manual......................................................2-24
Power........................................................2-25
Power Rear Quarter.....................................2-26
Side Window Latches...................................2-25
Windshield Washer.........................................3-10
Fluid..........................................................5-38
Windshield Wiper
Blade Replacement......................................5-56
Fuses......................................................5-106
Windshield Wipers..........................................3-10
Winter Driving................................................4-28
X
XM™ Satellite Radio Antenna System..............3-122
XM™ Satellite Radio Service..........................3-121
XM™ Satellite Radio Service
(48 Contiguous US States)...........3-65, 3-77, 3-93
Y
Your Vehicle and the Environment....................... 6-2
18