2004 CHEVROLET SILVERADO service
[x] Cancel search: servicePage 272 of 584
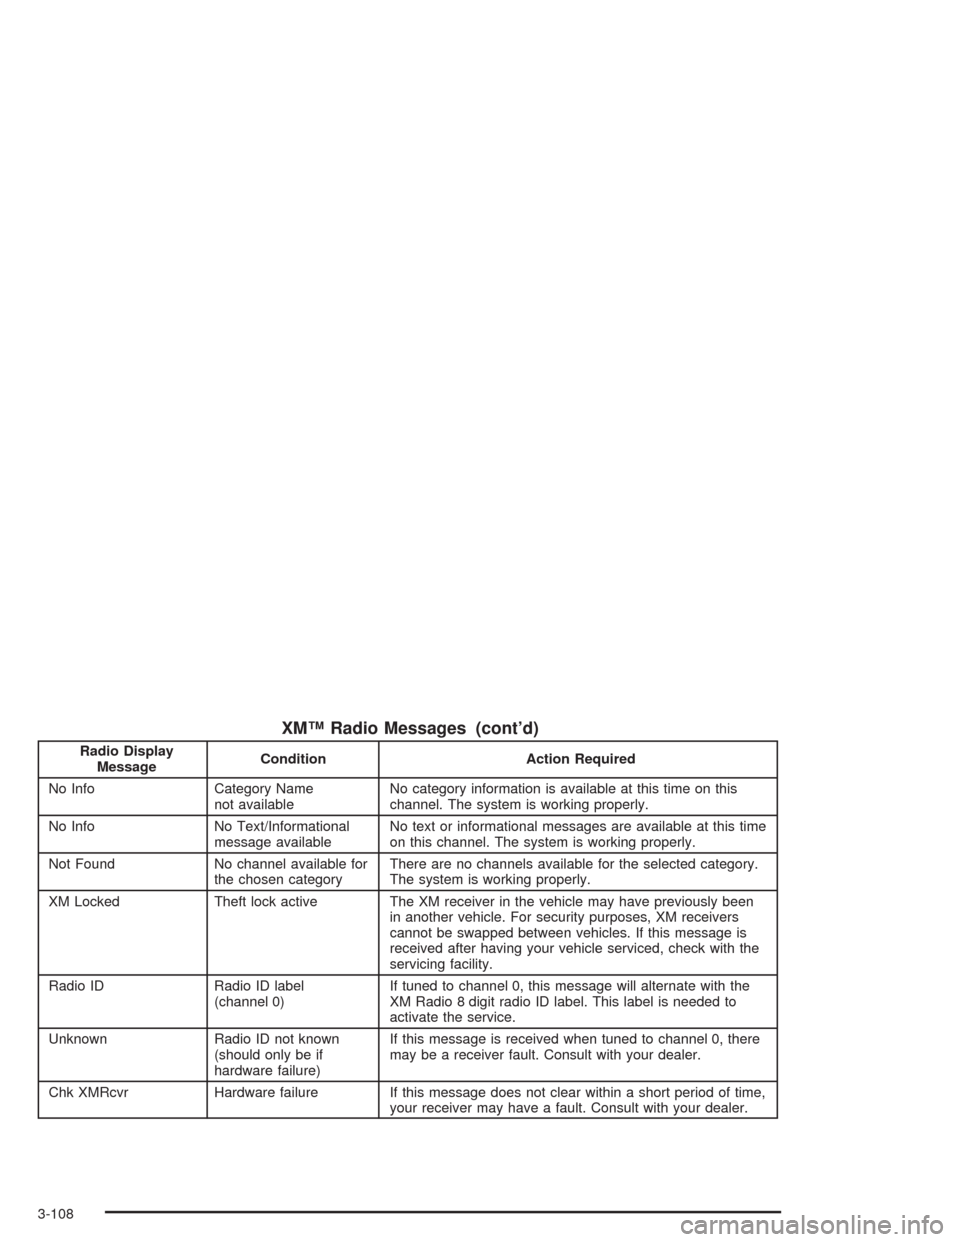
XM™ Radio Messages (cont’d)
Radio Display
MessageCondition Action Required
No Info Category Name
not availableNo category information is available at this time on this
channel. The system is working properly.
No Info No Text/Informational
message availableNo text or informational messages are available at this time
on this channel. The system is working properly.
Not Found No channel available for
the chosen categoryThere are no channels available for the selected category.
The system is working properly.
XM Locked Theft lock active The XM receiver in the vehicle may have previously been
in another vehicle. For security purposes, XM receivers
cannot be swapped between vehicles. If this message is
received after having your vehicle serviced, check with the
servicing facility.
Radio ID Radio ID label
(channel 0)If tuned to channel 0, this message will alternate with the
XM Radio 8 digit radio ID label. This label is needed to
activate the service.
Unknown Radio ID not known
(should only be if
hardware failure)If this message is received when tuned to channel 0, there
may be a receiver fault. Consult with your dealer.
Chk XMRcvr Hardware failure If this message does not clear within a short period of time,
your receiver may have a fault. Consult with your dealer.
3-108
Page 279 of 584

Headphones
The RSE system includes two sets of
wireless headphones.
Each set of headphones has an ON/OFF control. An
indicator light will illuminate on the headphones
when they are on. If the light does not illuminate, the
batteries may need to be replaced. See “Battery
Replacement” following for more information.
Each set of headphones has a volume knob. To adjust
the volume, adjust this knob.
The transmitters are located below the video display
screen. The headphones will shut off automatically
if they lose the signal from the system after about four
minutes to save battery power. The signal may be lost if
the system is turned off or if the headphones are out
of range of the transmitters.
When using the wired headphones, if the front seat
passengers play a CD in the Radio with Six-Disc CD
(if equipped) or use XM™ Satellite Radio Service
(if equipped), you will hear the audio for these sources,
instead of the DVD or CD that is currently playing
through the RSE.
Notice:Do not store the headphones in heat or
direct sunlight. This could damage the headphones
and repairs would not be covered by your warranty.
Keep the headphones stored in a cool, dry place.
Battery Replacement
To change the batteries, do the following:
1. Loosen the screw on the battery compartment door
located on the left side of the headphone earpiece.
2. Replace the two AAA batteries in the compartment.
Make sure that they are installed correctly, using the
diagram on the inside of the battery compartment.
3. Tighten the screw to close the compartment door.
If the headphones are to be stored for a long period
of time, remove the batteries and keep them in a cool,
dry place.
Stereo RCA Jacks
The RCA jacks are located behind the video screen.
The RCA jacks allow audio and video signals to
be connected from an auxiliary device such as a
camcorder or a video game unit to the RSE system.
Standard RCA cables, not included, are needed
to connect the auxiliary device to the RCA jacks. The
yellow connector inputs video and the red and white
connectors input right and left audio. Refer to the
manufacturer’s instructions for proper connection of the
auxiliary device.
3-115
Page 281 of 584
Video Screen
The video screen is located in the overhead console. To
use the video screen, push forward on the release
latch and the screen will fold down. Adjust the screen’s
position as desired. When the video screen is not in
use, push it up into its latched position.
The DVD player and display will continue to operate
when the screen is in the up or the down position. The
video screen contains the transmitters for the wireless
headphones and the remote control. If the screen
is in the closed position, the signals will not be
available for the operation of the headphones or the
remote control.
Notice:Directly touching the video screen
may damage it. Do not touch the screen. See
“Cleaning the Video Screen” later in this section
for more information.
DVD Player
The DVD player is located in the overhead console. The
DVD player can be controlled by the buttons on the
DVD player and/or by the buttons on the remote control.
See “Remote Control” later in this section for
more information.The DVD player power may be turned on when the
ignition is in RUN, ACCESSORY, or when Retained
Accessory Power (RAP) is active.
The RSE system DVD player is only compatible with
DVDs of the appropriate region code for the country that
the vehicle was sold in. The DVD region code is
printed on the jacket of most DVDs.
Standard audio CDs, CD-R, CD-RW, Video CD and
Photo CD/CD-R media are fully supported by this DVD
player. DVD-R and DVD-RW media is supported if
formatted as DVD-Video. DVD+R and DVD+RW media
may or may not be supported by the DVD player.
The DVD player does not support DVD-RAM,
DVD-ROM, and DVD Audio media. An error message
will appear on the display if this type of media is inserted
into the DVD player.
When using the wired headphones, not included, if the
front seat passengers play a CD in the Radio with
Six-Disc CD (if equipped) or use XM™ Satellite Radio
Service (if equipped), you will hear the audio for
these sources, instead of the DVD or CD that is currently
playing through the RSE.
If an error message appears on the video screen, see
“DVD Messages” later in this section.
3-117
Page 292 of 584
When a cassette tape is playing, press this button to
play the other side of the tape.
When a CD is playing in the CD changer, press this
button to go to the next available CD, if multiple CDs
are loaded.
QSOURCER:Press this button to switch between
FM1, FM2, AM, or XM1 or XM2 (if equipped), or a
cassette tape or CD. The cassette or CD must be loaded
to play. Available loaded sources are shown on the
display as a tape or a CD symbol.
QSEEKR:Press the up or the down arrow to go to
the next or to the previous radio station and stay
there. The radio will only seek stations with a strong
signal that are in the selected band.
When a cassette tape or CD is playing, press the up or
the down arrow to fast forward or reverse.
QVOLR(Volume):Press the up or the down arrow
to increase or to decrease the volume.
Radio Reception
AM
The range for most AM stations is greater than for FM,
especially at night. The longer range can cause
station frequencies to interfere with each other. Static
can occur on AM stations caused by things like
storms and power lines. Try reducing the treble to
reduce this noise.
FM Stereo
FM stereo will give the best sound, but FM signals will
reach only about 10 to 40 miles (16 to 65 km). Tall
buildings or hills can interfere with FM signals, causing
the sound to fade in and out.
XM™ Satellite Radio Service
XM™ Satellite Radio Service gives digital radio
reception from coast to coast. Just as with FM, tall
buildings or hills can interfere with satellite radio signals,
causing the sound to fade in and out. The radio may
display NO SIGNAL to indicate interference.
3-128
Page 293 of 584
Care of Your Cassette Tape Player
A tape player that is not cleaned regularly can cause
reduced sound quality, ruined cassettes, or a damaged
mechanism. Cassette tapes should be stored in their
cases away from contaminants, direct sunlight, and
extreme heat. If they are not, they may not operate
properly or may cause failure of the tape player.
The tape player should be cleaned regularly after every
50 hours of use. The radio may display CLEAN to
indicate that the tape player has been used for 50 hours
without resetting the tape clean timer. If this message
appears on the display, the cassette tape player
needs to be cleaned. It will still play tapes, but it should
be cleaned as soon as possible to prevent damage
to the tapes and player. If there is a reduction in sound
quality, try a known good cassette to see if the tape
or the tape player is at fault. If this other cassette has no
improvement in sound quality, clean the tape player.
For best results, use a scrubbing action, non-abrasive
cleaning cassette with pads which scrub the tape head as
the hubs of the cleaner cassette turn. The recommended
cleaning cassette is available through your dealer.
When cleaning the cassette tape player with the
recommended non-abrasive cleaning cassette, it is
possible that the cassette may eject, because the cut
tape detection feature on the radio may recognize it as a
broken tape, in error.To prevent the cleaning cassette from being ejected,
use the following steps:
1. Turn the ignition on.
2. Turn the radio off.
3. Press and hold the TAPE DISC button for �ve
seconds. READY will appear on the display and
the cassette symbol will �ash for �ve seconds.
4. Insert the scrubbing action cleaning cassette.
5. Eject the cleaning cassette after the manufacturer’s
recommended cleaning time.
When the cleaning cassette has been ejected, the
cut tape detection feature will be active again.
A non-scrubbing action, wet-type cleaner which uses a
cassette with a fabric belt to clean the tape head
can be used. This type of cleaning cassette will not
eject on its own. A non-scrubbing action cleaner may not
clean as thoroughly as the scrubbing type cleaner.
The use of a non-scrubbing action, dry-type cleaning
cassette is not recommended.
After the player is cleaned, press and hold the eject
button for �ve seconds to reset the CLEAN indicator.
The radio will display --- or CLEANED to show the
indicator was reset.
Cassettes are subject to wear and the sound
quality may degrade over time. Always make sure
the cassette tape is in good condition before the tape
player is serviced.
3-129
Page 301 of 584
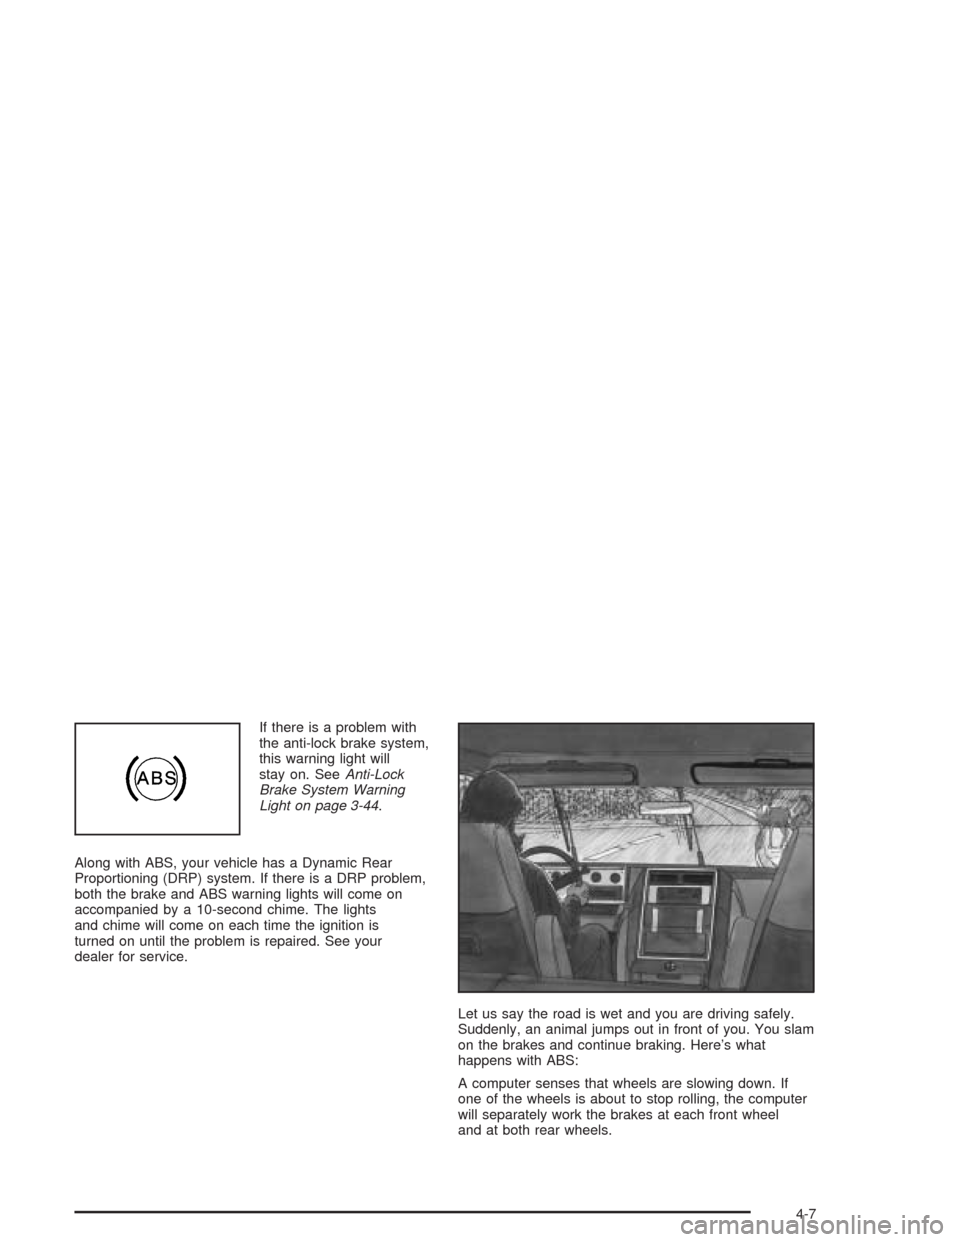
If there is a problem with
the anti-lock brake system,
this warning light will
stay on. SeeAnti-Lock
Brake System Warning
Light on page 3-44.
Along with ABS, your vehicle has a Dynamic Rear
Proportioning (DRP) system. If there is a DRP problem,
both the brake and ABS warning lights will come on
accompanied by a 10-second chime. The lights
and chime will come on each time the ignition is
turned on until the problem is repaired. See your
dealer for service.
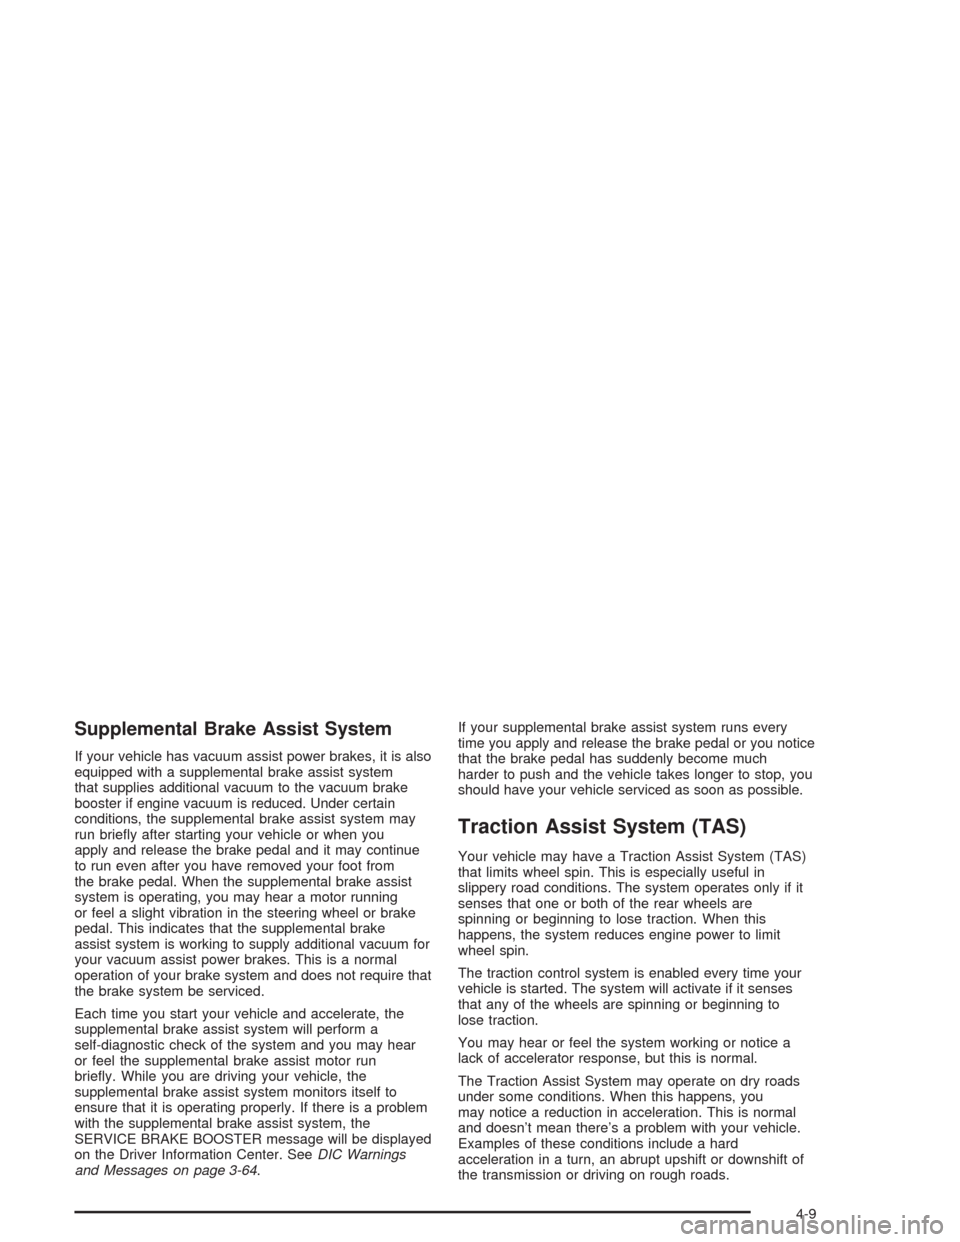
Let us say the road is wet and you are driving safely.
Suddenly, an animal jumps out in front of you. You slam
on the brakes and continue braking. Here’s what
happens with ABS:
A computer senses that wheels are slowing down. If
one of the wheels is about to stop rolling, the computer
will separately work the brakes at each front wheel
and at both rear wheels.
4-7
Page 303 of 584
Supplemental Brake Assist System
If your vehicle has vacuum assist power brakes, it is also
equipped with a supplemental brake assist system
that supplies additional vacuum to the vacuum brake
booster if engine vacuum is reduced. Under certain
conditions, the supplemental brake assist system may
run brie�y after starting your vehicle or when you
apply and release the brake pedal and it may continue
to run even after you have removed your foot from
the brake pedal. When the supplemental brake assist
system is operating, you may hear a motor running
or feel a slight vibration in the steering wheel or brake
pedal. This indicates that the supplemental brake
assist system is working to supply additional vacuum for
your vacuum assist power brakes. This is a normal
operation of your brake system and does not require that
the brake system be serviced.
Each time you start your vehicle and accelerate, the
supplemental brake assist system will perform a
self-diagnostic check of the system and you may hear
or feel the supplemental brake assist motor run
brie�y. While you are driving your vehicle, the
supplemental brake assist system monitors itself to
ensure that it is operating properly. If there is a problem
with the supplemental brake assist system, the
SERVICE BRAKE BOOSTER message will be displayed
on the Driver Information Center. SeeDIC Warnings
and Messages on page 3-64.If your supplemental brake assist system runs every
time you apply and release the brake pedal or you notice
that the brake pedal has suddenly become much
harder to push and the vehicle takes longer to stop, you
should have your vehicle serviced as soon as possible.
Traction Assist System (TAS)
Your vehicle may have a Traction Assist System (TAS)
that limits wheel spin. This is especially useful in
slippery road conditions. The system operates only if it
senses that one or both of the rear wheels are
spinning or beginning to lose traction. When this
happens, the system reduces engine power to limit
wheel spin.
The traction control system is enabled every time your
vehicle is started. The system will activate if it senses
that any of the wheels are spinning or beginning to
lose traction.
You may hear or feel the system working or notice a
lack of accelerator response, but this is normal.
The Traction Assist System may operate on dry roads
under some conditions. When this happens, you
may notice a reduction in acceleration. This is normal
and doesn’t mean there’s a problem with your vehicle.
Examples of these conditions include a hard
acceleration in a turn, an abrupt upshift or downshift of
the transmission or driving on rough roads.
4-9
Page 304 of 584

If your vehicle is in cruise control when the TAS begins
to limit wheel spin, the cruise control will automatically
disengage. When road conditions allow you to safely
use it again, you may re-engage the cruise control. See
Cruise ControlunderTurn Signal/Multifunction Lever
on page 3-7.
When the traction off light
is on, the TAS is off and
will not limit wheel
spin. Adjust your
driving accordingly.
The traction off light will come on under the
following conditions:
The Traction Assist System is turned off, either by
pressing the TAS on/off button or by turning off
the automatic engagement feature of the TAS.
The transmission is in FIRST (1); TAS will not
operate in this gear. This is normal.
The vehicle is driven on an extremely rough road.
When the vehicle leaves the rough surface, slows
down or stops, the light will go off and TAS will
be on again. This is normal.
A Traction Assist System, Anti-Lock Brake System
or engine-related problem has been detected and
the vehicle needs service.
If the vehicle has been driven with the TAS system
on for long periods of time, or if the vehicle has
gone through many several high speed braking
maneuvers the system may be automatically
disabled. The system will automatically re-enable
after approximately two minutes of not using
the brakes.
SeeTraction Off Light on page 3-45.
The Traction Assist System, as delivered from the
factory, will automatically come on whenever you start
your vehicle. To limit wheel spin, especially in
slippery road conditions, you should always leave the
system on. But you can turn the TAS off if you ever need
to. You should turn the TAS off if your vehicle ever
gets stuck in sand, mud or snow and rocking the vehicle
is required. SeeRocking Your VehicleunderIf You
Are Stuck: In Sand, Mud, Ice or Snow on page 4-50.
4-10