Page 9 of 366
{CAUTION:
If the seatback isn’t locked, it could move
forward in a sudden stop or crash. That could
cause injury to the person sitting there. Always
press rearward on the seatback to be sure it is
locked.
Lumbar Adjustments
The lumbar adjustment
knob is located on the
seatback, on the inboard
side of the driver’s
seat and on the
outboard side of the
passenger’s seat.
To get more support in the lumbar area of your back,
turn the lumbar adjustment knob clockwise. To decrease
the amount of lumbar support, turn the knob
counterclockwise.
Seatback Adjustment
The seatback adjustment
knob is located on the
inboard side of the driver’s
and passenger’s seat
cushions.
To tilt the seatback rearward, turn the knob
counterclockwise. Turn the knob clockwise to tilt the
seat forward.
1-3
Page 108 of 366
Outside Power Mirrors
If you have outside power mirrors, they can be adjusted
from the inside of the vehicle.
The control for this
feature is located on the
driver’s door.
Select the mirror you want to move by turning the
switch clockwise to adjust the passenger’s side mirror,
or counterclockwise to adjust the driver’s side mirror.
The center position is neutral.
Then, adjust the mirror by pressing the outer arrows on
the switch until the mirror is in the desired position.
Outside Convex Mirrors
Your vehicle has convex mirrors on the lower quarter of
both the driver’s and passenger’s side rearview
mirrors. A convex mirror’s surface is curved so you can
see more from the driver’s seat.
{CAUTION:
A convex mirror can make things (like other
vehicles) look farther away than they really are.
If you cut too sharply into the right or left lane,
you could hit a vehicle. Check your regular
outside mirrors (or your inside mirror, if you
have one) before changing lanes.
2-40
Page 129 of 366

Climate Controls
Climate Control System
With these systems, you can control the heating,
cooling and ventilation for your vehicle.
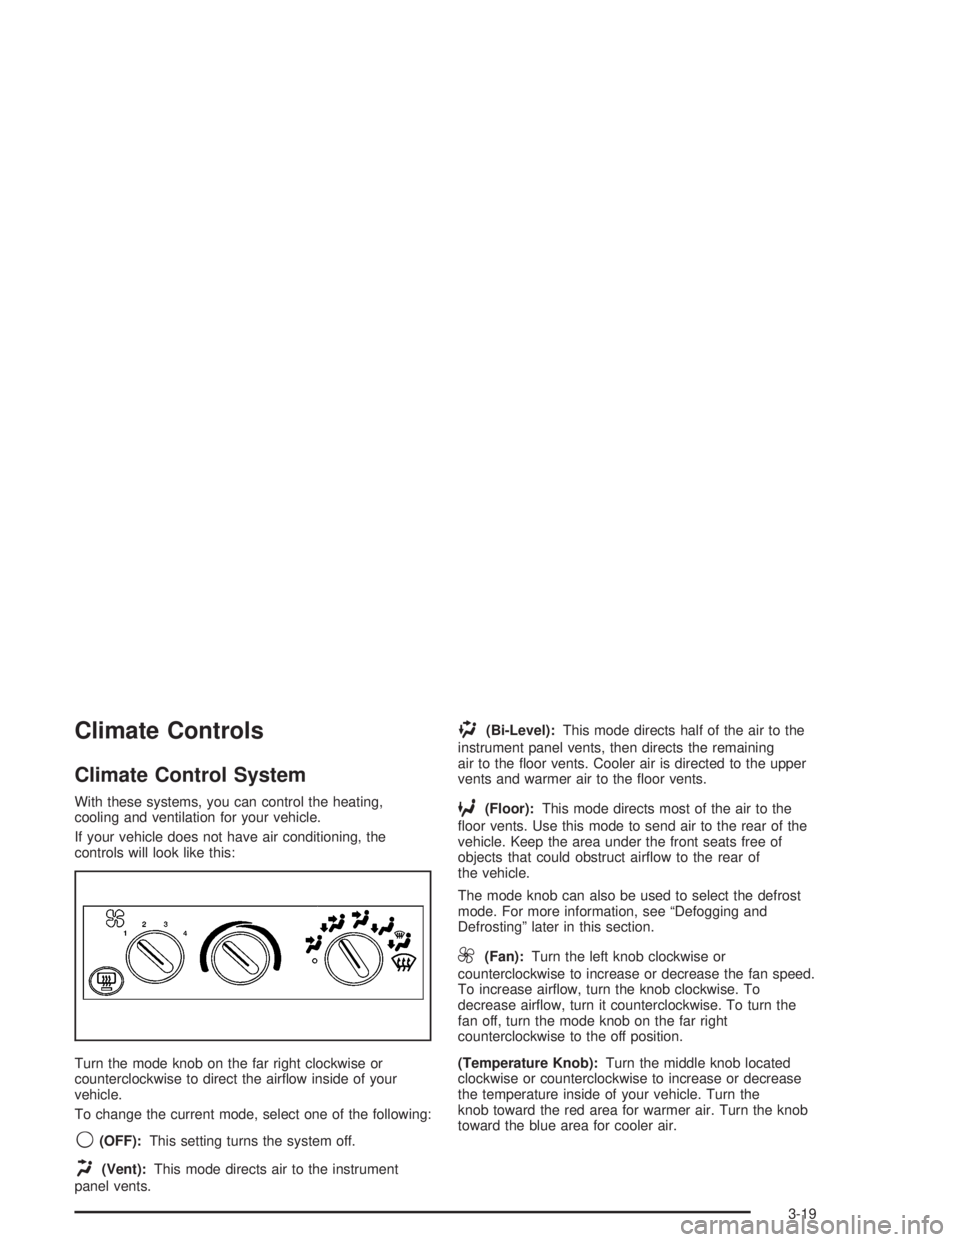
If your vehicle does not have air conditioning, the
controls will look like this:
Turn the mode knob on the far right clockwise or
counterclockwise to direct the airflow inside of your
vehicle.
To change the current mode, select one of the following:
9(OFF):This setting turns the system off.
H(Vent):This mode directs air to the instrument
panel vents.
)(Bi-Level):This mode directs half of the air to the
instrument panel vents, then directs the remaining
air to the floor vents. Cooler air is directed to the upper
vents and warmer air to the floor vents.
6(Floor):This mode directs most of the air to the
floor vents. Use this mode to send air to the rear of the
vehicle. Keep the area under the front seats free of
objects that could obstruct airflow to the rear of
the vehicle.
The mode knob can also be used to select the defrost
mode. For more information, see “Defogging and
Defrosting” later in this section.
9(Fan):Turn the left knob clockwise or
counterclockwise to increase or decrease the fan speed.
To increase airflow, turn the knob clockwise. To
decrease airflow, turn it counterclockwise. To turn the
fan off, turn the mode knob on the far right
counterclockwise to the off position.
(Temperature Knob):Turn the middle knob located
clockwise or counterclockwise to increase or decrease
the temperature inside of your vehicle. Turn the
knob toward the red area for warmer air. Turn the knob
toward the blue area for cooler air.
3-19
Page 160 of 366

To adjust both tone controls and both speaker controls
to the middle position, end out of audio by waiting
for the display to change to the clock display. Then
press and hold AUDIO for more than two seconds until
you hear a beep. CEN will appear on the display.
Adjusting the Speakers (Balance/Fade)
AUDIO:To adjust the balance between the right
and the left speakers, press and release AUDIO until
BAL appears on the display. Then press and hold the up
or the down arrow to move the sound toward the right
or the left speakers.
To adjust the fade between the front and the rear
speakers, press and release AUDIO until FAD appears
on the display. Then press and hold the up or the
down arrow to move the sound toward the front or the
rear speakers.
To adjust balance or fade to the middle position, select
BAL or FAD. Then press and hold AUDIO for more
than two seconds until you hear a beep. L and a zero or
F and a zero will appear on the display.
To adjust both tone controls and both speaker controls
to the middle position, end out of audio by waiting
for the display to change to the time display. Then press
and hold AUDIO for more than two seconds until you
hear a beep. CEN will appear on the display.
Fade may not be available if you have a regular
cab model.
Radio Messages
CAL (Calibration):Your audio system has been
calibrated for your vehicle from the factory. If CAL
appears on the display it means that your radio has not
been configured properly for your vehicle and must
be returned to the dealership for service.
LOC (Locked):This message is displayed when the
Theftlock
®system has locked up. Your vehicle must be
returned to the dealership for service.
Playing a Cassette
Your tape player is built to work best with tapes that are
up to 30 to 45 minutes long on each side. Tapes
longer than that are so thin they may not work well in
this player. The longer side with the tape visible should
face to the right. If the ignition is on, but the radio is
off, the tape can be inserted and will begin playing. If
you hear nothing but a garbled sound, the tape may not
be in squarely. Press the eject button to remove the
tape and start over.
While the tape is playing, use the VOL, AUDIO and
SEEK controls just as you do for the radio. The radio will
display UP if the top side of the tape is playing.
DN (Down) will appear if the bottom side is playing.
If you want to insert a tape while the ignition is off, first
press the eject button or the RCL knob.
3-50
Page 183 of 366

Steering in Emergencies
There are times when steering can be more effective
than braking. For example, you come over a hill and find
a truck stopped in your lane, or a car suddenly pulls
out from nowhere, or a child darts out from between
parked cars and stops right in front of you. You
can avoid these problems by braking — if you can stop
in time. But sometimes you can not; there is not
room. That is the time for evasive action — steering
around the problem.
Your vehicle can perform very well in emergencies like
these. First apply your brakes.
SeeBraking on page 4-6. It is better to remove as much
speed as you can from a possible collision. Then
steer around the problem, to the left or right depending
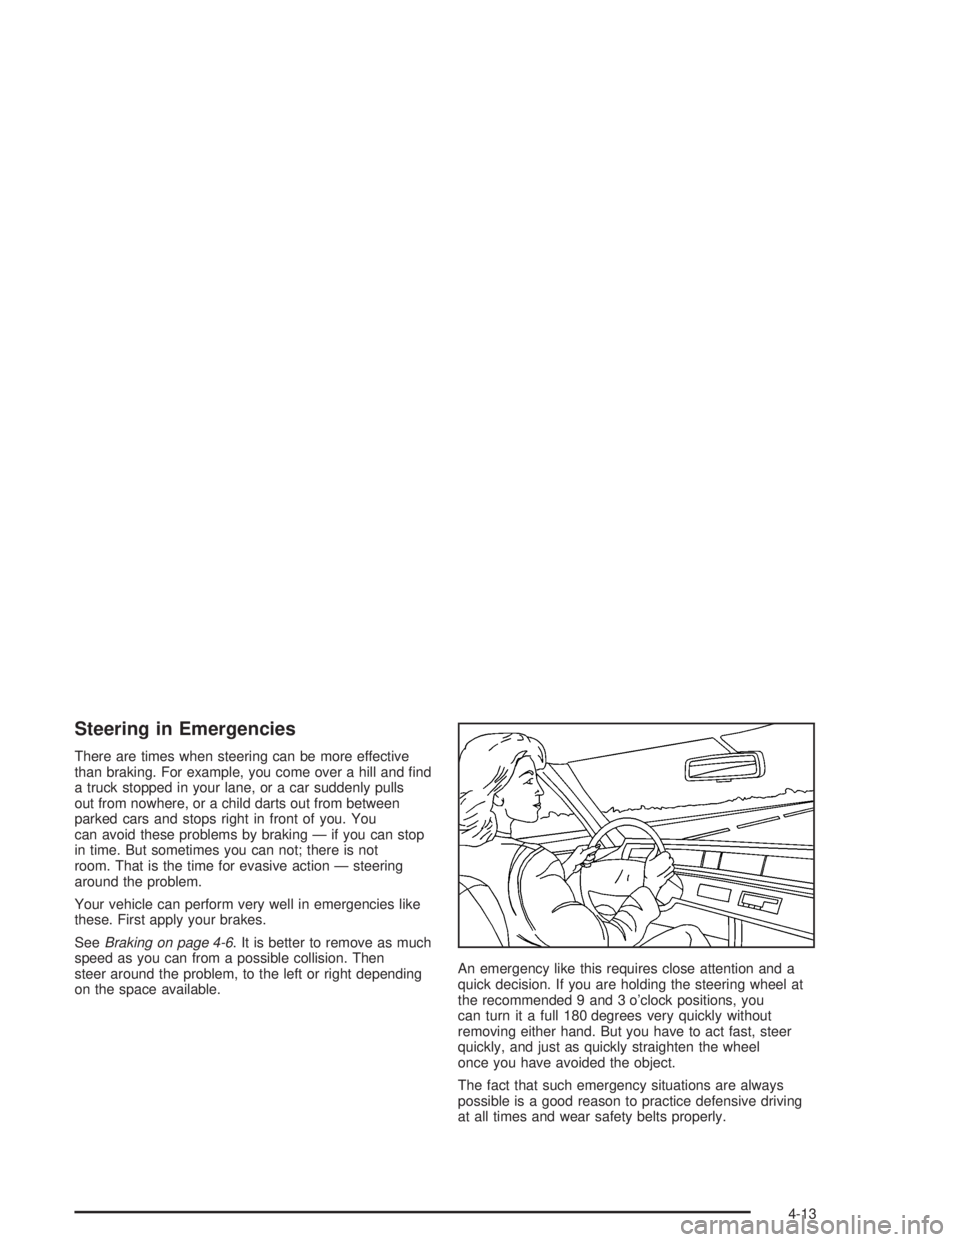
on the space available.An emergency like this requires close attention and a
quick decision. If you are holding the steering wheel at
the recommended 9 and 3 o’clock positions, you
can turn it a full 180 degrees very quickly without
removing either hand. But you have to act fast, steer
quickly, and just as quickly straighten the wheel
once you have avoided the object.
The fact that such emergency situations are always
possible is a good reason to practice defensive driving
at all times and wear safety belts properly.
4-13
Page 202 of 366
2. Remove the release stud and nut from the side of
the brake chamber. Some chambers have studs
which are visible at all times.3. Remove the rubber
cap from the rear of
the chamber.
4. Put the release stud, nut and flat washer into the
chamber.
5. Turn the stud clockwise a quarter of a turn.
4-32
Page 203 of 366
6. Turn the stud nut
clockwise several turns
to release the brakes.
Follow the same
procedure to release
the other brake.
7. At the repair facility, apply air pressure of at least
70 psi (480 kPa) to the brake chambers, either
from an external air supply or the vehicle’s
air system.
8. Turn the stud nut counterclockwise several turns.
Remove the stud from the chamber.
9. Replace the stud and washer and tighten the nut
into the side of the chamber.
10. Replace the rubber cap.Loading Your Vehicle
There is a GVW Rating label on your vehicle that shows
how much weight it may properly carry. It also shows
the size of your original tires and the inflation pressures
needed to obtain the gross weight capacity of your vehicle.
This is called the Gross Vehicle Weight Rating (GVWR).
The GVWR includes the weight of the vehicle, all
occupants, fuel and cargo.
4-33
Page 220 of 366
3. Make sure the fuel lines are properly connected
and the fuel filter is cool enough to touch.
4. Remove any dirt from the fuel filter head and vent
valve by wiping with a cloth.
5. Open the fuel filter vent
valve by turning the
screw counterclockwise
several full turns.6. Repeatedly push down
on the fuel filter primer
pump with the palm
of your hand. Let
the pump return
upward between
pushes.
7. Operate the priming pump until a small amount of
fuel seeps from the vent valve. When you see the
fuel, the filter is now full of fuel and the system
should be primed.
8. Close the vent valve.
9. Clean any fuel which accumulated on the fuel filter.
10. Start the engine and let idle for a few minutes.
11. Check the filter for leaks.
5-14