2004 CHEVROLET EPICA mirror
[x] Cancel search: mirrorPage 1 of 338
Seats and Restraint Systems........................... 1-1
Front Seats
............................................... 1-2
Rear Seats
............................................... 1-9
Safety Belts
.............................................1-10
Child Restraints
.......................................1-28
Air Bag Systems
......................................1-46
Restraint System Check
............................1-55
Features and Controls..................................... 2-1
Keys
........................................................ 2-2
Doors and Locks
....................................... 2-7
Windows
.................................................2-13
Theft-Deterrent Systems
............................2-15
Starting and Operating Your Vehicle
...........2-18
Mirrors
....................................................2-31
Storage Areas
.........................................2-33
Sunroof
..................................................2-35
Instrument Panel............................................. 3-1
Instrument Panel Overview
.......................... 3-4
Climate Controls
......................................3-18
Warning Lights, Gages, and Indicators
........3-30
Secondary Information Center (SIC)
............3-46
Audio System(s)
.......................................3-48Driving Your Vehicle....................................... 4-1
Your Driving, the Road, and Your Vehicle
........ 4-2
Towing
...................................................4-29
Service and Appearance Care.......................... 5-1
Service
..................................................... 5-3
Fuel
......................................................... 5-5
Checking Things Under the Hood
...............5-10
Headlamp Aiming
.....................................5-40
Bulb Replacement
....................................5-41
Windshield Wiper Blade Replacement
.........5-47
Tires
......................................................5-48
Appearance Care
.....................................5-68
Vehicle Identification
.................................5-77
Electrical System
......................................5-78
Capacities and Specifications
.....................5-85
Maintenance Schedule..................................... 6-1
Maintenance Schedule
................................ 6-2
Customer Assistance and Information.............. 7-1
Customer Assistance and Information
........... 7-2
Reporting Safety Defects
...........................7-11
Index................................................................ 1
2004 Chevrolet Epica Owner ManualM
Page 63 of 338
Keys...............................................................2-2
Remote Keyless Entry System.........................2-4
Remote Keyless Entry System Operation...........2-5
Doors and Locks.............................................2-7
Door Locks....................................................2-7
Central Door Unlocking System........................2-8
Power Door Locks..........................................2-9
Door Ajar Reminder........................................2-9
Rear Door Security Locks..............................2-10
Lockout Protection........................................2-10
Leaving Your Vehicle....................................2-11
Trunk..........................................................2-11
Windows........................................................2-13
Power Windows............................................2-14
Sun Visors...................................................2-14
Theft-Deterrent Systems..................................2-15
Theft-Deterrent System..................................2-15
Immobilizer..................................................2-17
Immobilizer Operation....................................2-17
Starting and Operating Your Vehicle................2-18
New Vehicle Break-In....................................2-18
Ignition Positions..........................................2-19
Starting Your Engine.....................................2-20Engine Coolant Heater..................................2-21
Automatic Transaxle Operation.......................2-22
Parking Brake..............................................2-26
Shifting Into Park (P).....................................2-27
Shifting Out of Park (P).................................2-28
Parking Over Things That Burn.......................2-29
Engine Exhaust............................................2-29
Running Your Engine While
You Are Parked........................................2-30
Mirrors...........................................................2-31
Manual Rearview Mirror.................................2-31
Automatic Dimming Rearview Mirror................2-31
Outside Power Mirrors...................................2-32
Outside Convex Mirror...................................2-33
Outside Heated Mirrors..................................2-33
Storage Areas................................................2-33
Glove Box...................................................2-33
Cupholder(s)................................................2-33
Coinholder(s)................................................2-33
Sunglasses Storage Compartment...................2-34
Center Console Storage Area.........................2-34
Rear Seat Armrest........................................2-34
Sunroof.........................................................2-35
Section 2 Features and Controls
2-1
Page 76 of 338
Power Windows
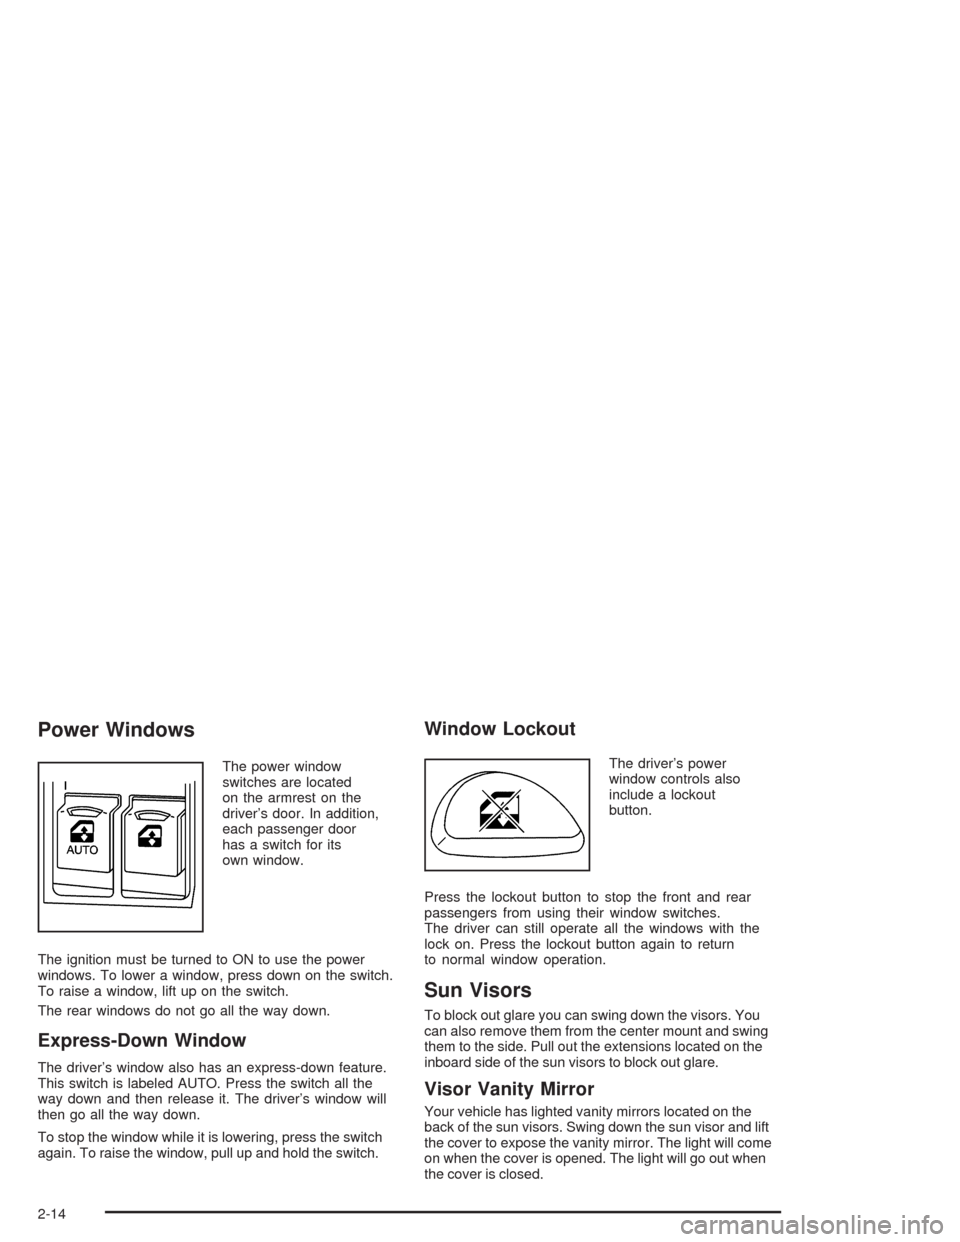
The power window
switches are located
on the armrest on the
driver’s door. In addition,
each passenger door
has a switch for its
own window.
The ignition must be turned to ON to use the power
windows. To lower a window, press down on the switch.
To raise a window, lift up on the switch.
The rear windows do not go all the way down.
Express-Down Window
The driver’s window also has an express-down feature.
This switch is labeled AUTO. Press the switch all the
way down and then release it. The driver’s window will
then go all the way down.
To stop the window while it is lowering, press the switch
again. To raise the window, pull up and hold the switch.
Window Lockout
The driver’s power
window controls also
include a lockout
button.
Press the lockout button to stop the front and rear
passengers from using their window switches.
The driver can still operate all the windows with the
lock on. Press the lockout button again to return
to normal window operation.
Sun Visors
To block out glare you can swing down the visors. You
can also remove them from the center mount and swing
them to the side. Pull out the extensions located on the
inboard side of the sun visors to block out glare.
Visor Vanity Mirror
Your vehicle has lighted vanity mirrors located on the
back of the sun visors. Swing down the sun visor and lift
the cover to expose the vanity mirror. The light will come
on when the cover is opened. The light will go out when
the cover is closed.
2-14
Page 93 of 338
Mirrors
Manual Rearview Mirror
When you are sitting in a comfortable driving position,
adjust the mirror so you can see clearly behind your
vehicle. Grip the mirror in the center to move it up
or down and side to side. The day/night adjustment
allows you to adjust the mirror to avoid glare from any
headlamps behind you. Push the tab away from
you for daytime use; pull it toward you for night use.
Automatic Dimming Rearview Mirror
Your vehicle may have an automatic dimming rearview
mirror.
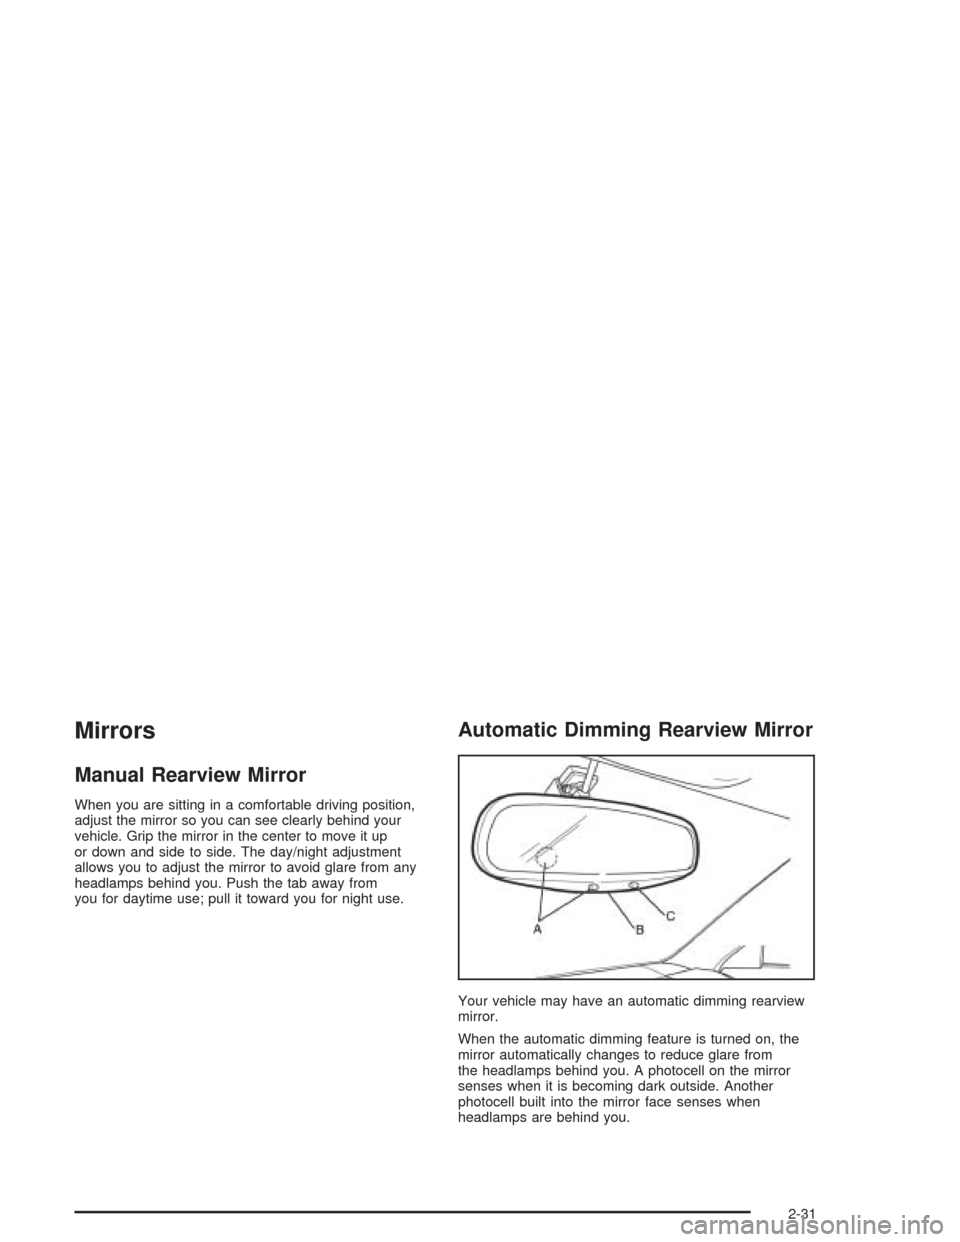
When the automatic dimming feature is turned on, the
mirror automatically changes to reduce glare from
the headlamps behind you. A photocell on the mirror
senses when it is becoming dark outside. Another
photocell built into the mirror face senses when
headlamps are behind you.
2-31
Page 94 of 338

At night, when the glare is too high, the mirror will
gradually darken to reduce glare. This change may
take a few seconds. The mirror will return to its clear
daytime state when the glare is reduced.
To activate the automatic dimming feature, press the
button (B) located below the rearview mirror. To turn
the feature off, press the button (B) again.
The ignition must be turned to ON to use the automatic
dimming rearview mirror. The indicator light (C) will
illuminate while this feature is active.
There are two light sensors (A) which detect ambient
light level and glare from vehicles behind you.
Do not cover the sensors as this will cancel the
automatic dimming operation.Outside Power Mirrors
The control for the
power mirrors is located
on the driver’s side
instrument panel,
below the side outlet.
Move the outside power mirror control to L for the left
mirror and to R for the right mirror. If you place the
control in the center position, no movement of the mirror
will occur. To adjust a mirror, press the corresponding
edges located on the four-way control pad to move
the mirror in the direction that you want it to go.
The ignition must be turned to ON to adjust the mirrors.
The outside rearview mirrors can be folded flat against
the side of the vehicle by pushing them toward the
vehicle.
2-32
Page 95 of 338
Outside Convex Mirror
Your passenger’s side mirror is convex. A convex
mirror’s surface is curved so you can see more from
the driver’s seat.
{CAUTION:
A convex mirror can make things (like other
vehicles) look farther away than they really are.
If you cut too sharply into the right lane, you
could hit a vehicle on your right. Check your
inside mirror or glance over your shoulder
before changing lanes.
Outside Heated Mirrors
When you operate the rear window defogger, the heated
driver’s and passenger’s outside power mirrors are
warmed to help clear them of ice and snow. See “Rear
Window and Outside Mirror Defogger” underClimate
Control System on page 3-18orAutomatic Climate
Control System on page 3-22for more information.
Storage Areas
Glove Box
Open the glove box by pulling the bottom of the handle
upward. Close the glove box with a firm push.
Cupholder(s)
The cupholders are located in the center console and in
the rear seat center armrest. To use the front cupholder,
pull up on the edge of the opening. To use the rear
cupholder, pull down the rear seat center armrest.
Coinholder(s)
Your vehicle has a coinholder located to the left of
the steering wheel on the instrument panel. There is
also a card holder located at the top of the coinholder.
To use these feature, pull out the coinholder drawer.
2-33
Page 103 of 338
The main components of your instrument panel are
the following:
A. Air Outlet. SeeOutlet Adjustment on page 3-28.
B. Instrument Panel Cluster. SeeInstrument Panel
Cluster on page 3-31.
C. Digital Clock and Secondary Information Center.
SeeClock on page 3-46andSecondary
Information Center (SIC) on page 3-46.
D. Hazard Warning Flashers Button. SeeHazard
Warning Flashers on page 3-6.
E. Climate Control System. SeeClimate Control
System on page 3-18.
F. Outside Power Mirror Control. SeeOutside
Power Mirrors on page 2-32.G. Instrument Panel Brightness Thumbwheel.
See “Instrument Panel Brightness” underInterior
Lamps on page 3-15.
H. Hood Release. SeeHood Release on page 5-11.
I. Coinholder. SeeCoinholder(s) on page 2-33.
J. Horn. SeeHorn on page 3-6.
K. Audio System. SeeAudio System(s) on page 3-48.
L. Cigarette Lighter and Ashtray. SeeAshtrays and
Cigarette Lighter on page 3-18.
M. Glove Box. SeeGlove Box on page 2-33.
3-5
Page 119 of 338
Rear Window and Outside Mirror
Defogger
Your vehicle has a rear window and outside mirror
defogger. This feature will only work when the ignition is
turned to ON.
The rear window defogger uses a warming grid to
remove fog or frost from the rear window. Before using
this feature, clear as much snow from the rear
window as possible.
button is located below the audio system. An indicator
light in the button will come on to let your know that
the feature is activated.The rear window and outside mirror defogger will turn
off about 15 minutes after the button is pressed.
The defogger can also be turned off by pressing the
button again or by turning off the engine.
Notice:Don’t use anything sharp on the inside of
the rear window. If you do, you could cut or damage
the warming grid, and the repairs wouldn’t be
covered by your warranty. Do not attach a temporary
vehicle license, tape, a decal or anything similar
to the defogger grid.
3-21