2004 CHEVROLET EPICA fuses
[x] Cancel search: fusesPage 80 of 338
When trying to start the vehicle, if the engine does
not start and the security light continues flashing, the
key may have a damaged transponder. Turn the ignition
off and try again.
If the engine still does not start, and the key appears to
be undamaged, try another key. At this time, you may
also want to check the fuse. SeeFuses and Circuit
Breakers on page 5-79. If the engine still does not start
with the other key, your vehicle needs service. If your
vehicle does start, the first key may be faulty. See your
dealer who can service the theft-deterrent system to
have a new key made.
Up to four keys may be programmed for the vehicle.
If you lose or damage your keys, only a GM dealer
can service the theft-deterrent system to have new
keys made.
If you are ever driving and the security light comes on
and stays on, you will be able to restart your engine
if you turn it off. The theft-deterrent system, however,
is not working properly and must be serviced by
your dealer. Your vehicle is not protected by the
theft-deterrent system at this time.
In an emergency, contact Chevrolet Roadside
Assistance. SeeRoadside Assistance Program
on page 7-6.Starting and Operating Your
Vehicle
New Vehicle Break-In
Notice:Your vehicle does not need an elaborate
“break-in.” But it will perform better in the long run
if you follow these guidelines:
Do not drive at any one speed — fast or
slow — for the �rst 500 miles (805 km).
Do not make full-throttle starts.
Avoid making hard stops for the �rst
200 miles (322 km) or so. During this time
your new brake linings are not yet broken in.
Hard stops with new linings can mean
premature wear and earlier replacement.
Follow this breaking-in guideline every time
you get new brake linings.
Do not tow a trailer during break-in.
SeeTowing a Trailer on page 4-35for
more information.
2-18
Page 106 of 338
Turn and Lane-Change Signals
The turn signal has two upward (for right) and two
downward (for left) positions. These positions allow you
to signal a turn or a lane change.
To signal a turn, move the lever all the way up or down.
When the turn is finished, the lever will return
automatically.
An arrow on the
instrument panel
cluster will flash
in the direction
of the turn or
lane change.
To signal a lane change, just raise or lower the lever
until the arrow starts to flash. Hold it there until you
complete your lane change. The lever will return by itself
when you release it.
As you signal a turn or a lane change, if the arrows
flash rapidly, a signal bulb may be burned out and other
drivers will not see your turn signal.
If a bulb is burned out, replace it to help avoid an
accident. If the arrows do not go on at all when you signal
a turn, check for burned-out bulbs. If the arrow still does
not work, check the fuse. SeeFuses and Circuit Breakers
on page 5-79.
Headlamp High/Low-Beam Changer
To change the headlamps from low beam to high beam,
push the turn signal/multifunction lever away from you.
When the high beams
are on, this light on the
instrument panel cluster
also will be on if the
ignition is turned to ON.
To change the headlamps from high beam to low beam,
pull the turn signal/multifunction lever toward you.
Flash-to-Pass Feature
This feature lets you use your high-beam headlamps to
signal a driver in front of you that you want to pass.
To use it, pull the turn signal/multifunction lever toward
you until the high-beam headlamps come on, then
release the lever to turn them off.
3-8
Page 115 of 338
Accessory Power Outlets
Your vehicle has an accessory power outlet. With an
accessory power outlet, you can plug in auxiliary
electrical equipment such as a cellular telephone or
CB radio.
The accessory power outlet is located on the front of
the center console below the front ashtray.
To use the outlet, remove the protective cap. When not
in use, always cover the outlet with the protective
cap. The accessory power outlet is operational when
the ignition is turned to ACC or ON.
Notice:Leaving electrical equipment on for
extended periods will drain the battery. Always turn
off electrical equipment when not in use and do
not plug in equipment that exceeds the maximum
amperage rating.
Certain electrical accessories may not be compatible
with the accessory power outlet and could result
in blown vehicle or adapter fuses. If you experience a
problem, see your dealer for additional information
on the accessory power outlet.Notice:Adding any electrical equipment to your
vehicle may damage it or keep other components
from working as they should. The repairs would not
be covered by your warranty. Check with your
dealer before adding electrical equipment.
When adding electrical equipment, be sure to follow
the proper installation instructions included with
the equipment.
Notice:Improper use of the power outlet can cause
damage not covered by your warranty. Do not
hang any type of accessory or accessory bracket
from the plug because the power outlets are
designed for accessory power plugs only.
3-17
Page 156 of 338
CD Messages
No Maga:An empty magazine is inserted in the CD
changer. Try the magazine again with a CD loaded
in one of the trays.
If the CD is not playing correctly, for any other reason,
try a known good CD.
If any error occurs repeatedly or if an error cannot be
corrected, contact your dealer. If your radio displays an
error message, write it down and provide it to your
dealer when reporting the problem.
Theft-Deterrent Feature
The theft-deterrent system is designed to discourage
theft of your radio. When the radio and vehicle are
turned off, your radio has a blinking red light to indicate
that the theft-deterrent system is activated.
The theft-deterrent system also activates when the
audio system has been disconnected from the battery.
When this occurs, the AF code and security code
will have to be entered in order to operate your radio.
An identification card stamped with the AF code
and security code will be provided with the vehicle.
Keep it in a safe place, not in the vehicle.To enter the security code do the following:
1. Turn the ignition to ACC or ON.
2. Turn the radio on. AF or COdE will flash on the
display. If AF flashes on the display, go to Step
2. If COdE flashes on the display, go to Step 4.
3. Enter the AF code by using the preset pushbuttons.
COdE will flash on the display.
4. Enter the security code by using the preset
pushbuttons. When the complete security code is
entered, the code will flash three times.
If the security code is not entered correctly, Err will
appear on the display for a few seconds. When
COdE appears back on the display, repeat Step 4.
If the incorrect AF code is entered, an incorrect
frequency level may be chosen and the radio
reception may be affected. If this occurs, reset the
audio system by removing and re-installing the
AUDIO fuse. See “Instrument Panel Fuse Block”
underFuses and Circuit Breakers on page 5-79for
more information. Then repeat Steps 1 through 4.
3-58
Page 196 of 338
Appearance Care............................................5-68
Cleaning the Inside of Your Vehicle.................5-69
Care of Safety Belts......................................5-72
Weatherstrips...............................................5-72
Cleaning the Outside of Your Vehicle.................5-72
Sheet Metal Damage.....................................5-74
Finish Damage.............................................5-74
Underbody Maintenance................................5-75
Chemical Paint Spotting.................................5-75
Vehicle Care/Appearance Materials..................5-75
Vehicle Identi�cation......................................5-77
Vehicle Identification Number (VIN).................5-77
Service Parts Identification Label.....................5-77Electrical System............................................5-78
Add-On Electrical Equipment..........................5-78
Headlamp Wiring..........................................5-78
Windshield Wiper Fuses................................5-78
Power Windows and Other Power Options.......5-78
Fuses and Circuit Breakers............................5-79
Capacities and Speci�cations..........................5-85
Section 5 Service and Appearance Care
5-2
Page 207 of 338
A. Engine Coolant Surge Tank. SeeCooling System on
page 5-24.
B. Power Steering Fluid Reservoir. SeePower Steering
Fluid on page 5-30.
C. Windshield Washer Fluid Reservoir. SeeWindshield
Washer Fluid on page 5-31.
D. Engine Oil Fill Cap. See “When to Add Engine Oil”
underEngine Oil on page 5-13.
E. Engine Oil Dipstick. See “Checking Engine Oil”
underEngine Oil on page 5-13.
F. Brake Fluid Reservoir. See “Brake Fluid” under
Brakes on page 5-32.
G. Engine Air Cleaner/Filter. SeeEngine Air
Cleaner/Filter on page 5-17.
H. Battery. SeeBattery on page 5-35.
I. Engine Compartment Fuse Block. See “Engine
Compartment Fuse Block” underFuses and Circuit
Breakers on page 5-79.Engine Oil
If the oil pressure light
appears on the instrument
cluster, it means you
need to check your engine
oil level right away.
For more information, seeOil Pressure Light on
page 3-42.
You should check your engine oil level regularly; this is
an added reminder.
5-13
Page 272 of 338
Electrical System
Add-On Electrical Equipment
Notice:Don’t add anything electrical to your vehicle
unless you check with your dealer �rst. Some
electrical equipment can damage your vehicle and
the damage wouldn’t be covered by your warranty.
Some add-on electrical equipment can keep other
components from working as they should.
Your vehicle has an air bag system. Before attempting
to add anything electrical to your vehicle, seeServicing
Your Air Bag-Equipped Vehicle on page 1-54.
Headlamp Wiring
The headlamp wiring is protected by fuses, one for
each headlamp, in the fuse block. An electrical overload
will cause the lamps to turn off. If this happens, have
your headlamp wiring checked right away.
Windshield Wiper Fuses
The windshield wiper motor is protected by an internal
circuit breaker and a fuse. If the motor overheats due
to heavy snow, etc., the wiper will stop until the
motor cools. If the overload is caused by some electrical
problem and not snow, etc., be sure to get it fixed.
Power Windows and Other Power
Options
Circuit breakers in the fuse block protect the power
windows and other power accessories. When the current
load is too heavy, the circuit breaker opens and
closes, protecting the circuit until the problem is fixed or
goes away.
5-78
Page 273 of 338
Fuses and Circuit Breakers
The wiring circuits in your vehicle are protected from
short circuits by a combination of fuses, circuit breakers
and fusible thermal links in the wiring itself.
Look at the silver-colored band inside the fuse. If the
band is broken or melted, replace the fuse. Be sure you
replace a bad fuse with a new one of the identical
size and rating.
Five spare fuses are provided in the engine compartment
fuse block. If you ever have a problem on the road and do
not have a spare fuse, you can borrow one that has the
same amperage. Just pick a feature of your vehicle that
you can get along without — like the radio or cigarette
lighter — and use its fuse, if it is the correct amperage.
Replace it as soon as you can.
There are two fuse blocks in your vehicle: the instrument
panel fuse block and the engine compartment fuse block.
There is a fuse puller located on the engine compartment
fuse block. It can be used to easily remove fuses from the
fuse block.
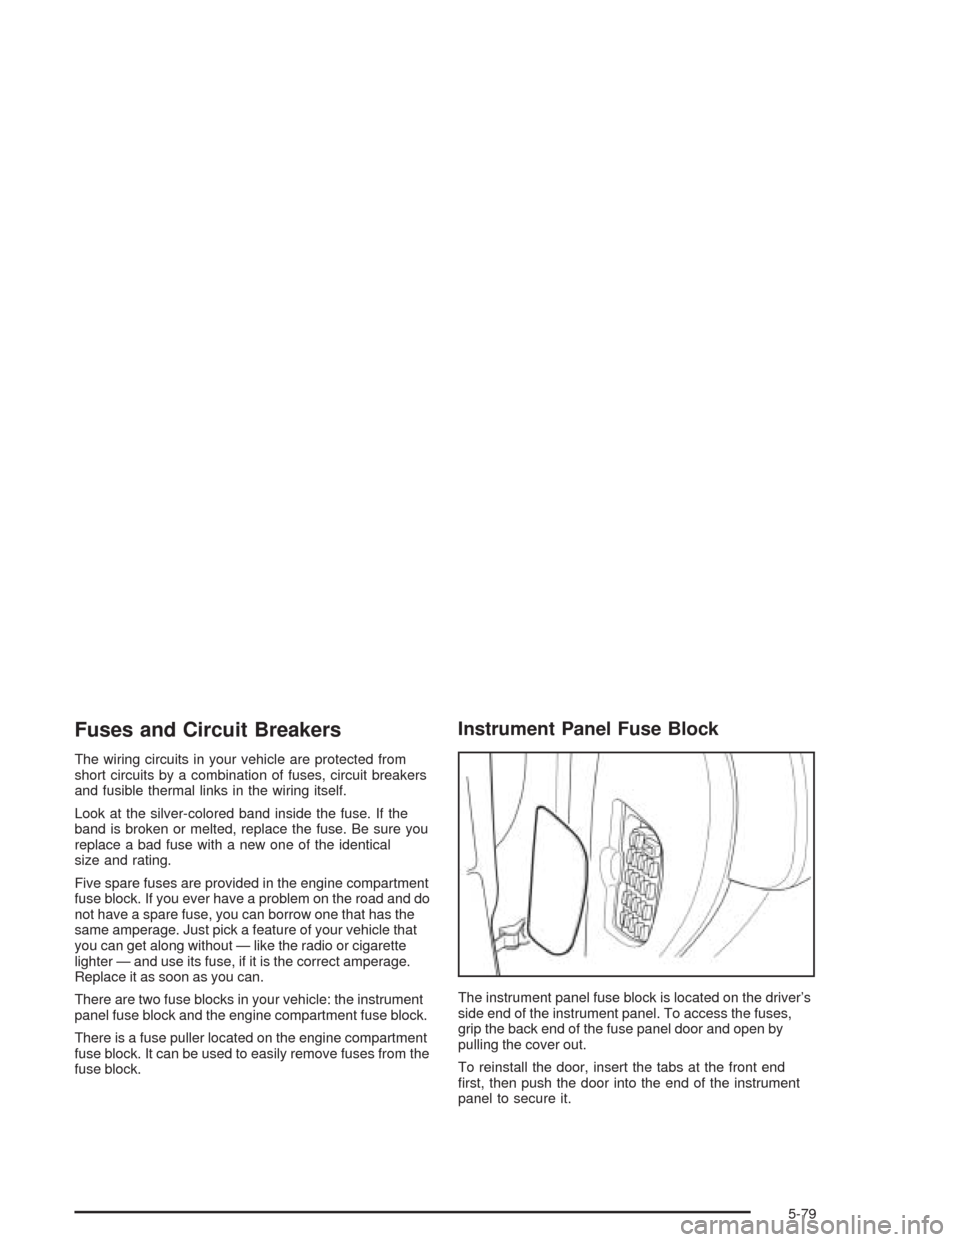
Instrument Panel Fuse Block
The instrument panel fuse block is located on the driver’s
side end of the instrument panel. To access the fuses,
grip the back end of the fuse panel door and open by
pulling the cover out.
To reinstall the door, insert the tabs at the front end
first, then push the door into the end of the instrument
panel to secure it.
5-79