2004 CHEVROLET CORVETTE wheel
[x] Cancel search: wheelPage 113 of 384
Vehicle Personalization
Memory
If your vehicle has this feature, MEMORY can store and
recall the settings for the driver’s seat position, the
outside rearview mirror positions, telescopic steering
column (if equipped), radio presets, tone, volume,
playback mode (AM/FM, tape or CD), last displayed
station, compact disc position and tape direction and the
last climate control setting.The MEMORY buttons are located on the driver’s door,
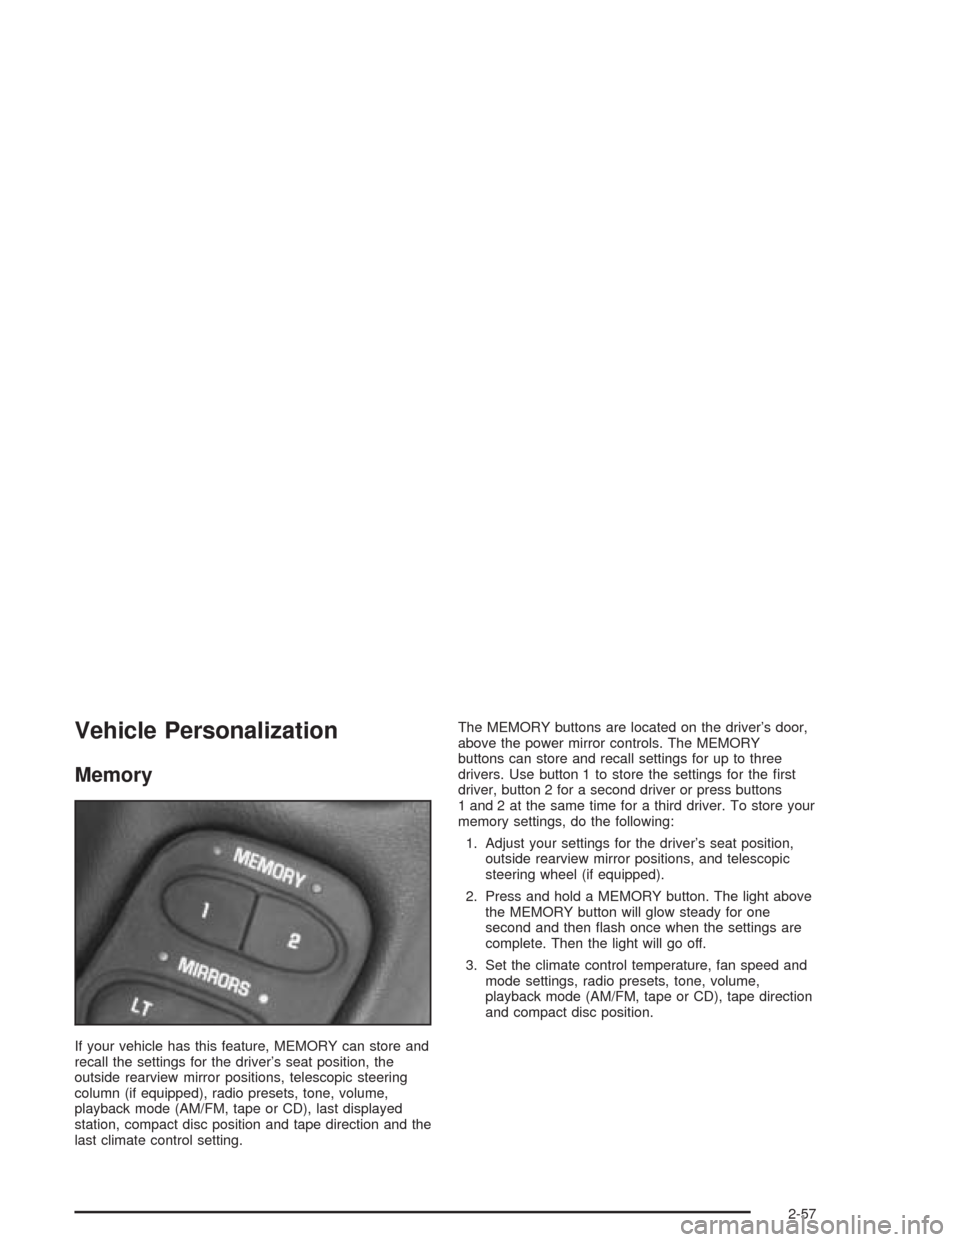
above the power mirror controls. The MEMORY
buttons can store and recall settings for up to three
drivers. Use button 1 to store the settings for the first
driver, button 2 for a second driver or press buttons
1 and 2 at the same time for a third driver. To store your
memory settings, do the following:
1. Adjust your settings for the driver’s seat position,
outside rearview mirror positions, and telescopic
steering wheel (if equipped).
2. Press and hold a MEMORY button. The light above
the MEMORY button will glow steady for one
second and then flash once when the settings are
complete. Then the light will go off.
3. Set the climate control temperature, fan speed and
mode settings, radio presets, tone, volume,
playback mode (AM/FM, tape or CD), tape direction
and compact disc position.
2-57
Page 115 of 384
Instrument Panel Overview...............................3-2
Hazard Warning Flashers................................3-4
Other Warning Devices...................................3-5
Horn.............................................................3-5
Tilt Wheel.....................................................3-5
Turn Signal/Multifunction Lever.........................3-6
Exterior Lamps.............................................3-13
Interior Lamps..............................................3-17
Head-Up Display (HUD).................................3-18
Accessory Power Outlets...............................3-22
Ashtrays and Cigarette Lighter........................3-23
Climate Controls............................................3-23
Dual Automatic Climate
Control System.........................................3-23
Outlet Adjustment.........................................3-31
Warning Lights, Gages, and Indicators............3-32
Instrument Panel Cluster................................3-33
Speedometer and Odometer...........................3-34
Tachometer.................................................3-34
Safety Belt Reminder Light.............................3-34
Air Bag Readiness Light................................3-35
Air Bag Off Light..........................................3-36
Voltmeter Gage............................................3-37
Brake System Warning Light..........................3-38
Anti-Lock Brake System Warning Light.............3-39
Traction Control System (TCS) Warning Light . . .3-39Active Handling System Light.........................3-40
Engine Coolant Temperature Gage..................3-41
Malfunction Indicator Lamp.............................3-41
Engine Oil Pressure Gage.............................3-44
Security Light...............................................3-45
Check Gages Warning Light...........................3-46
Fuel Gage...................................................3-46
Driver Information Center (DIC).......................3-48
DIC Controls and Displays.............................3-49
DIC Warnings and Messages.........................3-58
Other Messages...........................................3-68
Audio System(s).............................................3-69
Setting the Time...........................................3-69
Radio with Cassette......................................3-70
Radio with CD..............................................3-76
Trunk-Mounted CD Changer...........................3-81
Theft-Deterrent Feature..................................3-86
Radio Reception...........................................3-88
Care of Your Cassette Tape Player.................3-88
Care of Your CDs.........................................3-89
Care of Your CD Player................................3-89
Fixed Mast Antenna (Z06)..............................3-89
Power Antenna Mast Care (Convertible)...........3-90
Integrated Windshield and Rear Window
Antennas (Coupe).....................................3-90
Section 3 Instrument Panel
3-1
Page 119 of 384
Other Warning Devices
If you carry reflective triangles, you can set one up at
the side of the road about 300 feet (100 m) behind your
vehicle.
Horn
To sound the horn, press either horn symbol on the
steering wheel.
Tilt Wheel
A tilt wheel allows you to adjust the steering wheel
before you drive. You can raise it to the highest level to
give your legs more room when you exit and enter
the vehicle.
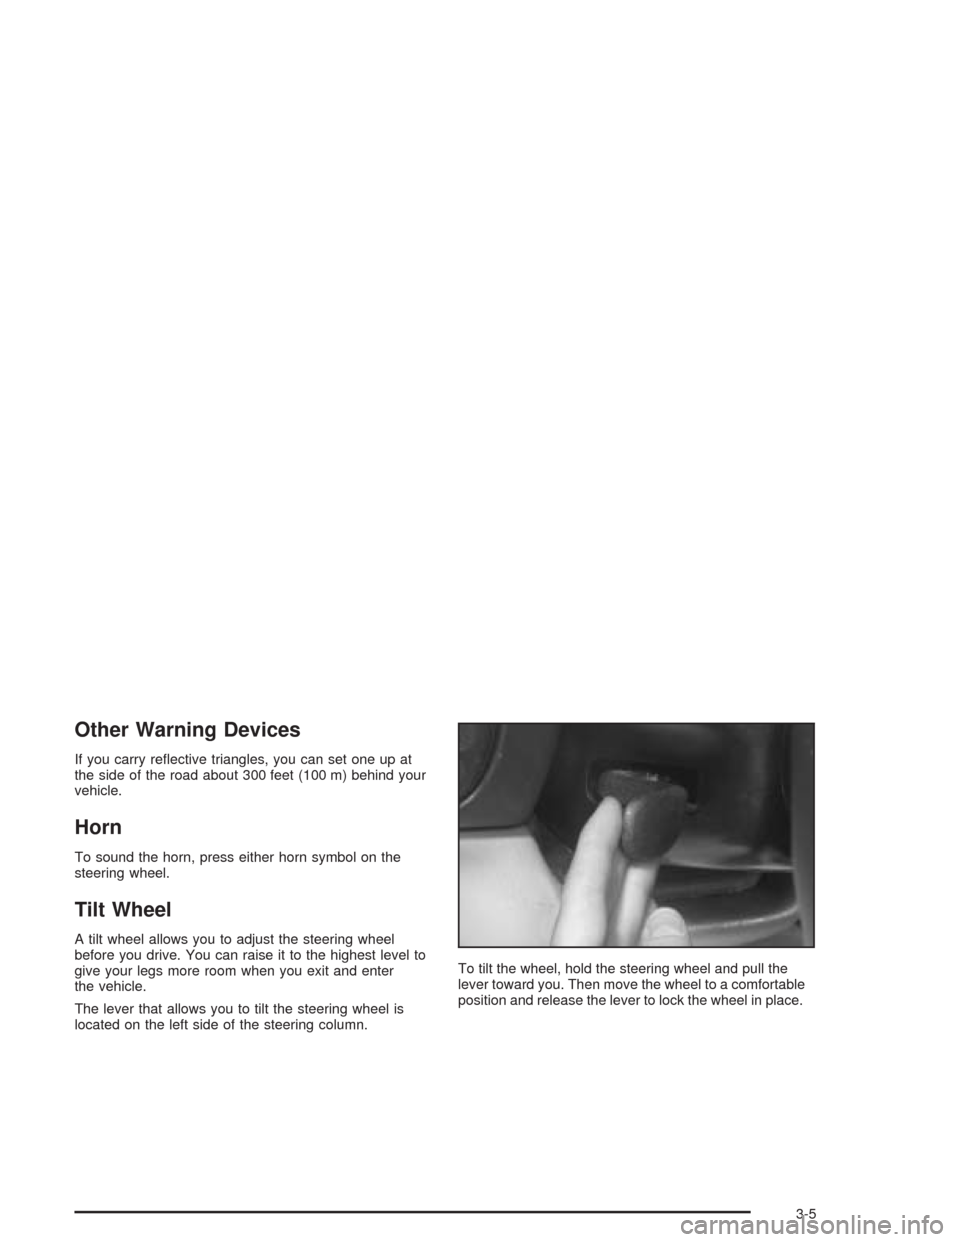
The lever that allows you to tilt the steering wheel is
located on the left side of the steering column.To tilt the wheel, hold the steering wheel and pull the
lever toward you. Then move the wheel to a comfortable
position and release the lever to lock the wheel in place.
3-5
Page 120 of 384
Telescopic Steering Column
If your vehicle has this feature, the telescopic steering
column will allow you to adjust the distance the steering
wheel is from the instrument panel.
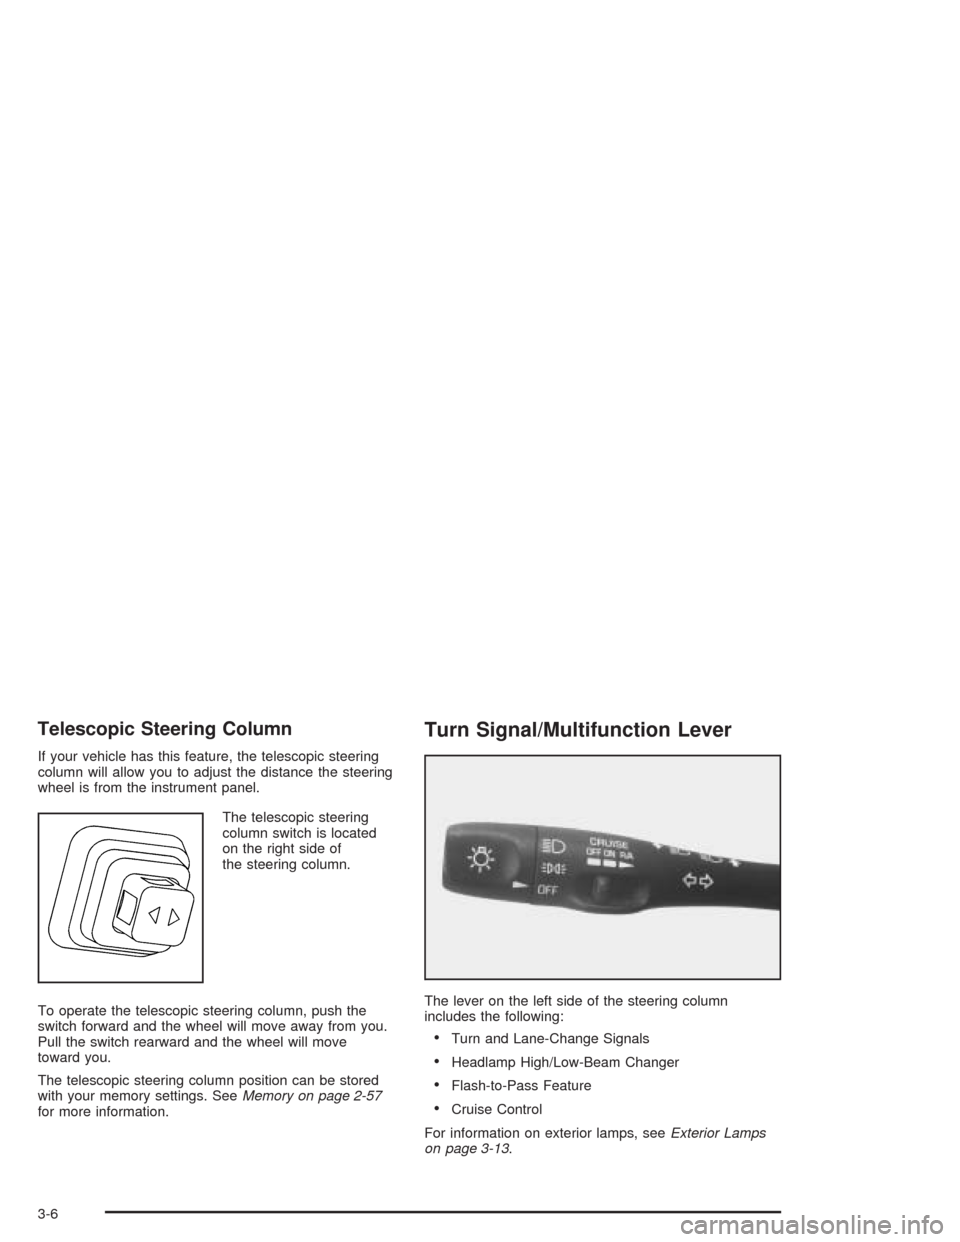
The telescopic steering
column switch is located
on the right side of
the steering column.
To operate the telescopic steering column, push the
switch forward and the wheel will move away from you.
Pull the switch rearward and the wheel will move
toward you.
The telescopic steering column position can be stored
with your memory settings. SeeMemory on page 2-57
for more information.
Turn Signal/Multifunction Lever
The lever on the left side of the steering column
includes the following:
•Turn and Lane-Change Signals
•Headlamp High/Low-Beam Changer
•Flash-to-Pass Feature
•Cruise Control
For information on exterior lamps, seeExterior Lamps
on page 3-13.
3-6
Page 124 of 384
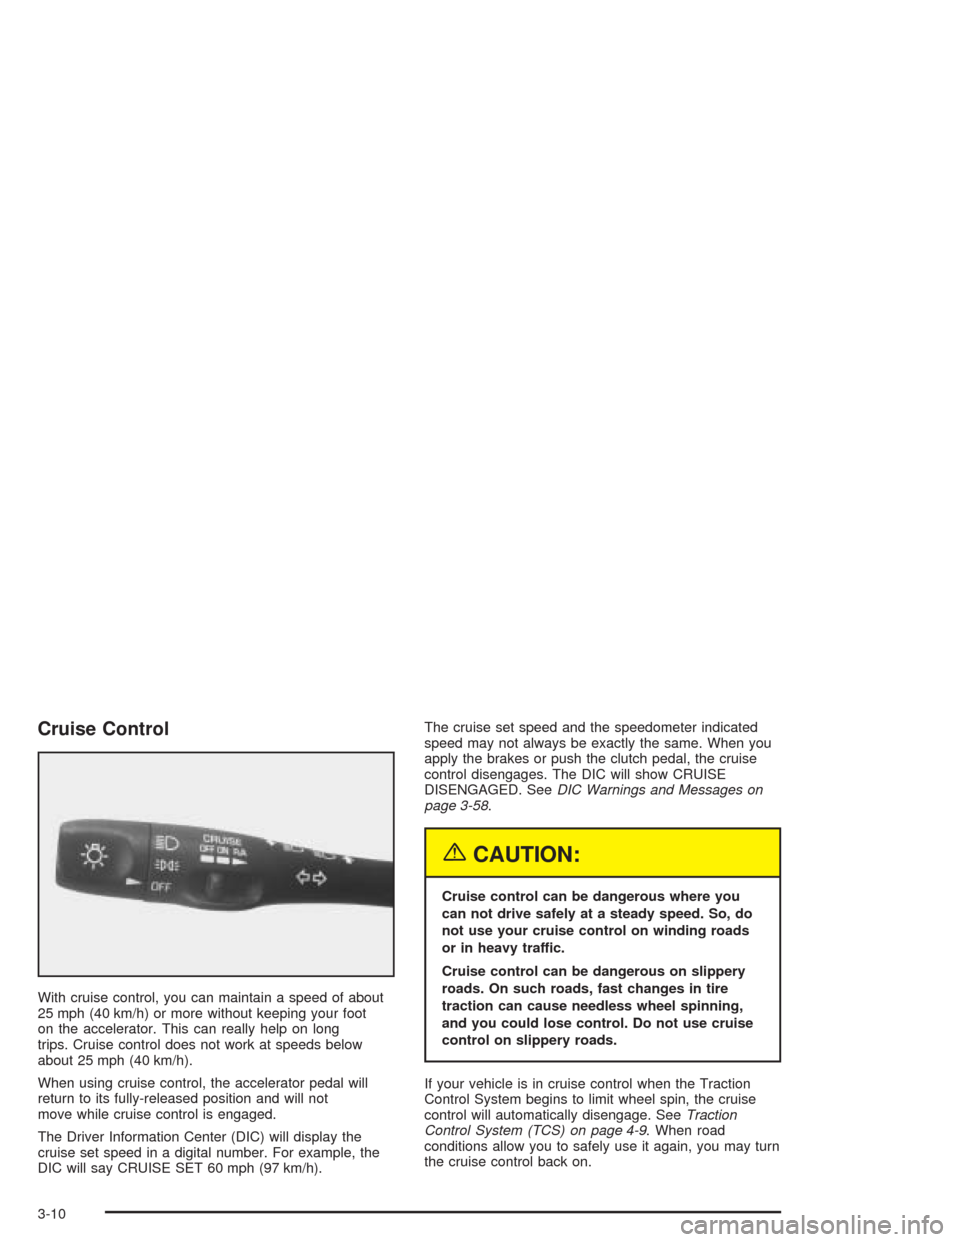
Cruise Control
With cruise control, you can maintain a speed of about
25 mph (40 km/h) or more without keeping your foot
on the accelerator. This can really help on long
trips. Cruise control does not work at speeds below
about 25 mph (40 km/h).
When using cruise control, the accelerator pedal will
return to its fully-released position and will not
move while cruise control is engaged.
The Driver Information Center (DIC) will display the
cruise set speed in a digital number. For example, the
DIC will say CRUISE SET 60 mph (97 km/h).The cruise set speed and the speedometer indicated
speed may not always be exactly the same. When you
apply the brakes or push the clutch pedal, the cruise
control disengages. The DIC will show CRUISE
DISENGAGED. SeeDIC Warnings and Messages on
page 3-58.
{CAUTION:
Cruise control can be dangerous where you
can not drive safely at a steady speed. So, do
not use your cruise control on winding roads
or in heavy traffic.
Cruise control can be dangerous on slippery
roads. On such roads, fast changes in tire
traction can cause needless wheel spinning,
and you could lose control. Do not use cruise
control on slippery roads.
If your vehicle is in cruise control when the Traction
Control System begins to limit wheel spin, the cruise
control will automatically disengage. SeeTraction
Control System (TCS) on page 4-9. When road
conditions allow you to safely use it again, you may turn
the cruise control back on.
3-10
Page 134 of 384

Be sure to continue scanning your displays, controls
and driving environment just as you would in a vehicle
without HUD. If you never look at your instrument
panel cluster, you may not see something important,
such as a warning light. Under important warning
conditions, the CHECK GAGES icon will illuminate in
the HUD. View your Driver Information Center (DIC) for
more information.The HUD controls are located to the left of the
steering wheel.
To adjust the HUD so you can see it properly, do the
following:
1. Start your engine and slide the HUD dimmer control
all the way up.
The brightness of the HUD image is determined by
the light conditions in the direction your vehicle is
facing and where you have the HUD dimmer control
set. If you are facing a dark object or a heavily
shaded area, your HUD may anticipate that you are
entering a dark area and may begin to dim.
3-20
Page 135 of 384
It is possible for sunlight to enter the HUD causing
all of the graphics to light up. The display will
return to normal when the sunlight is no longer
entering the HUD.
2. Adjust the seat to a comfortable driving position. If
you change your seat position later, you may have
to re-adjust your HUD.
3. Press the top or bottom of the DISPLAY switch to
center the HUD image in your view.
The HUD image can only be adjusted up and down,
not side-to-side.
4. Slide the dimmer control downward until the HUD
image is no brighter than necessary.
To turn HUD off, slide the switch to OFF.
If the sun comes out or it becomes cloudy, you may
need to adjust the HUD brightness again using
the dimmer control. Polarized sunglasses could make
the HUD image harder to see.
To change from English to metric units, press the
E/M button located to the right of the steering wheel.Clean the inside of the windshield as needed to remove
any dirt or film that reduces the sharpness or clarity
of the HUD image.
To clean the HUD, spray household glass cleaner on a
soft, clean cloth. Wipe the HUD lens gently, then dry
it. Do not spray cleaner directly on the lens because the
cleaner could leak into the unit.
If the ignition is on and you can’t see the HUD image,
check to see if:
•Something is covering the HUD unit.
•The HUD dimmer control is adjusted properly.
•The HUD image is adjusted to the proper height.
•Ambient light, in the direction your vehicle is facing,
is low.
•A fuse is blown. SeeFuses and Circuit Breakers on
page 5-93.
Keep in mind that your windshield is part of the HUD
system. If you ever have to have your windshield
replaced, be sure to get one that is designed for HUD
or your HUD image may look blurred and out of focus.
3-21
Page 153 of 384

Anti-Lock Brake System
Warning Light
With the anti-lock brake
system, the light will come
on when your engine is
started and may stay on for
several seconds. That is
normal.
If the light stays on, turn the ignition to OFF. Or, if the
light comes on when you are driving, stop as soon
as possible and turn the ignition off. Then start
the engine again to reset the system. If the light still
stays on, or comes on again while you are driving, your
vehicle needs service. If the regular brake system
warning light is not on, you still have brakes, but you do
not have anti-lock brakes. If the regular brake system
warning light is also on, you do not have anti-lock brakes
and there is a problem with your regular brakes. See
Brake System Warning Light on page 3-38. Also
see “Service ABS” underDIC Warnings and Messages
on page 3-58.
The anti-lock brake system warning light will come on
briefly when you turn the ignition key to ON. This is
normal. If the light does not come on then, have it fixed
so it will be ready to warn you if there is a problem.
Traction Control System (TCS)
Warning Light
This light should come on
briefly as you start the
engine. If the light does not
come on then, have it
fixed so it will be ready to
warn you if there is a
problem.
If it stays on, or comes on and the DIC shows a
SERVICE TRACTION SYSTEM message when you are
driving, there is a problem with your TCS system and
your vehicle needs service. When this light is on,
the system will not limit wheel spin. Adjust your driving
accordingly. If the driver turns off the Traction Control
System by pressing the button on the console, the TCS
system light will come on and the TRACTION SYSTEM
OFF message will show on the DIC.
3-39