2004 CHEVROLET COLORADO ignition
[x] Cancel search: ignitionPage 234 of 414

Four-Wheel Drive Vehicles
Use the following steps to tow your vehicle with all four
wheels on the ground:
1. Drive the vehicle to be towed into position behind
the tow vehicle.
2. Firmly set the parking brake. SeeParking Brake on
page 2-31for more information.
3. Put an automatic transmission in PARK (P) or a
manual transmission in FIRST (1).
4. Securely attach the vehicle being towed to the
tow vehicle.
{CAUTION:
Shifting a four-wheel-drive vehicle’s transfer
case into NEUTRAL can cause your vehicle to
roll even if the transmission is in Park (P) for
an automatic transmission, or if your vehicle is
in gear, for a manual transmission. You or
others could be injured. Make sure the parking
brake is �rmly set before you shift the transfer
case to NEUTRAL.5. Shift the transfer case to NEUTRAL.
SeeFour-Wheel Drive on page 2-27for
more information.
6. Release the parking brake only after the
vehicle being towed is �rmly attached to the
towing vehicle.
Notice:If you exceed 55 mph (90 km/h) while
towing your vehicle, it could be damaged. Never
exceed 55 mph (90 km/h) while towing your vehicle.
7. Turn the ignition to LOCK. To prevent your
battery from draining while towing, remove
the battery cable from the positive terminal (post)
of the battery.
After towing see “Shifting out of NEUTRAL” under
Four-Wheel Drive on page 2-27.
4-46
Page 236 of 414

{CAUTION:
Shifting a four-wheel-drive vehicle’s transfer
case into NEUTRAL can cause your vehicle to
roll even if the transmission is in Park (P) for
an automatic transmission, or if your vehicle is
in gear, for a manual transmission. You or
others could be injured. Make sure the parking
brake is �rmly set before you shift the transfer
case to NEUTRAL.
5. Shift the transfer case to NEUTRAL. See
Four-Wheel Drive on page 2-27for instructions.
6. Release the parking brake only after the
vehicle being towed is �rmly attached to the
towing vehicle.
Notice:If you exceed 55 mph (90 km/h) while
towing your vehicle, it could be damaged. Never
exceed 55 mph (90 km/h) while towing your vehicle.7. Turn the ignition to LOCK. To prevent your battery
from draining while towing, remove the battery
cable from the positive terminal (post) of the battery.
After towing see “Shifting out of NEUTRAL” under
Four-Wheel Drive on page 2-27.
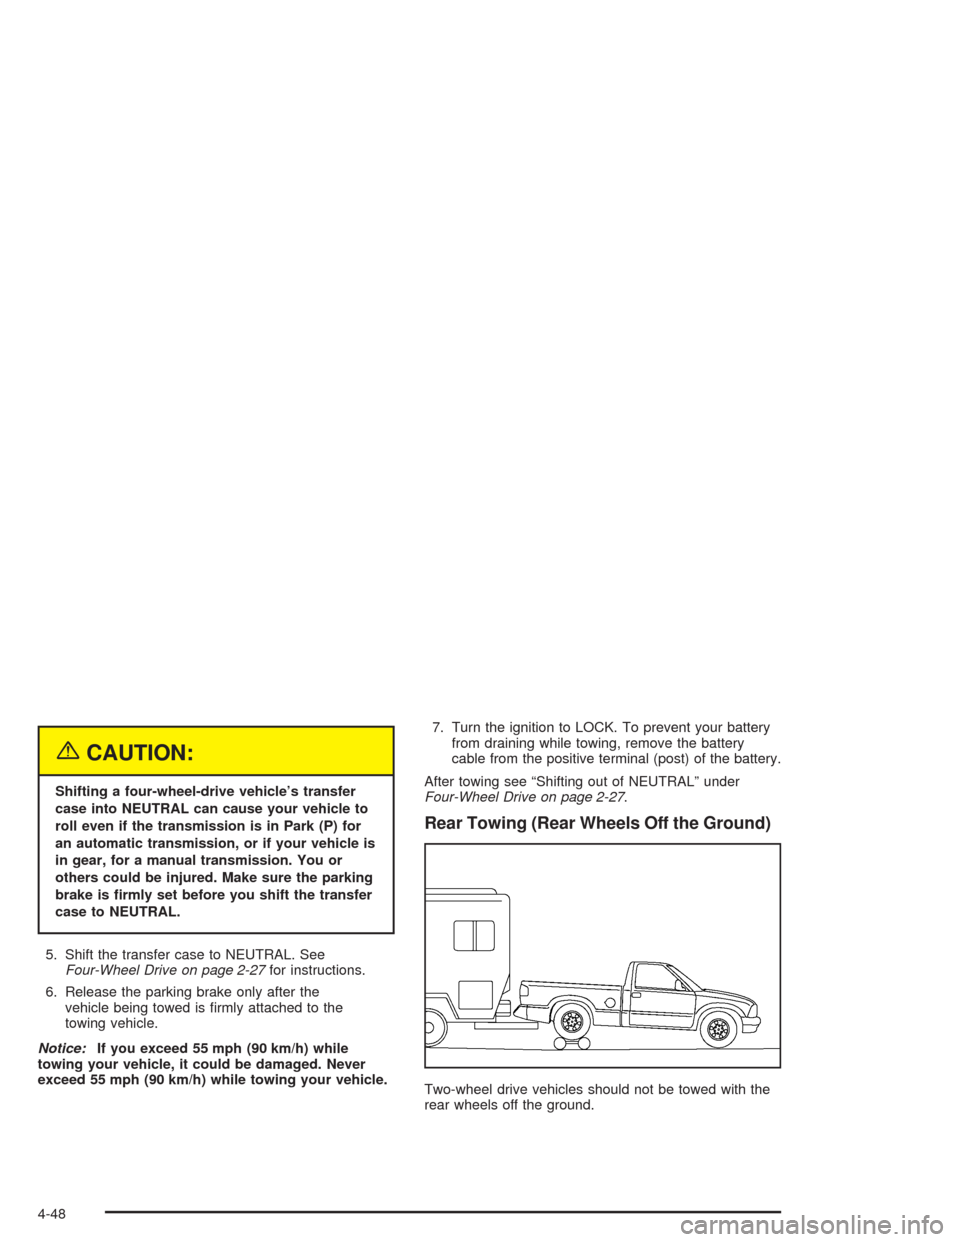
Rear Towing (Rear Wheels Off the Ground)
Two-wheel drive vehicles should not be towed with the
rear wheels off the ground.
4-48
Page 237 of 414

Four-Wheel-Drive Vehicles
Use the following steps to dolly tow your vehicle from
the rear:
1. Drive the vehicle up onto the dolly.
2. Firmly set the parking brake. SeeParking Brake on
page 2-31for more information.
3. Put an automatic transmission in PARK (P) or a
manual transmission in FIRST (1).
4. Follow the dolly manufacturer’s instructions to
attach and secure the vehicle being towed to
the dolly and then the loaded dolly to the
tow vehicle.
{CAUTION:
Shifting a four-wheel-drive vehicle’s transfer
case into NEUTRAL can cause your vehicle to
roll even if the transmission is in Park (P) for
an automatic transmission, or if your vehicle is
in gear, for a manual transmission. You or
others could be injured. Make sure the parking
brake is �rmly set before you shift the transfer
case to NEUTRAL.5. Shift the transfer case to 2HI. SeeFour-Wheel
Drive on page 2-27for instructions.
6. Release the parking brake only after the vehicle
being towed is �rmly attached to the
towing vehicle.
Notice:If you exceed 55 mph (90 km/h) while
towing your vehicle, it could be damaged. Never
exceed 55 mph (90 km/h) while towing your vehicle.
7. Turn the ignition to LOCK. To prevent your
battery from draining while towing, remove the
battery cable from the positive terminal (post) of
the battery.
After towing see “Shifting out of NEUTRAL” under
Four-Wheel Drive on page 2-27.
4-49
Page 301 of 414

Jump Starting
If your battery has run down, you may want to use
another vehicle and some jumper cables to start your
vehicle. Be sure to follow the steps below to do it safely.
{CAUTION:
Batteries can hurt you. They can be dangerous
because:
They contain acid that can burn you.
They contain gas that can explode
or ignite.
They contain enough electricity to
burn you.
If you do not follow these steps exactly, some
or all of these things can hurt you.
Notice:Ignoring these steps could result in costly
damage to your vehicle that would not be covered
by your warranty.
Trying to start your vehicle by pushing or pulling it
will not work, and it could damage your vehicle.
1. Check the other vehicle. It must have a
12–volt battery with a negative ground system.Notice:If the other vehicle’s system is not a 12-volt
system with a negative ground, both vehicles can
be damaged. Only use vehicles with 12-volt systems
with negative grounds to jump start your vehicle.
2. Get the vehicles close enough so the jumper cables
can reach, but be sure the vehicles aren’t touching
each other. If they are, it could cause a ground
connection you don’t want. You wouldn’t be able to
start your vehicle, and the bad grounding could
damage the electrical systems.
To avoid the possibility of the vehicles rolling, set
the parking brake �rmly on both vehicles involved in
the jump start procedure. Put an automatic
transmission in PARK (P) or a manual transmission
in NEUTRAL before setting the parking brake. If
you have a four-wheel-drive vehicle, be sure
the transfer case is not in NEUTRAL (N).
Notice:If you leave your radio or other accessories
on during the jump starting procedure, they could
be damaged. The repairs would not be covered
by your warranty. Always turn off your radio and
other accessories when jump starting your vehicle.
3. Turn off the ignition on both vehicles. Unplug
unnecessary accessories plugged into the cigarette
lighter or in the accessory power outlets. Turn off
the radio and all lamps that aren’t needed. This will
avoid sparks and help save both batteries. And it
could save your radio!
5-43
Page 363 of 414

Fuse Usage
1 Brake Switch, Stoplamps
2 Auxiliary Power 1
5 Air Conditioning Control Head
8 Wiper/Washer Switch
9 Fog Lamps
10 Ignition Transducers
11 Driver’s Side Headlamp
12 Passenger’s Side Headlamp
13 Fuel Pump
Fuse Usage
14 Wiper
15 Front Axle Actuator
16Antilock Brake System (ABS), ABS
module, Four-Wheel Drive, Gravity
Sensor
17Supplemental In�atable Restraint
System, Sensing and Diagnostic
Module, Air Bag Off Switch
18 Heated Seat
19Cruise Control Switch, Inside
Rearview Mirror, Transfer Case
Control Module, Brake Switch,
Clutch Disable
20 Electronic Throttle Control (ETC)
21 Power Door Locks
22 Injectors
23Ignition, Clutch Starter Switch,
Neutral Safety Back-Up Switch,
Ignition Coils 1-5, Air Conditioning
Relay
24 Transmission Solenoid
25 Powertrain Control Module (PCM)
26 Back-up Lights
27ERLS, Map Sensor, Can Purge
Solenoid
28 Rear Turn/Hazard Lights
5-105
Page 365 of 414

Relays Usage
58Power Window Fuse, Wiper/Washer
Switch Fuse, (Retained Accessory
Power Mode)
59Ignition 3, Climate Control, Climate
Control Head Fuse
61Run/Crank, Air Bag System Fuse,
Cruise Control Fuse, Ignition Fuse,
Back-Up Lamps, ABS Fuse, ERLS,
Front Axle, PCM-1, Injectors Fuse
62 Starter Relay (PCM Relay)
63 Wiper 2 (High/Low)Miscellaneous Usage
64 Diode — Wiper
65 Diode — Air Conditioning, Clutch
66 Mega Fuse
67 Not Used
Capacities and Speci�cations
The following approximate conversion capacities are given in English and metric conversions. SeeRecommended
Fluids and Lubricants on page 6-12for more information.
Capacities and Speci�cations
ApplicationCapacities
English Metric
Air Conditioning Capacity
Refrigerant R-134a1.6 lbs 1.73 kg
Cooling System
2.8 L Engine
3.5 L Engine10.4 quarts
10.6 quarts9.8 L
10.0 L
5-107
Page 377 of 414

Ignition Transmission Lock Check
While parked, and with the parking brake set, try to turn
the ignition key to LOCK in each shift lever position.
With an automatic transmission, the key should turn
to LOCK only when the shift lever is in PARK (P).
The key should come out only in LOCK.
With a manual transmission, the key should come
out only in LOCK.
Contact your GM Goodwrench dealer if service
is required.
Parking Brake and Automatic
Transmission Park (P) Mechanism Check
{CAUTION:
When you are doing this check, your vehicle
could begin to move. You or others could be
injured and property could be damaged. Make
sure there is room in front of your vehicle in
case it begins to roll. Be ready to apply the
regular brake at once should the vehicle begin
to move.Park on a fairly steep hill, with the vehicle facing
downhill. Keeping your foot on the regular brake, set the
parking brake.
To check the parking brake’s holding ability: With
the engine running and transmission in
NEUTRAL (N), slowly remove foot pressure from
the regular brake pedal. Do this until the vehicle is
held by the parking brake only.
To check the PARK (P) mechanism’s holding ability:
With the engine running, shift to PARK (P). Then
release the parking brake followed by the
regular brake.
Contact your GM Goodwrench dealer if service
is required.
Underbody Flushing Service
At least every spring, use plain water to �ush any
corrosive materials from the underbody. Take care to
clean thoroughly any areas where mud and other debris
can collect.
6-11
Page 405 of 414

H
Hazard Warning Flashers................................... 3-4
Head Restraints............................................... 1-7
Headlamps....................................................5-50
Bulb Replacement.......................................5-50
Front Turn Signal, Sidemarker and Daytime
Running Lamps........................................5-52
Halogen Bulbs............................................5-50
Heated Seats................................................... 1-5
Highbeam On Light.........................................3-28
Highway Hypnosis...........................................4-35
Hill and Mountain Roads..................................4-36
Hitches..........................................................4-65
Hood
Checking Things Under................................5-10
Release.....................................................5-11
Horn............................................................... 3-5
How to Add Coolant to the Coolant Recovery
Tank ..........................................................5-32
How to Add Coolant to the Radiator..................5-34
How to Add Fluid....................................5-22, 5-23
How to Check and Add Fluid............................5-25
How to Check Lubricant..........................5-48, 5-49
How to Check Power Steering Fluid..................5-37
How to Inspect the Engine Air Cleaner/Filter.......5-18
How to Use This Manual...................................... iiHow to Wear Safety Belts Properly...................1-16
Hydraulic Clutch.............................................5-24
Hydroplaning..................................................4-31
I
If No Steam Is Coming From Your Engine..........5-29
If Steam Is Coming From Your Engine...............5-28
If the Light is Flashing.....................................3-25
If the Light Is On Steady.................................3-26
If You Are Caught in a Blizzard.........................4-40
If You Are Stuck in Sand, Mud, Ice or Snow.......4-42
If You Do Decide To Pull A Trailer.....................4-58
Ignition Positions.............................................2-18
Infants and Young Children, Restraints...............1-34
In�ation - Tire Pressure...................................5-64
Instrument Panel
Cluster.......................................................3-16
Overview..................................................... 3-2
Instrument Panel Brightness.............................3-10
Interior Lamps................................................3-10
J
Jump Starting.................................................5-43
7