2004 CHEVROLET CLASSIC turn signal
[x] Cancel search: turn signalPage 74 of 348
At times you may notice a decrease in range. This is
normal for any remote keyless entry system. If the
transmitter does not work or if you have to stand closer
to your vehicle for the transmitter to work, try this:
•Check the distance. You may be too far from your
vehicle. You may need to stand closer during
rainy or snowy weather.
•Check the location. Other vehicles or objects may
be blocking the signal. Take a few steps to the
left or right, hold the transmitter higher, and
try again.
•Check to determine if battery replacement is
necessary. See “Battery Replacement” under
Remote Keyless Entry System Operation on
page 2-4.
•If you are still having trouble, see your dealer or a
qualified technician for service.
Remote Keyless Entry System
Operation
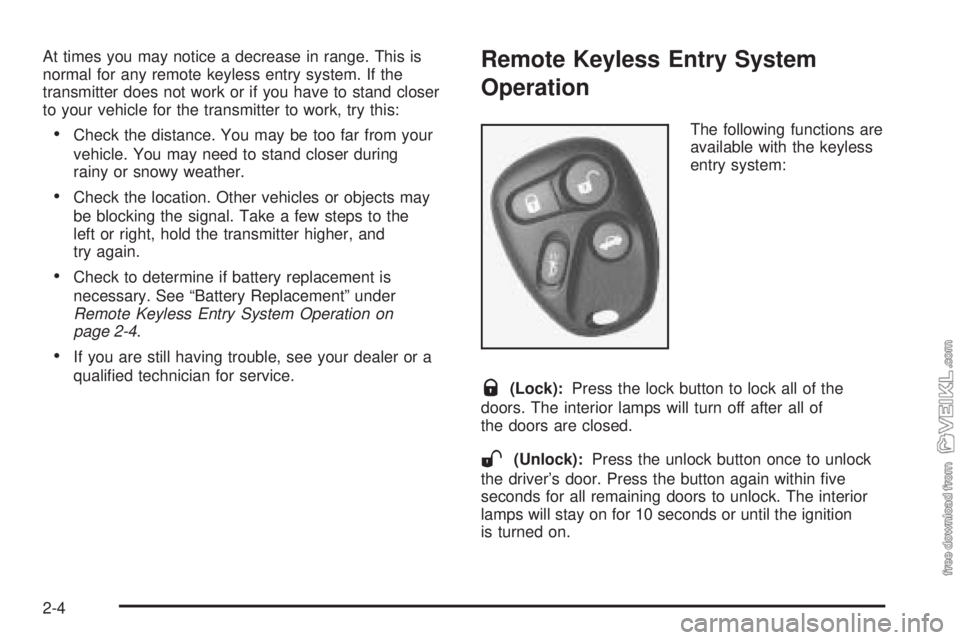
The following functions are
available with the keyless
entry system:
Q(Lock):Press the lock button to lock all of the
doors. The interior lamps will turn off after all of
the doors are closed.
W(Unlock):Press the unlock button once to unlock
the driver’s door. Press the button again within five
seconds for all remaining doors to unlock. The interior
lamps will stay on for 10 seconds or until the ignition
is turned on.
2-4
Page 103 of 348
Instrument Panel Overview...............................3-2
Hazard Warning Flashers................................3-4
Other Warning Devices...................................3-5
Horn.............................................................3-5
Tilt Wheel.....................................................3-5
Turn Signal/Multifunction Lever.........................3-6
Windshield Wiper Lever...................................3-8
Cruise Control..............................................3-10
Exterior Lamps.............................................3-13
Interior Lamps..............................................3-15
Accessory Power Outlets...............................3-16
Ashtrays and Cigarette Lighter........................3-17
Climate Controls............................................3-18
Climate Control System.................................3-18
Outlet Adjustment.........................................3-21
Warning Lights, Gages and Indicators.............3-22
Instrument Panel Cluster................................3-23
Speedometer and Odometer...........................3-24
Tachometer.................................................3-25
Safety Belt Reminder Light.............................3-25
Air Bag Readiness Light................................3-26
Charging System Light..................................3-27
Brake System Warning Light..........................3-27
Anti-Lock Brake System Warning Light.............3-28Engine Coolant Temperature Gage..................3-29
Low Coolant Warning Light............................3-29
Malfunction Indicator Lamp.............................3-30
Oil Pressure Light.........................................3-33
Passlock
®Warning Light................................3-34
Low Washer Fluid Warning Light.....................3-34
Door Ajar Light.............................................3-34
Service Vehicle Soon Light............................3-35
Fuel Gage...................................................3-35
Audio System(s).............................................3-36
Setting the Time for Radios without Radio
Data Systems (RDS)..................................3-37
Setting the Time for Radios with Radio Data
Systems (RDS).........................................3-37
Radio with CD..............................................3-38
Radio with Cassette and CD..........................3-43
Theft-Deterrent Feature (Non-RDS Radios).......3-54
Theft-Deterrent Feature (RDS Radios).............3-54
Understanding Radio Reception......................3-54
Care of Your Cassette Tape Player.................3-55
Care of Your CDs.........................................3-56
Care of Your CD Player................................3-56
Fixed Mast Antenna......................................3-56
Chime Level Adjustment................................3-56
Section 3 Instrument Panel
3-1
Page 105 of 348
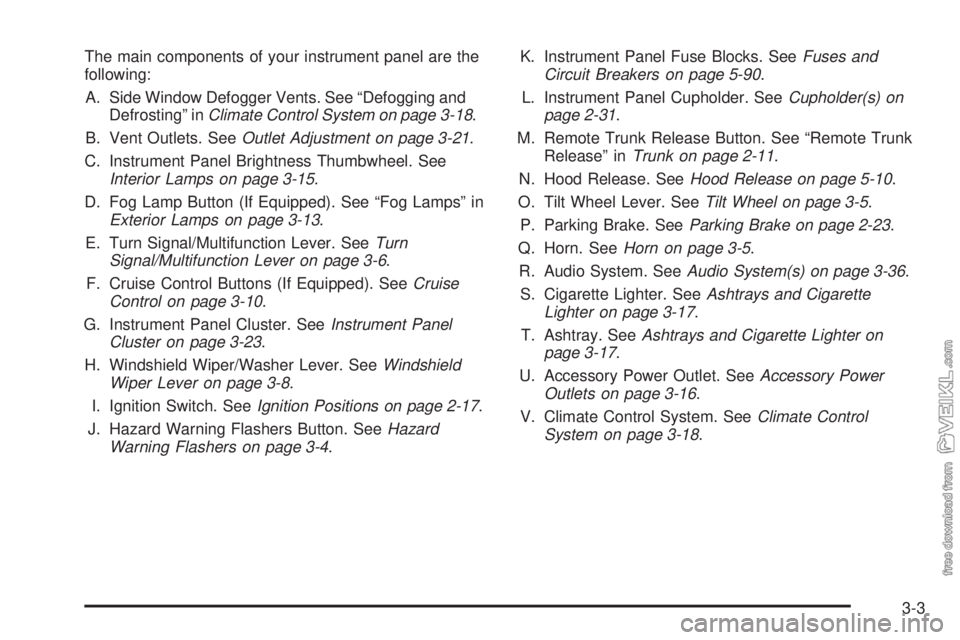
The main components of your instrument panel are the
following:
A. Side Window Defogger Vents. See “Defogging and
Defrosting” inClimate Control System on page 3-18.
B. Vent Outlets. SeeOutlet Adjustment on page 3-21.
C. Instrument Panel Brightness Thumbwheel. See
Interior Lamps on page 3-15.
D. Fog Lamp Button (If Equipped). See “Fog Lamps” in
Exterior Lamps on page 3-13.
E. Turn Signal/Multifunction Lever. SeeTurn
Signal/Multifunction Lever on page 3-6.
F. Cruise Control Buttons (If Equipped). SeeCruise
Control on page 3-10.
G. Instrument Panel Cluster. SeeInstrument Panel
Cluster on page 3-23.
H. Windshield Wiper/Washer Lever. SeeWindshield
Wiper Lever on page 3-8.
I. Ignition Switch. SeeIgnition Positions on page 2-17.
J. Hazard Warning Flashers Button. SeeHazard
Warning Flashers on page 3-4.K. Instrument Panel Fuse Blocks. SeeFuses and
Circuit Breakers on page 5-90.
L. Instrument Panel Cupholder. SeeCupholder(s) on
page 2-31.
M. Remote Trunk Release Button. See “Remote Trunk
Release” inTrunk on page 2-11.
N. Hood Release. SeeHood Release on page 5-10.
O. Tilt Wheel Lever. SeeTilt Wheel on page 3-5.
P. Parking Brake. SeeParking Brake on page 2-23.
Q. Horn. SeeHorn on page 3-5.
R. Audio System. SeeAudio System(s) on page 3-36.
S. Cigarette Lighter. SeeAshtrays and Cigarette
Lighter on page 3-17.
T. Ashtray. SeeAshtrays and Cigarette Lighter on
page 3-17.
U. Accessory Power Outlet. SeeAccessory Power
Outlets on page 3-16.
V. Climate Control System. SeeClimate Control
System on page 3-18.
3-3
Page 106 of 348
Hazard Warning Flashers
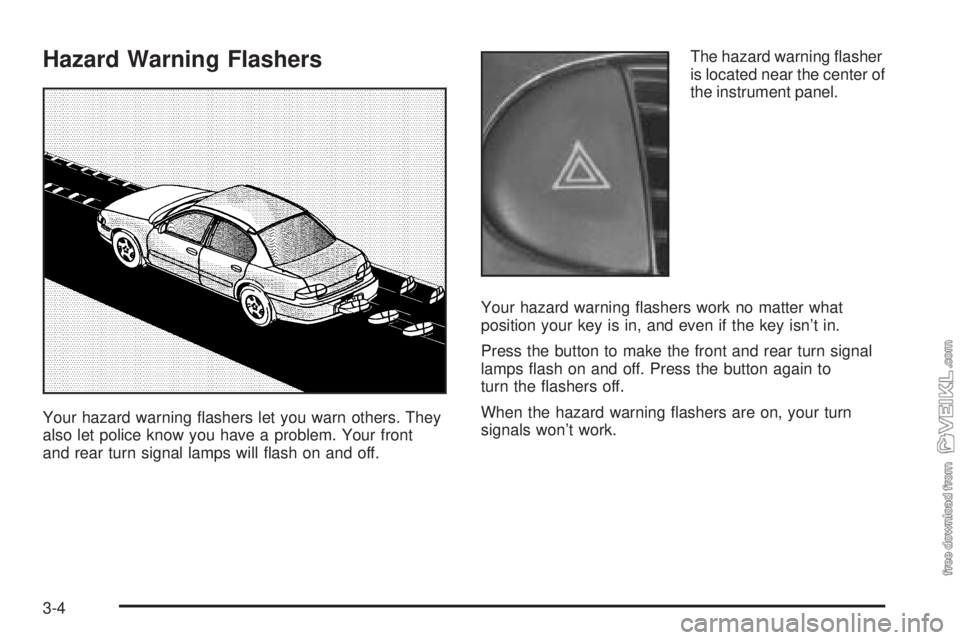
Your hazard warning flashers let you warn others. They
also let police know you have a problem. Your front
and rear turn signal lamps will flash on and off.The hazard warning flasher
is located near the center of
the instrument panel.
Your hazard warning flashers work no matter what
position your key is in, and even if the key isn’t in.
Press the button to make the front and rear turn signal
lamps flash on and off. Press the button again to
turn the flashers off.
When the hazard warning flashers are on, your turn
signals won’t work.
3-4
Page 108 of 348
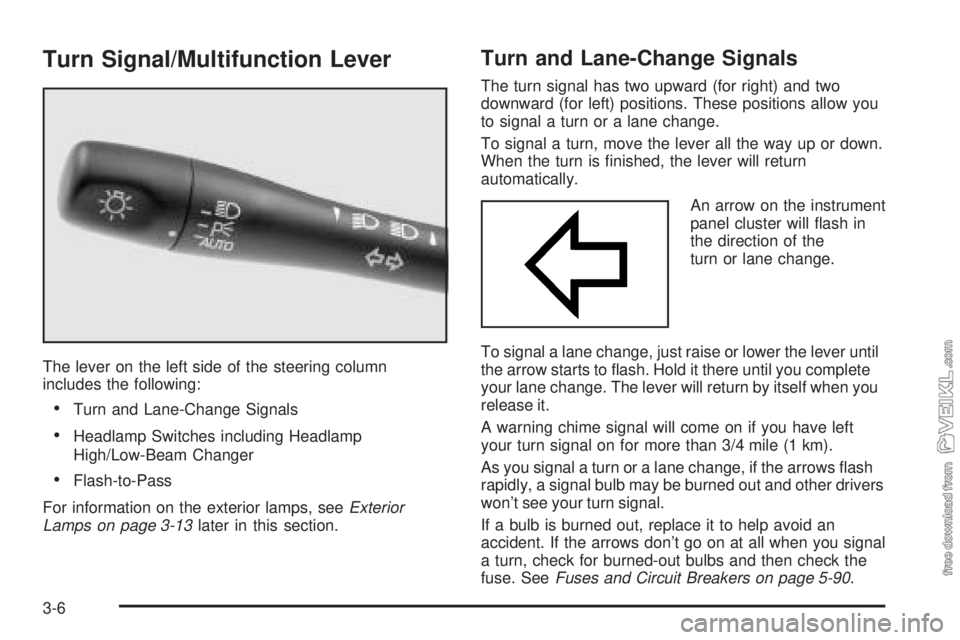
Turn Signal/Multifunction Lever
The lever on the left side of the steering column
includes the following:
•Turn and Lane-Change Signals
•Headlamp Switches including Headlamp
High/Low-Beam Changer
•Flash-to-Pass
For information on the exterior lamps, seeExterior
Lamps on page 3-13later in this section.
Turn and Lane-Change Signals
The turn signal has two upward (for right) and two
downward (for left) positions. These positions allow you
to signal a turn or a lane change.
To signal a turn, move the lever all the way up or down.
When the turn is finished, the lever will return
automatically.
An arrow on the instrument
panel cluster will flash in
the direction of the
turn or lane change.
To signal a lane change, just raise or lower the lever until
the arrow starts to flash. Hold it there until you complete
your lane change. The lever will return by itself when you
release it.
A warning chime signal will come on if you have left
your turn signal on for more than 3/4 mile (1 km).
As you signal a turn or a lane change, if the arrows flash
rapidly, a signal bulb may be burned out and other drivers
won’t see your turn signal.
If a bulb is burned out, replace it to help avoid an
accident. If the arrows don’t go on at all when you signal
a turn, check for burned-out bulbs and then check the
fuse. SeeFuses and Circuit Breakers on page 5-90.
3-6
Page 109 of 348
Headlamps
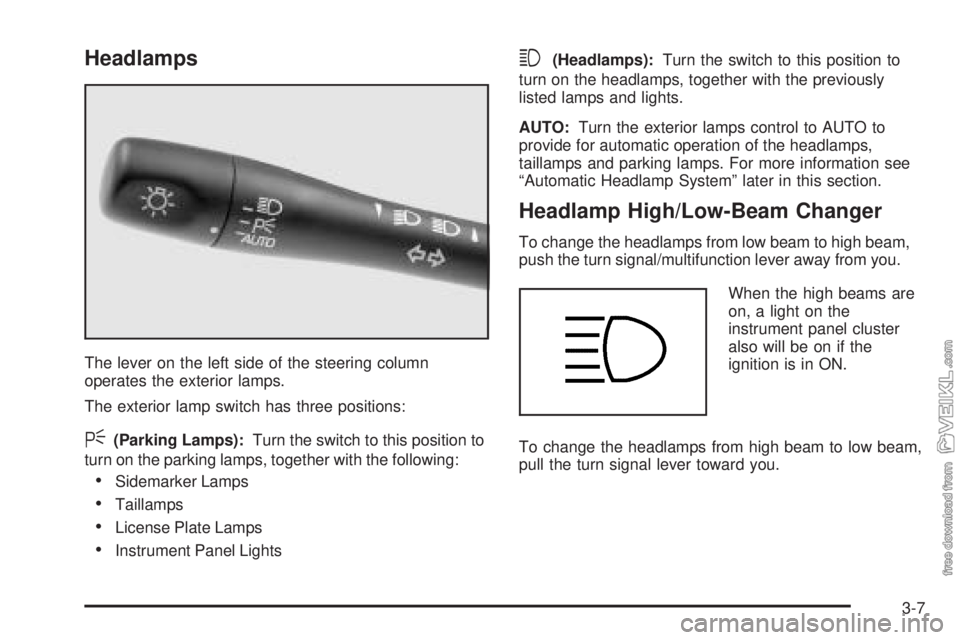
The lever on the left side of the steering column
operates the exterior lamps.
The exterior lamp switch has three positions:
<(Parking Lamps):Turn the switch to this position to
turn on the parking lamps, together with the following:
•Sidemarker Lamps
•Taillamps
•License Plate Lamps
•Instrument Panel Lights
3(Headlamps):Turn the switch to this position to
turn on the headlamps, together with the previously
listed lamps and lights.
AUTO:Turn the exterior lamps control to AUTO to
provide for automatic operation of the headlamps,
taillamps and parking lamps. For more information see
“Automatic Headlamp System” later in this section.
Headlamp High/Low-Beam Changer
To change the headlamps from low beam to high beam,
push the turn signal/multifunction lever away from you.
When the high beams are
on, a light on the
instrument panel cluster
also will be on if the
ignition is in ON.
To change the headlamps from high beam to low beam,
pull the turn signal lever toward you.
3-7
Page 110 of 348
Headlamps On Reminder
If you open the driver’s door and turn off the ignition
while leaving the lamps on, you will hear a warning
chime.
Flash-to-Pass Feature
This feature lets you use your high-beam headlamps to
signal a driver in front of you that you want to pass.
To use it, pull the turn signal/multifunction lever toward
you until the high-beam headlamps come on, then
release the lever to turn them off.
Windshield Wiper Lever
Use this lever located on the right side of the steering
wheel to operate the windshield wipers.
OFF:Move the lever to OFF to turn off the windshield
wipers.
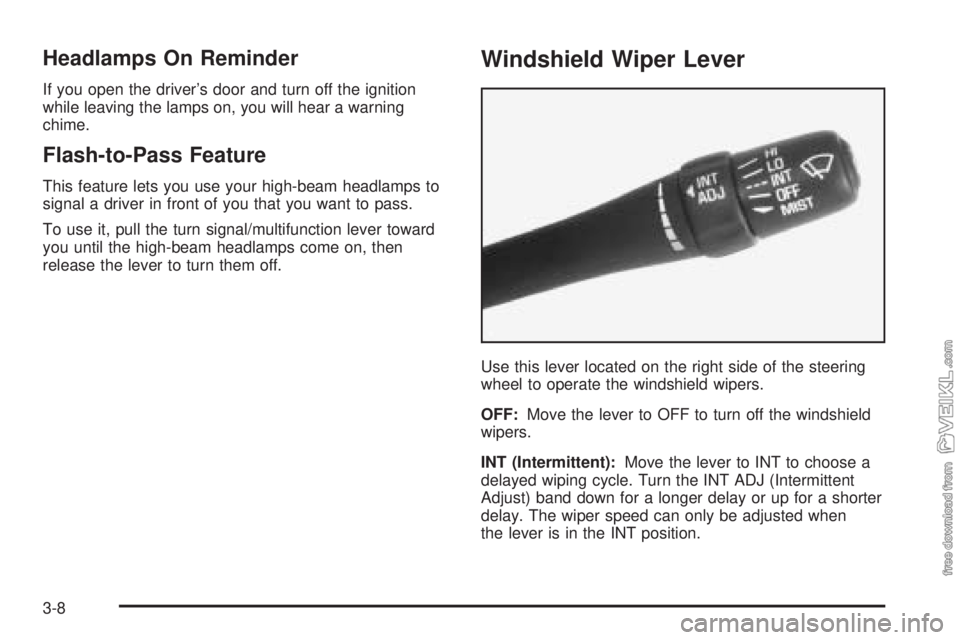
INT (Intermittent):Move the lever to INT to choose a
delayed wiping cycle. Turn the INT ADJ (Intermittent
Adjust) band down for a longer delay or up for a shorter
delay. The wiper speed can only be adjusted when
the lever is in the INT position.
3-8
Page 115 of 348

Exterior Lamps
Headlamps
See “Headlamps” underTurn Signal/Multifunction Lever
on page 3-6.
Daytime Running Lamps (DRL)
Daytime Running Lamps (DRL) can make it easier for
others to see the front of your vehicle during the
day. DRL can be helpful in many different driving
conditions, but they can be especially helpful in the short
periods after dawn and before sunset.
The DRL system will make your low-beam headlamps
come on at a reduced brightness when the following
conditions are met:
•The ignition is on,
•the exterior lamp control is turned to AUTO or you
have turned on your parking lamps,
•the light sensor detects daytime light,
•the parking brake is released, and
•the shift lever is not in PARK (P).When the DRL system is on, the taillamps, sidemarker
lamps, parking lamps and instrument panel lights
will not be illuminated unless you have turned the
exterior lamps control to the parking lamp or headlamp
position.
The DRL system will remain off any time your vehicle is
in PARK (P) or the parking brake is engaged and the
vehicle speed is less than 8 mph (13 km/h), for
United States vehicles only.
As with any vehicle, you should turn on the regular
headlamp system when you need it.
Automatic Headlamp System
When it is dark enough outside, your Automatic
Headlamp System will turn on your headlamps at the
normal brightness along with other lamps such as
the taillamps, sidemarker, parking lamps and the
instrument panel lights. The radio lights will also be dim.
Your vehicle is equipped with a light sensor on the
top of the instrument panel under the defroster grill, so
be sure it is not covered which will cause the system
to be on whenever the ignition is on.
The system may also be on when driving through a
parking garage, heavy overcast weather or a tunnel.
This is normal.
3-13