2004 CHEVROLET CLASSIC coolant
[x] Cancel search: coolantPage 71 of 348
Keys...............................................................2-2
Remote Keyless Entry System.........................2-3
Remote Keyless Entry System Operation...........2-4
Doors and Locks.............................................2-7
Door Locks....................................................2-7
Power Door Locks..........................................2-8
Door Ajar Reminder........................................2-8
Delayed Locking.............................................2-8
Programmable Automatic Door Locks................2-9
Rear Door Security Locks..............................2-10
Lockout Protection........................................2-11
Leaving Your Vehicle....................................2-11
Trunk..........................................................2-11
Windows........................................................2-14
Power Windows............................................2-15
Sun Visors...................................................2-15
Theft-Deterrent Systems..................................2-16
Passlock
®....................................................2-16
Starting and Operating Your Vehicle................2-16
New Vehicle Break-In....................................2-16
Ignition Positions..........................................2-17Starting Your Engine.....................................2-18
Engine Coolant Heater..................................2-19
Automatic Transaxle Operation.......................2-20
Parking Brake..............................................2-23
Shifting Into Park (P).....................................2-24
Shifting Out of Park (P).................................2-26
Parking Over Things That Burn.......................2-26
Engine Exhaust............................................2-27
Running Your Engine While You Are Parked.......2-28
Mirrors...........................................................2-29
Manual Rearview Mirror.................................2-29
Outside Remote Control Mirrors......................2-29
Outside Power Mirrors...................................2-30
Outside Convex Mirror...................................2-30
Storage Areas................................................2-31
Glove Box...................................................2-31
Cupholder(s)................................................2-31
Center Console Storage Area.........................2-31
Garment Hooks............................................2-31
Section 2 Features and Controls
2-1
Page 89 of 348
Engine Coolant Heater
Your vehicle may have this feature. In very cold
weather, 0°F (−18°C) or colder, the engine coolant
heater can provide easier starting and better fuel
economy during engine warm-up. Usually, the coolant
heater should be plugged in a minimum of four
hours prior to starting your vehicle. At temperatures
above 32°F (0°C), use of the coolant heater is not
required.
To Use the Engine Coolant Heater
1. Turn off the engine.
2. Open the hood and unwrap the electrical cord. The
engine coolant heater cord is located in front of the
coolant surge tank on the passenger’s side. See
Engine Compartment Overview on page 5-12
for more information on location.
3. Plug it into a normal, grounded 110-volt AC outlet.
{CAUTION:
Plugging the cord into an ungrounded outlet
could cause an electrical shock. Also, the
wrong kind of extension cord could overheat
and cause a �re. You could be seriously
injured. Plug the cord into a properly grounded
three-prong 110-volt AC outlet. If the cord will
not reach, use a heavy-duty three-prong
extension cord rated for at least 15 amps.
4. Before starting the engine, be sure to unplug and
store the cord as it was before to keep it away
from moving engine parts. If you don’t, it could be
damaged.
How long should you keep the coolant heater plugged
in? The answer depends on the outside temperature, the
kind of oil you have, and some other things. Instead
of trying to list everything here, we ask that you contact
your dealer in the area where you’ll be parking your
vehicle. The dealer can give you the best advice for that
particular area.
2-19
Page 103 of 348
Instrument Panel Overview...............................3-2
Hazard Warning Flashers................................3-4
Other Warning Devices...................................3-5
Horn.............................................................3-5
Tilt Wheel.....................................................3-5
Turn Signal/Multifunction Lever.........................3-6
Windshield Wiper Lever...................................3-8
Cruise Control..............................................3-10
Exterior Lamps.............................................3-13
Interior Lamps..............................................3-15
Accessory Power Outlets...............................3-16
Ashtrays and Cigarette Lighter........................3-17
Climate Controls............................................3-18
Climate Control System.................................3-18
Outlet Adjustment.........................................3-21
Warning Lights, Gages and Indicators.............3-22
Instrument Panel Cluster................................3-23
Speedometer and Odometer...........................3-24
Tachometer.................................................3-25
Safety Belt Reminder Light.............................3-25
Air Bag Readiness Light................................3-26
Charging System Light..................................3-27
Brake System Warning Light..........................3-27
Anti-Lock Brake System Warning Light.............3-28Engine Coolant Temperature Gage..................3-29
Low Coolant Warning Light............................3-29
Malfunction Indicator Lamp.............................3-30
Oil Pressure Light.........................................3-33
Passlock
®Warning Light................................3-34
Low Washer Fluid Warning Light.....................3-34
Door Ajar Light.............................................3-34
Service Vehicle Soon Light............................3-35
Fuel Gage...................................................3-35
Audio System(s).............................................3-36
Setting the Time for Radios without Radio
Data Systems (RDS)..................................3-37
Setting the Time for Radios with Radio Data
Systems (RDS).........................................3-37
Radio with CD..............................................3-38
Radio with Cassette and CD..........................3-43
Theft-Deterrent Feature (Non-RDS Radios).......3-54
Theft-Deterrent Feature (RDS Radios).............3-54
Understanding Radio Reception......................3-54
Care of Your Cassette Tape Player.................3-55
Care of Your CDs.........................................3-56
Care of Your CD Player................................3-56
Fixed Mast Antenna......................................3-56
Chime Level Adjustment................................3-56
Section 3 Instrument Panel
3-1
Page 121 of 348
?(Recirculation):This mode keeps outside air from
coming in the vehicle. It can be used to prevent outside
air and odors from entering your vehicle or to help heat or
cool the air inside your vehicle more quickly. Press this
button to turn the recirculation mode on or off. When the
button is pressed, an indicator light in the button will come
on to let you know that it is activated. The air-conditioning
compressor comes on. The recirculation mode can be
used with vent, bi-level, or floor modes, but it cannot be
used with the defog or defrost modes. Pressing this
button will cancel the outside air mode. When you switch
to the defog or defrost modes the system will
automatically move from recirculation to outside air.
When you move the mode knob back to another mode,
the system will move back into recirculation. When the
car is turned off and back on the system will default to
outside air automatically.
Temperature Control:Turn the center knob clockwise
or counterclockwise to increase or decrease the
temperature inside your vehicle.
When it’s cold outside 0°F (−18°C) or lower, use the
engine coolant heater, if equipped, to provide warmer air
faster to your vehicle. An engine coolant heater warms
the coolant that the engine uses to provide heat to
warm the inside of your vehicle. For more information,
seeEngine Coolant Heater on page 2-19.#A/C (Air Conditioning):Press this button to turn
the air-conditioning system on or off. When A/C is
pressed, an indicator light in the button will come on to
let you know that air conditioning is activated.
On hot days, open the windows to let hot inside air
escape; then close them. This helps to reduce the time
it takes for your vehicle to cool down. It also helps
the system to operate more efficiently.
For quick cool down on hot days, do the following:
1. Select the vent mode.
2. Select the highest fan speed.
3. Select A/C.
4. Select the recirculation mode.
5. Select the coolest temperature.
Using these settings together for long periods of time
may cause the air inside of your vehicle to become too
dry. To prevent this from happening, after the air in
your vehicle has cooled, turn the recirculation mode off.
The air-conditioning system removes moisture from
the air, so you may sometimes notice a small amount of
water dripping underneath your vehicle while idling or
after turning off the engine. This is normal.
3-19
Page 131 of 348
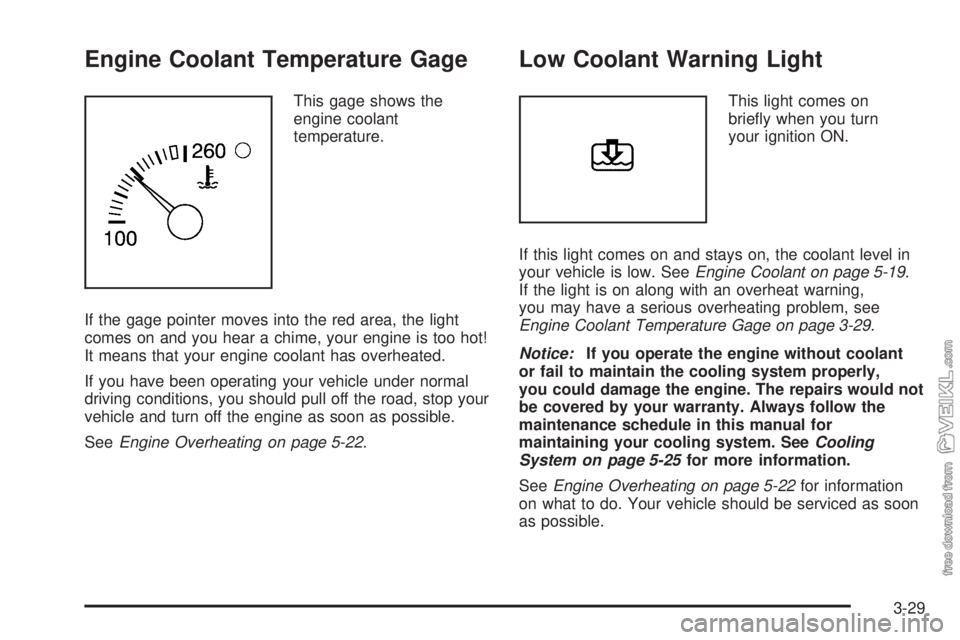
Engine Coolant Temperature Gage
This gage shows the
engine coolant
temperature.
If the gage pointer moves into the red area, the light
comes on and you hear a chime, your engine is too hot!
It means that your engine coolant has overheated.
If you have been operating your vehicle under normal
driving conditions, you should pull off the road, stop your
vehicle and turn off the engine as soon as possible.
SeeEngine Overheating on page 5-22.
Low Coolant Warning Light
This light comes on
briefly when you turn
your ignition ON.
If this light comes on and stays on, the coolant level in
your vehicle is low. SeeEngine Coolant on page 5-19.
If the light is on along with an overheat warning,
you may have a serious overheating problem, see
Engine Coolant Temperature Gage on page 3-29.
Notice:If you operate the engine without coolant
or fail to maintain the cooling system properly,
you could damage the engine. The repairs would not
be covered by your warranty. Always follow the
maintenance schedule in this manual for
maintaining your cooling system. SeeCooling
System on page 5-25for more information.
SeeEngine Overheating on page 5-22for information
on what to do. Your vehicle should be serviced as soon
as possible.
3-29
Page 201 of 348
Turn Signals When Towing a Trailer
When you tow a trailer, your vehicle may need additional
wiring. Check with your dealer. The arrows on your
instrument panel will flash whenever you signal a turn or
lane change. Properly hooked up, the trailer lamps
will also flash, telling other drivers you are about to turn,
change lanes or stop.
When towing a trailer, the arrows on your instrument
panel will flash for turns even if the bulbs on the trailer
are burned out. Thus, you may think drivers behind
you are seeing your signal when they are not. It
is important to check occasionally to be sure the trailer
bulbs are still working.
Driving On Grades
Notice:Do not tow on steep continuous grades
exceeding 6 miles (9.6 km). Extended, higher than
normal engine and transaxle temperatures may result
and damage your vehicle. Frequent stops are very
important to allow the engine and transaxle to cool.
Reduce speed and shift to a lower gearbeforeyou start
down a long or steep downgrade. If you do not shift
down, you might have to use your brakes so much that
they would get hot and no longer work well.
Pay attention to the engine coolant gage. If the indicator
is in the red area, turn off the air conditioning to reduce
engine load. SeeEngine Overheating on page 5-22.
Parking on Hills
{CAUTION:
You really should not park your vehicle, with a
trailer attached, on a hill. If something goes
wrong, your rig could start to move. People
can be injured, and both your vehicle and the
trailer can be damaged.
But if you ever have to park your rig on a hill, here is
how to do it:
1. Apply your regular brakes, but do not shift into
PARK (P) yet.
2. Have someone place chocks under the trailer
wheels.
3. When the wheel chocks are in place, release the
regular brakes until the chocks absorb the load.
4. Reapply the regular brakes. Then apply your
parking brake and shift into PARK (P).
5. Release the regular brakes.
4-43
Page 203 of 348
Service............................................................5-3
Doing Your Own Service Work.........................5-3
Adding Equipment to the Outside of Your
Vehicle......................................................5-4
Fuel................................................................5-4
Gasoline Octane............................................5-4
Gasoline Specifications....................................5-5
California Fuel...............................................5-5
Additives.......................................................5-6
Fuels in Foreign Countries...............................5-6
Filling Your Tank............................................5-7
Filling a Portable Fuel Container.......................5-9
Checking Things Under the Hood....................5-10
Hood Release..............................................5-10
Engine Compartment Overview.......................5-12
Engine Oil...................................................5-13
Engine Air Cleaner/Filter................................5-17
Automatic Transaxle Fluid..............................5-19
Engine Coolant.............................................5-19
Coolant Surge Tank Pressure Cap..................5-22
Engine Overheating.......................................5-22
Cooling System............................................5-25
Power Steering Fluid.....................................5-31
Windshield Washer Fluid................................5-32Brakes........................................................5-34
Battery........................................................5-38
Jump Starting...............................................5-39
Bulb Replacement..........................................5-45
Halogen Bulbs..............................................5-45
Headlamps..................................................5-45
Front Turn Signal Lamps...............................5-47
Center High-Mounted Stoplamp (CHMSL).........5-47
Taillamps, Turn Signal, Stoplamps and
Back-up Lamps.........................................5-48
Replacement Bulbs.......................................5-50
Windshield Wiper Blade Replacement..............5-51
Tires..............................................................5-52
Inflation - Tire Pressure.................................5-59
Tire Inspection and Rotation...........................5-60
When It Is Time for New Tires.......................5-62
Buying New Tires.........................................5-62
Uniform Tire Quality Grading..........................5-63
Wheel Alignment and Tire Balance..................5-65
Wheel Replacement......................................5-65
Tire Chains..................................................5-66
If a Tire Goes Flat........................................5-67
Changing a Flat Tire.....................................5-68
Compact Spare Tire......................................5-79
Section 5 Service and Appearance Care
5-1
Page 215 of 348
A. Engine Coolant Surge Tank. SeeCooling System on
page 5-25.
B. Ground. SeeJump Starting on page 5-39.
C. Engine Oil Dipstick. See “Checking Engine Oil” in
Engine Oil on page 5-13.
D. Engine Oil Fill Cap. See “When to Add Engine Oil”
inEngine Oil on page 5-13.
E. Brake Fluid Reservoir. See “Brake Fluid” inBrakes
on page 5-34.
F. Power Steering Fluid Reservoir. SeePower Steering
Fluid on page 5-31.
G. Engine Compartment Fuse Block. SeeFuses and
Circuit Breakers on page 5-90.
H. Engine Air Cleaner/Filter. SeeEngine Air
Cleaner/Filter on page 5-17.
I. Battery. SeeBattery on page 5-38.
J. Windshield Washer Fluid Reservoir. SeeWindshield
Washer Fluid on page 5-32.Engine Oil
Checking Engine Oil
It is a good idea to check your engine oil every time you
get fuel. In order to get an accurate reading, the oil
must be warm and the vehicle must be on level ground.
The engine oil dipstick handle is a yellow loop. See
Engine Compartment Overview on page 5-12for
the location of the engine oil dipstick.
Turn off the engine and give the oil several minutes to
drain back into the oil pan. If you don’t, the oil
dipstick might not show the actual level.
Pull the dipstick and clean it with a paper towel or cloth,
then push it back in all the way. Remove it again,
keeping the tip down and check the level.
5-13