2004 CADILLAC SEVILLE key
[x] Cancel search: keyPage 210 of 410
CD Messages
CD CHANGER ERROR:This message may appear on
the display for one of the following reasons:
•It is very hot. When the temperature returns to
normal, the CD should play.
•You are driving on a very rough road. When the
road becomes smoother, the CD should play.
•It is very hot. When the temperature returns to
normal, the CD should play.
•The CD is dirty, scratched, wet, or upside down.
•The air is very humid. If so, wait about an hour and
try again.
•There may have been a problem while burning
the CD.
•The label may be caught in the CD player.
If the CD is not playing correctly, for any other reason,
try a known good CD.
If any error occurs repeatedly or if an error cannot be
corrected, contact your dealer. If your radio display
an error message, write it down and provide it to your
dealer when reporting the problem.
Radio Personalization with Home
and Away Feature
If DRIVER 1 (HOME or AWAY) PRESETS or DRIVER 2
(HOME or AWAY) PRESETS appears in the display
when the radio is first turned on, your vehicle is
equipped with this feature.
This feature allows the driver to return to the last used
audio source: radio, cassette, or CD, using the
remote keyless entry transmitter. This feature can also
store and recall AM and FM presets, volume, tone,
and the last selected radio station. The number on the
back of each transmitter (1 or 2) corresponds to
driver 1 or 2. If transmitter 1 is used to enter the vehicle,
the last used audio source and/or settings set by
driver 1 will be recalled. If transmitter 2 is used to enter
the vehicle, the last used audio source and/or settings
set by driver 2 will be recalled. The settings can also be
recalled by pressing the MEMORY seat buttons 1 or 2
located on the driver’s door.
3-98
Page 219 of 410
Police records show that almost half of all motor
vehicle-related deaths involve alcohol. In most cases,
these deaths are the result of someone who was
drinking and driving. In recent years, more than
16,000 annual motor vehicle-related deaths have been
associated with the use of alcohol, with more than
300,000 people injured.
Many adults — by some estimates, nearly half the adult
population — choose never to drink alcohol, so they
never drive after drinking. For persons under 21,
it is against the law in every U.S. state to drink alcohol.
There are good medical, psychological and
developmental reasons for these laws.
The obvious way to eliminate the leading highway safety
problem is for people never to drink alcohol and then
drive. But what if people do? How much is “too much” if
someone plans to drive? It is a lot less than many might
think. Although it depends on each person and situation,
here is some general information on the problem.
The Blood Alcohol Concentration (BAC) of someone
who is drinking depends upon four things:
•The amount of alcohol consumed
•The drinker’s body weight
•The amount of food that is consumed before and
during drinking
•The length of time it has taken the drinker to
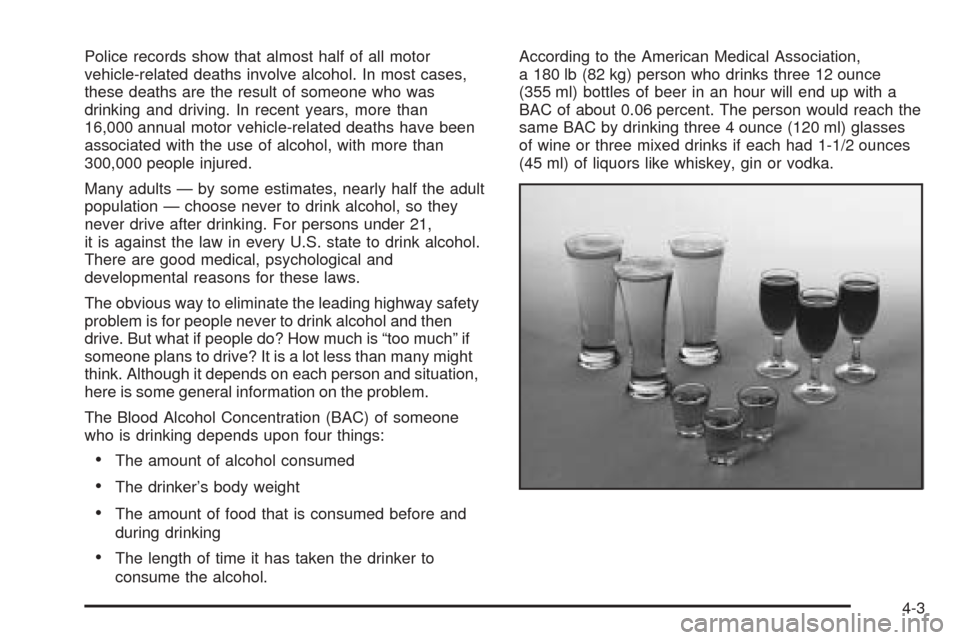
consume the alcohol.According to the American Medical Association,
a 180 lb (82 kg) person who drinks three 12 ounce
(355 ml) bottles of beer in an hour will end up with a
BAC of about 0.06 percent. The person would reach the
same BAC by drinking three 4 ounce (120 ml) glasses
of wine or three mixed drinks if each had 1-1/2 ounces
(45 ml) of liquors like whiskey, gin or vodka.
4-3
Page 247 of 410
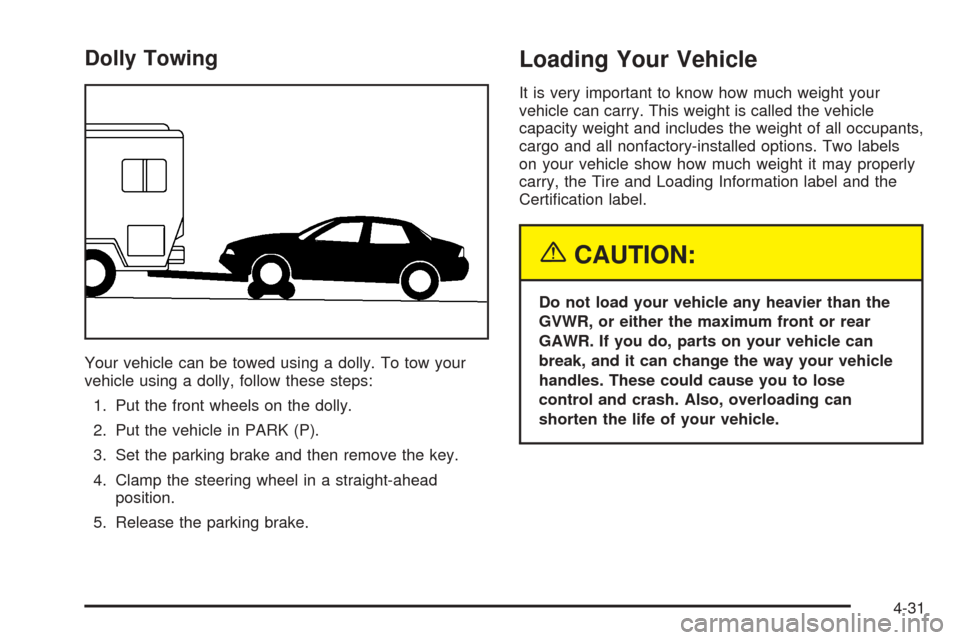
Dolly Towing
Your vehicle can be towed using a dolly. To tow your
vehicle using a dolly, follow these steps:
1. Put the front wheels on the dolly.
2. Put the vehicle in PARK (P).
3. Set the parking brake and then remove the key.
4. Clamp the steering wheel in a straight-ahead
position.
5. Release the parking brake.
Loading Your Vehicle
It is very important to know how much weight your
vehicle can carry. This weight is called the vehicle
capacity weight and includes the weight of all occupants,
cargo and all nonfactory-installed options. Two labels
on your vehicle show how much weight it may properly
carry, the Tire and Loading Information label and the
Certification label.
{CAUTION:
Do not load your vehicle any heavier than the
GVWR, or either the maximum front or rear
GAWR. If you do, parts on your vehicle can
break, and it can change the way your vehicle
handles. These could cause you to lose
control and crash. Also, overloading can
shorten the life of your vehicle.
4-31
Page 277 of 410
How to Reset the CHANGE ENGINE OIL
Message
The GM Oil Life System calculates when to change
your engine oil and filter based on vehicle use. Anytime
your oil is changed, reset the system so it can
calculate when the next oil change is required. If a
situation occurs where you change your oil prior to a
CHANGE ENGINE OIL message in the Driver
Information Center (DIC) being turned on, reset
the system.
After the oil has been changed, the CHANGE ENGINE
OIL message must be reset. To reset the message,
do the following:
1. Turn the key to the ON position without starting the
engine.
2. Press the INFO button on the Driver Information
Center (DIC) until ENGINE OIL LIFE is displayed.
3. Press and hold the INFO RESET button until 100%
ENGINE OIL LIFE is displayed. This resets the oil
life indicator.
4. Turn the key to OFF.
If the CHANGE ENGINE OIL message comes back on
when you start your vehicle, the engine oil life system
has not reset. Repeat the procedure.The percentage of oil life remaining may be checked at
any time by pressing the INFO button until ENGINE
OIL LIFE is displayed on the DIC. For more information
on the oil life indicator, seeOil Life Indicator on
page 3-74.
What to Do with Used Oil
Used engine oil contains certain elements that may be
unhealthy for your skin and could even cause cancer.
Do not let used oil stay on your skin for very long. Clean
your skin and nails with soap and water, or a good
hand cleaner. Wash or properly dispose of clothing or
rags containing used engine oil. See the manufacturer’s
warnings about the use and disposal of oil products.
Used oil can be a threat to the environment. If you
change your own oil, be sure to drain all the oil from the
filter before disposal. Never dispose of oil by putting it
in the trash, pouring it on the ground, into sewers, or into
streams or bodies of water. Instead, recycle it by
taking it to a place that collects used oil. If you have a
problem properly disposing of your used oil, ask
your dealer, a service station or a local recycling center
for help.
5-17
Page 296 of 410
Power Steering Fluid
The power steering fluid reservoir is located next to the
underhood fuse block on the passenger’s side of the
vehicle. SeeEngine Compartment Overview on
page 5-12for more information on location.
When to Check Power Steering Fluid
It is not necessary to regularly check power steering fluid
unless you suspect there is a leak in the system or
you hear an unusual noise. A fluid loss in this system
could indicate a problem. Have the system inspected
and repaired.
How to Check Power Steering Fluid
Turn the key off, let the engine compartment cool down,
wipe the cap and the top of the reservoir clean, then
unscrew the cap and wipe the dipstick with a clean rag.
Replace the cap and completely tighten it. Then
remove the cap again and look at the fluid level on the
dipstick.
The level should be at the FULL COLD mark. If
necessary, add only enough fluid to bring the level up to
the mark.
What to Use
To determine what kind of fluid to use, see
Recommended Fluids and Lubricants on page 6-12.
Always use the proper fluid. Failure to use the proper
fluid can cause leaks and damage hoses and seals.
5-36
Page 371 of 410
Maintenance Footnotes
†The U.S. Environmental Protection Agency or the
California Air Resources Board has determined that the
failure to perform this maintenance item will not nullify
the emission warranty or limit recall liability prior to
the completion of the vehicle’s useful life. We, however,
urge that all recommended maintenance services be
performed at the indicated intervals and the
maintenance be recorded.
(a)Visually inspect brake lines and hoses for proper
hook-up, binding, leaks, cracks, cha�ng, etc. Inspect
disc brake pads for wear and rotors for surface
condition. Inspect other brake parts, including calipers,
parking brake, etc.
(b)Visually inspect front and rear suspension and
steering system for damaged, loose or missing parts or
signs of wear. Inspect power steering lines and
hoses for proper hook-up, binding, leaks, cracks,
cha�ng, etc.
(c)Visually inspect hoses and have them replaced if they
are cracked, swollen or deteriorated. Inspect all pipes,
�ttings and clamps; replace with genuine GM parts as
needed. To help ensure proper operation, a pressure test
of the cooling system and pressure cap and cleaning the
outside of the radiator and air conditioning condenser is
recommended at least once a year.(d)Visually inspect wiper blades for wear or cracking.
Replace blade inserts that appear worn or damaged
or that streak or miss areas of the windshield.
(e)Make sure the safety belt reminder light and all your
belts, buckles, latch plates, retractors and anchorages
are working properly. Look for any other loose or
damaged safety belt system parts. If you see anything
that might keep a safety belt system from doing its
job, have it repaired. Have any torn or frayed safety belts
replaced. Also look for any opened or broken air bag
coverings, and have them repaired or replaced. (The air
bag system does not need regular maintenance.)
(f)Lubricate all key lock cylinders. Lubricate all hinges
and latches, including those for the hood, rear
compartment, glove box door and console door. More
frequent lubrication may be required when exposed to a
corrosive environment. Applying silicone grease on
weatherstrips with a clean cloth will make them
last longer, seal better and not stick or squeak.
(g)If you drive regularly under dusty conditions, the
�lter may require replacement more often.
6-7
Page 374 of 410
Automatic Transaxle Shift Lock Control
System Check
{CAUTION:
When you are doing this inspection, the
vehicle could move suddenly. If the vehicle
moves, you or others could be injured.
1. Before you start, be sure you have enough room
around the vehicle. It should be parked on a level
surface.
2. Firmly apply the parking brake. SeeParking Brake
on page 2-31if necessary.
Be ready to apply the regular brake immediately if
the vehicle begins to move.3. With the engine off, turn the key to the ON position,
but do not start the engine. Without applying the
regular brake, try to move the shift lever out
of PARK (P) with normal effort. If the shift lever
moves out of PARK (P), contact your GM
Goodwrench dealer for service.Ignition Transaxle Lock Check
While parked, and with the parking brake set, try to turn
the ignition key to OFF in each shift lever position.
•The key should turn to OFF only when the shift lever
is in PARK (P).
•The key should come out only in OFF.
Contact your GM Goodwrench dealer if service is
required.
6-10
Page 376 of 410
Recommended Fluids and
Lubricants
Fluids and lubricants identified below by name, part
number or specification may be obtained from your
dealer.
Usage Fluid/Lubricant
Engine OilEngine oil which meets GM Standard
GM6094M and displays the
American Petroleum Institute
Certified for Gasoline Engines
starburst symbol. To determine the
proper viscosity for your vehicle’s
engine, seeEngine Oil on page 5-13.
Engine Coolant50/50 mixture of clean, drinkable
water and use only
DEX-COOL
®Coolant. SeeEngine
Coolant on page 5-23.
Hydraulic Brake
SystemDelco Supreme 11 Brake Fluid or
equivalent DOT-3 brake fluid.
Windshield
Washer SolventGM Optikleen
®Washer Solvent.
Parking Brake
Cable GuidesChassis Lubricant (GM Part No. U.S.
12377985, in Canada 88901242) or
lubricant meeting requirements of
NLGI #2, Category LB or GC-LB.
Usage Fluid/Lubricant
Power Steering
SystemGM Power Steering Fluid (GM Part
No. U.S. 89021184, in Canada
89021186).
Automatic
TransaxleDEXRON
®-IIII Automatic
Transmission Fluid.
Key Lock
CylindersMulti-Purpose Lubricant, Superlube
(GM Part No. U.S. 12346241, in
Canada 10953474).
Hood Latch
Assembly,
Secondary
Latch, Pivots,
Spring Anchor
and Release
PawlLubriplate Lubricant Aerosol (GM
Part No. U.S. 12346293, in Canada
992723) or lubricant meeting
requirements of NLGI #2, Category
LB or GC-LB.
Hood and Door
HingesMulti-Purpose Lubricant, Superlube
(GM Part No. U.S. 12346241, in
Canada 10953474).
Weatherstrip
ConditioningDielectric Silicone Grease (GM Part
No. U.S. 12345579, in Canada
992887).
6-12