2004 BMW Z4 ROADSTER 3.0I ABS
[x] Cancel search: ABSPage 15 of 120

At a glance
Controls
Driving tips
Mobility Reference
13
Colors
The indicator and warning lamps can light
up in various colors and combinations.
The following section explains the signifi-
cance of the individual colors as well as
how you should respond.
>Red:
Stop the vehicle immediately
or
an important reminder
>Red and yellow:
Continue driving cautiously
>Yellow:
Have the system checked soon
or
for your information
>Green:
For your information
>Blue:
For your information. Please fasten safety belts
+30
Airbags
+56
Battery charge current
+91
Engine oil pressure/Engine oil
level/Engine oil sensor
+83
Parking brake/Chassis control sys-
tems/Dynamic Brake Control/
Brake fluid
+38/ 52/ 53/ 85
Parking brake/Chassis control sys-
tems/Dynamic Brake Control/
Brake fluid for Canadian models
+38/ 52/ 53/ 85
Antilock Brake System ABS/Chas-
sis control systems
+54/ 52
Antilock Brake System ABS/Chas-
sis control systems for Canadian
models
+54/ 52
Dynamic Stability Control
DSC
+52
Dynamic Traction Control
DTC
+52
Flat Tire Monitor
+54
Automatic transmission/
Sequential manual gearbox
SMG
+40/ 42
Brake pads
+70
Add coolant84
CHECK GAS CAP
+74
Service Engine Soon +87
Service Engine Soon warning lamp
for Canadian models
+87
Defective bulbs46
Turn signal indicators43
Fog lamps47
Headlamp flasher/
High beams43/ 47
Electric Power Steering EPS
+43
Engine electronics
+
Engine electronics malfunction.
You can continue to drive with
reduced engine output or engine
speed. Please have the system
inspected by your BMW center.
Page 21 of 120
Reference
At a glance
Controls
Driving tips
Mobility
19
To lock
>Either use the central locking button to
lock both doors at once or
>press the individual door lock buttons
down.
To prevent the driver from being
inadvertently locked out of the
vehicle, the driver's door lock button
will not engage as long as the door is
open.<
Since persons or animals in the vehi-
cle could lock the doors from the
inside, always take the vehicle keys with
you so that the vehicle can be opened
again from the outside at any time.<
Luggage compartment lid
To open from the outside
Turn the master key to the left as far as it
will go. The luggage compartment lid will
open slightly.
If the alarm system is armed, opening the
luggage compartment with the key will trig-
ger an alarm; refer also to page 26.
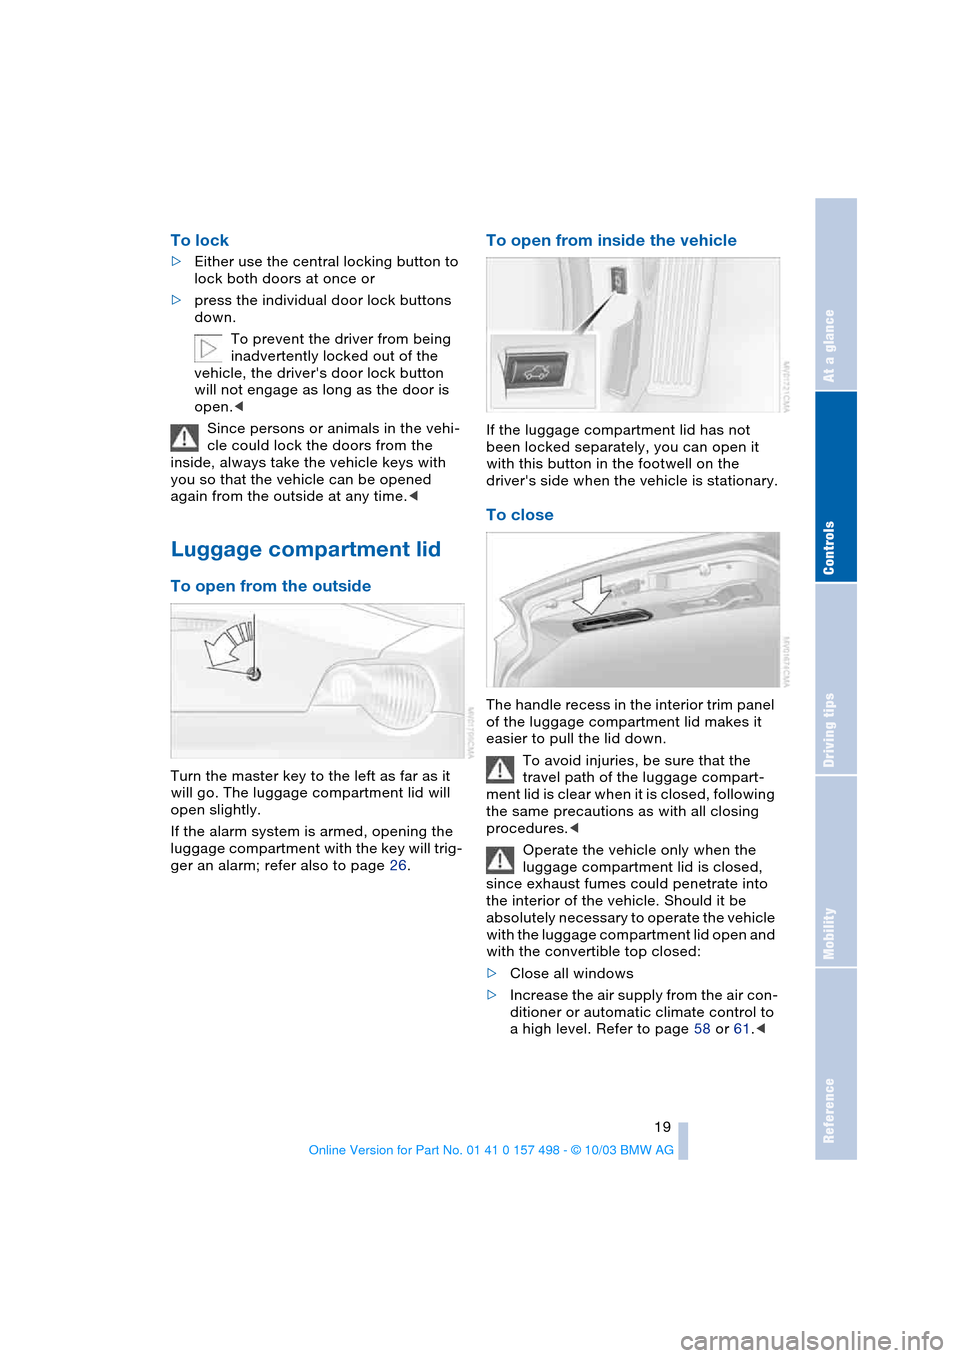
To open from inside the vehicle
If the luggage compartment lid has not
been locked separately, you can open it
with this button in the footwell on the
driver's side when the vehicle is stationary.
To close
The handle recess in the interior trim panel
of the luggage compartment lid makes it
easier to pull the lid down.
To avoid injuries, be sure that the
travel path of the luggage compart-
ment lid is clear when it is closed, following
the same precautions as with all closing
procedures.<
Operate the vehicle only when the
luggage compartment lid is closed,
since exhaust fumes could penetrate into
the interior of the vehicle. Should it be
absolutely necessary to operate the vehicle
with the luggage compartment lid open and
with the convertible top closed:
>Close all windows
>Increase the air supply from the air con-
ditioner or automatic climate control to
a high level. Refer to page 58 or 61.<
Page 55 of 120
Reference
At a glance
Controls
Driving tips
Mobility
53
If the brake warning lamp comes on
together with the yellow indicator
lamps for the Antilock Brake Sys-
tem ABS and the Dynamic Stability
Control DSC:
The entire ABS and DSC control
system has failed. Continue driving
cautiously and defensively. Avoid
hard brake applications. Please have the
system checked by your BMW center as
soon as possible.
Indicator and warning lamps for
Antilock Brake System ABS and
Dynamic Stability Control DSC for
Canadian models.
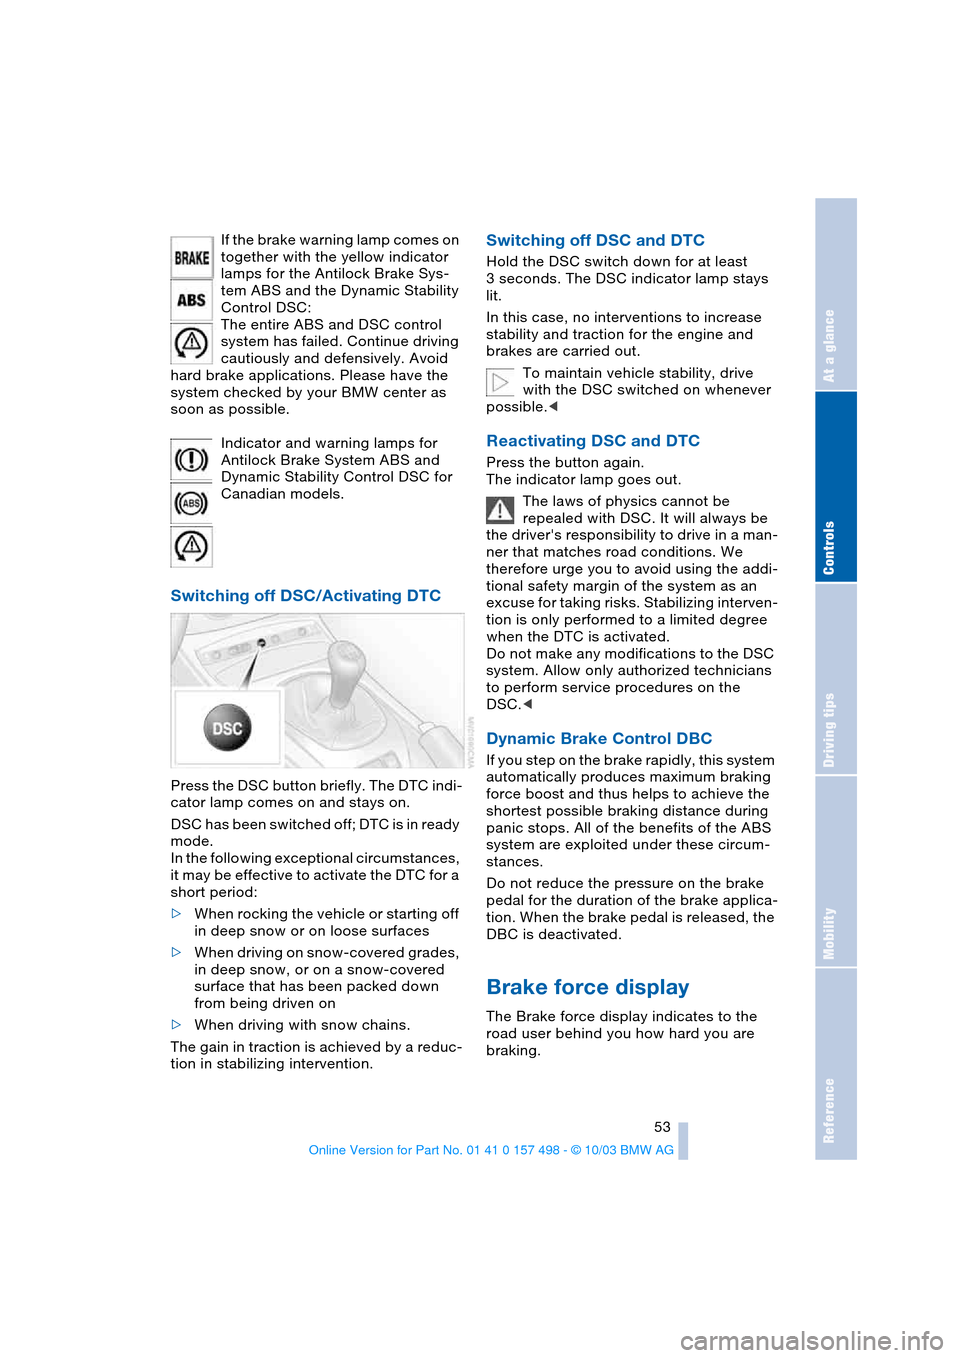
Switching off DSC/Activating DTC
Press the DSC button briefly. The DTC indi-
cator lamp comes on and stays on.
DSC has been switched off; DTC is in ready
mode.
In the following exceptional circumstances,
it may be effective to activate the DTC for a
short period:
>When rocking the vehicle or starting off
in deep snow or on loose surfaces
>When driving on snow-covered grades,
in deep snow, or on a snow-covered
surface that has been packed down
from being driven on
>When driving with snow chains.
The gain in traction is achieved by a reduc-
tion in stabilizing intervention.
Switching off DSC and DTC
Hold the DSC switch down for at least
3 seconds. The DSC indicator lamp stays
lit.
In this case, no interventions to increase
stability and traction for the engine and
brakes are carried out.
To maintain vehicle stability, drive
with the DSC switched on whenever
possible.<
Reactivating DSC and DTC
Press the button again.
The indicator lamp goes out.
The laws of physics cannot be
repealed with DSC. It will always be
the driver's responsibility to drive in a man-
ner that matches road conditions. We
therefore urge you to avoid using the addi-
tional safety margin of the system as an
excuse for taking risks. Stabilizing interven-
tion is only performed to a limited degree
when the DTC is activated.
Do not make any modifications to the DSC
system. Allow only authorized technicians
to perform service procedures on the
DSC.<
Dynamic Brake Control DBC
If you step on the brake rapidly, this system
automatically produces maximum braking
force boost and thus helps to achieve the
shortest possible braking distance during
panic stops. All of the benefits of the ABS
system are exploited under these circum-
stances.
Do not reduce the pressure on the brake
pedal for the duration of the brake applica-
tion. When the brake pedal is released, the
DBC is deactivated.
Brake force display
The Brake force display indicates to the
road user behind you how hard you are
braking.
Page 56 of 120
Technology for safety and driving convenience
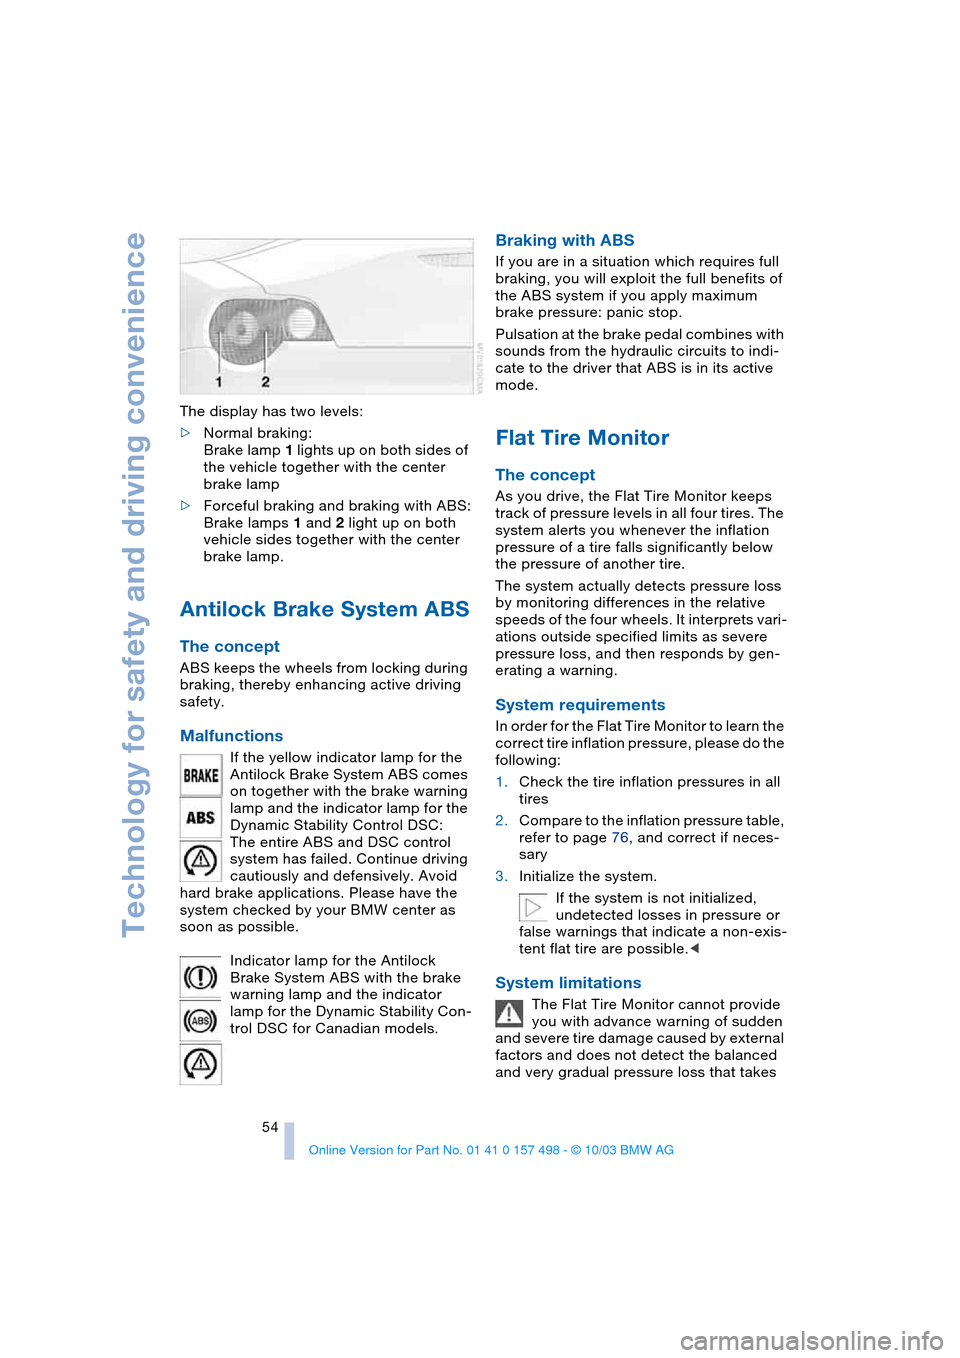
54 The display has two levels:
>Normal braking:
Brake lamp 1 lights up on both sides of
the vehicle together with the center
brake lamp
>Forceful braking and braking with ABS:
Brake lamps 1 and 2 light up on both
vehicle sides together with the center
brake lamp.
Antilock Brake System ABS
The concept
ABS keeps the wheels from locking during
braking, thereby enhancing active driving
safety.
Malfunctions
If the yellow indicator lamp for the
Antilock Brake System ABS comes
on together with the brake warning
lamp and the indicator lamp for the
Dynamic Stability Control DSC:
The entire ABS and DSC control
system has failed. Continue driving
cautiously and defensively. Avoid
hard brake applications. Please have the
system checked by your BMW center as
soon as possible.
Indicator lamp for the Antilock
Brake System ABS with the brake
warning lamp and the indicator
lamp for the Dynamic Stability Con-
trol DSC for Canadian models.
Braking with ABS
If you are in a situation which requires full
braking, you will exploit the full benefits of
the ABS system if you apply maximum
brake pressure: panic stop.
Pulsation at the brake pedal combines with
sounds from the hydraulic circuits to indi-
cate to the driver that ABS is in its active
mode.
Flat Tire Monitor
The concept
As you drive, the Flat Tire Monitor keeps
track of pressure levels in all four tires. The
system alerts you whenever the inflation
pressure of a tire falls significantly below
the pressure of another tire.
The system actually detects pressure loss
by monitoring differences in the relative
speeds of the four wheels. It interprets vari-
ations outside specified limits as severe
pressure loss, and then responds by gen-
erating a warning.
System requirements
In order for the Flat Tire Monitor to learn the
correct tire inflation pressure, please do the
following:
1.Check the tire inflation pressures in all
tires
2.Compare to the inflation pressure table,
refer to page 76, and correct if neces-
sary
3.Initialize the system.
If the system is not initialized,
undetected losses in pressure or
false warnings that indicate a non-exis-
tent flat tire are possible.<
System limitations
The Flat Tire Monitor cannot provide
you with advance warning of sudden
and severe tire damage caused by external
factors and does not detect the balanced
and very gradual pressure loss that takes
Page 81 of 120
Reference
At a glance
Controls
Driving tips
Mobility
79
Wheel and tire replacement
Unprofessional attempts by laymen to
service tires can lead to damage and
accidents.
Have this work performed by skilled pro-
fessionals only. Any BMW center has the
required technical knowledge and the
proper equipment and will be happy to
assist you.<
The correct wheel and tire combination
also affects various systems that would
otherwise be impaired, for example ABS or
DSC.
Have the wheels balanced after each tire or
wheel replacement.
BMW advises against using retreaded
tires, since driving safety may be
impaired. This is due to possible variations
in casing structures and, in some cases, to
their extreme age, factors which can lead
to a decrease in their durability.<
The correct wheels and tires
BMW recommends using only wheels
and tires that have been tested and
approved by BMW for your particular vehi-
cle model, as otherwise body contact and
serious accidents can result despite the
use of the same nominal size, e.g. due to
manufacturing tolerances. If non-approved
wheels and tires are used, BMW cannot
evaluate their suitability, and therefore can-
not be held liable for driving safety.<
To maintain good handling and vehicle
response, use only tires of a single brand
and tread configuration. In the event of a
flat tire, remount the previous wheel and
tire combination as soon as possible.
Recommended tire sizes and brands
BMW tests certain tire brands for each tire
size, classifies them as road-safe and
approves them. You can best find out
about these at a specialized shop, particu-
larly your BMW center. Observe any coun-
try-specific regulations, e.g. on making a
corresponding entry in the vehicle docu-
ments.The factory-approved radial-ply tires are
matched to your vehicle and have been
selected to provide optimum safety and
driving comfort when used properly.
Run Flat tires fitted
Use only Run Flat tires, since no spare
wheel is available in the event of a flat.
Special characteristics of winter
tires
BMW recommends the use of winter tires
for operation under winter road conditions.
While all-season tires, with M+S designa-
tion, provide better winter traction than
summer tires, they generally do not achieve
the full performance of winter tires.
For mounting winter tires, refer to the
descriptions under Tire condition and
Wheel and tire replacement, pages 78, 79.
Run Flat tires fitted
Use only winter Run Flat tires, since no
spare wheel is available in the event of a
flat.
Observing speed ratings
Never exceed the maximum speed for
which the winter tires are rated.
Unprofessional attempts by laymen to ser-
vice tires can lead to damage and acci-
dents. Have this work performed by skilled
professionals only. The technicans at your
BMW center will be glad to assist you with
the required professional knowledge and
specialized equipment.<
Storage
Store tires in a cool, dry place, protecting
them against light whenever possible. Pro-
tect the tires from contact with oil, grease
and fuel. Do not exceed the maximum tire
inflation pressures specified on the tire
sidewall.
Page 85 of 120

Reference
At a glance
Controls
Driving tips
Mobility
83
Washer fluids for washer
systems
Headlamp* and windshield washer
system
Capacity of windshield washer system:
approx. 3.2 quarts/3 liters.
Capacity when equipped with headlamp
washer system: approx. 5.3 quarts/5 liters.
Fill with water and, if required, with an anti-
freeze agent according to the manufac-
turer's recommendations.
We recommend that you mix the
washer fluid before adding it to the
reservoir.<
Antifreeze agents for the washing
systems are highly flammable. For
this reason, keep them away from sources
of flame and store them only in their original
containers. Store them so that they are
inaccessible to children. Comply with the
instructions on the containers.<
Engine oil
Engine oil pressure
The indicator lamp lights up in red:
Stop the vehicle immediately and
switch off the engine. Check the
engine oil level and top off as required. If
the oil level is correct, please contact the
nearest BMW center.
Do not continue driving, as the engine
could sustain serious damage from
inadequate lubrication.<
Engine oil level
The indicator lamp lights up in yel-
low while driving:
The oil level is at the absolute mini-
mum; refill as soon as possible. Do not
drive more than 30 miles/50 km before
refilling.
The indicator lamp lights up in yel-
low after the engine has been
switched off:
Add engine oil at the earliest opportunity,
when you stop to refuel.
Engine oil sensor
The indicator lamp lights up in yel-
low within 20 seconds after the
engine is started:
The oil level sensor is defective. Please
have it checked by a BMW center.
Checking the oil level
1.Park the vehicle on a level surface
2.Switch the engine off after it has
reached normal operating temperature
3.After approx. 5 minutes, pull the dip-
stick out and wipe it off with a clean lint-
free cloth, paper towel, or similar mate-
rial
4.Carefully push the dipstick all the way
into the guide tube and pull it out again
5.The oil level should be between the two
marks on the dipstick
6.Return the dipstick to the guide tube,
inserting it as far as it will go.
As with fuel economy, oil consumption is
directly influenced by your driving style and
vehicle operating conditions.
Page 87 of 120
Reference
At a glance
Controls
Driving tips
Mobility
85
allow accumulated pressure to escape,
then open completely
2.The coolant level is correct when the
upper end of the red float is at least
even with the upper edge of the filler
neck but no more than 3/4 in/2 cm
above it, that is up to the second mark
on the float. Refer also to the schematic
diagram next to the filler neck
3.If necessary, add coolant. Slowly add
coolant until the correct level is
reached; do not overfill.
Comply with the applicable environ-
mental laws regulating the disposal of
antifreeze with corrosion inhibitor.<
Brake fluid
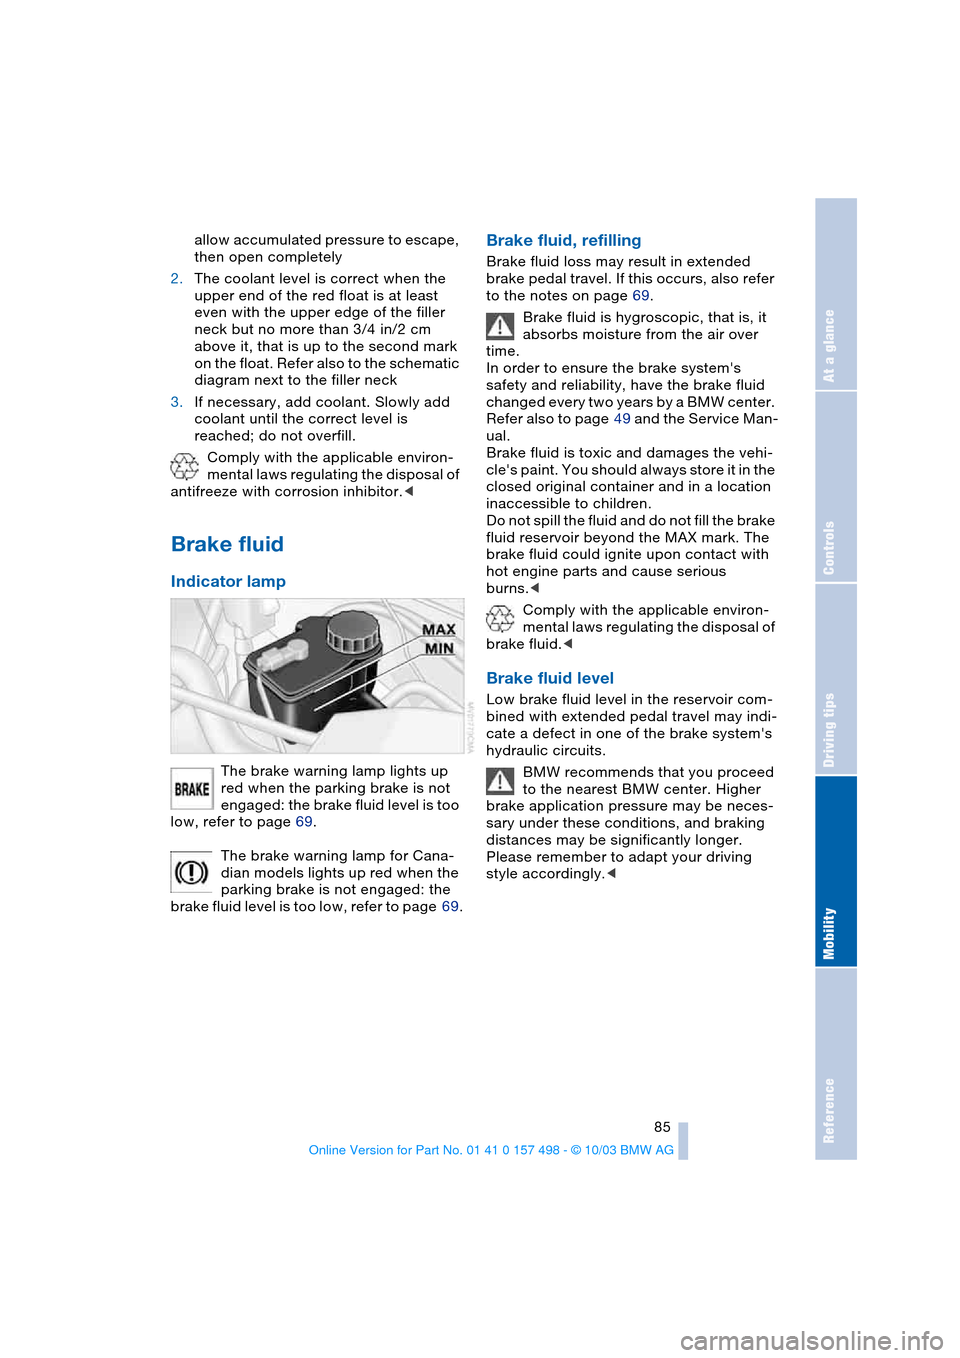
Indicator lamp
The brake warning lamp lights up
red when the parking brake is not
engaged: the brake fluid level is too
low, refer to page 69.
The brake warning lamp for Cana-
dian models lights up red when the
parking brake is not engaged: the
brake fluid level is too low, refer to page 69.
Brake fluid, refilling
Brake fluid loss may result in extended
brake pedal travel. If this occurs, also refer
to the notes on page 69.
Brake fluid is hygroscopic, that is, it
absorbs moisture from the air over
time.
In order to ensure the brake system's
safety and reliability, have the brake fluid
changed every two years by a BMW center.
Refer also to page 49 and the Service Man-
ual.
Brake fluid is toxic and damages the vehi-
cle's paint. You should always store it in the
closed original container and in a location
inaccessible to children.
Do not spill the fluid and do not fill the brake
fluid reservoir beyond the MAX mark. The
brake fluid could ignite upon contact with
hot engine parts and cause serious
burns.<
Comply with the applicable environ-
mental laws regulating the disposal of
brake fluid.<
Brake fluid level
Low brake fluid level in the reservoir com-
bined with extended pedal travel may indi-
cate a defect in one of the brake system's
hydraulic circuits.
BMW recommends that you proceed
to the nearest BMW center. Higher
brake application pressure may be neces-
sary under these conditions, and braking
distances may be significantly longer.
Please remember to adapt your driving
style accordingly.<
Page 96 of 120
Giving and receiving assistance
94
Warning triangle*
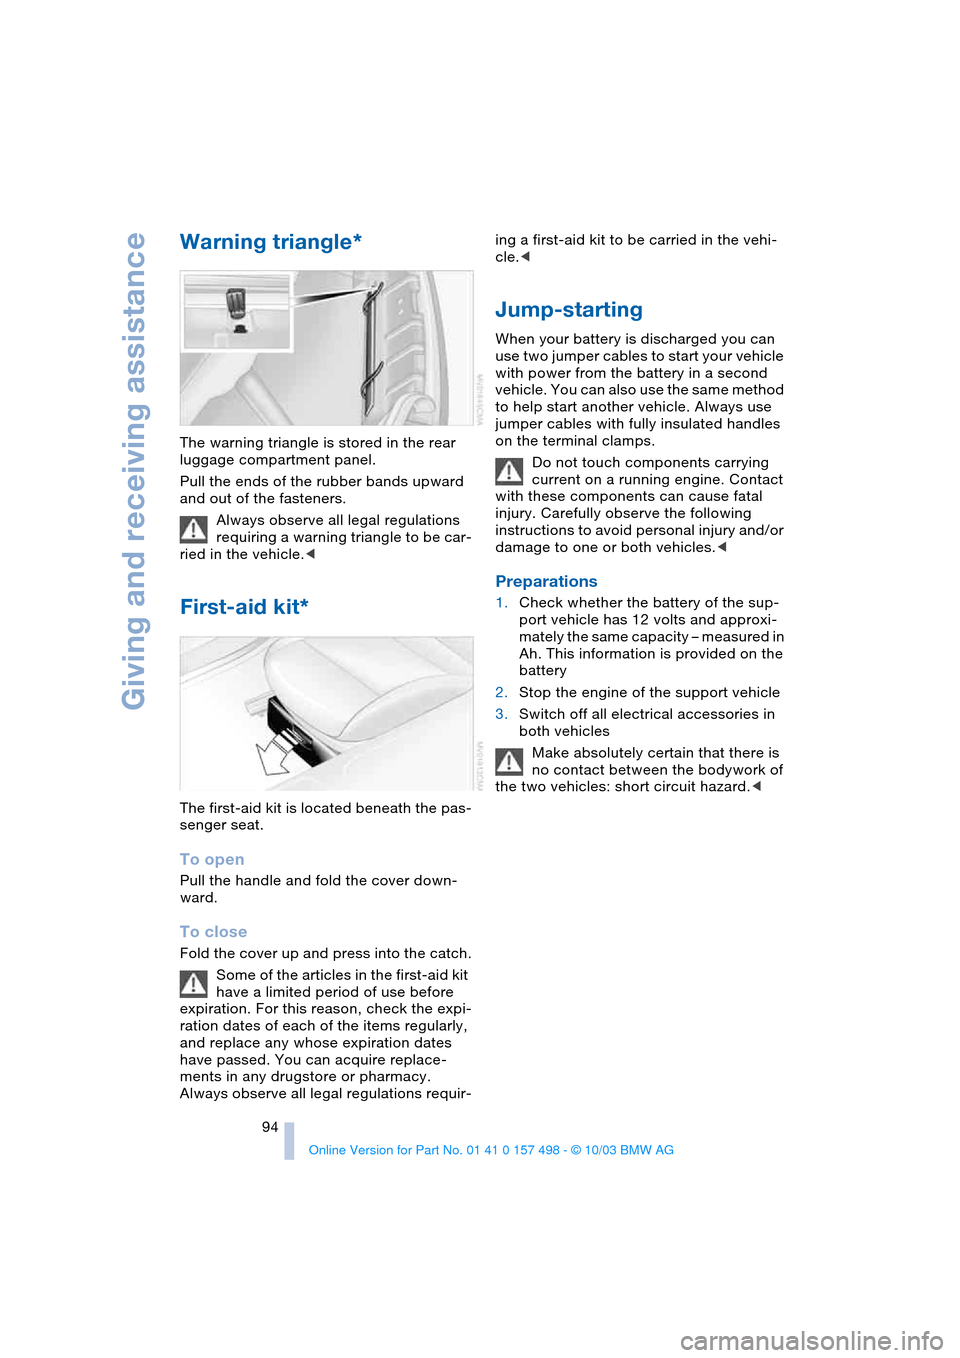
The warning triangle is stored in the rear
luggage compartment panel.
Pull the ends of the rubber bands upward
and out of the fasteners.
Always observe all legal regulations
requiring a warning triangle to be car-
ried in the vehicle.<
First-aid kit*
The first-aid kit is located beneath the pas-
senger seat.
To open
Pull the handle and fold the cover down-
ward.
To close
Fold the cover up and press into the catch.
Some of the articles in the first-aid kit
have a limited period of use before
expiration. For this reason, check the expi-
ration dates of each of the items regularly,
and replace any whose expiration dates
have passed. You can acquire replace-
ments in any drugstore or pharmacy.
Always observe all legal regulations requir-ing a first-aid kit to be carried in the vehi-
cle.<
Jump-starting
When your battery is discharged you can
use two jumper cables to start your vehicle
with power from the battery in a second
vehicle. You can also use the same method
to help start another vehicle. Always use
jumper cables with fully insulated handles
on the terminal clamps.
Do not touch components carrying
current on a running engine. Contact
with these components can cause fatal
injury. Carefully observe the following
instructions to avoid personal injury and/or
damage to one or both vehicles.<
Preparations
1.Check whether the battery of the sup-
port vehicle has 12 volts and approxi-
mately the same capacity – measured in
Ah. This information is provided on the
battery
2.Stop the engine of the support vehicle
3.Switch off all electrical accessories in
both vehicles
Make absolutely certain that there is
no contact between the bodywork of
the two vehicles: short circuit hazard.<