2004 BMW Z4 ROADSTER 3.0I check engine light
[x] Cancel search: check engine lightPage 15 of 120

At a glance
Controls
Driving tips
Mobility Reference
13
Colors
The indicator and warning lamps can light
up in various colors and combinations.
The following section explains the signifi-
cance of the individual colors as well as
how you should respond.
>Red:
Stop the vehicle immediately
or
an important reminder
>Red and yellow:
Continue driving cautiously
>Yellow:
Have the system checked soon
or
for your information
>Green:
For your information
>Blue:
For your information. Please fasten safety belts
+30
Airbags
+56
Battery charge current
+91
Engine oil pressure/Engine oil
level/Engine oil sensor
+83
Parking brake/Chassis control sys-
tems/Dynamic Brake Control/
Brake fluid
+38/ 52/ 53/ 85
Parking brake/Chassis control sys-
tems/Dynamic Brake Control/
Brake fluid for Canadian models
+38/ 52/ 53/ 85
Antilock Brake System ABS/Chas-
sis control systems
+54/ 52
Antilock Brake System ABS/Chas-
sis control systems for Canadian
models
+54/ 52
Dynamic Stability Control
DSC
+52
Dynamic Traction Control
DTC
+52
Flat Tire Monitor
+54
Automatic transmission/
Sequential manual gearbox
SMG
+40/ 42
Brake pads
+70
Add coolant84
CHECK GAS CAP
+74
Service Engine Soon +87
Service Engine Soon warning lamp
for Canadian models
+87
Defective bulbs46
Turn signal indicators43
Fog lamps47
Headlamp flasher/
High beams43/ 47
Electric Power Steering EPS
+43
Engine electronics
+
Engine electronics malfunction.
You can continue to drive with
reduced engine output or engine
speed. Please have the system
inspected by your BMW center.
Page 50 of 120

Everything under control
48
Everything under control
Odometer
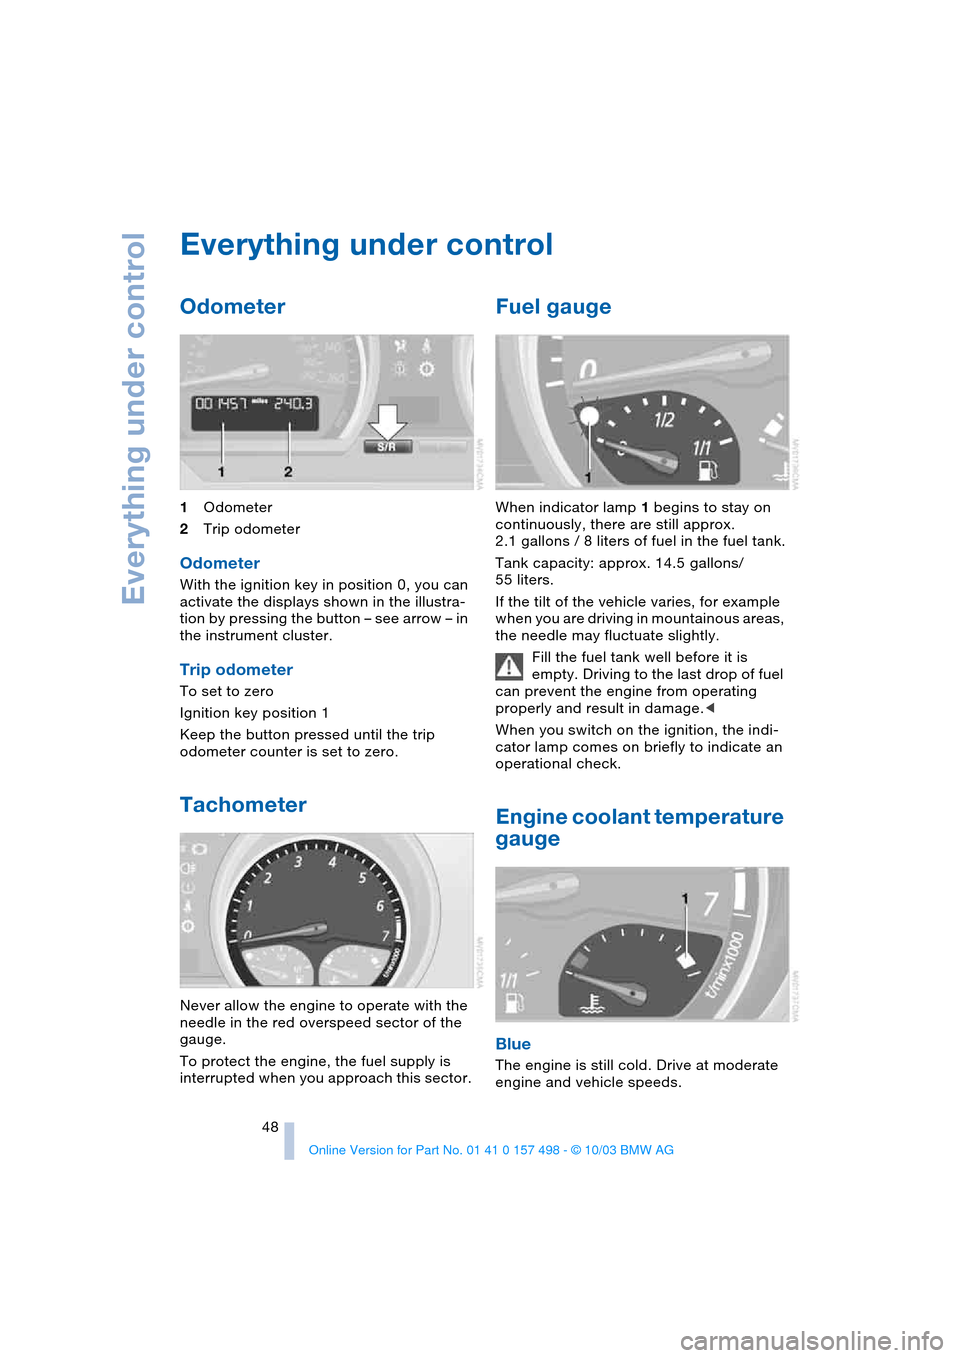
1Odometer
2Trip odometer
Odometer
With the ignition key in position 0, you can
activate the displays shown in the illustra-
tion by pressing the button – see arrow – in
the instrument cluster.
Trip odometer
To set to zero
Ignition key position 1
Keep the button pressed until the trip
odometer counter is set to zero.
Tachometer
Never allow the engine to operate with the
needle in the red overspeed sector of the
gauge.
To protect the engine, the fuel supply is
interrupted when you approach this sector.
Fuel gauge
When indicator lamp 1 begins to stay on
continuously, there are still approx.
2.1 gallons / 8 liters of fuel in the fuel tank.
Tank capacity: approx. 14.5 gallons/
55 liters.
If the tilt of the vehicle varies, for example
when you are driving in mountainous areas,
the needle may fluctuate slightly.
Fill the fuel tank well before it is
empty. Driving to the last drop of fuel
can prevent the engine from operating
properly and result in damage.<
When you switch on the ignition, the indi-
cator lamp comes on briefly to indicate an
operational check.
Engine coolant temperature
gauge
Blue
The engine is still cold. Drive at moderate
engine and vehicle speeds.
Page 57 of 120

Reference
At a glance
Controls
Driving tips
Mobility
55
place in all four tires over an extended
period of time.<
On the other hand, the following situations
can lead to false warning, a delayed detec-
tion of pressure loss and even to the sys-
tem not functioning:
>Driving on snow-covered or slippery
roads
>Performance-oriented driving: slip at
the drive wheels, high levels of lateral
acceleration
>When driving with snow chains, false
warnings and undetected pressure
losses may occur
>If the Flat Tire Monitor was not initial-
ized after the last time the tire inflation
pressures were corrected, undetected
losses in pressure or false warnings
that indicate a non-existent flat tire are
possible.
Initializing the system
Each time you correct the pressure in
a tire, or change a wheel or tire, reini-
tialize the system immediately afterwards.
This requires driving.<
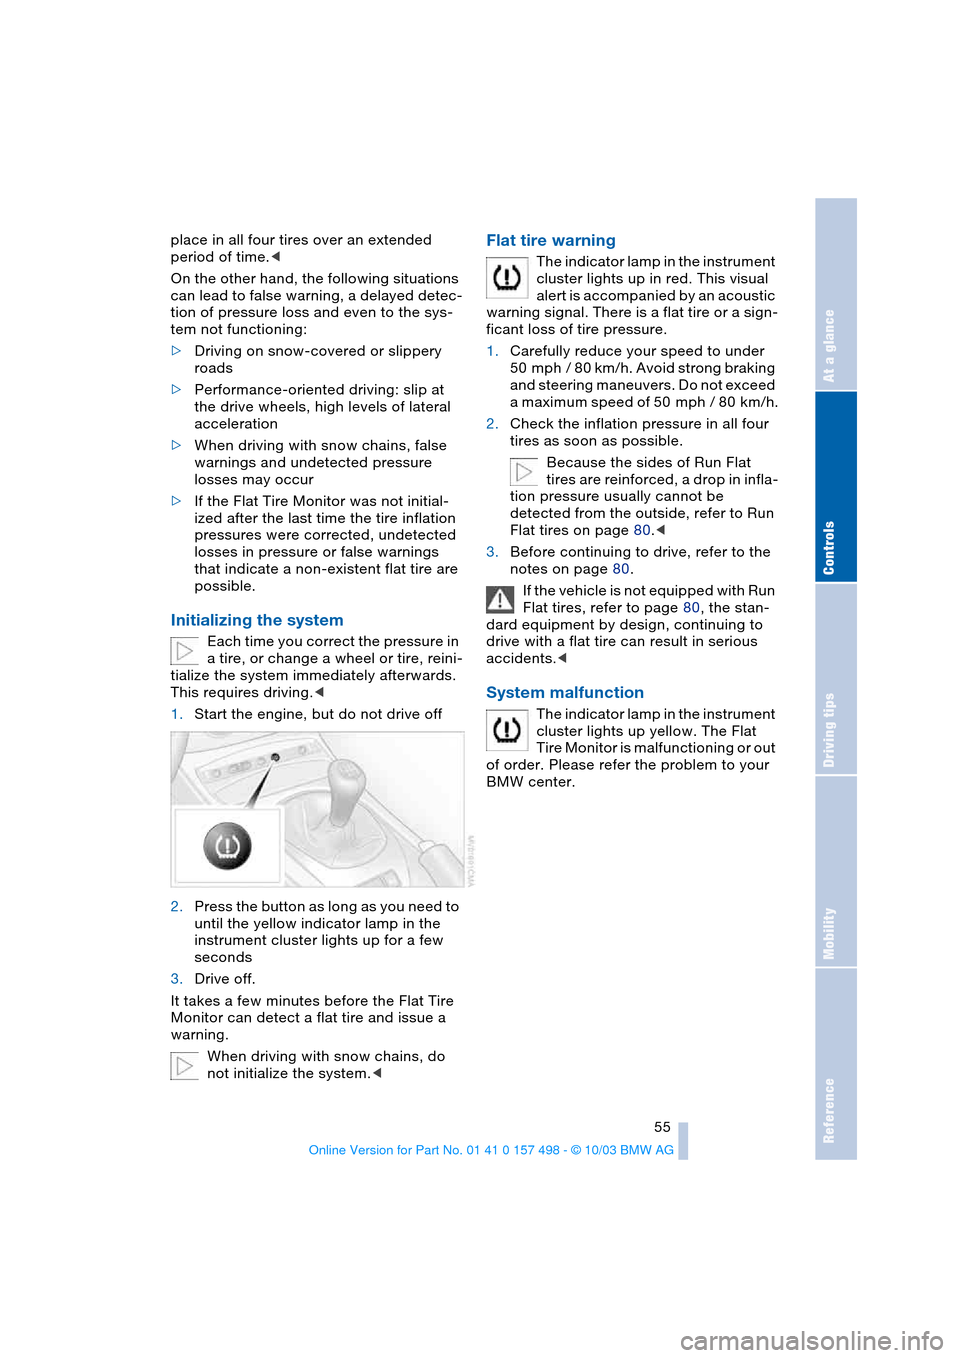
1.Start the engine, but do not drive off
2.Press the button as long as you need to
until the yellow indicator lamp in the
instrument cluster lights up for a few
seconds
3.Drive off.
It takes a few minutes before the Flat Tire
Monitor can detect a flat tire and issue a
warning.
When driving with snow chains, do
not initialize the system.<
Flat tire warning
The indicator lamp in the instrument
cluster lights up in red. This visual
alert is accompanied by an acoustic
warning signal. There is a flat tire or a sign-
ficant loss of tire pressure.
1.Carefully reduce your speed to under
50 mph / 80 km/h. Avoid strong braking
and steering maneuvers. Do not exceed
a maximum speed of 50 mph / 80 km/h.
2.Check the inflation pressure in all four
tires as soon as possible.
Because the sides of Run Flat
tires are reinforced, a drop in infla-
tion pressure usually cannot be
detected from the outside, refer to Run
Flat tires on page 80.<
3.Before continuing to drive, refer to the
notes on page 80.
If the vehicle is not equipped with Run
Flat tires, refer to page 80, the stan-
dard equipment by design, continuing to
drive with a flat tire can result in serious
accidents.<
System malfunction
The indicator lamp in the instrument
cluster lights up yellow. The Flat
Tire Monitor is malfunctioning or out
of order. Please refer the problem to your
BMW center.
Page 71 of 120

Reference
At a glance
Controls
Driving tips
Mobility
69
Driving notes
Parking the vehicle
Condensation forms in the air conditioner
system during operation, which then exits
under the vehicle. Traces of condensed
water on the ground underneath the vehi-
cle are thus normal.
Brakes
Do not drive with your foot resting on
the brake pedal. Even light but con-
sistent pedal pressure can lead to high
temperatures, brake wear and possibly
even brake failure.
Hydroplaning
When driving on wet or slushy roads,
reduce vehicle speed. If you do not, a
wedge of water may form between the tires
and the road surface. This phenomenon
can lead to partial or complete loss of trac-
tion, vehicle control and braking effective-
ness.<
Driving through water
Do not drive through water on the
road if it is deeper than 1 ft / 30 cm,
and then only at walking speed. Otherwise,
the vehicle's engine, the electrical systems
and the transmission may be damaged.<
High temperatures
High temperatures occur with every
vehicle equipped with a catalytic con-
verter. Heat shields are installed adjacent
to some sections of the exhaust system.
Never remove these shields; do not apply
undercoating to their surfaces. When driv-
ing, standing at idle and parking the vehi-
cle, take care to avoid contact between the
hot exhaust system and flammable materi-
als, e.g. hay, leaves, grass, etc. Such con-
tact could lead to a fire, resulting in serious
personal injury and property damage.<
Brake system
Indicator lamp
The indicator lamp lights up
although the parking brake is not
engaged:
Check the brake fluid level. It is very impor-
tant that you follow the instructions on
page 85 before driving on.
Disc brakes
Corrosion
Limited vehicle use, extended periods with
the vehicle parked or in storage, and oper-
ating conditions in which braking is
restricted to gentle, low-pressure applica-
tions will all increase the tendency for cor-
rosion to form on the rotors and contamina-
tion to accumulate on the brake pads. This
occurs because the minimal pressure
which must be exerted by the pads to clean
the rotors by brake applications is not
reached.
If the brake rotors are corroded, they will
tend to respond to braking with a pulsating
effect which even extended application will
fail to cure.
Wet roads
When driving in heavy rain and on wet
roads, it is useful to apply light pressure
to the brake pedal every few miles. Watch
traffic conditions to ensure that this maneu-
ver does not endanger other road users.
The resulting heat dries the brake rotors
and brake pads. Immediate braking control
is then available if necessary.
Inclines
Extended or steep mountain descents
should be driven in the gear or drive posi-
tion in which only minimal periodic brake
application is required. This helps avoid
placing excessive loads on the brake sys-
tem. Observe the maximum allowable
engine speed when doing so; refer to
page 48.
Page 76 of 120

Refueling
74
Refueling
Fuel filler door
1.Open fuel filler door
2.Turn the gas cap in a counter-clockwise
direction
3.Place the gas cap in the bracket on the
filler door.
Releasing manually
If an electrical malfunction occurs, you can
unlock the fuel filler door manually:
1.Remove the covers of the tail lamps by
turning the lock to the right; refer also to
page 90
2.Pull the luggage compartment trim
panel slightly toward the interior.
The green button with the fuel pump
symbol is revealed
3.Undo the adhesive strip and pull off
4.Pull the button
The fuel filler door is released.
Pull on the button slowly and
carefully as it could otherwise be
torn off.<
Fuel gas cap
Close the gas cap carefully after refuel-
ing until a click is heard. While closing,
be sure not to squeeze the strap which is fas-
tened to the cap. A loose or missing cap will
activate the CHECK GAS CAP lamp
*.<
Check Gas Cap
*
This indicator lamp comes on when
the gas cap is loose or missing.
Close the gas cap tightly as described
above.
Tank capacity: approx. 14.5 gallons/
55 liters, of which approx. 2.1 gallons/
8 liters are reserve capacity.
Simple and environmentally friendly
When handling fuels, comply with all
of the applicable safety precautions
posted at the service station.<
When refueling, insert the filler nozzle com-
pletely into the filler pipe. Lifting the nozzle
during refueling
>results in premature shutoff
>and will reduce the effect of the vapor
recovery system on the pump.
The fuel tank is full when the filler nozzle
shuts off the first time.
Fill the fuel tank before it is com-
pletely empty. Driving to the last drop
of fuel can prevent the engine from operat-
ing properly and result in damage.<
Fuel specifications
The engine uses lead-free gasoline only.
Required fuel:
>Premium Unleaded Gasoline,
min. 91 AKI.
AKI = Anti Knock Index
Do not use leaded fuels. The use of
leaded fuels will cause permanent
damage to the system's oxygen sensor and
the catalytic converter.<
Page 85 of 120

Reference
At a glance
Controls
Driving tips
Mobility
83
Washer fluids for washer
systems
Headlamp* and windshield washer
system
Capacity of windshield washer system:
approx. 3.2 quarts/3 liters.
Capacity when equipped with headlamp
washer system: approx. 5.3 quarts/5 liters.
Fill with water and, if required, with an anti-
freeze agent according to the manufac-
turer's recommendations.
We recommend that you mix the
washer fluid before adding it to the
reservoir.<
Antifreeze agents for the washing
systems are highly flammable. For
this reason, keep them away from sources
of flame and store them only in their original
containers. Store them so that they are
inaccessible to children. Comply with the
instructions on the containers.<
Engine oil
Engine oil pressure
The indicator lamp lights up in red:
Stop the vehicle immediately and
switch off the engine. Check the
engine oil level and top off as required. If
the oil level is correct, please contact the
nearest BMW center.
Do not continue driving, as the engine
could sustain serious damage from
inadequate lubrication.<
Engine oil level
The indicator lamp lights up in yel-
low while driving:
The oil level is at the absolute mini-
mum; refill as soon as possible. Do not
drive more than 30 miles/50 km before
refilling.
The indicator lamp lights up in yel-
low after the engine has been
switched off:
Add engine oil at the earliest opportunity,
when you stop to refuel.
Engine oil sensor
The indicator lamp lights up in yel-
low within 20 seconds after the
engine is started:
The oil level sensor is defective. Please
have it checked by a BMW center.
Checking the oil level
1.Park the vehicle on a level surface
2.Switch the engine off after it has
reached normal operating temperature
3.After approx. 5 minutes, pull the dip-
stick out and wipe it off with a clean lint-
free cloth, paper towel, or similar mate-
rial
4.Carefully push the dipstick all the way
into the guide tube and pull it out again
5.The oil level should be between the two
marks on the dipstick
6.Return the dipstick to the guide tube,
inserting it as far as it will go.
As with fuel economy, oil consumption is
directly influenced by your driving style and
vehicle operating conditions.
Page 86 of 120

In the engine compartment
84 The oil volume between the two marks on
the dipstick corresponds to approx.
1.1 quarts/1 liter. Do not fill beyond the
upper mark on the dipstick. Excess oil will
damage the engine.
Adding engine oil
While you should wait until the level has
dropped to just above the lower mark
before adding oil, you should never allow
the oil level to fall below this mark.
BMW engines are designed to oper-
ate without oil additives; the use of
additives could even lead to damage in
some cases. This also applies to manual
and automatic transmissions and to the dif-
ferential.<
Continuous exposure to used oil has
caused cancer in laboratory tests. For
this reason, thoroughly wash any areas of
skin that come into contact with oil using
soap and water.
Always store oils, grease and similar mate-
rials so that they are inaccessible to chil-
dren. Comply with warning labels and the
information on the containers.<
Comply with the applicable environ-
mental laws regulating the disposal of
used oil.<
Approved engine oils
The quality of the engine oil is extremely
important for the function and life of an
engine. Based on extensive testing, BMW
has approved certain grades of engine oil.
Use approved High Performance Synthetic
Oil.
If you are unable to obtain an approved
High Performance Synthetic Oil, you may use small volumes of other synthetic oils for
topping up between oil changes. Use only
oils with the specification API SH or higher.
Ask your BMW center for details con-
cerning the specific High Perfor-
mance Synthetic Oil or synthetic oils that
have been approved.<
You can also call BMW of North America
toll-free at 1-800-831-1117 or visit this
website: www.bmwusa.com to obtain this
information.
Coolant
The yellow coolant indicator lamp
lights up:
The coolant level is too low: top up
as soon as possible.
Do not add coolant to the cooling sys-
tem when the engine is hot. If you do,
escaping coolant can cause burns.
Antifreeze and anti-corrosion agents are
hazardous to health. You should always
store them in their original containers and
in a location inaccessible to children.
Antifreeze and anti-corrosion agents are
flammable. For this reason, do not spill
them on hot engine parts. They could ignite
and cause burns. Comply with the instruc-
tions on the containers.<
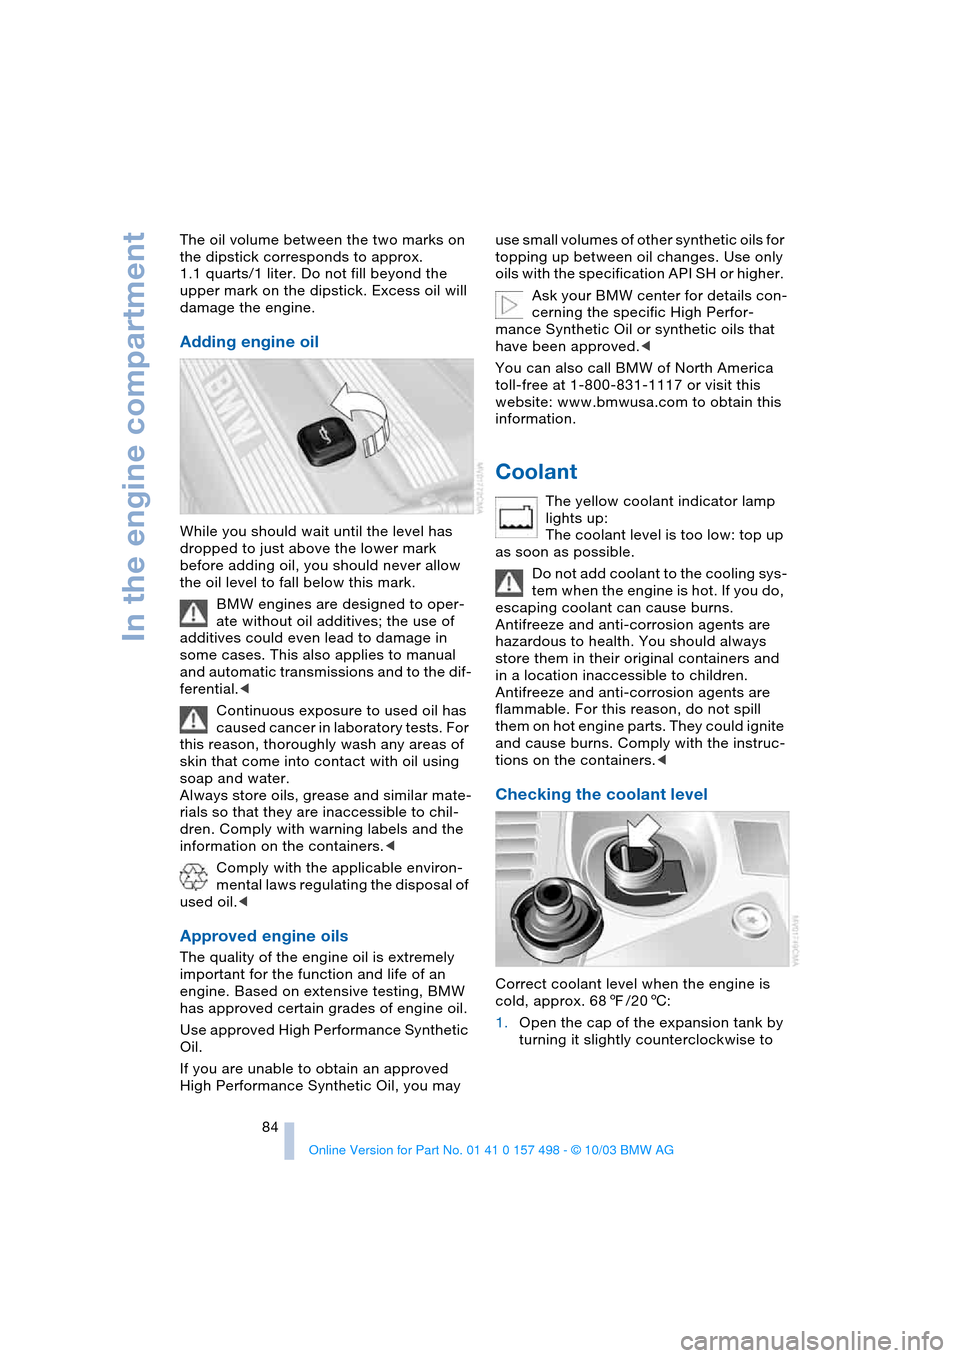
Checking the coolant level
Correct coolant level when the engine is
cold, approx. 687/206:
1.Open the cap of the expansion tank by
turning it slightly counterclockwise to
Page 89 of 120

Reference
At a glance
Controls
Driving tips
Mobility
87
Laws and regulations
California Proposition 65
warning
California laws require us to state the fol-
lowing warning:
Engine exhaust and a wide variety of
automobile components and parts,
including components found in the interior
furnishings in a vehicle, contain or emit
chemicals known to the State of California
to cause cancer and birth defects and
reproductive harm. In addition, certain flu-
ids contained in vehicles and certain prod-
ucts of component wear contain or emit
chemicals known to the State of CA to
cause cancer and birth defects or other
reproductive harm. Battery posts, terminals
and related accessories contain lead and
lead compounds. Wash your hands after
handling. Used engine oil contains chemi-
cals that have caused cancer in laboratory
animals. Always protect your skin by wash-
ing thoroughly with soap and water.<
OBD interface socket
The Onboard Diagnostic OBD interface
socket is located on the left of the driver's
side under the instrument panel and under
a cover.
The cover has the letters OBD on it.
The purpose of the OBD system is to
ensure proper operation of the emission
control system for the vehicle's lifetime. The system monitors emission-related
components and system for deterioration
and malfunction.
If the Service Engine Soon indicator
lamp comes on either continuously
or intermittently, this indicates a
fault in the emissions-related electronic
systems. Although the vehicle remains
operational, you should have the systems
checked by your BMW center at the earli-
est possible opportunity.
The illuminated indicator informs you of the
need for service, not that you need to stop
the vehicle. However, the systems should
be checked by your BMW center at the
next opportunity.
If the indicator blinks or flashes, this indi-
cates a high level of engine misfire. Reduce
speed and contact the nearest BMW center
immediately. Severe engine misfiring over
even a short period of time can seriously
damage emission control system compo-
nents, especially the catalytic converter.
Service Engine Soon warning lamp
for Canadian models.
If the gas cap is not on tight enough,
the OBD system can detect leaking
vapor and the indicator will light up. If the
gas cap is then tightened, the indicator will
usually go out after a short period of time.<