Page 117 of 162

6115
Maintenance
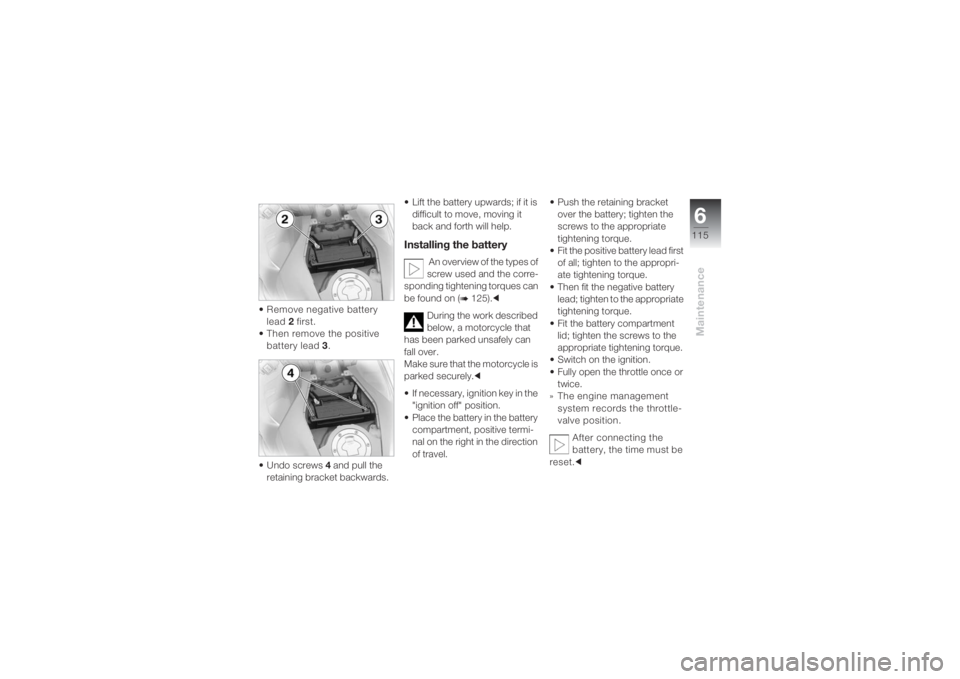
• Remove negative battery
lead 2 first.
•Then remove the positive
battery lead 3.
•Undo screws 4 and pull the
retaining bracket backwards.• Lift the battery upwards; if it is
difficult to move, moving it
back and forth will help.
Installing the battery
An overview of the types of
screw used and the corre-
sponding tightening torques can
be found on (
b 125).c
During the work described
below, a motorcycle that
has been parked unsafely can
fall over.
Make sure that the motorcycle is
parked securely.c
• If necessary, ignition key in the
"ignition off" position.
• Place the battery in the battery
compartment, positive termi-
nal on the right in the direction
of travel.• Push the retaining bracket
over the battery; tighten the
screws to the appropriate
tightening torque.
• Fit the positive battery lead first
of all; tighten to the appropri-
ate tightening torque.
• Then fit the negative battery
lead; tighten to the appropriate
tightening torque.
• Fit the battery compartment
lid; tighten the screws to the
appropriate tightening torque.
• Switch on the ignition.
• Fully open the throttle once or
twice.
» The engine management
system records the throttle-
valve position.
After connecting the
battery, the time must be
reset.c
Page 122 of 162

Care7120
fluid as well as bird droppings.
BMW vehicle polish or BMW
paint cleaner are recom-
mended here.
Contamination on the paint fin-
ish is particularly easy to see
after the motorcycle as been
washed. Remove stains of this
kind immediately using clean-
ing-grade benzine or petro-
leum spirit on a clean cloth or
ball of cotton wool. We recom-
mend that specks of tar be
removed with BMW tar
remover. Then add a protec-
tive wax coating to the paint at
these locations.Protective wax coatingFor the protective wax coating
of paint, we recommend that
you use only BMW vehicle wax
or agents that contain car-
nauba wax or synthetic waxes.The best way to see whether
the paint has to be protected
is that water no longer forms
pearls.
Touching upYour authorised BMW motor-
cycle dealer is equipped with
suitable systems for rapid and
low-cost correction of minor
paint damage. We recom-
mend that minor paintwork
flaws be rectified with a BMW
paint spray or a BMW paint
pencil and larger paint dam-
age be dealt with at your
authorised BMW motorcycle
dealer by a specialised repair
paint job carried out in accord-
ance with works specifications
with original BMW paints.
RubberTreat rubber components with
water or BMW rubber protec-
tion coating agent.
The use of silicon sprays
to care for rubber gas-
kets can lead to damage.
Do not use silicon sprays or
other care products that
contain silicon.cLaying up• Clean the motorcycle
(b 118-120).
• Remove the battery (
b 114).
• Spray the brake and clutch
lever pivots and the main
and side stand pivots with a
suitable lubricant.
• Coat bright metal/chrome-
plated parts with an acid-
free grease (e.g. Vaseline).
Page 123 of 162
7121
Care
• Place the motorcycle in a dry
room on the centre stand
OA
or rear wheel stand.
• Raise the engine with the
front wheel stand in such a
way that both wheels are
without load.
Before laying the vehicle
up, have the engine oil
and the oil filter element
changed by a specialist work-
shop, preferably your author-
ised BMW motorcycle dealer.
Combine work for laying up/
restoring to use with a mainte-
nance service or inspection.c
Restoring to use• Remove the protective wax
coating.
•Clean the motorcycle
(b 118-120).• Install a charged battery
(
b 115).
• Perform the safety checks
(b 52).
• Check the brakes (
b 89-91).
• Check the tyre pressures
(
b 47).
Page 127 of 162
8125
Technical data
Bolt connections(1) in the toolkitActivity Type of bolt connectionTightening
torqueBattery
Battery compartment lid Internal TORX
® T25 (1) hand-tight
Battery-terminal clamps External hexagon w/f 10 or
slotted head screw, large (1)hand-tight
Securing bracket Internal TORX® T20 hand-tight
Splash guard
Splash guard Internal TORX® T25 (1) hand-tight
Page 137 of 162
8135
Technical data
Electrical system Battery
Type 12 V 14 Ah, maintenance-free
Low temperature test current 190 A
Spark plugs
Approved spark plugs BOSCH YR 5DDE
Electrode gap 0.7 mm
Wear limit 1.0 mm
Fuses
All circuits are electronically protected, so
plug-in fuses are no longer necessary. If an
electronic fuse trips and de-energises a circuit,
the circuit is active as soon as the ignition is
switched on after the fault has been rectified.
Page 151 of 162

i149
Index
AAbbreviations, 4
ABS
Braking power assistance, 70
partial integral braking, 70
Rising rear wheel, 71
Self-diagnosis, 54
Warning indicator, 25
Warning light, 19
Accessories
BMW optional extras, 4
Cable routing, 75
General instructions, 74
Non-BMW products, 6
Operation from the power
socket, 75
Accessory
BMW optional accessories, 4
Adjusting mirrors, 43
Adjusting the rear shock
absorber, 44
Adjusting the rear spring
preload, 43
Adjusting the vertical aim, 38
BBattery
Battery compartment, 11
Charging when
connected, 113
Charging when
disconnected, 114
Maintenance instructions, 112
Removing, 114
Technical data, 135
Warning indicator for charge
current, 24
BMW Service
Annual inspection, 141
Confirmation of maintenance
work, 143
Confirmation of service, 147
Information, 6
Inspection, 141
Maintenance schedules, 141
Maintenance service, 141
Running-in check, 141
Service Card, 140
Worldwide, 140Bolt connections, 124
Brake
Adjusting the handbrake
lever, 36
Front fluid tank, 11
Rear fluid reservoir, 11
Safety instructions, 68
Brake light
Replacing the bulb, 108
Brake pads, 58
Brakes
Brake pads, 90
Checking the brake pad
thickness at the front, 90
Checking the brake pad
thickness at the rear, 91
Checking the fluid level, 91
Checking the function, 89
Bulbs
Information, 105
Technical data, 136
Warning indicator defective
lamp, 24
Page 153 of 162
i151
Index
FFront-wheel stand, 103
Fuel
Filler aperture, 11
Fuel gauge, 18
Quality, 68, 134
Refuelling, 67
Reserve display, 22
Fuel tank capacity, 68
Fuses, 135GGear indicator, 18
Gearbox
Gear shifts, 59
Position on starting, 53
Technical data, 128
General view
Left side, 9
Right side, 11
Grip heating, 13, 35
HHandlebar controls
Left, 12
Right, 13
Hazard warning
flashers, 12, 32, 33
Headlight
Adjustment for right-hand/left-
hand traffic, 38
Overview, 15
Headlight flasher, 12, 37
Headlights
Adjusting the vertical aim, 9
Helmet holder, 9, 41
High-beam headlight
Bulb, 15
Replacing the bulb, 107
Switching on, 12, 37
Telltale light, 18
Horn, 12
IIgnition
Switching off, 30
Switching on, 30, 53
Inflation pressures, 126
Installing the battery, 115
Instrument cluster, 14JJump starting, 111KKeys
Ignition keys, 30
Replacement keys, 32
Kill switch, 13, 34LLaying up, 120
Low-beam headlight
Bulb, 15
Replacing the bulb, 106
Switching on, 37
Page 159 of 162

E1BMW Motorrad Integral ABS
About BMW Motorrad Integral ABS
How does ABS work?
The maximum braking force
it is possible to transfer to the
carriageway depends, among
other things, on the road
surface's coefficient of friction.
Gravel, ice and snow, and
water on the road, have
significantly poorer coeffi-
cients of friction than a dry,
clean asphalt road surface.
The poorer the road's coeffi-
cient of friction, the longer the
braking distance.
If the maximum braking force it
is possible to apply to the road
is exceeded when the rider
increases brake pressure, the
wheels will begin to lock and
directional stability is lost; a fall
threatens. Before this situation
can arise, ABS intervenes and adapts the braking pressure to
the maximum braking force
it is possible to transfer so that
the wheels continue to turn
and driving stability is main-
tained whatever the prevailing
road conditions.
What happens with bumps
in the road?
Corrugated road surfaces or
bumps in the road can cause
the tyres to temporarily lose
contact with the road surface
and hence the braking force it
is possible to apply to drop to
zero. If the brakes are applied
in this situation, the ABS must
reduce the braking pressure to
ensure driving stability when
contact with the road surface
is restored. At this moment,
BMW Motorrad Integral ABS must assume extremely low
coefficients of friction (gravel,
ice, snow) so that the wheels
turn in any conceivable situa-
tion and thus the stability of
the motorcycle is ensured.
Once the actual circum-
stances are detected, the
system will set the brake pres-
sure to the optimum value.
What do we observe during
rider safety training?
Braking in which ABS has to
intervene has, by comparison
with normal braking, a signifi-
cantly higher demand for
electricity which puts a heavy
load on the battery. The
battery is constantly being
charged in normal riding so
that it always has sufficient
capacity available. Info_I_ABS_en_xx.fm Seite 1 Dienstag, 19. Juli 2005 2:48 14