Page 97 of 162
695Maintenance
Removing the front wheel
You will find an overview
of the types of screw
used on (
b 124).c
During the following
work, parts of the front
brake, in particular of the
BMW Integral ABS, can be
damaged.
Ensure that no parts of the
brake system are damaged, in
particular the ABS sensor with
cable and the ABS sensor
ring.c
Motorcycles without centre
stands
OA
:
To ensure a secure stance of
the motorcycle during the
following work:
• Place the motorcycle on the
BMW Motorrad rear wheel
stand (b 104). • The rest of the procedure is
the same as for motorcycles
with centre stands.
Motorcycles with centre
stands
OA
:
• Place the motorcycle on the
centre stand
OA.
• Remove screws1 on the left
and right.
• Pull out the front wheel
mudguard towards the front.• Remove the mounting
bolts2 of the brake calipers
on the left and right.
Page 101 of 162

699Maintenance
Without BMW Integral ABS:
• Press the handbrake lever
firmly a number of times until
the resistance point is
noticeable.
With BMW Integral ABS:
• Switch on the ignition.
• Wait for the self-diagnosis
(b 54)
.
• Press the handbrake lever
firmly a number of times until
the resistance point is
noticeable.
B rake pads that are not fully
applied to the brake discs
lead to delays in the braking ef-
fect. Before beginning a journey,
check that the braking effect
kicks in without any delay.c
Removing the rear wheel
You will find an overview
of the types of screw
used on (
b 124).c
Motorcycle without centre
stand
OA
:
To ensure a secure stance of
the motorcycle during the
following work:
• Place the motorcycle on the
BMW Motorrad rear wheel
stand (b 104).
• The rest of the procedure is
the same as for motorcycles
with centre stands.Motorcycles with centre
stands
OA
:
• Place the motorcycle on the
centre stand
OA.
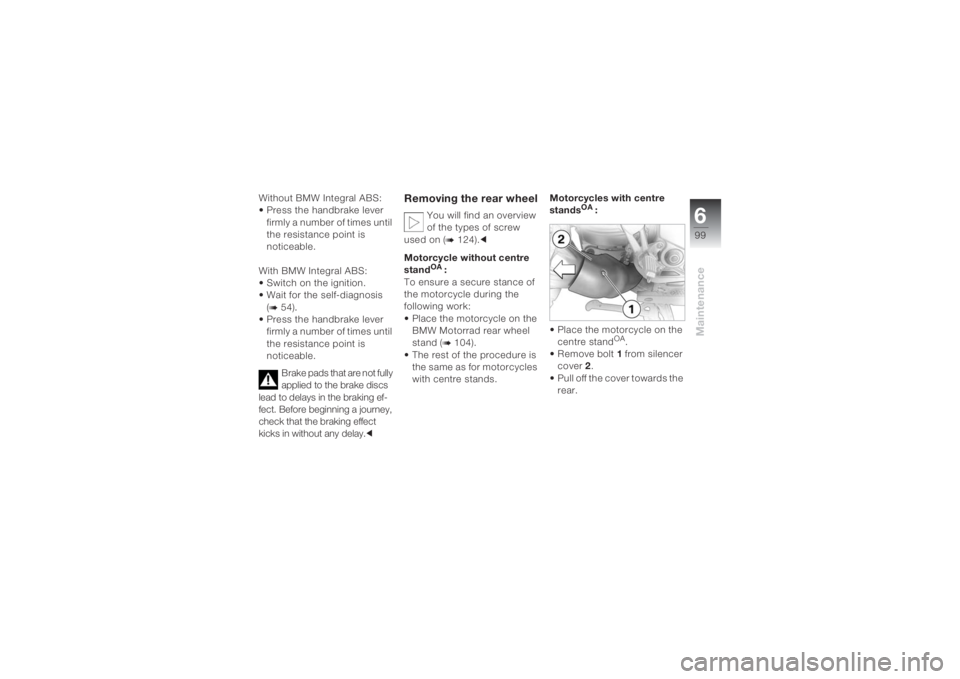
• Remove bolt1 from silencer
cover 2.
• Pull off the cover towards the
rear.
Page 108 of 162
Maintenance6106
Do not touch the glass of
new bulbs with your
fingers. Use a clean, dry cloth
when fitting. Dirt deposits, in
particular oil and grease,
interfere with heat radiation
from the bulb. This will result in
overheating and therefore
shorten the service life of the
bulbs.c
You will find an overview
of the types of screw
used on (
b 124).c
Replacing the low-beam
headlight bulb
During the work
described below, a
motorcycle that has been
parked unsafely can fall over.
Make sure that the motorcycle
is parked securely.cThe bulb is pressurised,
injuries may result if the
bulb is damaged.
Wear protective goggles and
gloves when changing
bulbs.c
To achieve better acces-
sibility, turn the handle-
bars to the right.c
• If necessary, switch off the
ignition.
• Loosen the cover 1 by
turning it anticlockwise and
remove it.• Pull off the connector 2.
• Remove the spring wire
brackets 3 from their detents
on the left and right and fold
them up.
Page 109 of 162
6107
Maintenance
• Remove the bulb 4.
Assemble in reverse order.
• On assembly, make sure
that the lug 5 points
upwards.
Replacing the high-beam
headlight bulb
During the work de-
scribed below, a motor-
cycle that has been parked
insecurely can fall over.
Make sure that the motorcycle
is parked securely.c
The bulb is pressurised,
injuries may result if the
bulb is damaged.
Wear protective goggles and
gloves when changing
bulbs.c
To achieve better acces-
sibility, turn the handle-
bars to the left.c1Cover
High-beam headlight
bulbs
• The high-beam headlight
bulbs are changed in the
same way as those of the
low-beam headlight.
Page 110 of 162
Maintenance6108
Replacing the parking
light
During the work de-
scribed below, a motor-
cycle that has been parked
insecurely can fall over.
Make sure that the motorcycle
is parked securely.c
1Parking light
2Access beneath the
headlight3Connector
4Bulb holder
5Bulb
• If necessary, switch off the
ignition.
• Pull off the connector 3
beneath the headlight.
• Remove the bulb holder 4
from the headlight housing
by turning it anticlockwise.
• Pull the bulb 5 from the bulb
holder.Assemble in reverse order.
• To hold the new bulb, use a
clean, dry cloth.
Replacing the brake light
and rear light bulbs
During the work de-
scribed below, a motor-
cycle that has been parked i
nsecurely can fall over.
Make sure that the motorcycle
is parked securely.c
• If necessary, switch off the
ignition.
• Remove the seat (
b 40).
Page 111 of 162
6109
Maintenance
• Remove the bolt 1.
• Pull the lamp housing
towards the rear from the
brackets 2.• Remove the bulb holder 3
from the lamp housing by
turning it anticlockwise.
• Press the bulb into the fitting
and remove it by turning
anticlockwise.
Assemble in reverse order.
• To hold the new bulb, use a
clean, dry cloth.
Replacing the front turn
signal lamp
During the work de-
scribed below, a motor-
cycle that has been parked
unsafely can fall over.
Make sure that the motorcycle
is parked securely.c
• If necessary, switch off the
ignition.
• Remove the bolt 1.
Page 112 of 162
Maintenance6110
• Pull the lamp housing on the
screw connection side out of
the mirror housing.• Remove the bulb holder 2
from the lamp housing by
turning it anticlockwise.
• Remove the bulb 3 from the
bulb holder.
Assemble in reverse order.
• To hold the new bulb, use a
clean, dry cloth.
Replacing the rear turn
indicator bulb
During the work de-
scribed below, a motor-
cycle that has been parked
insecurely can fall over.
Make sure that the motorcycle
is parked securely.c
• If necessary, switch off the
ignition.• Remove the bolt 1.
• Pull the lamp housing on the
screw connection side out of
the turn indicator housing.
Page 116 of 162

Maintenance6114
If you are unable to
charge the battery via the
power socket, you may be
using a charger that is not
compatible with your motorcy-
cle’s electronics. In this case,
please charge the battery
directly at the terminals of the
disconnected battery.c
Charging the discon-
nected battery
In the case of longer
immobilisation periods,
the battery must be recharged
regularly.
In this connection, comply
with the instructions for the
battery. Always fully recharge
the battery before restoring it
to use.c• Charge the battery using a
suitable charger.
• Comply with the operating
instructions of the charger.
• Once the battery is fully
charged, disconnect the
charger terminal clips from
the battery terminals.
Removing the battery
You will find an overview
of the types of screw
used on (
b 125).c
During the work
described below, a
motorcycle that has been
parked unsafely can fall over.
Make sure that the motorcycle
is parked securely.c
• If necessary, switch off the
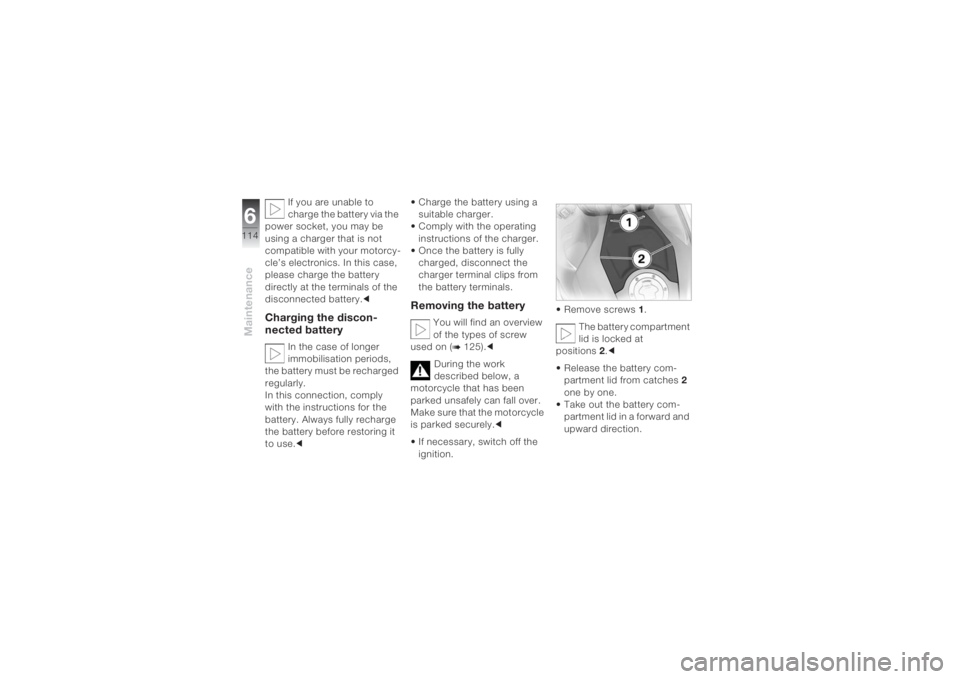
ignition.• Remove screws 1.
The battery compartment
lid is locked at
positions 2.c
• Release the battery com-
partment lid from catches 2
one by one.
• Take out the battery com-
partment lid in a forward and
upward direction.