Page 69 of 162

467Riding
Pushing the motorcycle
off the centre stand
OA
With the ignition switched
off, there is no braking
power assistance; the motor-
cycle can begin to roll.
Especially on inclines, switch
on the ignition and wait for the
ABS self-diagnosis (
b 54).c
• Unlock the ignition lock,
switch on the ignition.
•Wait for the ABS self-
diagnosis.
• Place your left hand on the
left handlebar grip.
• With your right hand, take
hold of the pillion passenger
grab handle.
• Push the motorcycle for-
wards off the centre stand.• Check whether the centre
stand has folded in fully.
Fuel Refuelling
Fuel is a fire hazard and
explosive!
Do not smoke and make sure
that there are no naked flames
during all activities at the fuel
tank.c
Fuel expands under the
influence of high temper-
atures and exposure to sun-
light.
Fill up only to the lower edge of
the filler neck.c
Fuel can damage plastic
parts.
Avoid fuel coming into contact
with body panels.c• Place the motorcycle on the
centre stand
OA or side
stand, ensuring that the
ground is firm and level.
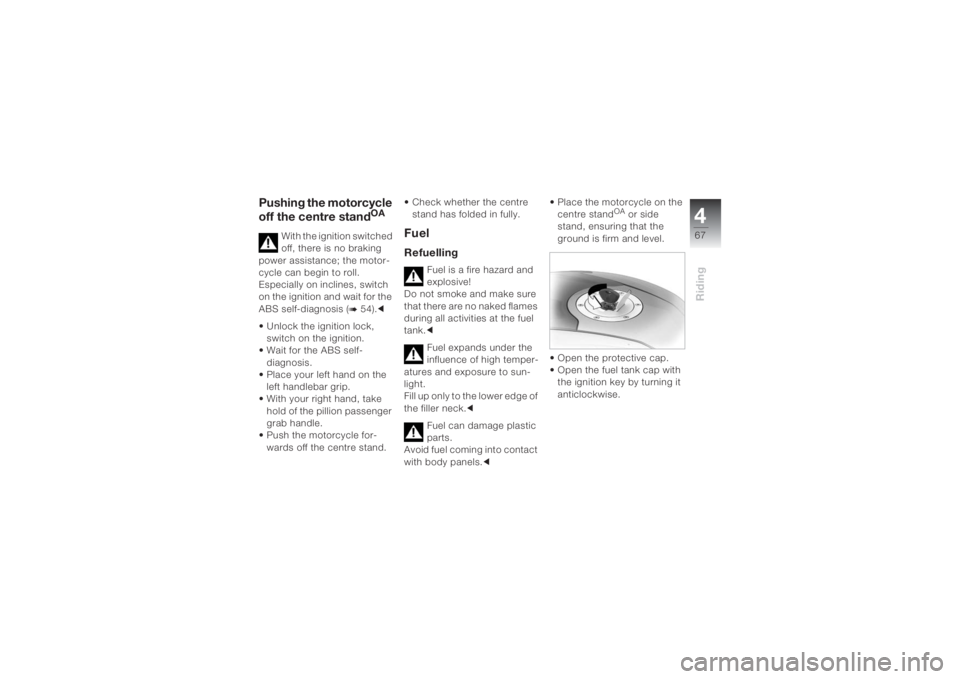
• Open the protective cap.
• Open the fuel tank cap with
the ignition key by turning it
anticlockwise.
Page 80 of 162
Accessories578
Cases not locked and
secured • Turn the lock on the right-
hand case by 90°
anticlockwise.
• Turn the lock on the left-
hand case by 90° clockwise.
» Case can be opened.
»Case secured.
»Key can be removed.Case unsecured
• Turn the lock on the right-
hand case by 45° clockwise.
• Turn the lock on the
left-hand case by 45°
anticlockwise.
» Cases locked.
» Cases can be removed.
» Key cannot be removed.
Opening the cases • Turn the case lock to the
position "case unlocked".
• Pull the grey release lever
upwards.
Page 108 of 162
Maintenance6106
Do not touch the glass of
new bulbs with your
fingers. Use a clean, dry cloth
when fitting. Dirt deposits, in
particular oil and grease,
interfere with heat radiation
from the bulb. This will result in
overheating and therefore
shorten the service life of the
bulbs.c
You will find an overview
of the types of screw
used on (
b 124).c
Replacing the low-beam
headlight bulb
During the work
described below, a
motorcycle that has been
parked unsafely can fall over.
Make sure that the motorcycle
is parked securely.cThe bulb is pressurised,
injuries may result if the
bulb is damaged.
Wear protective goggles and
gloves when changing
bulbs.c
To achieve better acces-
sibility, turn the handle-
bars to the right.c
• If necessary, switch off the
ignition.
• Loosen the cover 1 by
turning it anticlockwise and
remove it.• Pull off the connector 2.
• Remove the spring wire
brackets 3 from their detents
on the left and right and fold
them up.
Page 110 of 162
Maintenance6108
Replacing the parking
light
During the work de-
scribed below, a motor-
cycle that has been parked
insecurely can fall over.
Make sure that the motorcycle
is parked securely.c
1Parking light
2Access beneath the
headlight3Connector
4Bulb holder
5Bulb
• If necessary, switch off the
ignition.
• Pull off the connector 3
beneath the headlight.
• Remove the bulb holder 4
from the headlight housing
by turning it anticlockwise.
• Pull the bulb 5 from the bulb
holder.Assemble in reverse order.
• To hold the new bulb, use a
clean, dry cloth.
Replacing the brake light
and rear light bulbs
During the work de-
scribed below, a motor-
cycle that has been parked i
nsecurely can fall over.
Make sure that the motorcycle
is parked securely.c
• If necessary, switch off the
ignition.
• Remove the seat (
b 40).
Page 111 of 162
6109
Maintenance
• Remove the bolt 1.
• Pull the lamp housing
towards the rear from the
brackets 2.• Remove the bulb holder 3
from the lamp housing by
turning it anticlockwise.
• Press the bulb into the fitting
and remove it by turning
anticlockwise.
Assemble in reverse order.
• To hold the new bulb, use a
clean, dry cloth.
Replacing the front turn
signal lamp
During the work de-
scribed below, a motor-
cycle that has been parked
unsafely can fall over.
Make sure that the motorcycle
is parked securely.c
• If necessary, switch off the
ignition.
• Remove the bolt 1.
Page 112 of 162
Maintenance6110
• Pull the lamp housing on the
screw connection side out of
the mirror housing.• Remove the bulb holder 2
from the lamp housing by
turning it anticlockwise.
• Remove the bulb 3 from the
bulb holder.
Assemble in reverse order.
• To hold the new bulb, use a
clean, dry cloth.
Replacing the rear turn
indicator bulb
During the work de-
scribed below, a motor-
cycle that has been parked
insecurely can fall over.
Make sure that the motorcycle
is parked securely.c
• If necessary, switch off the
ignition.• Remove the bolt 1.
• Pull the lamp housing on the
screw connection side out of
the turn indicator housing.
Page 113 of 162

6111
Maintenance
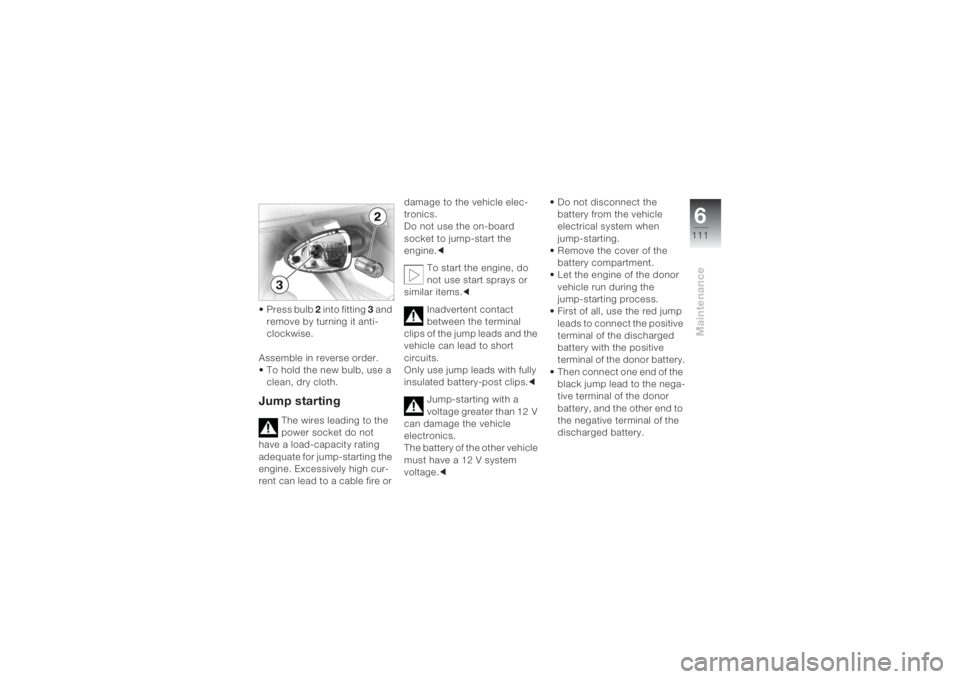
• Press bulb 2 into fitting 3 and
remove by turning it anti-
clockwise.
Assemble in reverse order.
• To hold the new bulb, use a
clean, dry cloth.Jump starting
The wires leading to the
power socket do not
have a load-capacity rating
adequate for jump-starting the
engine. Excessively high cur-
rent can lead to a cable fire or damage to the vehicle elec-
tronics.
Do not use the on-board
socket to jump-start the
engine.c
To start the engine, do
not use start sprays or
similar items.c
Inadvertent contact
between the terminal
clips of the jump leads and the
vehicle can lead to short
circuits.
Only use jump leads with fully
insulated battery-post clips.c
Jump-starting with a
voltage greater than 12 V
can damage the vehicle
electronics.
The battery of the other vehicle
must have a 12 V system
voltage.c• Do not disconnect the
battery from the vehicle
electrical system when
jump-starting.
• Remove the cover of the
battery compartment.
• Let the engine of the donor
vehicle run during the
jump-starting process.
• First of all, use the red jump
leads to connect the positive
terminal of the discharged
battery with the positive
terminal of the donor battery.
• Then connect one end of the
black jump lead to the nega-
tive terminal of the donor
battery, and the other end to
the negative terminal of the
discharged battery.
Page 114 of 162

Maintenance6112
• Start the engine of the
vehicle with the discharged
battery in the usual way; if
the engine does not start,
wait a few minutes before
repeating the attempt in
order to protect the starter
and the donor battery.
• Allow both engines to idle for
a few minutes before discon-
necting the jump leads.
• Disconnect the jump lead
from the negative terminals
first, then disconnect the
second lead from the
positive terminals.
• Screw down the cover of the
battery compartment.Touching live parts of the
ignition system with the
engine running can lead to
electric shocks.
Do not touch any parts of the
ignition system when the
engine is running.c
BatteryMaintenance informationYour motorcycle is supplied
with a maintenance-free
battery.
Correct upkeep, recharging
and storage will prolong the
life of the battery and are
essential if warranty claims are
to be considered.
Compliance with the points
below is important in order to
maximise battery life:– Keep the surface of the
battery clean and dry.
– Do not open the battery.
– Do not top up with water.
– Be sure to read and comply
with the instructions for
charging the battery on the
following pages.
– Do not turn the battery
upside down.
If the battery is not dis-
connected, the on-board
electronics (clock, etc.) will
drain the battery. This can
cause the battery to run flat.
If this happens, warranty
claims will not be accepted.
During immobilisation periods
of more than four weeks,
disconnect the battery from
the motorcycle or connect a
trickle charger to the battery.c