2004 BMW 645CI COUPE display
[x] Cancel search: displayPage 85 of 216

Controls
83Reference
At a glance
Driving tips
Communications
Navigation
Entertainment
Mobility
Never move the convertible top when
the rollover protection system is
raised.
No changes of any nature may be made to
the individual components of the rollover
protection system and wiring.
Work on the rollover protection system may
only be performed at a BMW center.
Unprofessional attempts to service the sys-
tem can lead to failure or malfunction.
For a system check and to ensure long-
term functioning, you must comply with the
maintenance intervals of the service
requirement display.<
Head-Up Display*
The concept
With the Head-Up Display important infor-
mation is projected into the driver's field of
view, e.g. navigation instructions. This
enables you to take in this information with-
out looking away from the road.
Switching on/off
Ignition key in position 2:
Press the button to activate or deactivate
this system.1Navigation instructions
2Display for cruise control
3Speed
Selecting displays
Control Center, for principle details, refer to
page 16:
1.Press button.
The start menu is opened
2.Press the controller to open the menu
3.Select "Display settings" and press the
controller
4.Select "HUD selection" and press the
controller
5.Select desired information of Head-Up
Display
Page 86 of 216
Technology for comfort, convenience and safety
84 6.Press the controller.
The information appears on the
Head-Up Display.
Depending on which key you have used to
open the vehicle, the last adjustment is
applied.
Adjusting brightness
The brightness of the display is automati-
cally adapted to the ambient lighting condi-
tions. However, you can change the base
setting.
With the low beams switched on, the
brightness can also be adjusted with the
serrated dial of the instrument lighting.
Control Center, for principle details, refer to
page 16:
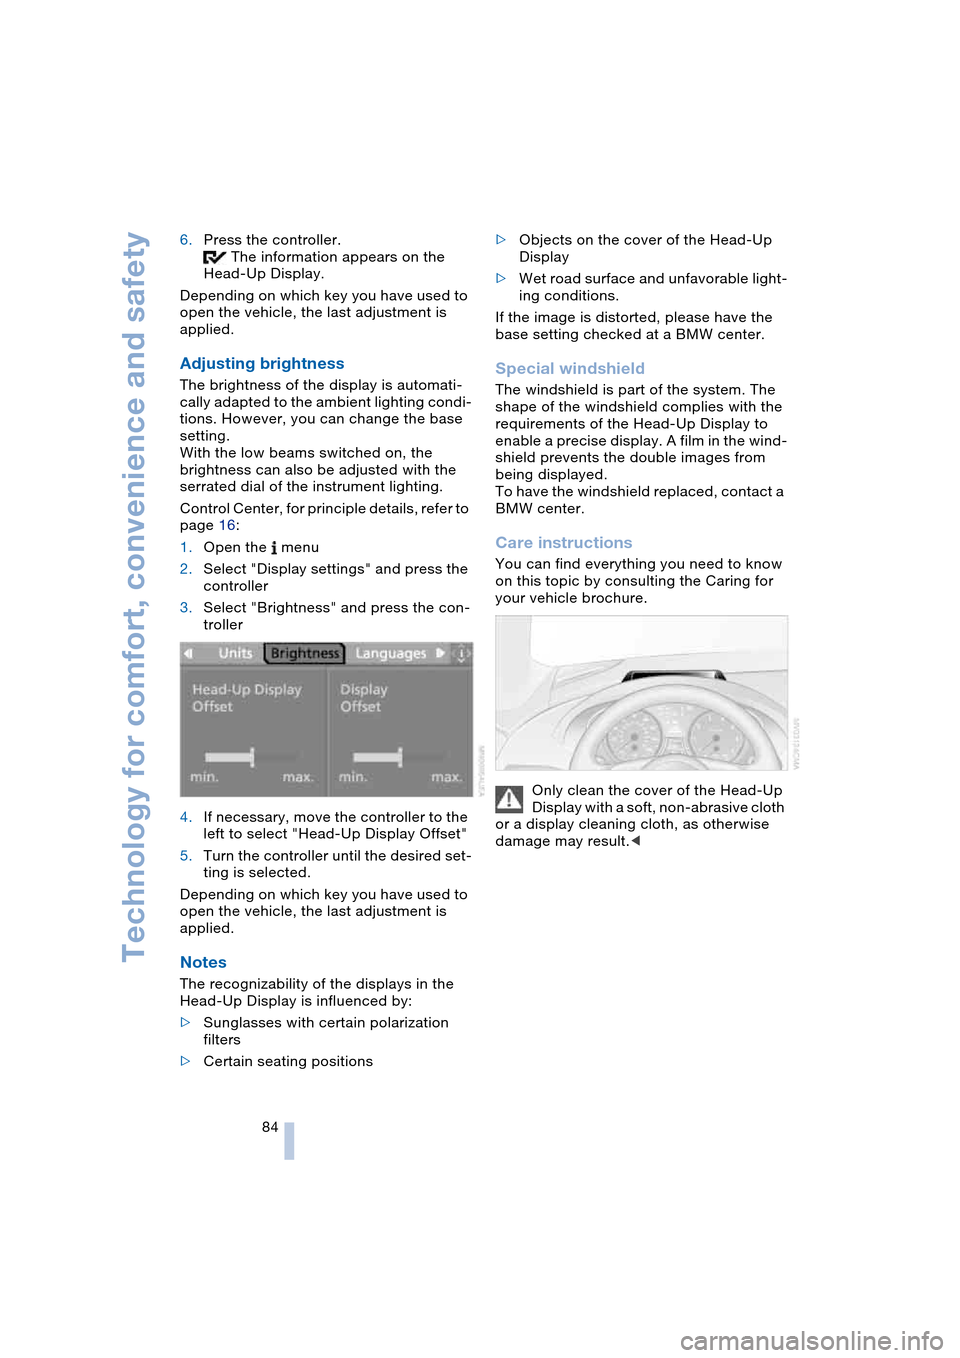
1.Open the menu
2.Select "Display settings" and press the
controller
3.Select "Brightness" and press the con-
troller
4.If necessary, move the controller to the
left to select "Head-Up Display Offset"
5.Turn the controller until the desired set-
ting is selected.
Depending on which key you have used to
open the vehicle, the last adjustment is
applied.
Notes
The recognizability of the displays in the
Head-Up Display is influenced by:
>Sunglasses with certain polarization
filters
>Certain seating positions>Objects on the cover of the Head-Up
Display
>Wet road surface and unfavorable light-
ing conditions.
If the image is distorted, please have the
base setting checked at a BMW center.
Special windshield
The windshield is part of the system. The
shape of the windshield complies with the
requirements of the Head-Up Display to
enable a precise display. A film in the wind-
shield prevents the double images from
being displayed.
To have the windshield replaced, contact a
BMW center.
Care instructions
You can find everything you need to know
on this topic by consulting the Caring for
your vehicle brochure.
Only clean the cover of the Head-Up
Display with a soft, non-abrasive cloth
or a display cleaning cloth, as otherwise
damage may result.<
Page 87 of 216
Controls
85Reference
At a glance
Driving tips
Communications
Navigation
Entertainment
Mobility
Lamps
Parking lamps/low beams
Parking lamps
With the switch in this position, the
front, rear and side vehicle lighting
is switched on. You can use the
parking lamps for parking. For lighting on
one side for parking as an additional fea-
ture, refer to page 86.
Low beams
When you switch off the ignition
with the headlamps on, the head-
lamps go out, and only the parking
lamps remain on.
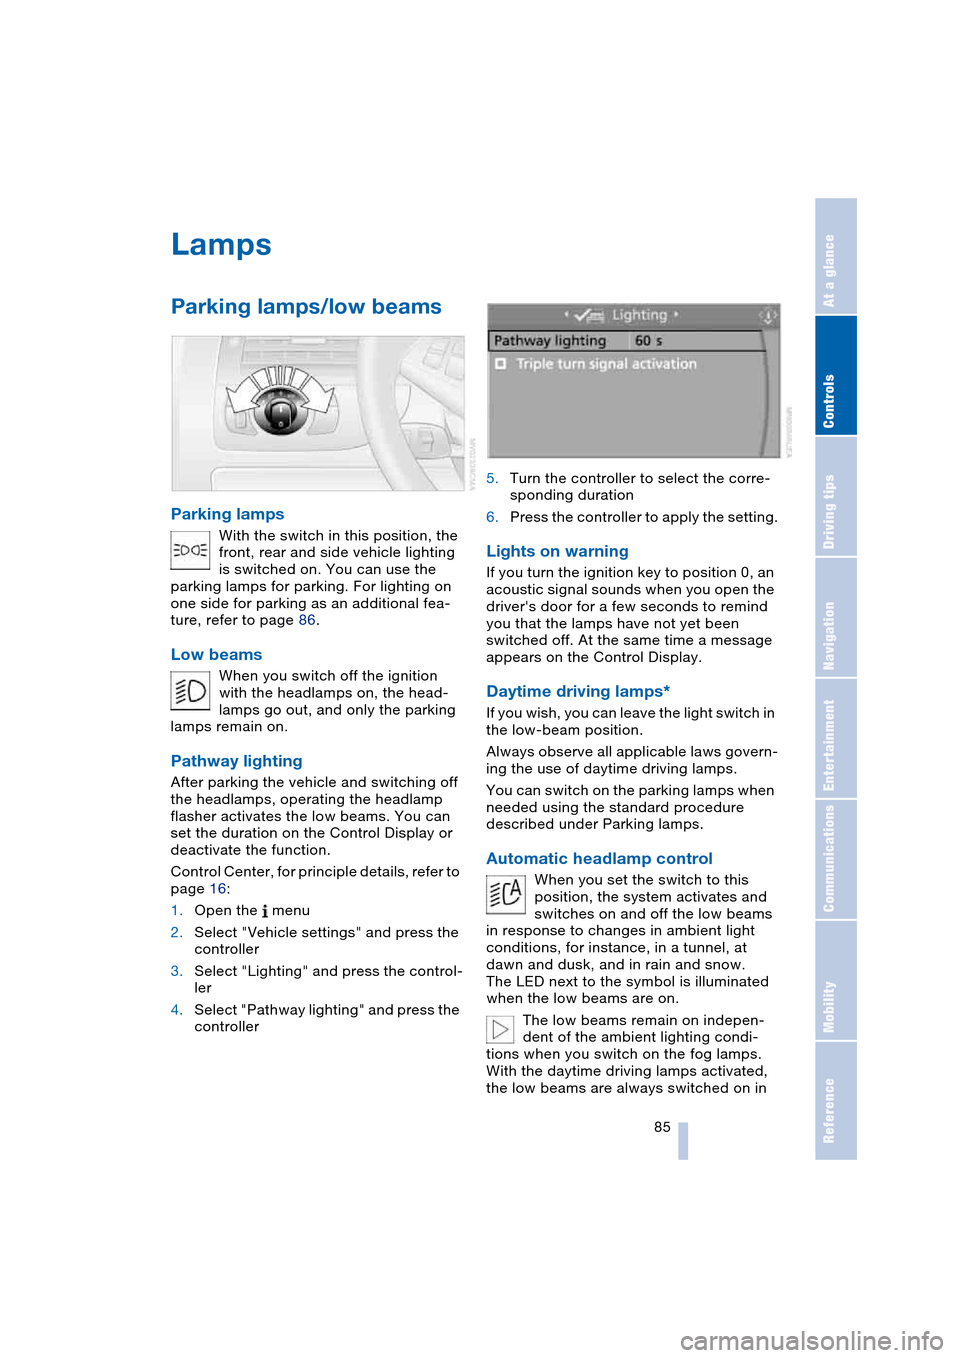
Pathway lighting
After parking the vehicle and switching off
the headlamps, operating the headlamp
flasher activates the low beams. You can
set the duration on the Control Display or
deactivate the function.
Control Center, for principle details, refer to
page 16:
1.Open the menu
2.Select "Vehicle settings" and press the
controller
3.Select "Lighting" and press the control-
ler
4.Select "Pathway lighting" and press the
controller5.Turn the controller to select the corre-
sponding duration
6.Press the controller to apply the setting.
Lights on warning
If you turn the ignition key to position 0, an
acoustic signal sounds when you open the
driver's door for a few seconds to remind
you that the lamps have not yet been
switched off. At the same time a message
appears on the Control Display.
Daytime driving lamps*
If you wish, you can leave the light switch in
the low-beam position.
Always observe all applicable laws govern-
ing the use of daytime driving lamps.
You can switch on the parking lamps when
needed using the standard procedure
described under Parking lamps.
Automatic headlamp control
When you set the switch to this
position, the system activates and
switches on and off the low beams
in response to changes in ambient light
conditions, for instance, in a tunnel, at
dawn and dusk, and in rain and snow.
The LED next to the symbol is illuminated
when the low beams are on.
The low beams remain on indepen-
dent of the ambient lighting condi-
tions when you switch on the fog lamps.
With the daytime driving lamps activated,
the low beams are always switched on in
Page 91 of 216
Controls
89Reference
At a glance
Driving tips
Communications
Navigation
Entertainment
Mobility
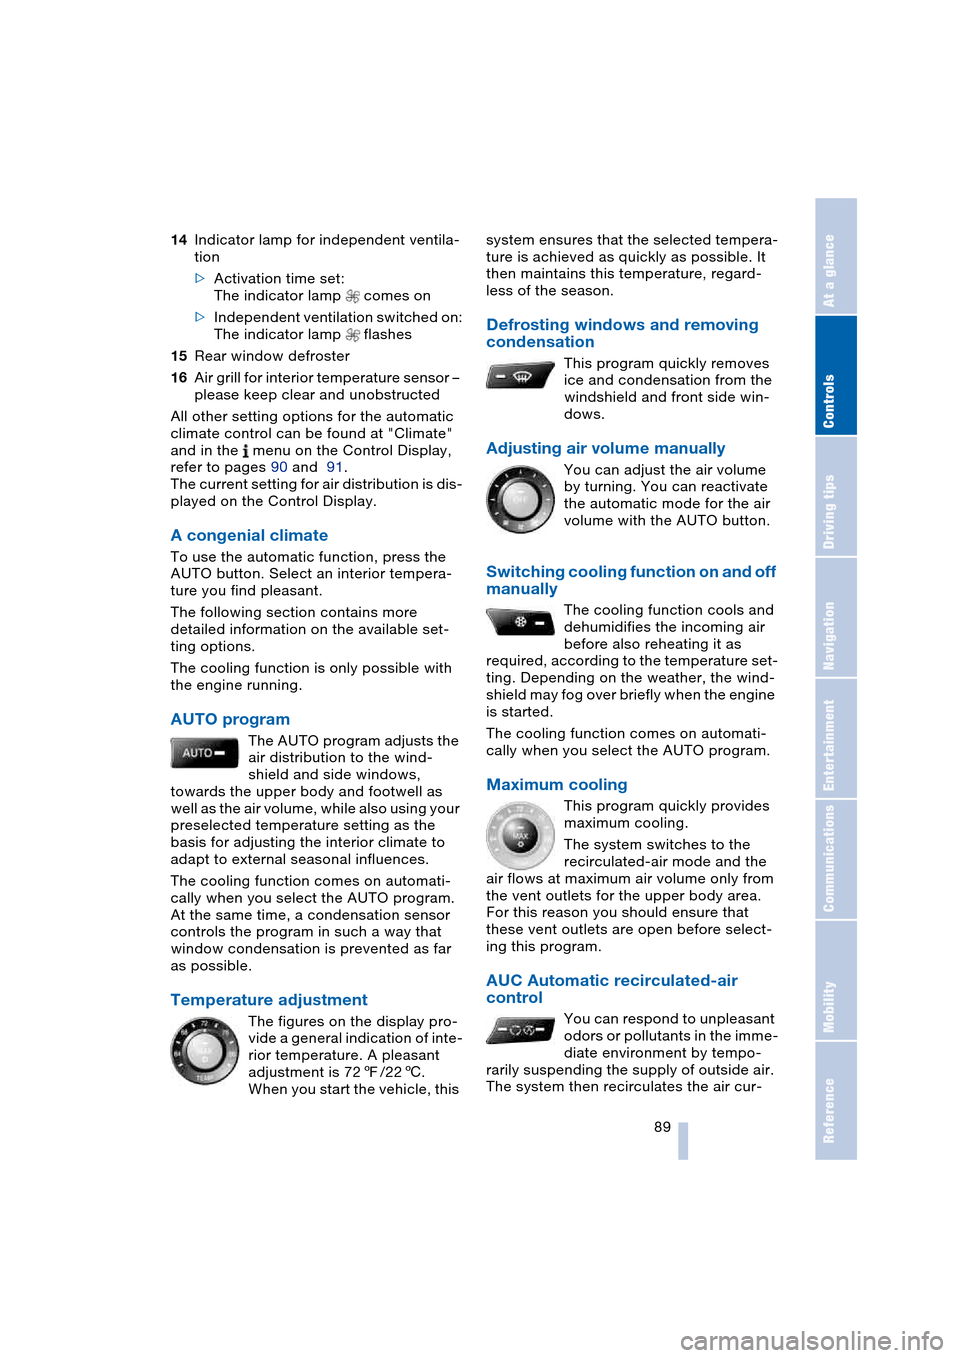
14Indicator lamp for independent ventila-
tion
>Activation time set:
The indicator lamp comes on
>Independent ventilation switched on:
The indicator lamp flashes
15Rear window defroster
16Air grill for interior temperature sensor –
please keep clear and unobstructed
All other setting options for the automatic
climate control can be found at "Climate"
and in the menu on the Control Display,
refer to pages 90 and 91.
The current setting for air distribution is dis-
played on the Control Display.
A congenial climate
To use the automatic function, press the
AUTO button. Select an interior tempera-
ture you find pleasant.
The following section contains more
detailed information on the available set-
ting options.
The cooling function is only possible with
the engine running.
AUTO program
The AUTO program adjusts the
air distribution to the wind-
shield and side windows,
towards the upper body and footwell as
well as the air volume, while also using your
preselected temperature setting as the
basis for adjusting the interior climate to
adapt to external seasonal influences.
The cooling function comes on automati-
cally when you select the AUTO program.
At the same time, a condensation sensor
controls the program in such a way that
window condensation is prevented as far
as possible.
Temperature adjustment
The figures on the display pro-
vide a general indication of inte-
rior temperature. A pleasant
adjustment is 727/226.
When you start the vehicle, this system ensures that the selected tempera-
ture is achieved as quickly as possible. It
then maintains this temperature, regard-
less of the season.
Defrosting windows and removing
condensation
This program quickly removes
ice and condensation from the
windshield and front side win-
dows.
Adjusting air volume manually
You can adjust the air volume
by turning. You can reactivate
the automatic mode for the air
volume with the AUTO button.
Switching cooling function on and off
manually
The cooling function cools and
dehumidifies the incoming air
before also reheating it as
required, according to the temperature set-
ting. Depending on the weather, the wind-
shield may fog over briefly when the engine
is started.
The cooling function comes on automati-
cally when you select the AUTO program.
Maximum cooling
This program quickly provides
maximum cooling.
The system switches to the
recirculated-air mode and the
air flows at maximum air volume only from
the vent outlets for the upper body area.
For this reason you should ensure that
these vent outlets are open before select-
ing this program.
AUC Automatic recirculated-air
control
You can respond to unpleasant
odors or pollutants in the imme-
diate environment by tempo-
rarily suspending the supply of outside air.
The system then recirculates the air cur-
Page 94 of 216

A congenial climate
92 climate control is optimized for driving with
the convertible top open. In addition, the air
supply is increased as the speed increases.
If the convertible program has been
selected, it is automatically active every
time the top is opened.
The effect of the convertible program
can be greatly enhanced if the wind
deflector is fitted.<
Ventilation
You can use the serrated dials 1 to open
and close the vent outlets through an infi-
nitely-variable range, while the levers 2
allow you to adjust the airflow direction.
Do not drop any foreign bodies into
the vent outlets, as otherwise these
could be catapulted outwards and lead to
injuries.<
Ventilation for cooling
Adjust the vent outlets to direct the flow of
cool air in your direction, for instance, if the
interior has become too warm, etc.
Draft-free ventilation
Set the vent outlets so that the air flows
past you and is not directed straight at you.
Microfilter/activated-charcoal filter
The microfilter removes dust and pollen
from the incoming air. The activated-char-
coal filter provides additional protection by
filtering gaseous pollutants from the out-
side air. Your BMW center replaces this
combined filter as a standard part of your
scheduled maintenance.You can select a display of more detailed
information in the service requirement dis-
play, refer to page 65.
Independent ventilation
The independent ventilation blows air into
the passenger compartment to lower inte-
rior temperatures.
The independent ventilation is controlled
using the Control Center. You can set two
different times for the system to start.
The independent ventilation remains on for
30 minutes. It can also be switched on and
off directly. Since the system uses a sub-
stantial amount of electrical current, you
should refrain from activating it twice in
succession without allowing the battery to
be recharged in normal operation between
use.
The independent ventilation is ready for
use at any outside temperature up to igni-
tion key position 1.
The air emerges through the upper body
region vent outlets in the instrument panel.
These vent outlets must be open for the
system to operate.
Switching on and off directly
Control Center, for principle details, refer to
page 16:
1.Open "Climate"
2.Select "Ventilation" and press the con-
troller
3.Select "Automatic ventilation" and
press the controller
4.Select "Parked car ventilation" and
press the controller.
Page 111 of 216
Navigation
Driving tips
109Reference
At a glance
Controls
Communications
Entertainment
Mobility
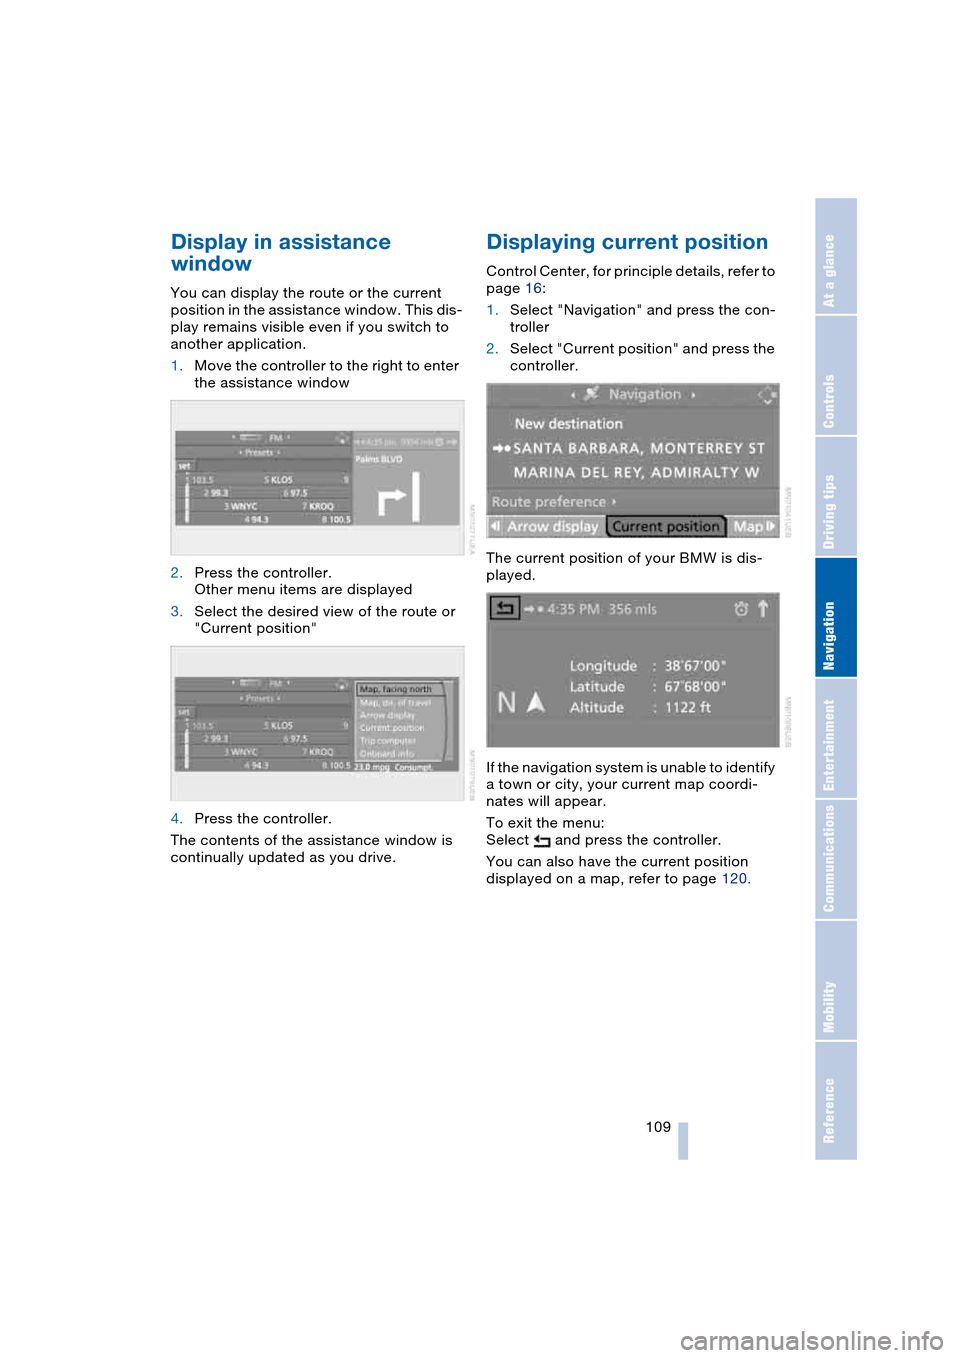
Display in assistance
window
You can display the route or the current
position in the assistance window. This dis-
play remains visible even if you switch to
another application.
1.Move the controller to the right to enter
the assistance window
2.Press the controller.
Other menu items are displayed
3.Select the desired view of the route or
"Current position"
4.Press the controller.
The contents of the assistance window is
continually updated as you drive.
Displaying current position
Control Center, for principle details, refer to
page 16:
1.Select "Navigation" and press the con-
troller
2.Select "Current position" and press the
controller.
The current position of your BMW is dis-
played.
If the navigation system is unable to identify
a town or city, your current map coordi-
nates will appear.
To exit the menu:
Select and press the controller.
You can also have the current position
displayed on a map, refer to page 120.
Page 112 of 216

Destination entry
110
Destination entry
In entering your destination you can select
from among the following options:
>Entering a destination manually, see
below
>Selecting destination using information,
refer to page 113
>Selecting from among recent destina-
tions, refer to Destination list, page 113
>Selecting destination from address
book, refer to page 114.
After selecting your destination you can
proceed to start the destination guidance,
refer to page 118.
Entering a destination
manually
The system supports the wordmatch prin-
ciple to make it easier for you to enter the
names of streets or towns/cities. This
enables input of different spellings and
supplements your input automatically so
that stored names can be applied as desti-
nations as quickly as possible.
Control Center, for principle details, refer to
page 16:
1.Select "Navigation" and press the con-
troller
2.Select "New destination" and press the
controller
3.Select "Enter address" and press the
controller.The system also supports you with the fol-
lowing features:
>If you do not enter a street, the system
will guide you to the downtown area of
a town or city
>You can skip the entry of country and
locality if the current entries are being
retained for your new destination
>The commands of the voice command
system for destination entry differ from
those of the individual menu items on
the Control Display. You can have the
system list the possible voice com-
mands, refer to page 21.
Selecting country of destination
1.Select "State / Province" or the dis-
played country and press the controller.
A list of available countries appears on
the display
2.Select the country of destination and
press the controller.
In order to be able to start the destination
guidance, at least the city of destination or
its zip code must be entered.
Page 113 of 216
Navigation
Driving tips
111Reference
At a glance
Controls
Communications
Entertainment
Mobility
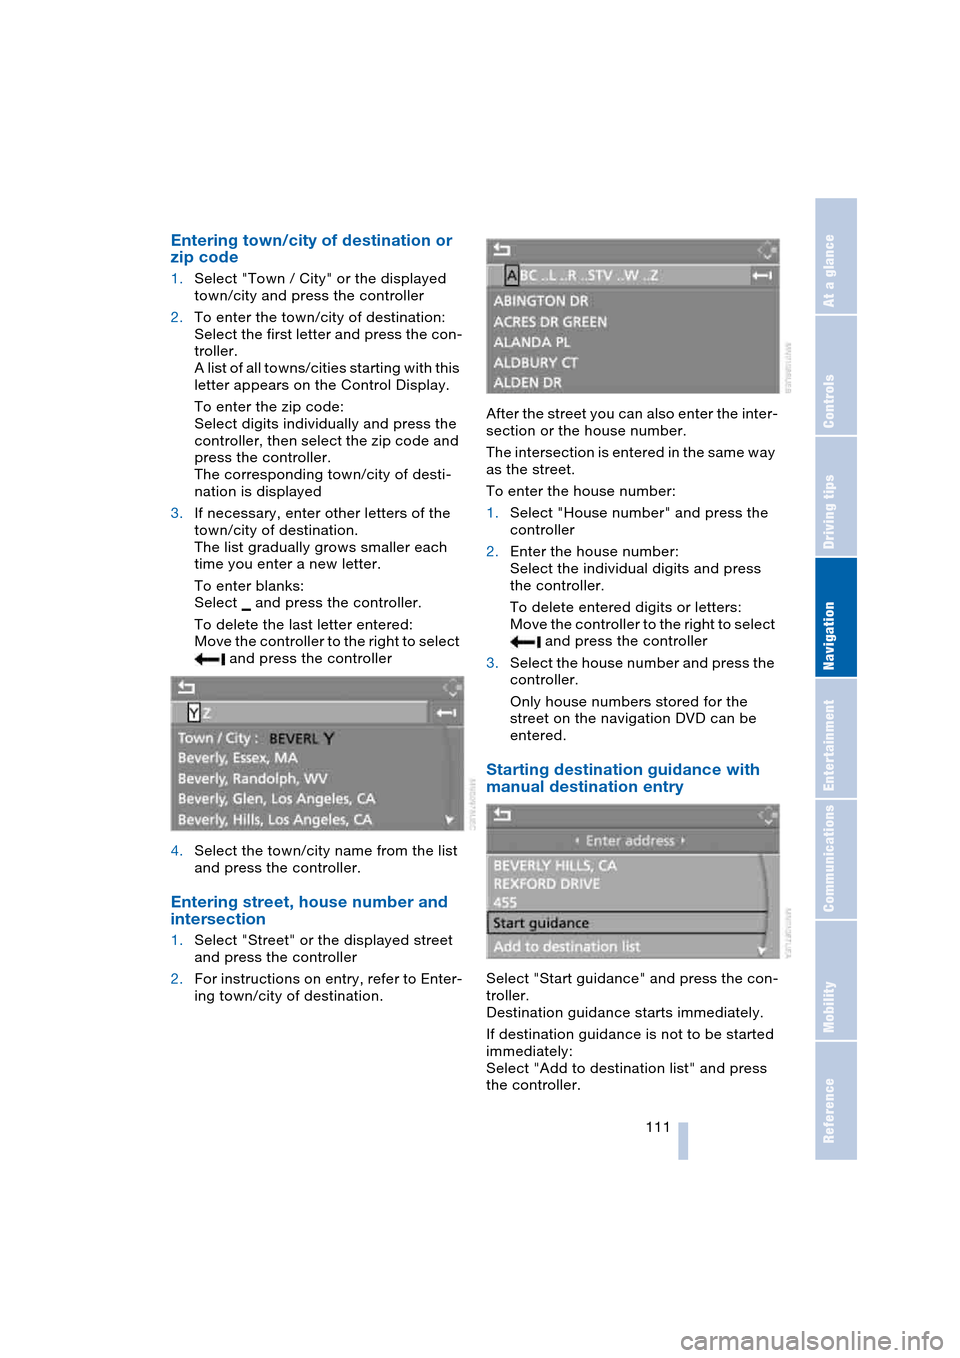
Entering town/city of destination or
zip code
1.Select "Town / City" or the displayed
town/city and press the controller
2.To enter the town/city of destination:
Select the first letter and press the con-
troller.
A list of all towns/cities starting with this
letter appears on the Control Display.
To enter the zip code:
Select digits individually and press the
controller, then select the zip code and
press the controller.
The corresponding town/city of desti-
nation is displayed
3.If necessary, enter other letters of the
town/city of destination.
The list gradually grows smaller each
time you enter a new letter.
To enter blanks:
Select and press the controller.
To delete the last letter entered:
Move the controller to the right to select
and press the controller
4.Select the town/city name from the list
and press the controller.
Entering street, house number and
intersection
1.Select "Street" or the displayed street
and press the controller
2.For instructions on entry, refer to Enter-
ing town/city of destination.After the street you can also enter the inter-
section or the house number.
The intersection is entered in the same way
as the street.
To enter the house number:
1.Select "House number" and press the
controller
2.Enter the house number:
Select the individual digits and press
the controller.
To delete entered digits or letters:
Move the controller to the right to select
and press the controller
3.Select the house number and press the
controller.
Only house numbers stored for the
street on the navigation DVD can be
entered.
Starting destination guidance with
manual destination entry
Select "Start guidance" and press the con-
troller.
Destination guidance starts immediately.
If destination guidance is not to be started
immediately:
Select "Add to destination list" and press
the controller.