Page 48 of 220

Transporting children safely
46
Installing child-restraint
systems
Before installing any child-restraint system
or child seat, read the following:
Observe the child-restraint system
manufacturer's instructions for instal-
lation and use. Otherwise the degree of
protection can be reduced.
Following an accident, have all parts of the
affected vehicle safety-belt system
checked and, if necessary, replaced by a
BMW center.<
Commercially-available child-restraint sys-
tems are designed to be secured with a lap
belt or with the lap belt portion of a combi-
nation lap/shoulder belt. Improperly or
inadequately installed restraint systems
can increase the risk of injury to children.
Always read and follow the instructions that
come with the system.
Child seat security
All of the rear belt retractors and the front
passenger's safety belt can be locked for
mounting and securing child-restraint sys-
tems.
Information regarding this is located near
the buckle latch of each safety belt.
To lock the safety belt
Pull the entire length of the belt from the
belt retractor. Allow the reel to retract the
belt somewhat and engage the buckle,
then tighten the belt against the child-
restraint system. The retraction mechanism
is now locked.
To unlock the safety belt
Release the buckle, remove the child-
restraint system and allow the belt retractor
to reel the belt completely in.
Child-restraint system with tether
strap
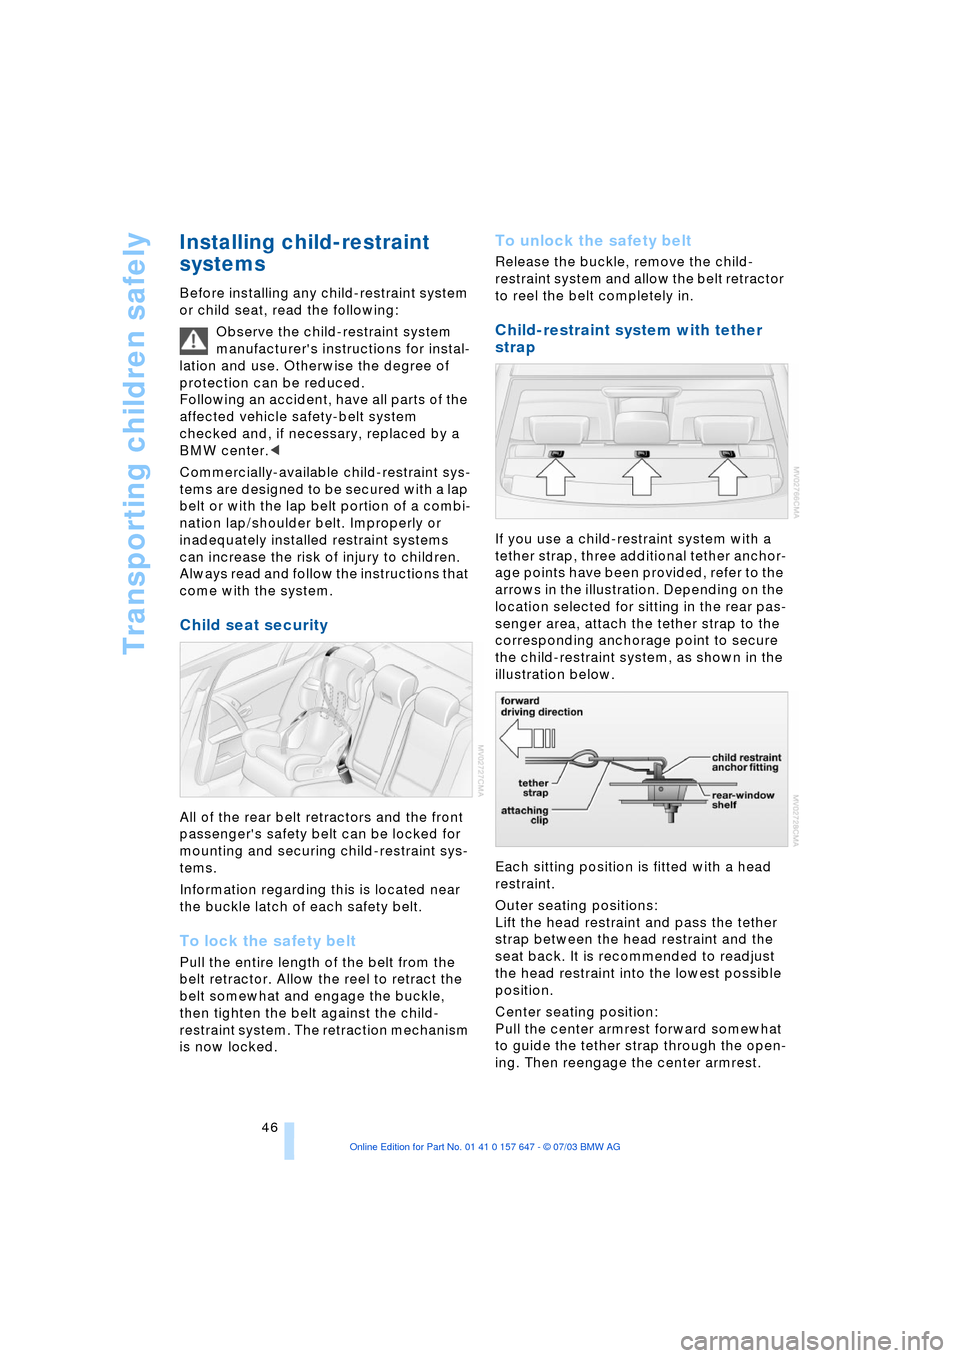
If you use a child-restraint system with a
tether strap, three additional tether anchor-
age points have been provided, refer to the
arrows in the illustration. Depending on the
location selected for sitting in the rear pas-
senger area, attach the tether strap to the
corresponding anchorage point to secure
the child-restraint system, as shown in the
illustration below.
Each sitting position is fitted with a head
restraint.
Outer seating positions:
Lift the head restraint and pass the tether
strap between the head restraint and the
seat back. It is recommended to readjust
the head restraint into the lowest possible
position.
Center seating position:
Pull the center armrest forward somewhat
to guide the tether strap through the open-
ing. Then reengage the center armrest.
Page 103 of 220

Controls
101Reference
At a glance
Driving tips
Communications
Navigation
Entertainment
Mobility
Rear center armrest
1Storage compartment: pull upwards
2To open the beverage holder: press and
open the cover
With the center armrest folded down, you
have a better view towards the rear.
Fold down rear seat*
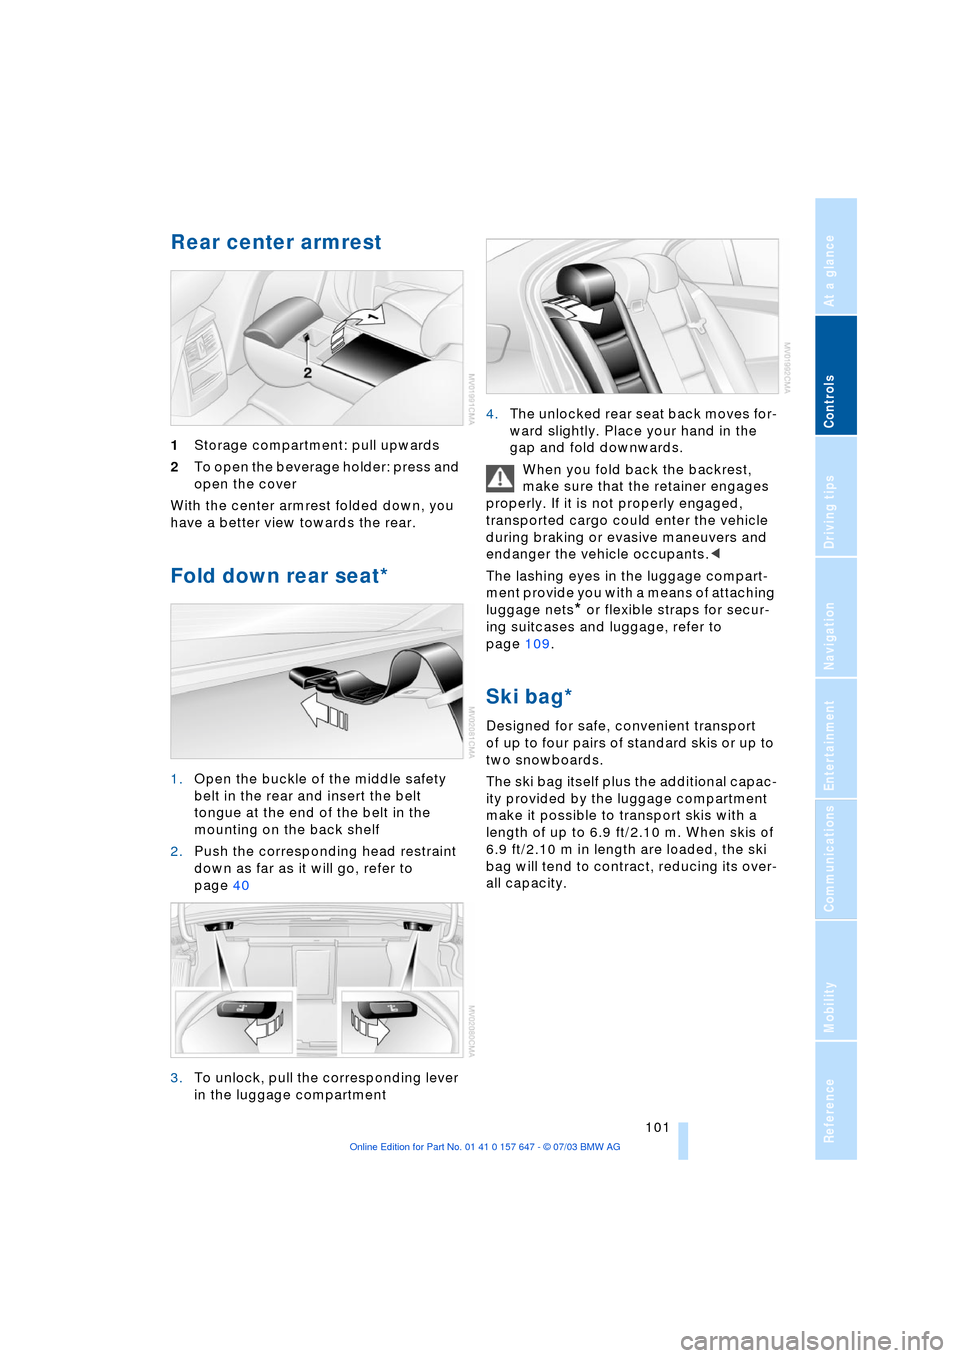
1.Open the buckle of the middle safety
belt in the rear and insert the belt
tongue at the end of the belt in the
mounting on the back shelf
2.Push the corresponding head restraint
down as far as it will go, refer to
page 40
3.To unlock, pull the corresponding lever
in the luggage compartment 4.The unlocked rear seat back moves for-
ward slightly. Place your hand in the
gap and fold downwards.
When you fold back the backrest,
make sure that the retainer engages
properly. If it is not properly engaged,
transported cargo could enter the vehicle
during braking or evasive maneuvers and
endanger the vehicle occupants.<
The lashing eyes in the luggage compart-
ment provide you with a means of attaching
luggage nets
* or flexible straps for secur-
ing suitcases and luggage, refer to
page 109.
Ski bag*
Designed for safe, convenient transport
of up to four pairs of standard skis or up to
two snowboards.
The ski bag itself plus the additional capac-
ity provided by the luggage compartment
make it possible to transport skis with a
length of up to 6.9 ft/2.10 m. When skis of
6.9 ft/2.10 m in length are loaded, the ski
bag will tend to contract, reducing its over-
all capacity.
Page 210 of 220

Everything from A to Z
208 Heating 90
Ð mirrors 43
Ð steering wheel 44
Heating while stopped 92
Heavy cargo, refer to
Stowing cargo 109
Height, refer to
Dimensions 199
Height adjustment
Ð head restraints 39
Ð seats 37
Ð steering wheel 43
High beams 88
Ð headlight flasher 88
Ð indicator lamp 13
Ð replacing the bulbs 185
Hills 107
Holder for beverages 99
"Horn" 44
Horn 10
"Hour memo" 75
"House number" for
destination entry 117
Hydraulic brake assistant,
refer to DBC 79
Hydroplaning 106, 174
I
Ice warning 65
iDrive, refer to Control
Center 16
Ignition key 26
Ignition key positions, refer
to Ignition lock 49
Ignition lock 49
Independent ventilation
Ð switching on and off
directly 94
Independent ventilation/
heating
Ð entering switch-on
times 95
Ð preselecting switch-on
times 95Indicator/warning lamp
Ð active steering 82
Ð airbags 84
Ð Flat Tire Monitor 81
Ð front fog lamps 11
Ð overview 13
Ð safety belt warning 40
Individual air distribution 93
Individual button
assignment options on
steering wheel 44
Individual settings, refer to
Key Memory 26
Inflation pressure, refer to
Tire inflation
pressure 170
"Information" for
navigation 118
Information for navigation
Ð on a different city 118
Ð on city of destination 118
Ð on current position 118
"Information on
destination" 119
"Input map" 118
Installation location
Ð CD changer 144
Ð navigation computer 114
Ð portable phone 151
Instructions for navigation
system, refer to Voice
instructions 124
Instrument cluster 12
Instrument combination,
refer to Instrument
cluster 12
Instrument lighting 88
Instrument panel, refer to
Instrument cluster 10
Integrated universal remote
control 96
Interesting destination 118
"Interim time" 73
Interior lamps 89
Ð remote control 28
Interior mirror, refer to
Interior rearview mirror 43
Interior motion sensor 33
Ð switching off 28Interior rearview mirror 43
Ð automatic dimming
feature 43
Interlock, refer to Steering
locked 49
Intermittent mode of the
wipers 57
J
Jacking points 188
Joystick, refer to Control
Center 16
Jump-starting 192
K
Key Memory 26
"Keypad" 156
Keys 26
Key set, refer Central keys
with remote control 26
Kickdown 55
Knock control 169
L
Lamps and bulbs 184
"Languages" 74
"Languages" for
navigation 124
Lashing eyes, refer to
Securing the load 109
"Last seat position" 38
LATCH child-restraint
fixing 47
LEDs light-emitting
diodes 89
Length, refer to
Dimensions 199
Letter symbol on portable
phone 156
License plate light
Ð replacing the bulbs 186
Light-emitting diodes
LEDs 89
Lighter 100
Ð socket 100
"Lighting" 56, 87