2004 BMW 545I SEDAN Glove
[x] Cancel search: GlovePage 28 of 220
Opening and closing
26
Opening and closing
The key set
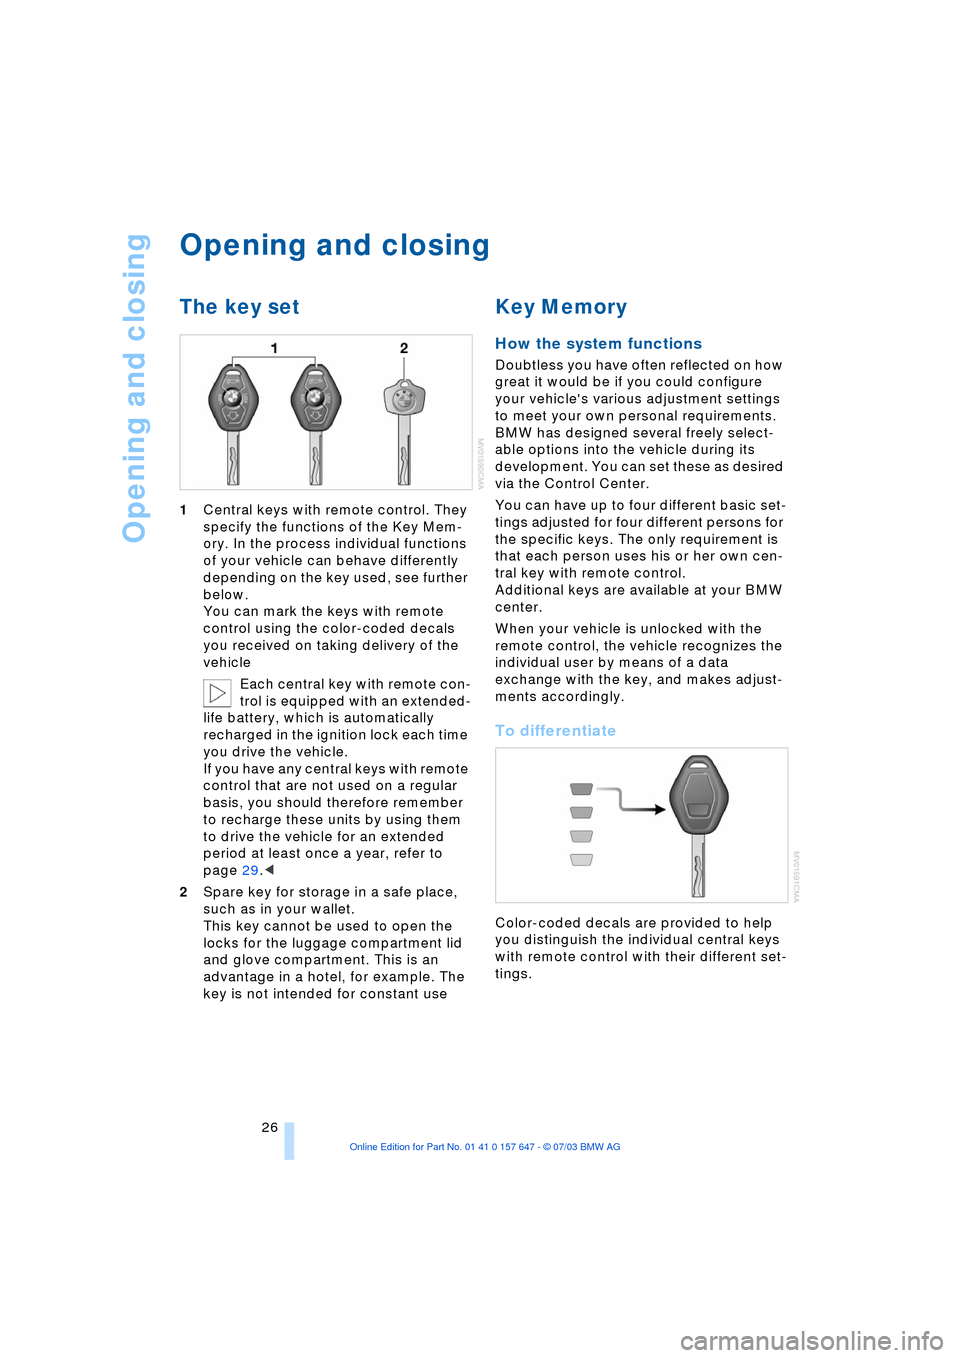
1Central keys with remote control. They
specify the functions of the Key Mem-
ory. In the process individual functions
of your vehicle can behave differently
depending on the key used, see further
below.
You can mark the keys with remote
control using the color-coded decals
you received on taking delivery of the
vehicle
Each central key with remote con-
trol is equipped with an extended-
life battery, which is automatically
recharged in the ignition lock each time
you drive the vehicle.
If you have any central keys with remote
control that are not used on a regular
basis, you should therefore remember
to recharge these units by using them
to drive the vehicle for an extended
period at least once a year, refer to
page 29.<
2Spare key for storage in a safe place,
such as in your wallet.
This key cannot be used to open the
locks for the luggage compartment lid
and glove compartment. This is an
advantage in a hotel, for example. The
key is not intended for constant use
Key Memory
How the system functions
Doubtless you have often reflected on how
great it would be if you could configure
your vehicle's various adjustment settings
to meet your own personal requirements.
BMW has designed several freely select-
able options into the vehicle during its
development. You can set these as desired
via the Control Center.
You can have up to four different basic set-
tings adjusted for four different persons for
the specific keys. The only requirement is
that each person uses his or her own cen-
tral key with remote control.
Additional keys are available at your BMW
center.
When your vehicle is unlocked with the
remote control, the vehicle recognizes the
individual user by means of a data
exchange with the key, and makes adjust-
ments accordingly.
To differentiate
Color-coded decals are provided to help
you distinguish the individual central keys
with remote control with their different set-
tings.
Page 100 of 220
Practical interior accessories
98
Glove compartment
Opening
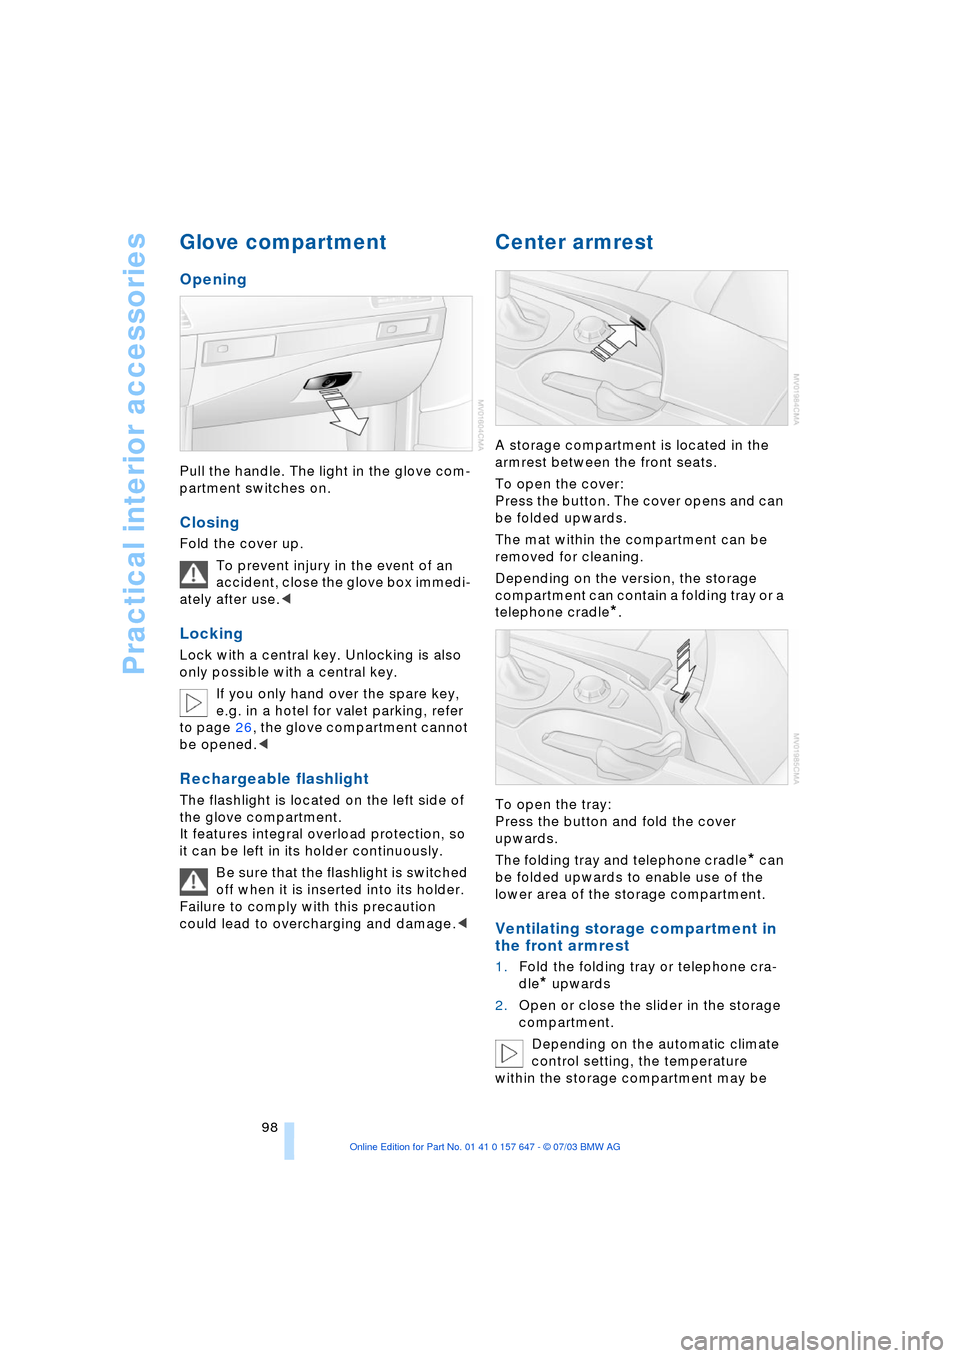
Pull the handle. The light in the glove com-
partment switches on.
Closing
Fold the cover up.
To prevent injury in the event of an
accident, close the glove box immedi-
ately after use.<
Locking
Lock with a central key. Unlocking is also
only possible with a central key.
If you only hand over the spare key,
e.g. in a hotel for valet parking, refer
to page 26, the glove compartment cannot
be opened.<
Rechargeable flashlight
The flashlight is located on the left side of
the glove compartment.
It features integral overload protection, so
it can be left in its holder continuously.
Be sure that the flashlight is switched
off when it is inserted into its holder.
Failure to comply with this precaution
could lead to overcharging and damage.<
Center armrest
A storage compartment is located in the
armrest between the front seats.
To open the cover:
Press the button. The cover opens and can
be folded upwards.
The mat within the compartment can be
removed for cleaning.
Depending on the version, the storage
compartment can contain a folding tray or a
telephone cradle
*.
To open the tray:
Press the button and fold the cover
upwards.
The folding tray and telephone cradle
* can
be folded upwards to enable use of the
lower area of the storage compartment.
Ventilating storage compartment in
the front armrest
1.Fold the folding tray or telephone cra-
dle
* upwards
2.Open or close the slider in the storage
compartment.
Depending on the automatic climate
control setting, the temperature
within the storage compartment may be
Page 146 of 220
CD changer
144
CD changer
CD magazine
The BMW CD changer for six CDs is
installed in the glove compartment.
Removing the CD magazine
To load or remove CDs from the CD maga-
zine you must first remove it from the CD
changer:
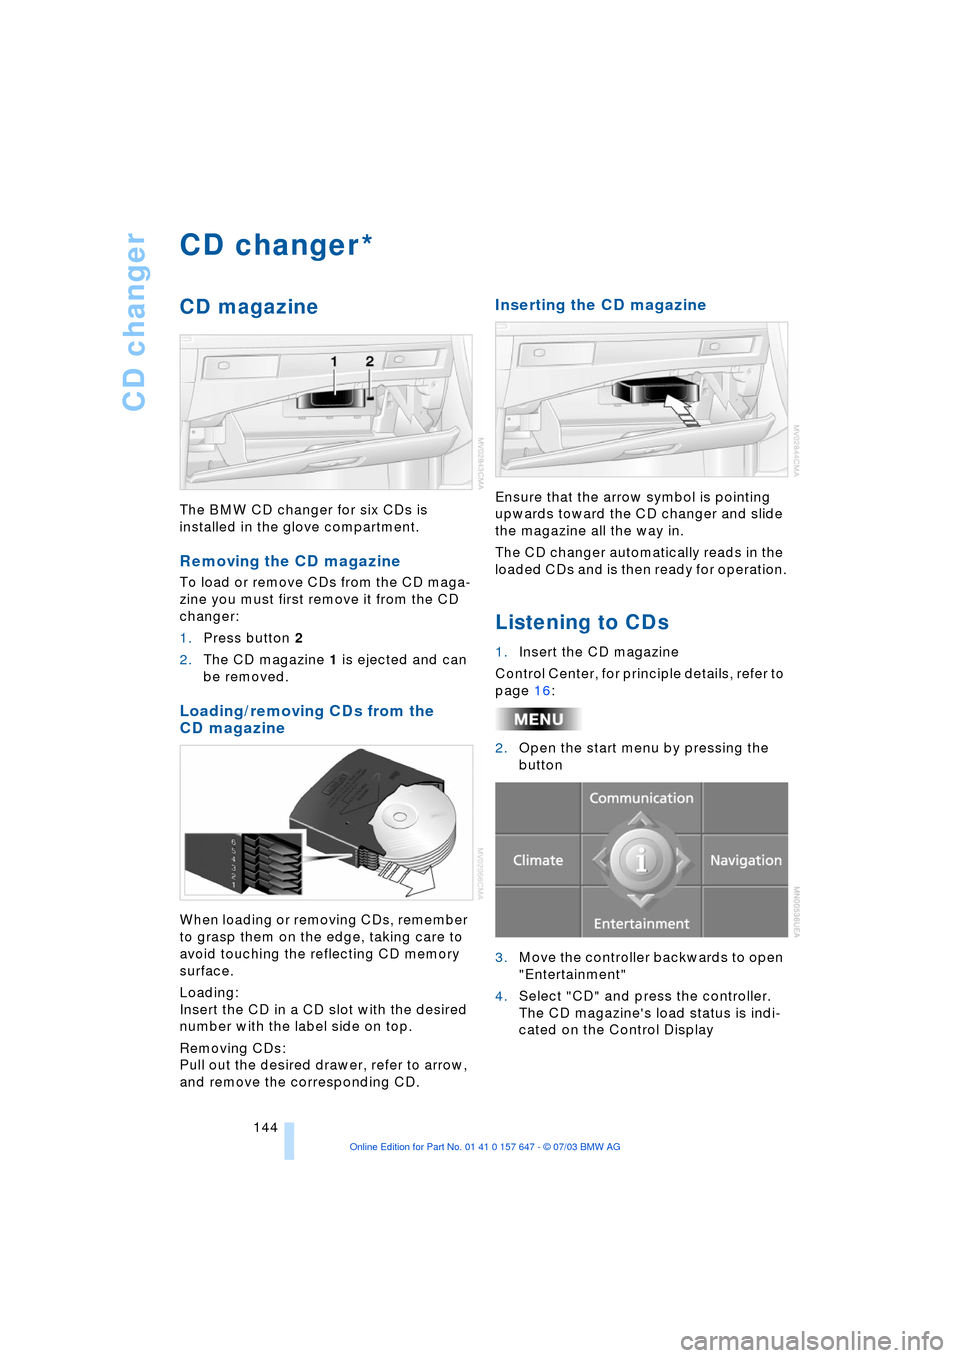
1.Press button 2
2.The CD magazine 1 is ejected and can
be removed.
Loading/removing CDs from the
CD magazine
When loading or removing CDs, remember
to grasp them on the edge, taking care to
avoid touching the reflecting CD memory
surface.
Loading:
Insert the CD in a CD slot with the desired
number with the label side on top.
Removing CDs:
Pull out the desired drawer, refer to arrow,
and remove the corresponding CD.
Inserting the CD magazine
Ensure that the arrow symbol is pointing
upwards toward the CD changer and slide
the magazine all the way in.
The CD changer automatically reads in the
loaded CDs and is then ready for operation.
Listening to CDs
1.Insert the CD magazine
Control Center, for principle details, refer to
page 16:
2.Open the start menu by pressing the
button
3.Move the controller backwards to open
"Entertainment"
4.Select "CD" and press the controller.
The CD magazine's load status is indi-
cated on the Control Display
*
Page 186 of 220
Replacing components
184
Replacing components
Onboard tool kit
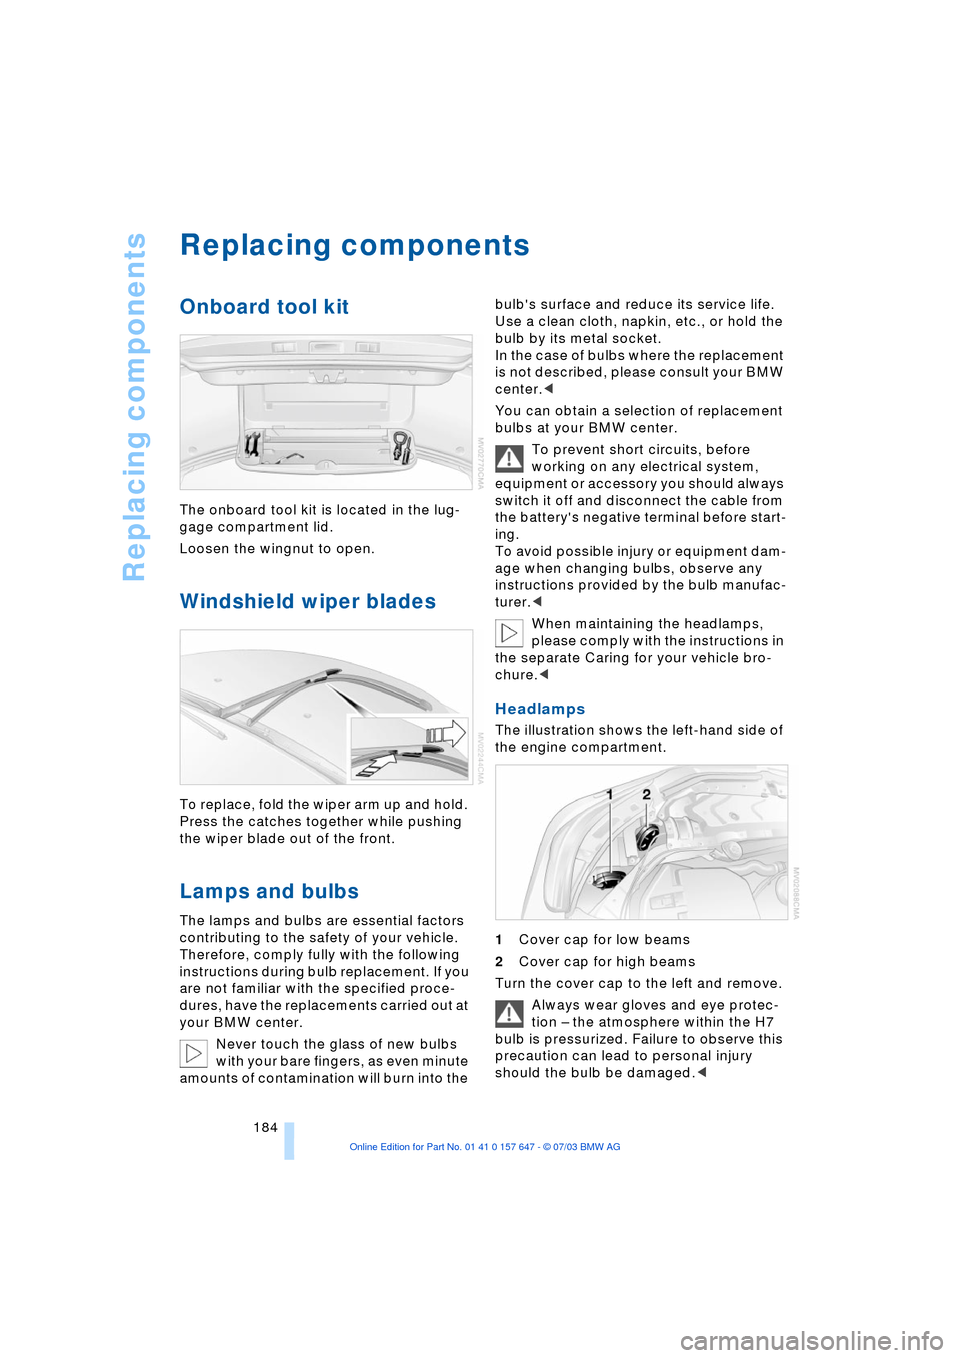
The onboard tool kit is located in the lug-
gage compartment lid.
Loosen the wingnut to open.
Windshield wiper blades
To replace, fold the wiper arm up and hold.
Press the catches together while pushing
the wiper blade out of the front.
Lamps and bulbs
The lamps and bulbs are essential factors
contributing to the safety of your vehicle.
Therefore, comply fully with the following
instructions during bulb replacement. If you
are not familiar with the specified proce-
dures, have the replacements carried out at
your BMW center.
Never touch the glass of new bulbs
with your bare fingers, as even minute
amounts of contamination will burn into the bulb's surface and reduce its service life.
Use a clean cloth, napkin, etc., or hold the
bulb by its metal socket.
In the case of bulbs where the replacement
is not described, please consult your BMW
center.<
You can obtain a selection of replacement
bulbs at your BMW center.
To prevent short circuits, before
working on any electrical system,
equipment or accessory you should always
switch it off and disconnect the cable from
the battery's negative terminal before start-
ing.
To avoid possible injury or equipment dam-
age when changing bulbs, observe any
instructions provided by the bulb manufac-
turer.<
When maintaining the headlamps,
please comply with the instructions in
the separate Caring for your vehicle bro-
chure.<
Headlamps
The illustration shows the left-hand side of
the engine compartment.
1Cover cap for low beams
2Cover cap for high beams
Turn the cover cap to the left and remove.
Always wear gloves and eye protec-
tion Ð the atmosphere within the H7
bulb is pressurized. Failure to observe this
precaution can lead to personal injury
should the bulb be damaged.<
Page 191 of 220
Mobility
189Reference
At a glance
Controls
Driving tips
Communications
Navigation
Entertainment
Charging the battery
Only charge the battery in the vehicle via
the terminals in the engine compartment
with the engine off. Connections, refer to
Jump-starting on page 192.
Disposal
Return used batteries to a recycling
point or your BMW center. Maintain
the battery in an upright position for trans-
port and storage. Always restrain the bat-
tery to prevent it from tipping over during
transport.<
Fuses
Never attempt to repair a blown fuse,
and do not replace a defective fuse
with a substitute of another color or amper-
age rating, as this could lead to a circuit
overload, ultimately resulting in a fire in the
vehicle.<
Spare fuses, plastic tweezers and details of
the fuse assignment are located in the
compartment for the onboard tool kit, refer
to page 184.
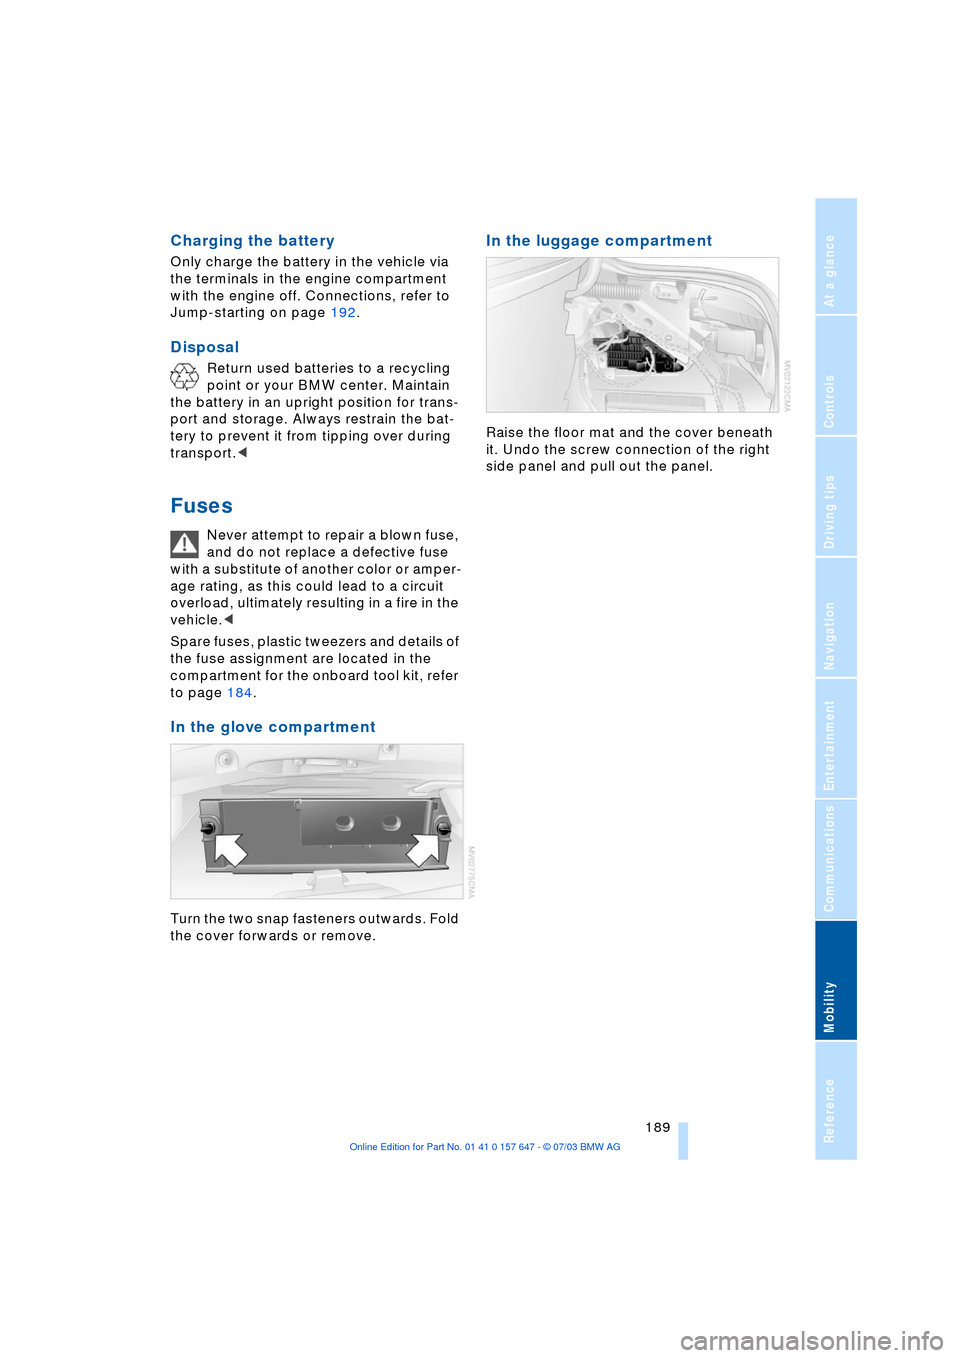
In the glove compartment
Turn the two snap fasteners outwards. Fold
the cover forwards or remove.
In the luggage compartment
Raise the floor mat and the cover beneath
it. Undo the screw connection of the right
side panel and pull out the panel.
Page 209 of 220
Reference 207
At a glance
Controls
Driving tips
Communications
Navigation
Entertainment
Mobility
ESP Electronic Stability
Program, refer to DSC
Dynamic Stability
Control 78
Exhaust system, refer to
High temperatures 106
Exterior mirrors 42
Ð automatic dimming
feature 43
F
"Fader", audio systems 132
Failure messages, refer to
Check Control 68
False alarms, refer to
Avoiding unintentional
alarms 33
False alarms with the Flat
Tire Monitor 80
Fastening safety belts, refer
to Safety belt
Ð indicator lamp 40
"Fastest route" for
navigation 121
Fastest route for
navigation 121
First aid, refer to First aid
kit 191
First aid kit 191
Fitting for towing 193
Flashlight, refer to
Rechargeable
flashlight 98
Flash when locking/
unlocking 28
Flat tire
Ð compact wheel 187
Ð Flat Tire Monitor 81
Ð refer also to Changing a
wheel 187
Ð refer also to Tire
condition 173
Ð run-flat tires 81, 175
Flat Tire Monitor 80
Ð false alarms 80
Ð indicator lamp 81
Ð initializing the system 81
Ð malfunctions 82
Floods, refer to Water on
the road 107"FM", waveband 130, 134
FM, waveband 134
Fog lamps 89
Ð indicator lamp 89
Fold down rear seat 101
Folding rear seat back 101
Footwell lamps 89
Forward, fast
Ð CD changer 146
Ð CD player 142
For your own safety 6
Front airbags 83
Front armrest 98
Front head restraints 40
Front seat adjustment 36
Front-to-rear adjustment in
Audio mode 132
"FTM" 81
Fuel 169
Ð display 66
Ð quality 169
Ð tank volume 66
Fuel clock, refer to Fuel
gauge 66
Fuel display, refer to Fuel
gauge 66
Fuel filler door 168
Ð releasing in the event of
electrical malfunction 168
Fuel specifications 169
Fuses 189
G
Garage door opener, refer
to Integrated universal
remote control 96
Gasoline, refer to Fuel
quality 169
Gasoline display, refer to
Fuel gauge 66
Gear changes, refer to
Automatic transmission
with Steptronic 55
Gear display 54
Gearshift lever
Ð automatic transmission
with Steptronic 55
Ð manual transmission 51
Ð Sequential manual
transmission SMG 51General car care, refer to
Caring for your vehicle
brochure
General driving notes 106
Glass roof, electrical 34
Ð closing in the event of an
electrical defect 35
Ð convenience operation 29
Ð remote control 28
Glove compartment 98
Ð lighting 98
GPS navigation, refer to
Navigation system 114
Grilles of the automatic
climate control 90
Gross vehicle weight, refer
to Weights 200
H
Halogen lamps 185
Handbrake 50
Ð indicator lamp 50
Hands-free unit 151
Hazard warning flashers 14
Head airbags 83
Headlamp control,
automatic 87
Headlamp flasher 56
Headlamps 87
Ð care, refer to Caring for
your vehicle brochure
Ð replacing the bulbs 185
Headlamp washers 57
Head Light, refer to
Adaptive Head Light 88
Head restraints 39
Ð front 39
Ð front, active 40
Ð rear 40
"Head-Up Display" 44
Head-Up Display 85
Heated mirrors 43
Heated rear window 91
Heated seats 41
Heated steering wheel 44
"Heated steering wheel on /
off" 44
Heater, rear window 91