2004 BMW 545I SEDAN start
[x] Cancel search: startPage 58 of 220
Driving
56 Shifting from M/S to the selector-lever
positions P, R and N is only possible by
going through D.
Malfunctions
Indicator lamp
If the indicator lamp lights up, a
malfunction has occurred in the
transmission system.
While it will remain still possible to move
the selector lever to any desired position,
the transmission will revert to operation in
its default mode with only a limited number
of forward gears.
If this happens, avoid extreme engine loads
and consult the nearest BMW center.
Information on jump-starting and towing
begins on page 192.
Turn signal indicators/
headlamp flasher
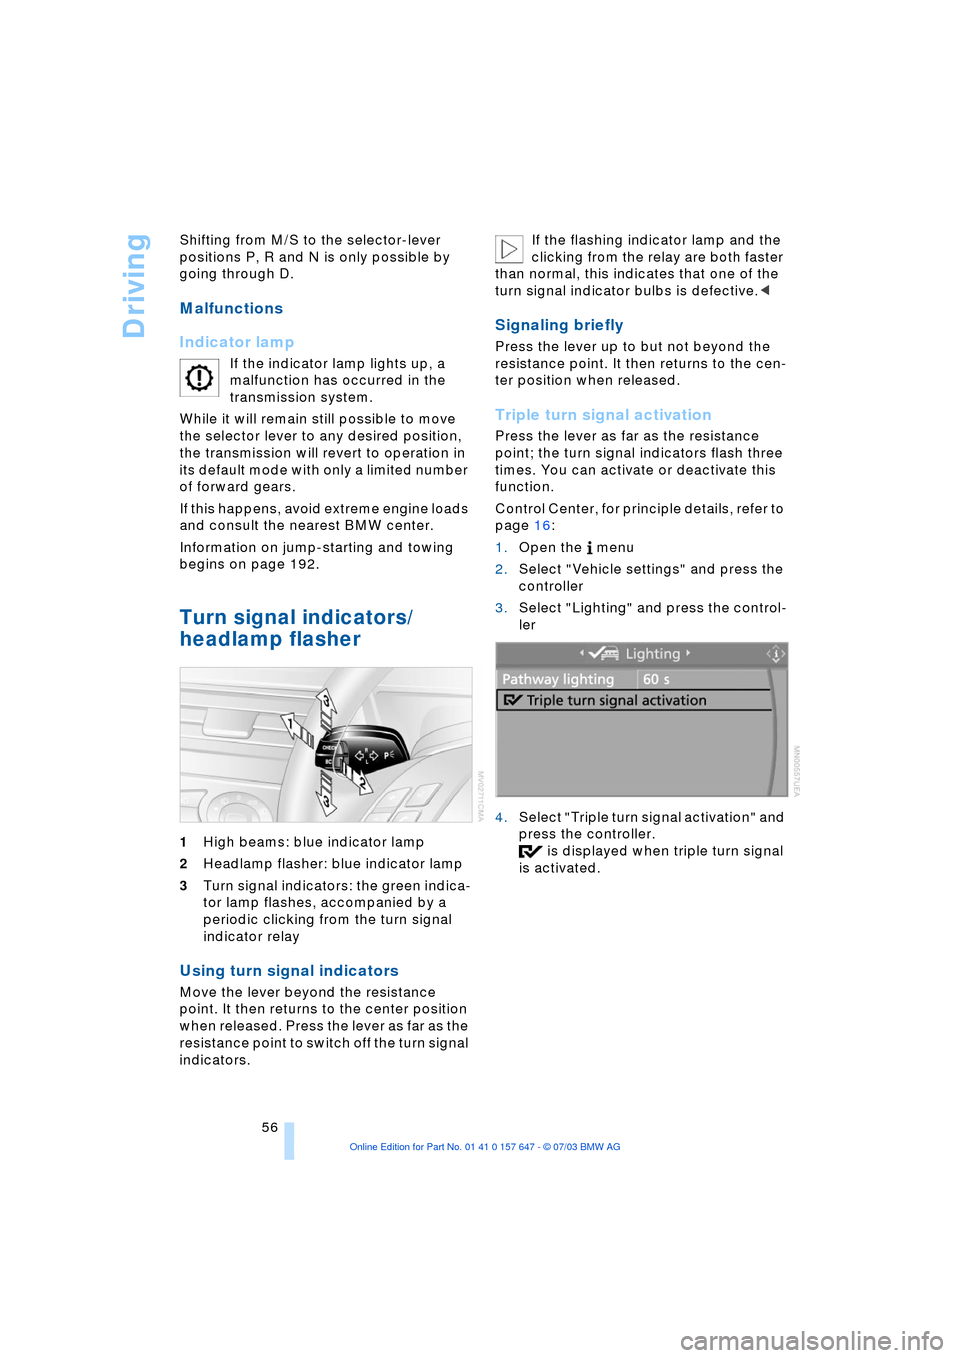
1High beams: blue indicator lamp
2Headlamp flasher: blue indicator lamp
3Turn signal indicators: the green indica-
tor lamp flashes, accompanied by a
periodic clicking from the turn signal
indicator relay
Using turn signal indicators
Move the lever beyond the resistance
point. It then returns to the center position
when released. Press the lever as far as the
resistance point to switch off the turn signal
indicators. If the flashing indicator lamp and the
clicking from the relay are both faster
than normal, this indicates that one of the
turn signal indicator bulbs is defective.<
Signaling briefly
Press the lever up to but not beyond the
resistance point. It then returns to the cen-
ter position when released.
Triple turn signal activation
Press the lever as far as the resistance
point; the turn signal indicators flash three
times. You can activate or deactivate this
function.
Control Center, for principle details, refer to
page 16:
1.Open the menu
2.Select "Vehicle settings" and press the
controller
3.Select "Lighting" and press the control-
ler
4.Select "Triple turn signal activation" and
press the controller.
is displayed when triple turn signal
is activated.
Page 64 of 220
Driving
62
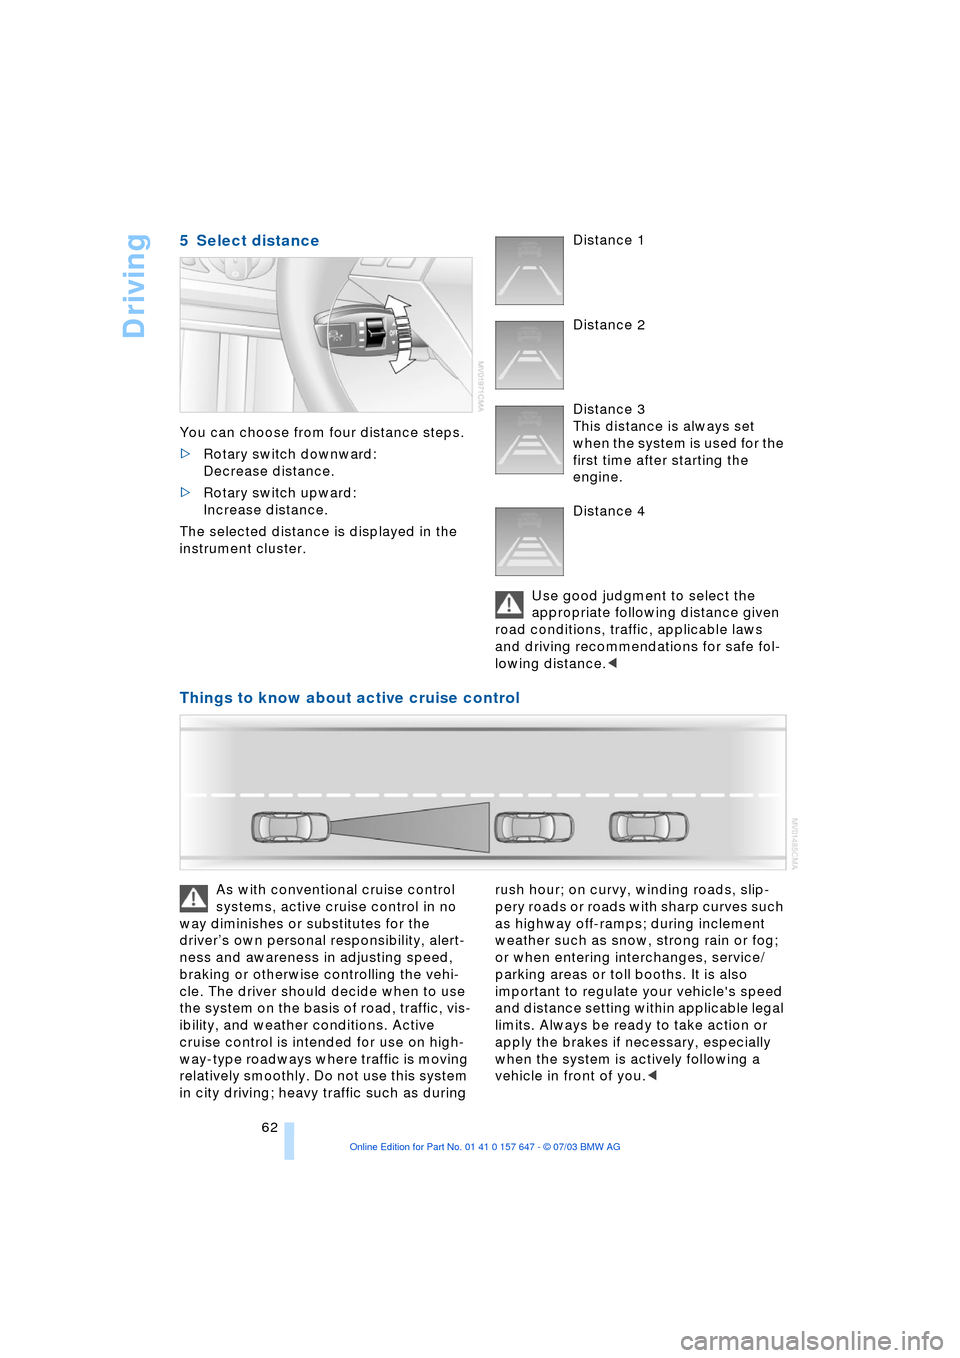
5 Select distance
You can choose from four distance steps.
>Rotary switch downward:
Decrease distance.
>Rotary switch upward:
Increase distance.
The selected distance is displayed in the
instrument cluster. Distance 1
Distance 2
Distance 3
This distance is always set
when the system is used for the
first time after starting the
engine.
Distance 4
Use good judgment to select the
appropriate following distance given
road conditions, traffic, applicable laws
and driving recommendations for safe fol-
lowing distance.<
Things to know about active cruise control
As with conventional cruise control
systems, active cruise control in no
way diminishes or substitutes for the
driverÕs own personal responsibility, alert-
ness and awareness in adjusting speed,
braking or otherwise controlling the vehi-
cle. The driver should decide when to use
the system on the basis of road, traffic, vis-
ibility, and weather conditions. Active
cruise control is intended for use on high-
way-type roadways where traffic is moving
relatively smoothly. Do not use this system
in city driving; heavy traffic such as during rush hour; on curvy, winding roads, slip-
pery roads or roads with sharp curves such
as highway off-ramps; during inclement
weather such as snow, strong rain or fog;
or when entering interchanges, service/
parking areas or toll booths. It is also
important to regulate your vehicle's speed
and distance setting within applicable legal
limits. Always be ready to take action or
apply the brakes if necessary, especially
when the system is actively following a
vehicle in front of you.<
Page 71 of 220
Controls
69Reference
At a glance
Driving tips
Communications
Navigation
Entertainment
Mobility
The symbols also indicate the status of the
service requirement display, refer to
page 67.
Calling up stored messages on the
Control Display
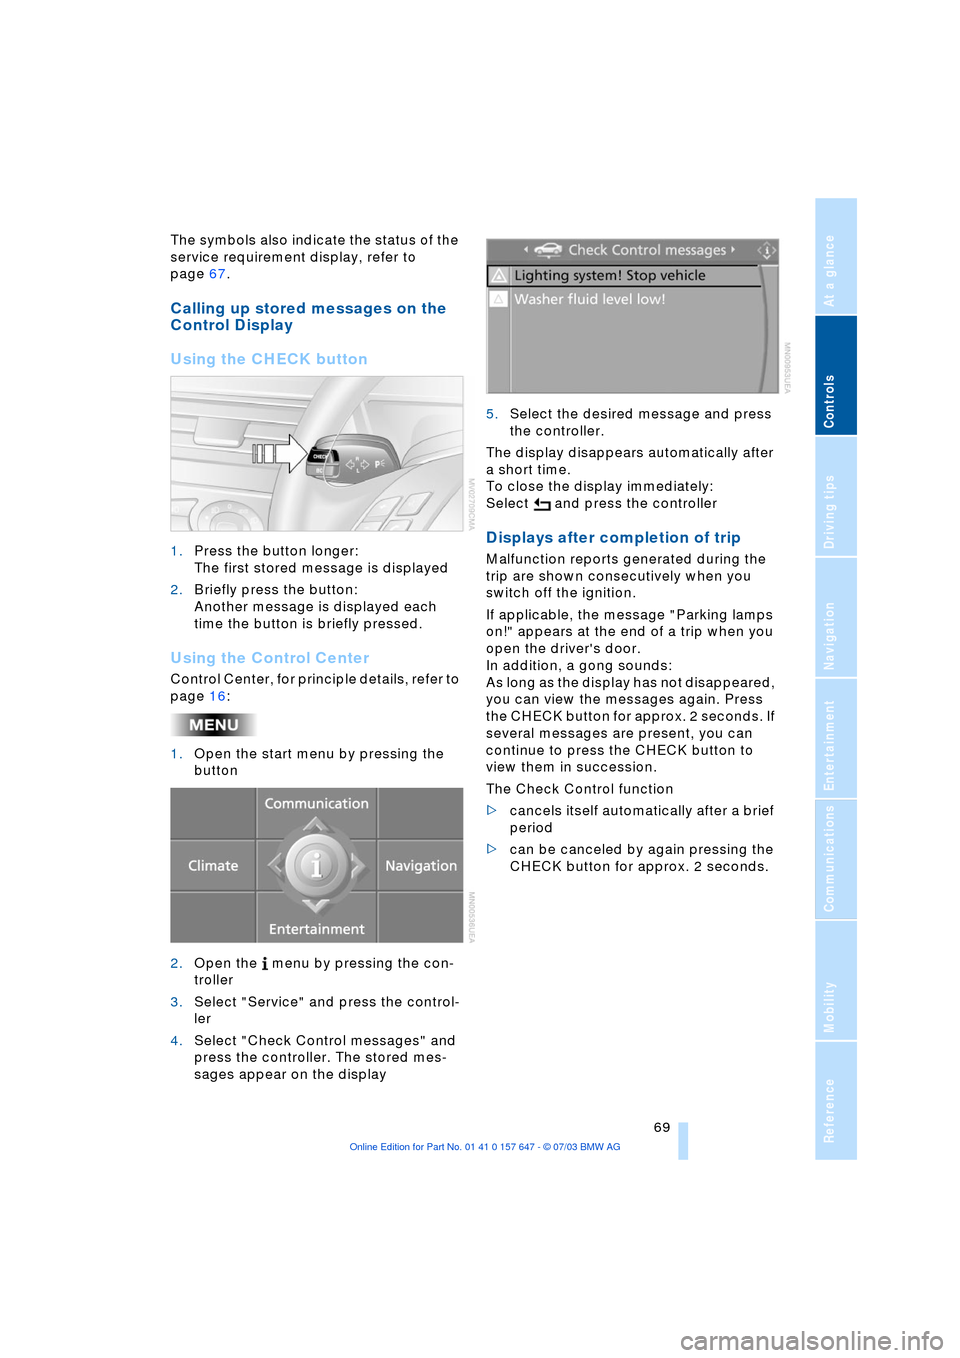
Using the CHECK button
1.Press the button longer:
The first stored message is displayed
2.Briefly press the button:
Another message is displayed each
time the button is briefly pressed.
Using the Control Center
Control Center, for principle details, refer to
page 16:
1.Open the start menu by pressing the
button
2.Open the menu by pressing the con-
troller
3.Select "Service" and press the control-
ler
4.Select "Check Control messages" and
press the controller. The stored mes-
sages appear on the display 5.Select the desired message and press
the controller.
The display disappears automatically after
a short time.
To close the display immediately:
Select and press the controller
Displays after completion of trip
Malfunction reports generated during the
trip are shown consecutively when you
switch off the ignition.
If applicable, the message "Parking lamps
on!" appears at the end of a trip when you
open the driver's door.
In addition, a gong sounds:
As long as the display has not disappeared,
you can view the messages again. Press
the CHECK button for approx. 2 seconds. If
several messages are present, you can
continue to press the CHECK button to
view them in succession.
The Check Control function
>cancels itself automatically after a brief
period
>can be canceled by again pressing the
CHECK button for approx. 2 seconds.
Page 72 of 220
Everything under control
70
Computer
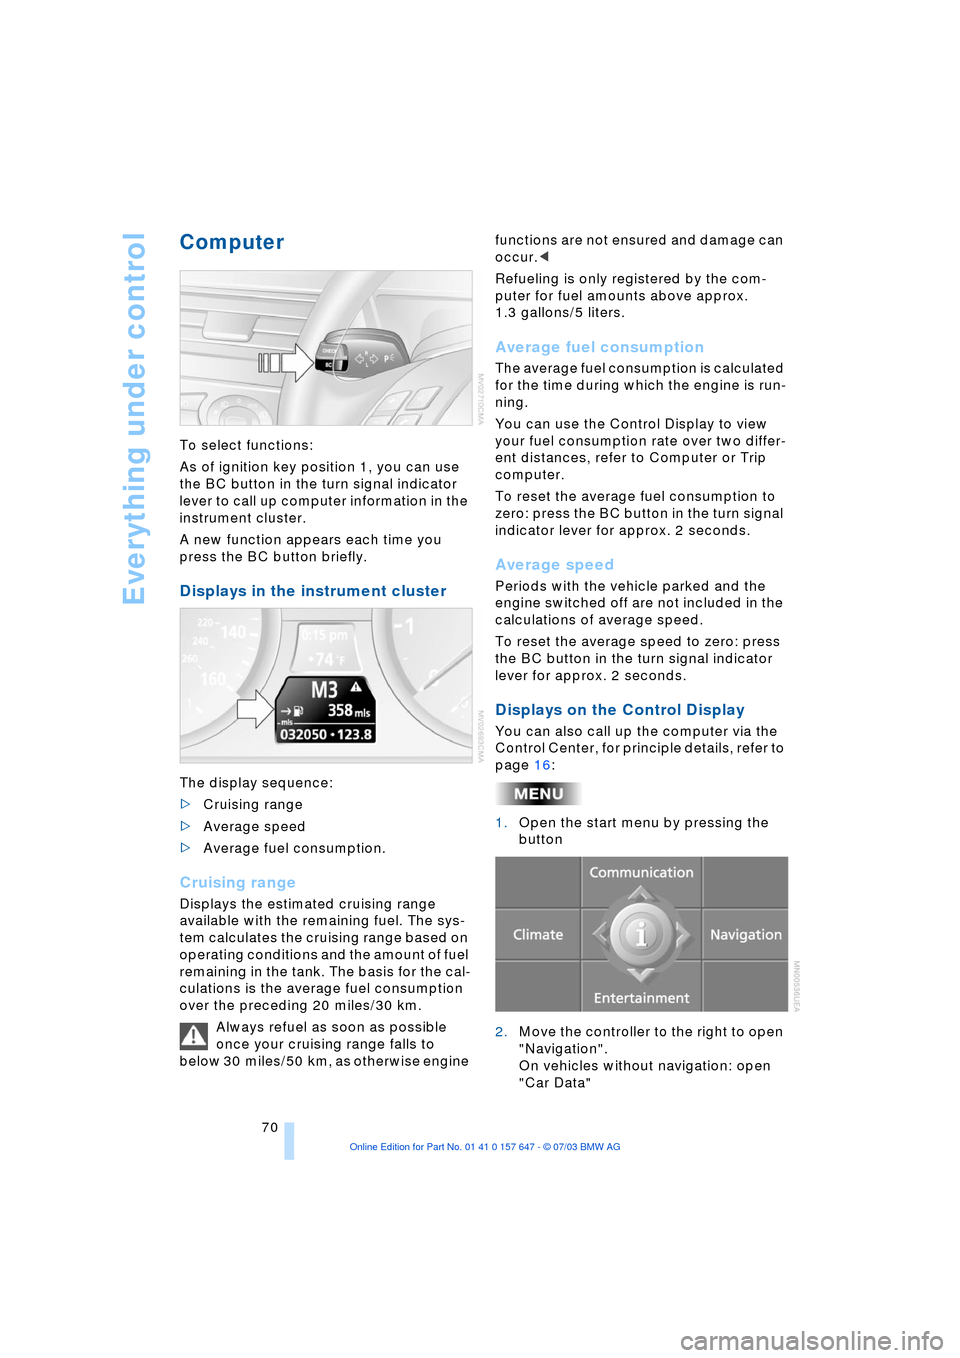
To select functions:
As of ignition key position 1, you can use
the BC button in the turn signal indicator
lever to call up computer information in the
instrument cluster.
A new function appears each time you
press the BC button briefly.
Displays in the instrument cluster
The display sequence:
>Cruising range
>Average speed
>Average fuel consumption.
Cruising range
Displays the estimated cruising range
available with the remaining fuel. The sys-
tem calculates the cruising range based on
operating conditions and the amount of fuel
remaining in the tank. The basis for the cal-
culations is the average fuel consumption
over the preceding 20 miles/30 km.
Always refuel as soon as possible
once your cruising range falls to
below 30 miles/50 km, as otherwise engine functions are not ensured and damage can
occur.<
Refueling is only registered by the com-
puter for fuel amounts above approx.
1.3 gallons/5 liters.
Average fuel consumption
The average fuel consumption is calculated
for the time during which the engine is run-
ning.
You can use the Control Display to view
your fuel consumption rate over two differ-
ent distances, refer to Computer or Trip
computer.
To reset the average fuel consumption to
zero: press the BC button in the turn signal
indicator lever for approx. 2 seconds.
Average speed
Periods with the vehicle parked and the
engine switched off are not included in the
calculations of average speed.
To reset the average speed to zero: press
the BC button in the turn signal indicator
lever for approx. 2 seconds.
Displays on the Control Display
You can also call up the computer via the
Control Center, for principle details, refer to
page 16:
1.Open the start menu by pressing the
button
2.Move the controller to the right to open
"Navigation".
On vehicles without navigation: open
"Car Data"
Page 73 of 220
Controls
71Reference
At a glance
Driving tips
Communications
Navigation
Entertainment
Mobility
3.Select "Car Data" and press the con-
troller.
You have two possibilities to display infor-
mation of the computer:
>Computer
>Trip computer
It is best to use this for driving on vaca-
tion, as when you reset the values to
zero, all the functions are reset together
and then restart.
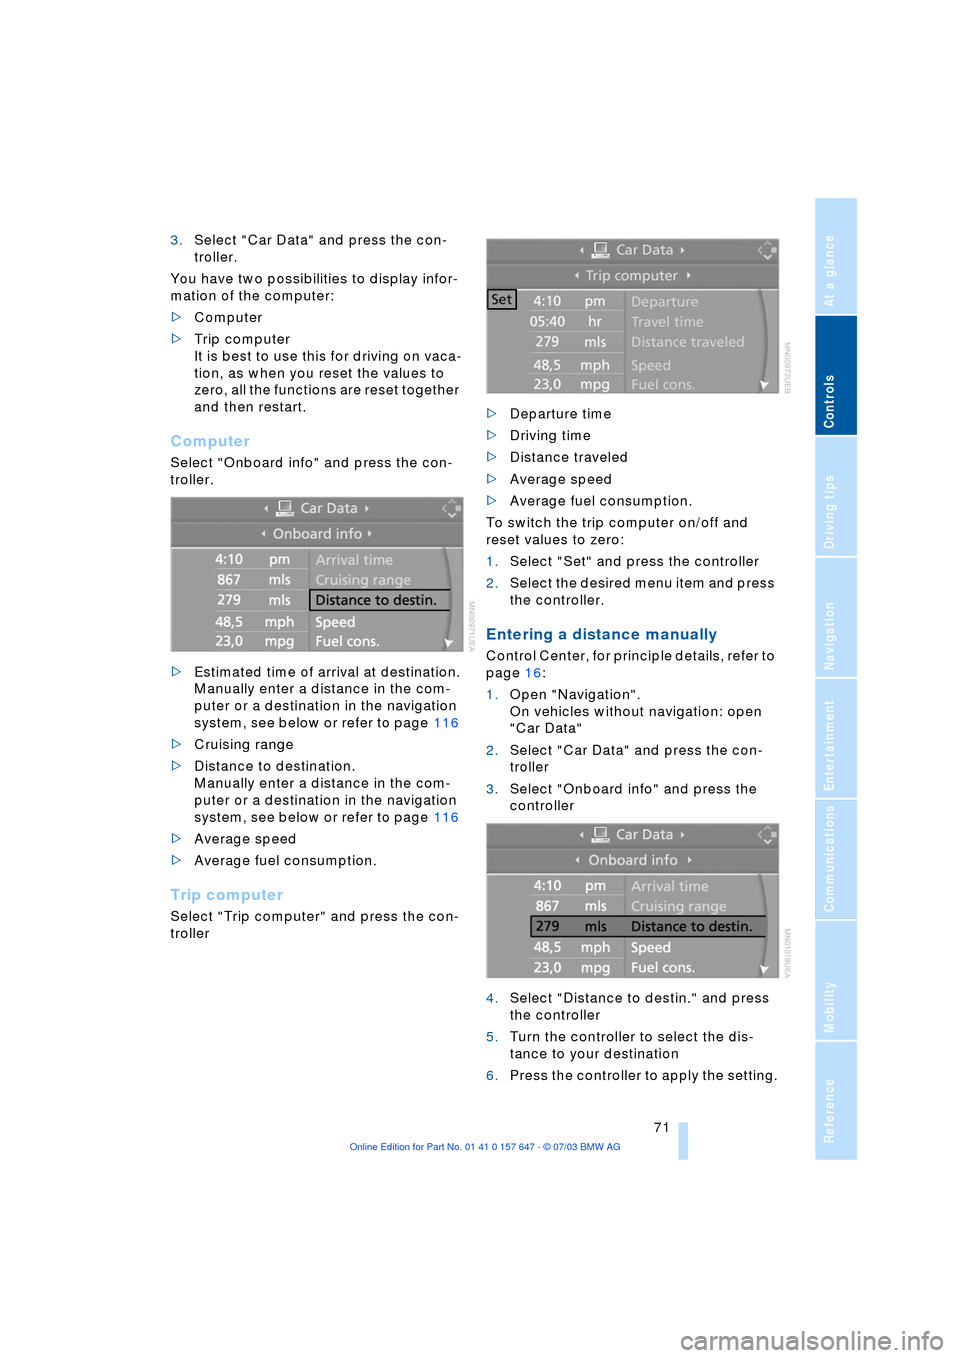
Computer
Select "Onboard info" and press the con-
troller.
>Estimated time of arrival at destination.
Manually enter a distance in the com-
puter or a destination in the navigation
system, see below or refer to page 116
>Cruising range
>Distance to destination.
Manually enter a distance in the com-
puter or a destination in the navigation
system, see below or refer to page 116
>Average speed
>Average fuel consumption.
Trip computer
Select "Trip computer" and press the con-
troller>Departure time
>Driving time
>Distance traveled
>Average speed
>Average fuel consumption.
To switch the trip computer on/off and
reset values to zero:
1.Select "Set" and press the controller
2.Select the desired menu item and press
the controller.
Entering a distance manually
Control Center, for principle details, refer to
page 16:
1.Open "Navigation".
On vehicles without navigation: open
"Car Data"
2.Select "Car Data" and press the con-
troller
3.Select "Onboard info" and press the
controller
4.Select "Distance to destin." and press
the controller
5.Turn the controller to select the dis-
tance to your destination
6.Press the controller to apply the setting.
Page 75 of 220
Controls
73Reference
At a glance
Driving tips
Communications
Navigation
Entertainment
Mobility
3.Select "Limit" and press the controller
4.Select "Select current speed" and
press the controller. The system adopts
your current speed as the limit.
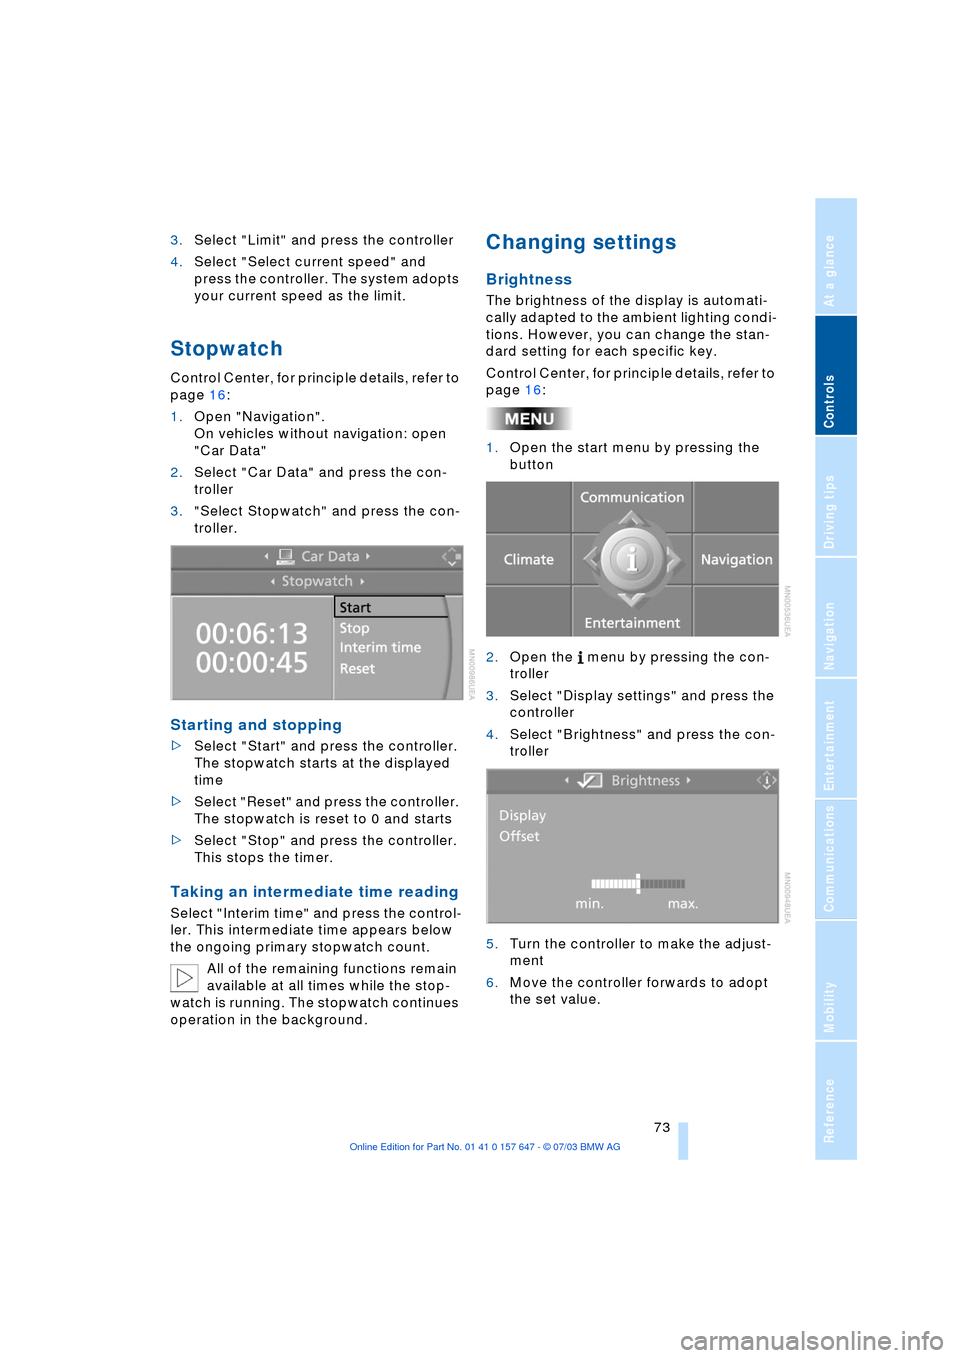
Stopwatch
Control Center, for principle details, refer to
page 16:
1.Open "Navigation".
On vehicles without navigation: open
"Car Data"
2.Select "Car Data" and press the con-
troller
3."Select Stopwatch" and press the con-
troller.
Starting and stopping
>Select "Start" and press the controller.
The stopwatch starts at the displayed
time
>Select "Reset" and press the controller.
The stopwatch is reset to 0 and starts
>Select "Stop" and press the controller.
This stops the timer.
Taking an intermediate time reading
Select "Interim time" and press the control-
ler. This intermediate time appears below
the ongoing primary stopwatch count.
All of the remaining functions remain
available at all times while the stop-
watch is running. The stopwatch continues
operation in the background.
Changing settings
Brightness
The brightness of the display is automati-
cally adapted to the ambient lighting condi-
tions. However, you can change the stan-
dard setting for each specific key.
Control Center, for principle details, refer to
page 16:
1.Open the start menu by pressing the
button
2.Open the menu by pressing the con-
troller
3.Select "Display settings" and press the
controller
4.Select "Brightness" and press the con-
troller
5.Turn the controller to make the adjust-
ment
6.Move the controller forwards to adopt
the set value.
Page 79 of 220
Controls
77Reference
At a glance
Driving tips
Communications
Navigation
Entertainment
Mobility
ence of objects in green before they are
close enough to generate a signal tone.
Control Center, for principle details, refer to
page 16:
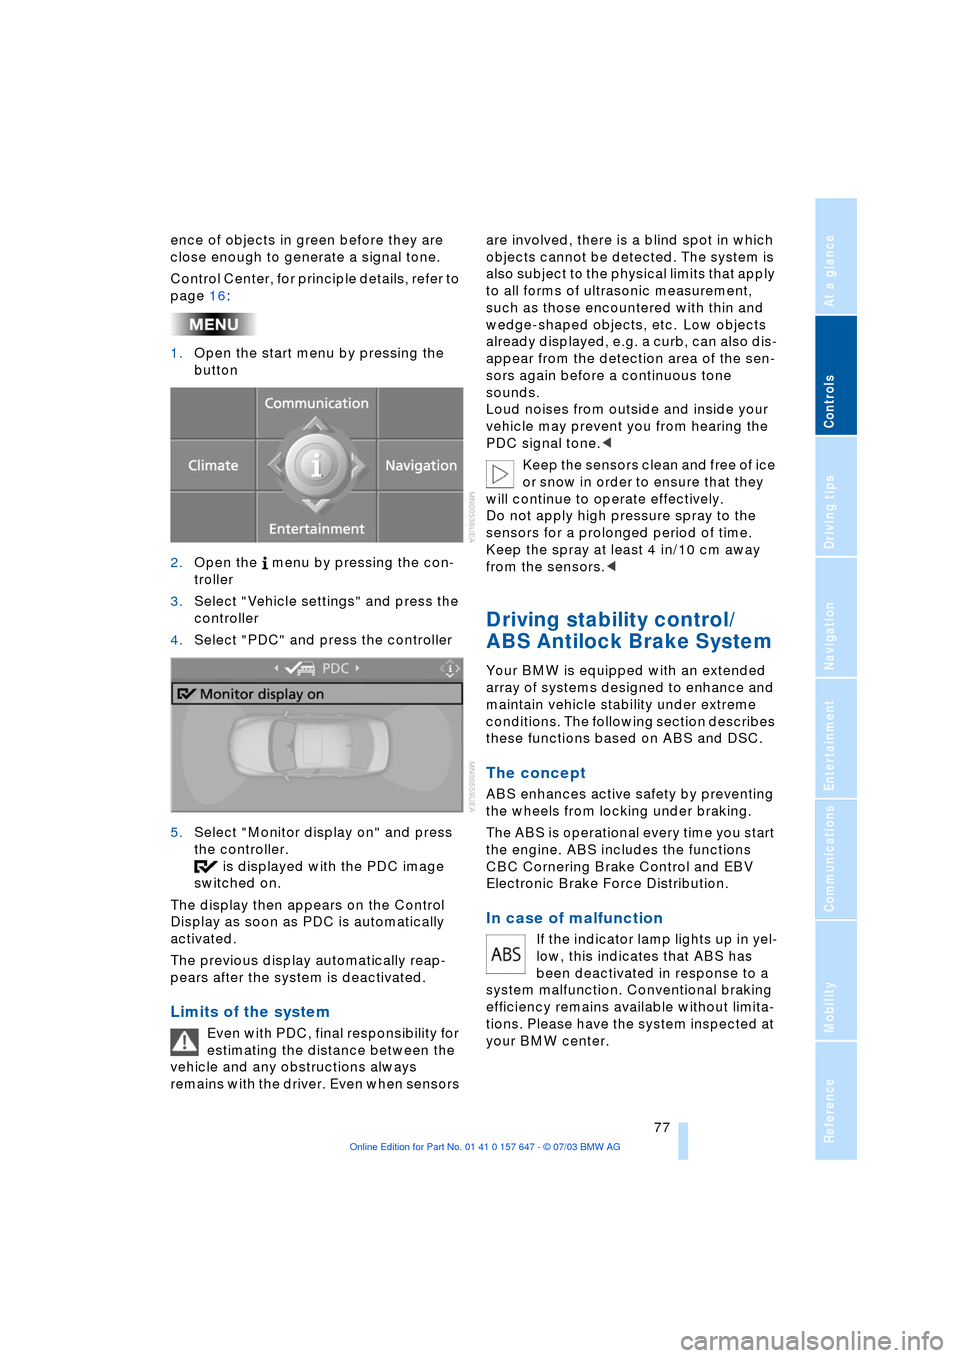
1.Open the start menu by pressing the
button
2.Open the menu by pressing the con-
troller
3.Select "Vehicle settings" and press the
controller
4.Select "PDC" and press the controller
5.Select "Monitor display on" and press
the controller.
is displayed with the PDC image
switched on.
The display then appears on the Control
Display as soon as PDC is automatically
activated.
The previous display automatically reap-
pears after the system is deactivated.
Limits of the system
Even with PDC, final responsibility for
estimating the distance between the
vehicle and any obstructions always
remains with the driver. Even when sensors are involved, there is a blind spot in which
objects cannot be detected. The system is
also subject to the physical limits that apply
to all forms of ultrasonic measurement,
such as those encountered with thin and
wedge-shaped objects, etc. Low objects
already displayed, e.g. a curb, can also dis-
appear from the detection area of the sen-
sors again before a continuous tone
sounds.
Loud noises from outside and inside your
vehicle may prevent you from hearing the
PDC signal tone.<
Keep the sensors clean and free of ice
or snow in order to ensure that they
will continue to operate effectively.
Do not apply high pressure spray to the
sensors for a prolonged period of time.
Keep the spray at least 4 in/10 cm away
from the sensors.<
Driving stability control/
ABS Antilock Brake System
Your BMW is equipped with an extended
array of systems designed to enhance and
maintain vehicle stability under extreme
conditions. The following section describes
these functions based on ABS and DSC.
The concept
ABS enhances active safety by preventing
the wheels from locking under braking.
The ABS is operational every time you start
the engine. ABS includes the functions
CBC Cornering Brake Control and EBV
Electronic Brake Force Distribution.
In case of malfunction
If the indicator lamp lights up in yel-
low, this indicates that ABS has
been deactivated in response to a
system malfunction. Conventional braking
efficiency remains available without limita-
tions. Please have the system inspected at
your BMW center.
Page 80 of 220

Technology for comfort, convenience and safety
78
CBC Cornering Brake Control
CBC is a supplement to ABS. It provides
further enhancements in vehicle stability
and steering response during lane changes
and cornering at high rates of lateral accel-
eration.
EBV Electronic Brake Force
Distribution
EBV controls the brake system's applica-
tion pressure at the rear wheels to ensure
stable deceleration.
In case of malfunction
If the brake system warning lamp
lights up in red, appearing together
with the yellow indicator lamps for
ABS and DSC:
The driving stability control has
failed.
If all three lamps light up yellow:
Fault in the driving stability control.
The EBV electronic brake-force distribution
is active.
While you may continue, you should
remember to proceed cautiously and drive
defensively while avoiding full brake appli-
cations.
Please have the system checked at the
nearest BMW center.
If a message appears on the Control Dis-
play, please note the supplementary infor-
mation.
You can find more information on the
Check Control starting on page 68.
Indicator and warning lamps for
Canadian models.
Driving stability control/
DSC Dynamic Stability
Control
The concept
DSC maintains vehicle stability, even in
critical driving situations.
The DSC is operational every time you start
the engine. DSC includes the functionality
of the DTC Dynamic Traction Control and
DBC Dynamic Brake Control, refer to
page 79.
The system optimizes vehicle stability dur-
ing acceleration and when starting from a
full stop, as well as optimizing traction. The
system recognizes any tendency for the
vehicle to assume an unstable attitude
such as oversteer or understeer; it then
counteracts this tendency with a combina-
tion of graduated reductions in engine
torque and selective braking intervention at
individual wheels. DSC provides optimal
stability within the limits defined by the
laws of physics.
Indicator lamps
The indicator lamp in the instrument
cluster goes out soon after you start
the engine.
If the indicator lamp flashes:
DSC is regulating the drive and braking
forces.
If the indicator lamp lights up permanently:
DSC has been switched off using the but-
ton.
If the indicator lamp and the brake
warning lamp light up permanently:
Malfunction in DSC, DTC and DBC.
When the system is off, the stability main-
tenance functions described above are no
longer available. The vehicle will remain
completely operational, however, without
DSC.
Please respond to any malfunctions by
referring the problem to your BMW center.