2004 BMW 545I SEDAN ESP
[x] Cancel search: ESPPage 40 of 220
Adjustments
38
Lumbar support* adjustment
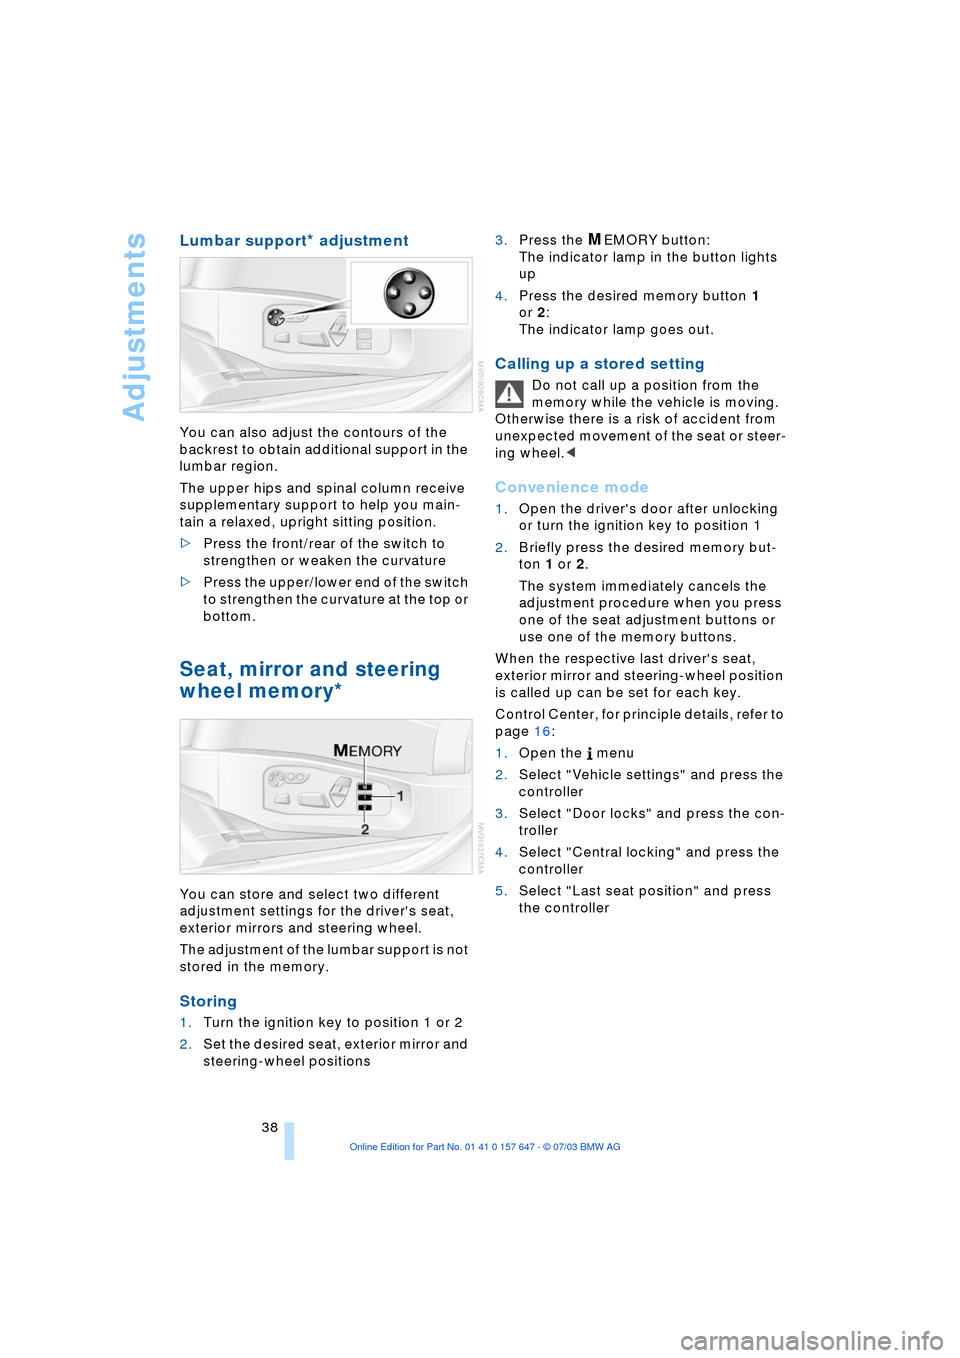
You can also adjust the contours of the
backrest to obtain additional support in the
lumbar region.
The upper hips and spinal column receive
supplementary support to help you main-
tain a relaxed, upright sitting position.
>Press the front/rear of the switch to
strengthen or weaken the curvature
>Press the upper/lower end of the switch
to strengthen the curvature at the top or
bottom.
Seat, mirror and steering
wheel memory*
You can store and select two different
adjustment settings for the driver's seat,
exterior mirrors and steering wheel.
The adjustment of the lumbar support is not
stored in the memory.
Storing
1.Turn the ignition key to position 1 or 2
2.Set the desired seat, exterior mirror and
steering-wheel positions 3.Press the
MEMORY button:
The indicator lamp in the button lights
up
4.Press the desired memory button 1
or 2:
The indicator lamp goes out.
Calling up a stored setting
Do not call up a position from the
memory while the vehicle is moving.
Otherwise there is a risk of accident from
unexpected movement of the seat or steer-
ing wheel.<
Convenience mode
1.Open the driver's door after unlocking
or turn the ignition key to position 1
2.Briefly press the desired memory but-
ton 1 or 2.
The system immediately cancels the
adjustment procedure when you press
one of the seat adjustment buttons or
use one of the memory buttons.
When the respective last driver's seat,
exterior mirror and steering-wheel position
is called up can be set for each key.
Control Center, for principle details, refer to
page 16:
1.Open the menu
2.Select "Vehicle settings" and press the
controller
3.Select "Door locks" and press the con-
troller
4.Select "Central locking" and press the
controller
5.Select "Last seat position" and press
the controller
Page 42 of 220
Adjustments
40
Comfort seat
Setting the side extensions
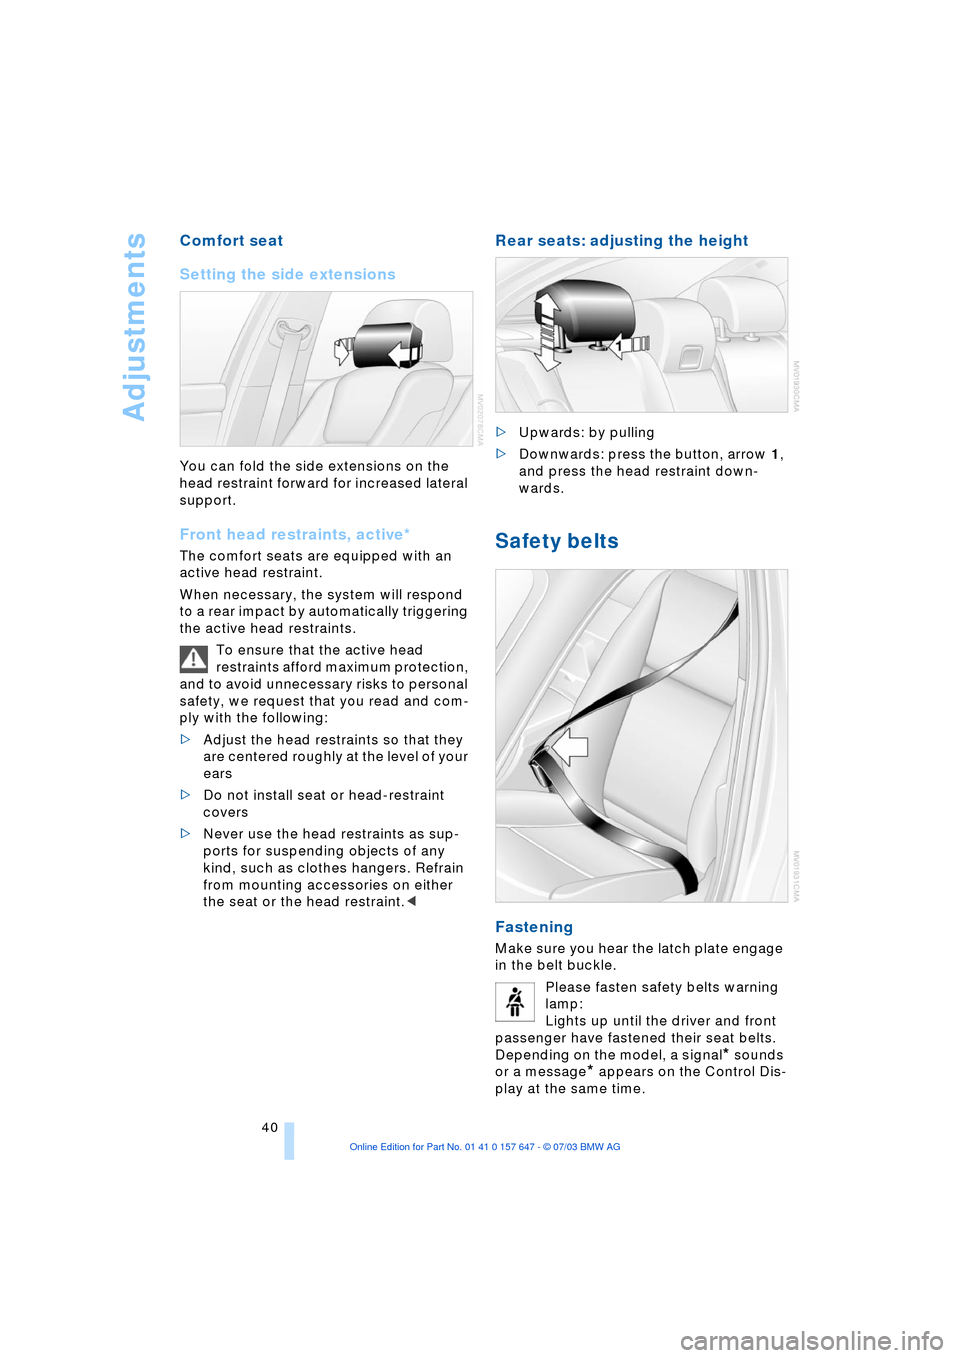
You can fold the side extensions on the
head restraint forward for increased lateral
support.
Front head restraints, active*
The comfort seats are equipped with an
active head restraint.
When necessary, the system will respond
to a rear impact by automatically triggering
the active head restraints.
To ensure that the active head
restraints afford maximum protection,
and to avoid unnecessary risks to personal
safety, we request that you read and com-
ply with the following:
>Adjust the head restraints so that they
are centered roughly at the level of your
ears
>Do not install seat or head-restraint
covers
>Never use the head restraints as sup-
ports for suspending objects of any
kind, such as clothes hangers. Refrain
from mounting accessories on either
the seat or the head restraint.<
Rear seats: adjusting the height
>Upwards: by pulling
>Downwards: press the button, arrow 1,
and press the head restraint down-
wards.
Safety belts
Fastening
Make sure you hear the latch plate engage
in the belt buckle.
Please fasten safety belts warning
lamp:
Lights up until the driver and front
passenger have fastened their seat belts.
Depending on the model, a signal
* sounds
or a message
* appears on the Control Dis-
play at the same time.
Page 45 of 220
Controls
43Reference
At a glance
Driving tips
Communications
Navigation
Entertainment
Mobility
You can also adjust the mirrors manually by
pressing against the outer edges of their
lenses.
Storing the mirror positions, refer to Seat,
mirror and steering wheel memory on
page 38.
The mirror on the passenger's side
features a lens with a more convex
surface than the mirror installed on the
driver's side. When estimating the distance
between yourself and other traffic, bear in
mind that the objects reflected in the mirror
are closer than they appear. This means
that estimations of the distance to following
traffic should not be regarded as precise.<
Self-defrosting mirrors
Both exterior mirrors are automatically
heated in ignition key position 2.
Interior rearview mirror
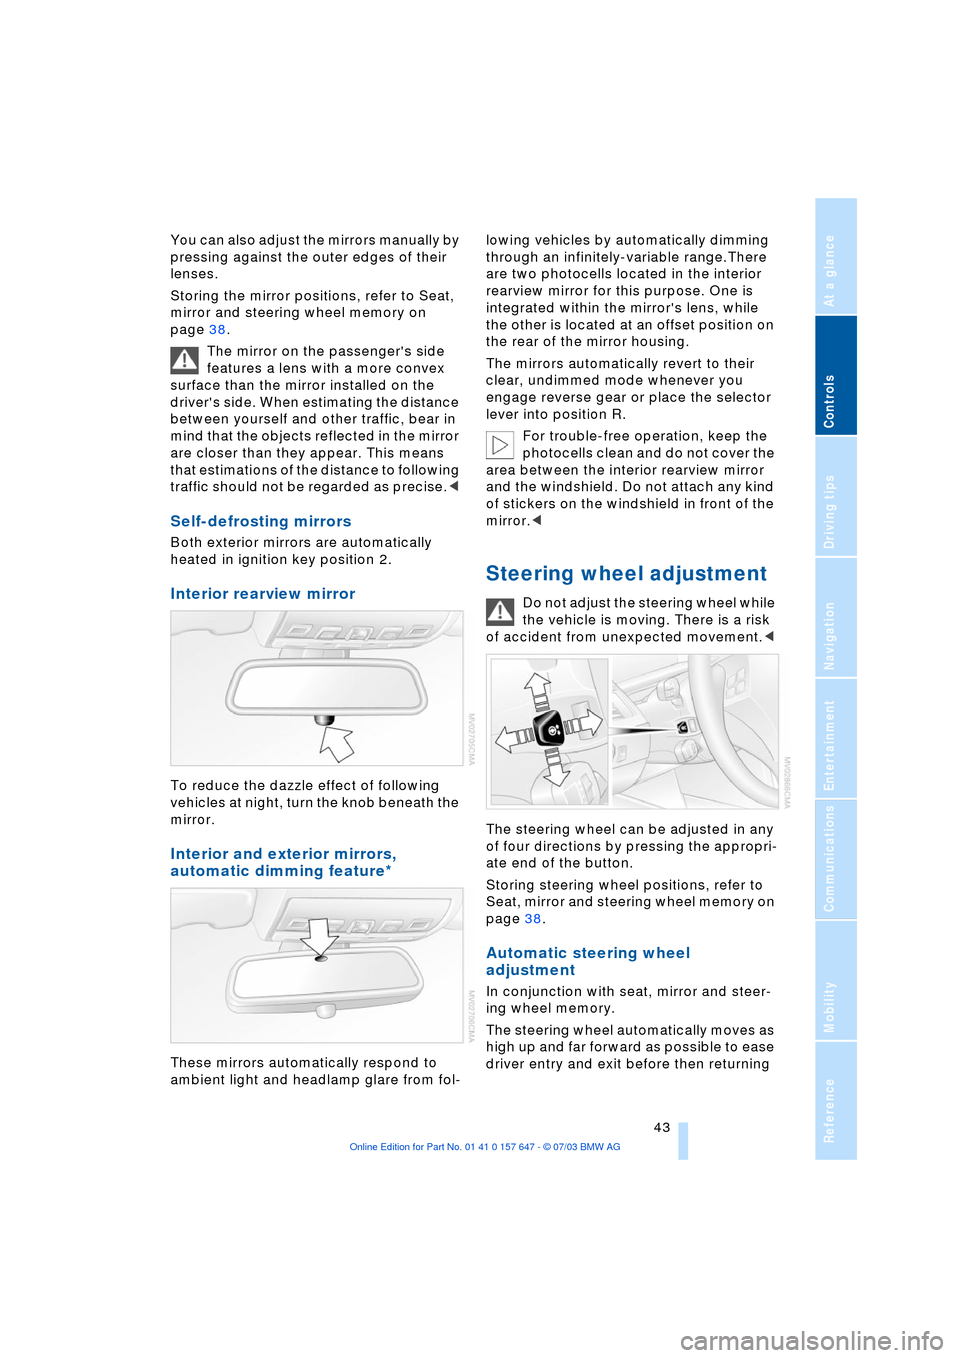
To reduce the dazzle effect of following
vehicles at night, turn the knob beneath the
mirror.
Interior and exterior mirrors,
automatic dimming feature*
These mirrors automatically respond to
ambient light and headlamp glare from fol-lowing vehicles by automatically dimming
through an infinitely-variable range.There
are two photocells located in the interior
rearview mirror for this purpose. One is
integrated within the mirror's lens, while
the other is located at an offset position on
the rear of the mirror housing.
The mirrors automatically revert to their
clear, undimmed mode whenever you
engage reverse gear or place the selector
lever into position R.
For trouble-free operation, keep the
photocells clean and do not cover the
area between the interior rearview mirror
and the windshield. Do not attach any kind
of stickers on the windshield in front of the
mirror.<
Steering wheel adjustment
Do not adjust the steering wheel while
the vehicle is moving. There is a risk
of accident from unexpected movement.<
The steering wheel can be adjusted in any
of four directions by pressing the appropri-
ate end of the button.
Storing steering wheel positions, refer to
Seat, mirror and steering wheel memory on
page 38.
Automatic steering wheel
adjustment
In conjunction with seat, mirror and steer-
ing wheel memory.
The steering wheel automatically moves as
high up and far forward as possible to ease
driver entry and exit before then returning
Page 48 of 220
Transporting children safely
46
Installing child-restraint
systems
Before installing any child-restraint system
or child seat, read the following:
Observe the child-restraint system
manufacturer's instructions for instal-
lation and use. Otherwise the degree of
protection can be reduced.
Following an accident, have all parts of the
affected vehicle safety-belt system
checked and, if necessary, replaced by a
BMW center.<
Commercially-available child-restraint sys-
tems are designed to be secured with a lap
belt or with the lap belt portion of a combi-
nation lap/shoulder belt. Improperly or
inadequately installed restraint systems
can increase the risk of injury to children.
Always read and follow the instructions that
come with the system.
Child seat security
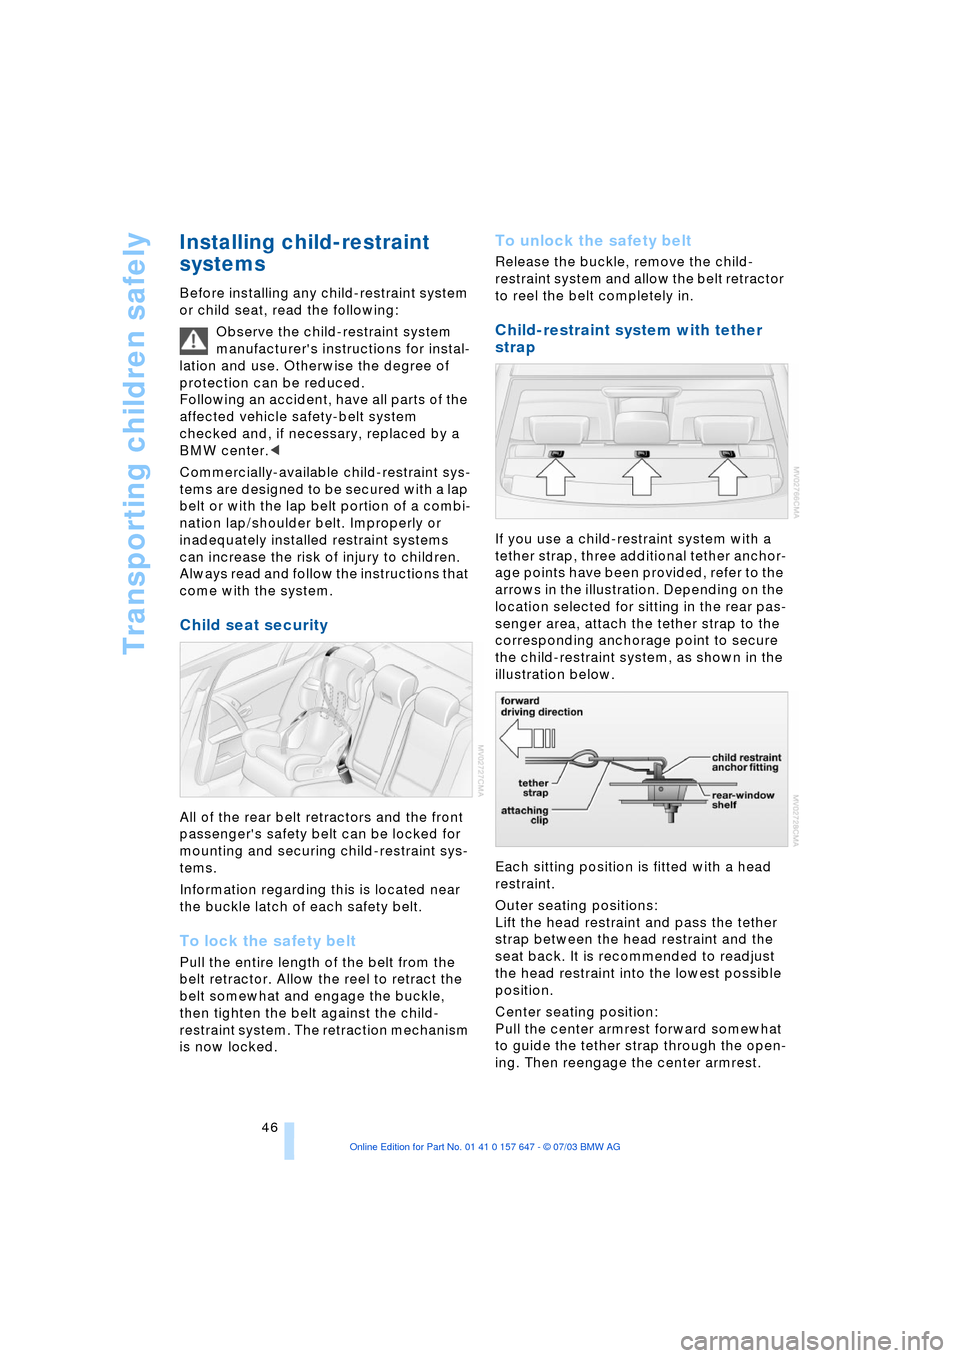
All of the rear belt retractors and the front
passenger's safety belt can be locked for
mounting and securing child-restraint sys-
tems.
Information regarding this is located near
the buckle latch of each safety belt.
To lock the safety belt
Pull the entire length of the belt from the
belt retractor. Allow the reel to retract the
belt somewhat and engage the buckle,
then tighten the belt against the child-
restraint system. The retraction mechanism
is now locked.
To unlock the safety belt
Release the buckle, remove the child-
restraint system and allow the belt retractor
to reel the belt completely in.
Child-restraint system with tether
strap
If you use a child-restraint system with a
tether strap, three additional tether anchor-
age points have been provided, refer to the
arrows in the illustration. Depending on the
location selected for sitting in the rear pas-
senger area, attach the tether strap to the
corresponding anchorage point to secure
the child-restraint system, as shown in the
illustration below.
Each sitting position is fitted with a head
restraint.
Outer seating positions:
Lift the head restraint and pass the tether
strap between the head restraint and the
seat back. It is recommended to readjust
the head restraint into the lowest possible
position.
Center seating position:
Pull the center armrest forward somewhat
to guide the tether strap through the open-
ing. Then reengage the center armrest.
Page 51 of 220
Controls
49Reference
At a glance
Driving tips
Communications
Navigation
Entertainment
Mobility
Driving
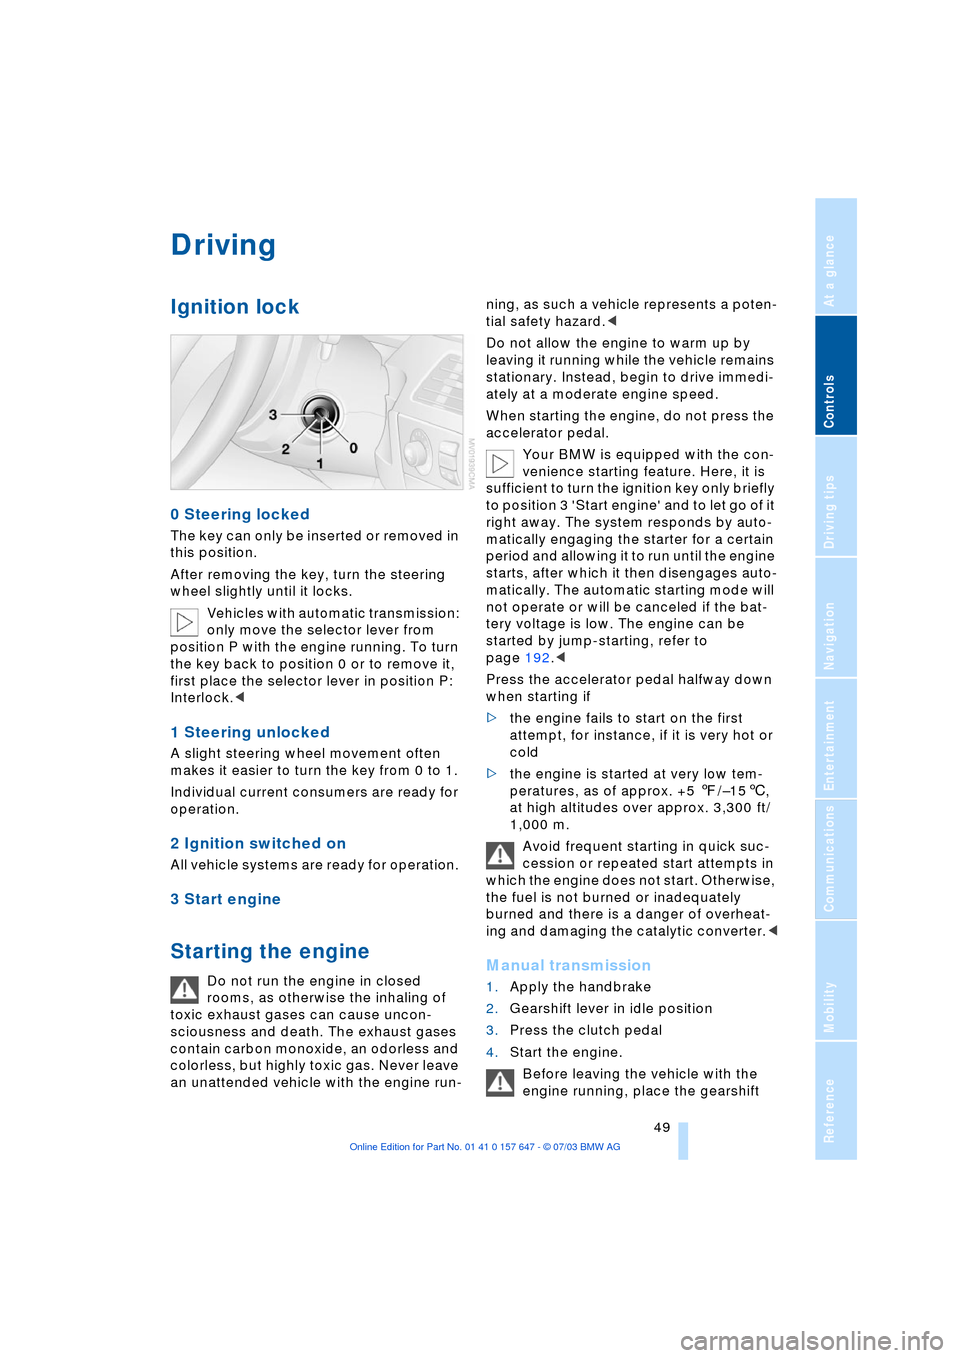
Ignition lock
0 Steering locked
The key can only be inserted or removed in
this position.
After removing the key, turn the steering
wheel slightly until it locks.
Vehicles with automatic transmission:
only move the selector lever from
position P with the engine running. To turn
the key back to position 0 or to remove it,
first place the selector lever in position P:
Interlock.<
1 Steering unlocked
A slight steering wheel movement often
makes it easier to turn the key from 0 to 1.
Individual current consumers are ready for
operation.
2 Ignition switched on
All vehicle systems are ready for operation.
3 Start engine
Starting the engine
Do not run the engine in closed
rooms, as otherwise the inhaling of
toxic exhaust gases can cause uncon-
sciousness and death. The exhaust gases
contain carbon monoxide, an odorless and
colorless, but highly toxic gas. Never leave
an unattended vehicle with the engine run-ning, as such a vehicle represents a poten-
tial safety hazard.<
Do not allow the engine to warm up by
leaving it running while the vehicle remains
stationary. Instead, begin to drive immedi-
ately at a moderate engine speed.
When starting the engine, do not press the
accelerator pedal.
Your BMW is equipped with the con-
venience starting feature. Here, it is
sufficient to turn the ignition key only briefly
to position 3 'Start engine' and to let go of it
right away. The system responds by auto-
matically engaging the starter for a certain
period and allowing it to run until the engine
starts, after which it then disengages auto-
matically. The automatic starting mode will
not operate or will be canceled if the bat-
tery voltage is low. The engine can be
started by jump-starting, refer to
page 192.<
Press the accelerator pedal halfway down
when starting if
>the engine fails to start on the first
attempt, for instance, if it is very hot or
cold
>the engine is started at very low tem-
peratures, as of approx. +5 7/Ð156,
at high altitudes over approx. 3,300 ft/
1,000 m.
Avoid frequent starting in quick suc-
cession or repeated start attempts in
which the engine does not start. Otherwise,
the fuel is not burned or inadequately
burned and there is a danger of overheat-
ing and damaging the catalytic converter.
2.Gearshift lever in idle position
3.Press the clutch pedal
4.Start the engine.
Before leaving the vehicle with the
engine running, place the gearshift
Page 56 of 220
Driving
54
Dynamic Driving Control
With Dynamic Driving Control, you can
choose between a standard and a sport
program.
Sport program
>The engine responds more spontane-
ously to accelerator pedal movements
>The steering becomes more direct and
provides even better road contact.
In addition, with SMG and an automatic
transmission:
>The shifting times are shorter
>The engine speed range is used opti-
mally in the Drive mode.
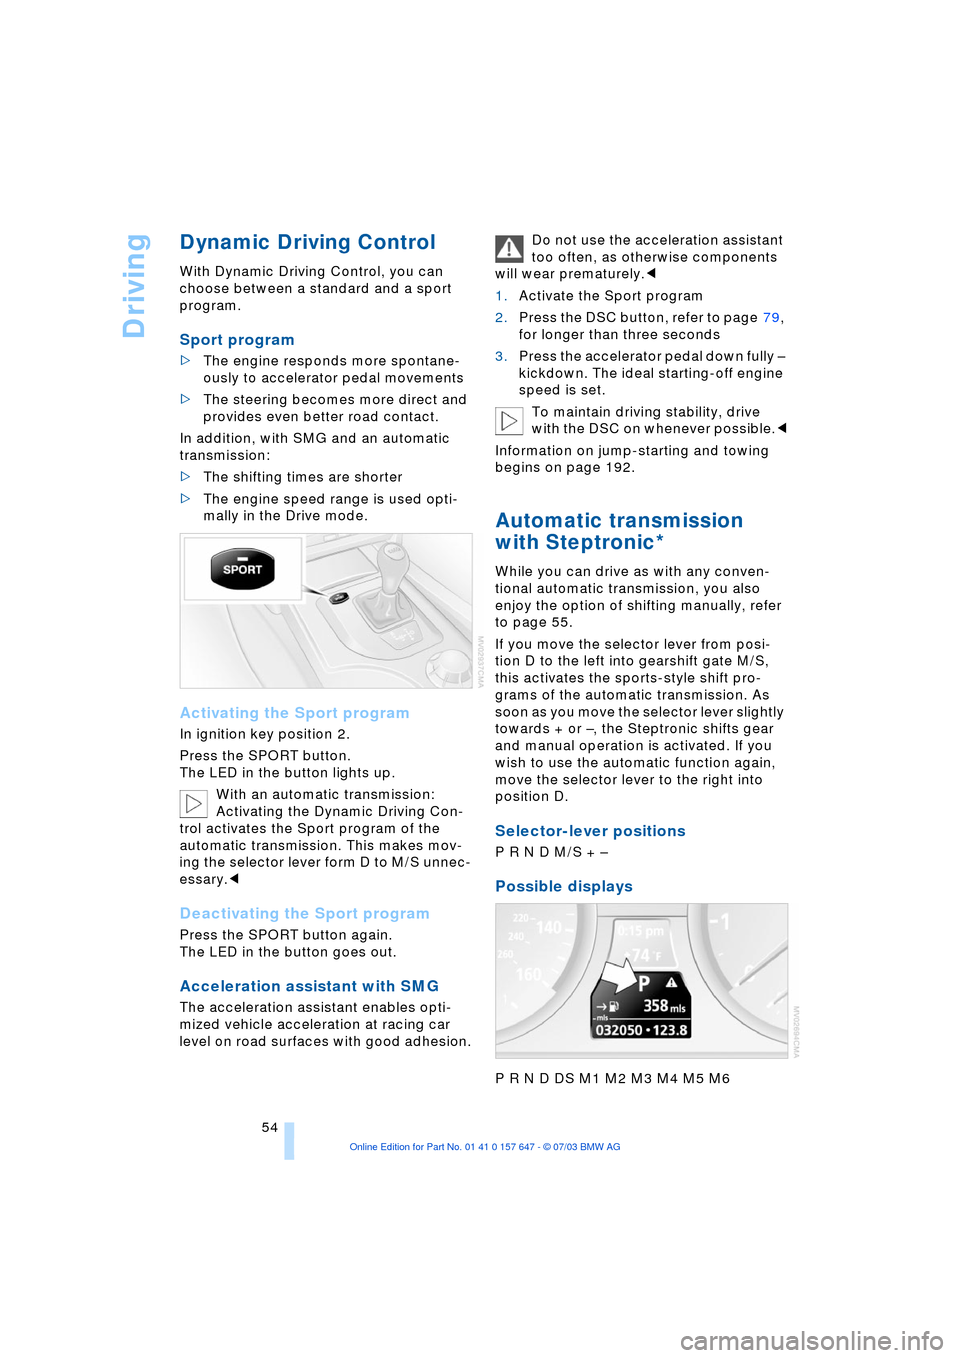
Activating the Sport program
In ignition key position 2.
Press the SPORT button.
The LED in the button lights up.
With an automatic transmission:
Activating the Dynamic Driving Con-
trol activates the Sport program of the
automatic transmission. This makes mov-
ing the selector lever form D to M/S unnec-
essary.<
Deactivating the Sport program
Press the SPORT button again.
The LED in the button goes out.
Acceleration assistant with SMG
The acceleration assistant enables opti-
mized vehicle acceleration at racing car
level on road surfaces with good adhesion.Do not use the acceleration assistant
too often, as otherwise components
will wear prematurely.<
1.Activate the Sport program
2.Press the DSC button, refer to page 79,
for longer than three seconds
3.Press the accelerator pedal down fully Ð
kickdown. The ideal starting-off engine
speed is set.
To maintain driving stability, drive
with the DSC on whenever possible.<
Information on jump-starting and towing
begins on page 192.
Automatic transmission
with Steptronic*
While you can drive as with any conven-
tional automatic transmission, you also
enjoy the option of shifting manually, refer
to page 55.
If you move the selector lever from posi-
tion D to the left into gearshift gate M/S,
this activates the sports-style shift pro-
grams of the automatic transmission. As
soon as you move the selector lever slightly
towards + or Ð, the Steptronic shifts gear
and manual operation is activated. If you
wish to use the automatic function again,
move the selector lever to the right into
position D.
Selector-lever positions
P R N D M/S + Ð
Possible displays
P R N D DS M1 M2 M3 M4 M5 M6
Page 59 of 220
Controls
57Reference
At a glance
Driving tips
Communications
Navigation
Entertainment
Mobility
Wiper system
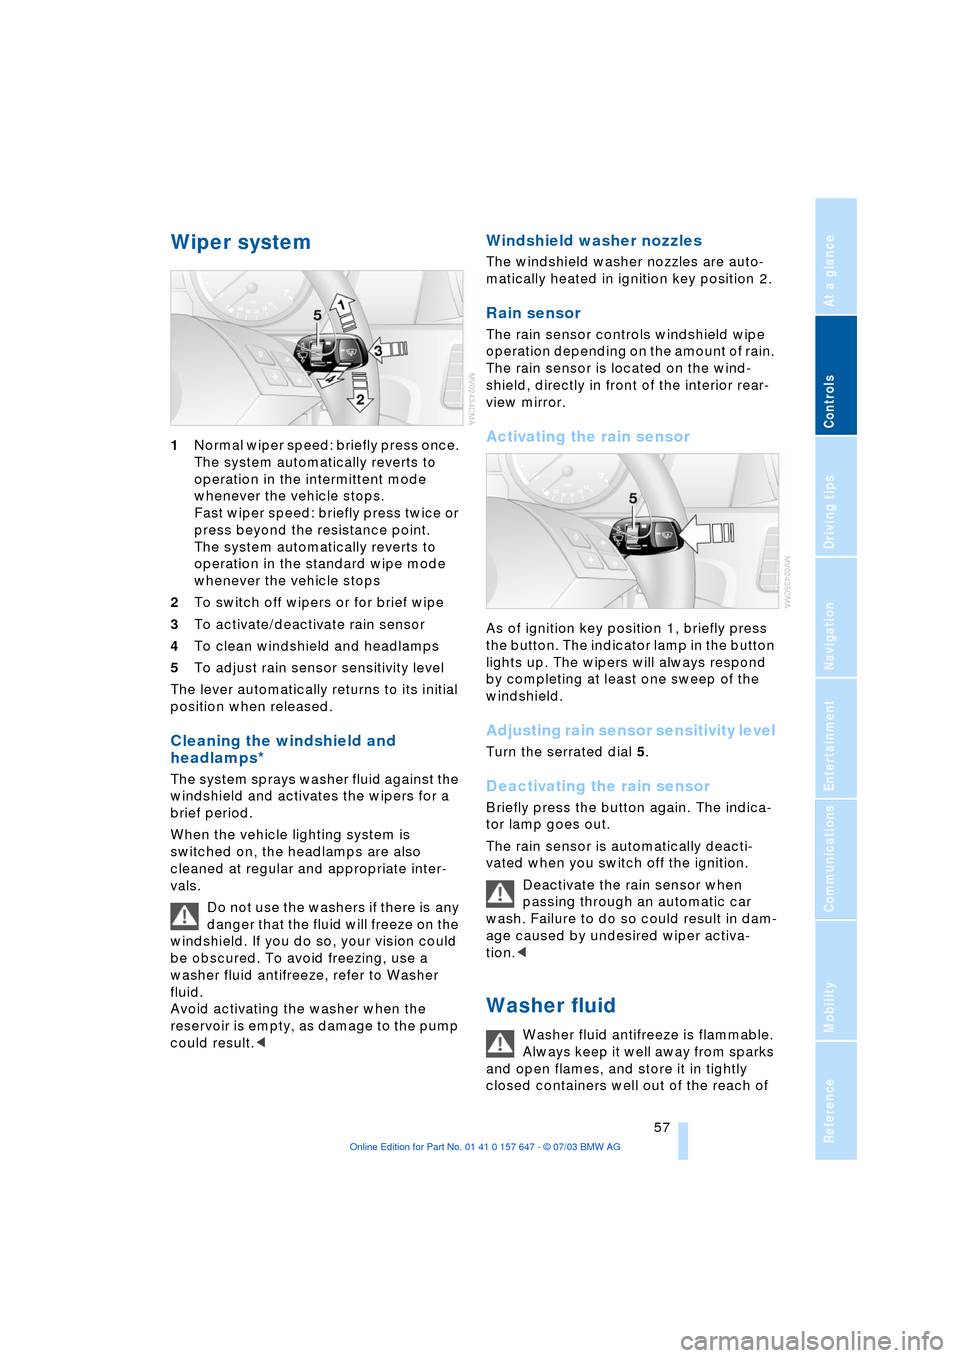
1Normal wiper speed: briefly press once.
The system automatically reverts to
operation in the intermittent mode
whenever the vehicle stops.
Fast wiper speed: briefly press twice or
press beyond the resistance point.
The system automatically reverts to
operation in the standard wipe mode
whenever the vehicle stops
2To switch off wipers or for brief wipe
3To activate/deactivate rain sensor
4To clean windshield and headlamps
5To adjust rain sensor sensitivity level
The lever automatically returns to its initial
position when released.
Cleaning the windshield and
headlamps*
The system sprays washer fluid against the
windshield and activates the wipers for a
brief period.
When the vehicle lighting system is
switched on, the headlamps are also
cleaned at regular and appropriate inter-
vals.
Do not use the washers if there is any
danger that the fluid will freeze on the
windshield. If you do so, your vision could
be obscured. To avoid freezing, use a
washer fluid antifreeze, refer to Washer
fluid.
Avoid activating the washer when the
reservoir is empty, as damage to the pump
could result.<
Windshield washer nozzles
The windshield washer nozzles are auto-
matically heated in ignition key position 2.
Rain sensor
The rain sensor controls windshield wipe
operation depending on the amount of rain.
The rain sensor is located on the wind-
shield, directly in front of the interior rear-
view mirror.
Activating the rain sensor
As of ignition key position 1, briefly press
the button. The indicator lamp in the button
lights up. The wipers will always respond
by completing at least one sweep of the
windshield.
Adjusting rain sensor sensitivity level
Turn the serrated dial 5.
Deactivating the rain sensor
Briefly press the button again. The indica-
tor lamp goes out.
The rain sensor is automatically deacti-
vated when you switch off the ignition.
Deactivate the rain sensor when
passing through an automatic car
wash. Failure to do so could result in dam-
age caused by undesired wiper activa-
tion.<
Washer fluid
Washer fluid antifreeze is flammable.
Always keep it well away from sparks
and open flames, and store it in tightly
closed containers well out of the reach of
Page 61 of 220
Controls
59Reference
At a glance
Driving tips
Communications
Navigation
Entertainment
Mobility
>when you press the clutch or engage
position N of the automatic transmis-
sion
>when the DSC system is in active oper-
ation.
4 Recalling stored speed
Press button 4 briefly: the vehicle acceler-
ates to and maintains the last speed stored.
Deactivating system
When the ignition is switched off, the sys-
tem is deactivated and the stored speed is
deleted.
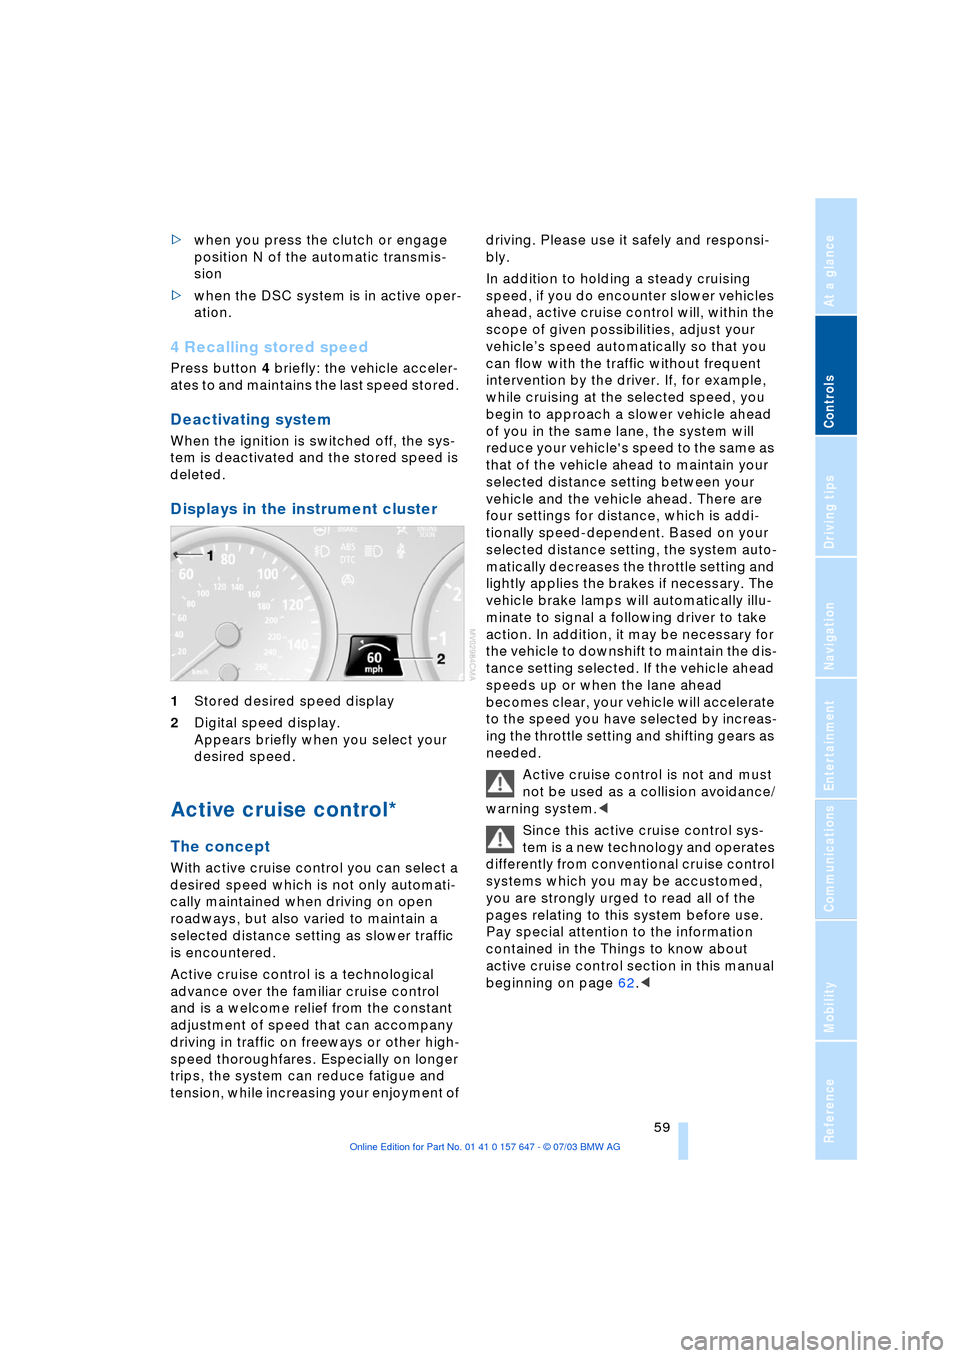
Displays in the instrument cluster
1Stored desired speed display
2Digital speed display.
Appears briefly when you select your
desired speed.
Active cruise control*
The concept
With active cruise control you can select a
desired speed which is not only automati-
cally maintained when driving on open
roadways, but also varied to maintain a
selected distance setting as slower traffic
is encountered.
Active cruise control is a technological
advance over the familiar cruise control
and is a welcome relief from the constant
adjustment of speed that can accompany
driving in traffic on freeways or other high-
speed thoroughfares. Especially on longer
trips, the system can reduce fatigue and
tension, while increasing your enjoyment of driving. Please use it safely and responsi-
bly.
In addition to holding a steady cruising
speed, if you do encounter slower vehicles
ahead, active cruise control will, within the
scope of given possibilities, adjust your
vehicleÕs speed automatically so that you
can flow with the traffic without frequent
intervention by the driver. If, for example,
while cruising at the selected speed, you
begin to approach a slower vehicle ahead
of you in the same lane, the system will
reduce your vehicle's speed to the same as
that of the vehicle ahead to maintain your
selected distance setting between your
vehicle and the vehicle ahead. There are
four settings for distance, which is addi-
tionally speed-dependent. Based on your
selected distance setting, the system auto-
matically decreases the throttle setting and
lightly applies the brakes if necessary. The
vehicle brake lamps will automatically illu-
minate to signal a following driver to take
action. In addition, it may be necessary for
the vehicle to downshift to maintain the dis-
tance setting selected. If the vehicle ahead
speeds up or when the lane ahead
becomes clear, your vehicle will accelerate
to the speed you have selected by increas-
ing the throttle setting and shifting gears as
needed.
Active cruise control is not and must
not be used as a collision avoidance/
warning system.<
Since this active cruise control sys-
tem is a new technology and operates
differently from conventional cruise control
systems which you may be accustomed,
you are strongly urged to read all of the
pages relating to this system before use.
Pay special attention to the information
contained in the Things to know about
active cruise control section in this manual
beginning on page 62.<