2004 BMW 525I wheel
[x] Cancel search: wheelPage 40 of 220

Adjustments
38
Lumbar support* adjustment
You can also adjust the contours of the
backrest to obtain additional support in the
lumbar region.
The upper hips and spinal column receive
supplementary support to help you main-
tain a relaxed, upright sitting position.
>Press the front/rear of the switch to
strengthen or weaken the curvature
>Press the upper/lower end of the switch
to strengthen the curvature at the top or
bottom.
Seat, mirror and steering
wheel memory*
You can store and select two different
adjustment settings for the driver's seat,
exterior mirrors and steering wheel.
The adjustment of the lumbar support is not
stored in the memory.
Storing
1.Turn the ignition key to position 1 or 2
2.Set the desired seat, exterior mirror and
steering-wheel positions 3.Press the
MEMORY button:
The indicator lamp in the button lights
up
4.Press the desired memory button 1
or 2:
The indicator lamp goes out.
Calling up a stored setting
Do not call up a position from the
memory while the vehicle is moving.
Otherwise there is a risk of accident from
unexpected movement of the seat or steer-
ing wheel.<
Convenience mode
1.Open the driver's door after unlocking
or turn the ignition key to position 1
2.Briefly press the desired memory but-
ton 1 or 2.
The system immediately cancels the
adjustment procedure when you press
one of the seat adjustment buttons or
use one of the memory buttons.
When the respective last driver's seat,
exterior mirror and steering-wheel position
is called up can be set for each key.
Control Center, for principle details, refer to
page 16:
1.Open the menu
2.Select "Vehicle settings" and press the
controller
3.Select "Door locks" and press the con-
troller
4.Select "Central locking" and press the
controller
5.Select "Last seat position" and press
the controller
Page 45 of 220
Controls
43Reference
At a glance
Driving tips
Communications
Navigation
Entertainment
Mobility
You can also adjust the mirrors manually by
pressing against the outer edges of their
lenses.
Storing the mirror positions, refer to Seat,
mirror and steering wheel memory on
page 38.
The mirror on the passenger's side
features a lens with a more convex
surface than the mirror installed on the
driver's side. When estimating the distance
between yourself and other traffic, bear in
mind that the objects reflected in the mirror
are closer than they appear. This means
that estimations of the distance to following
traffic should not be regarded as precise.<
Self-defrosting mirrors
Both exterior mirrors are automatically
heated in ignition key position 2.
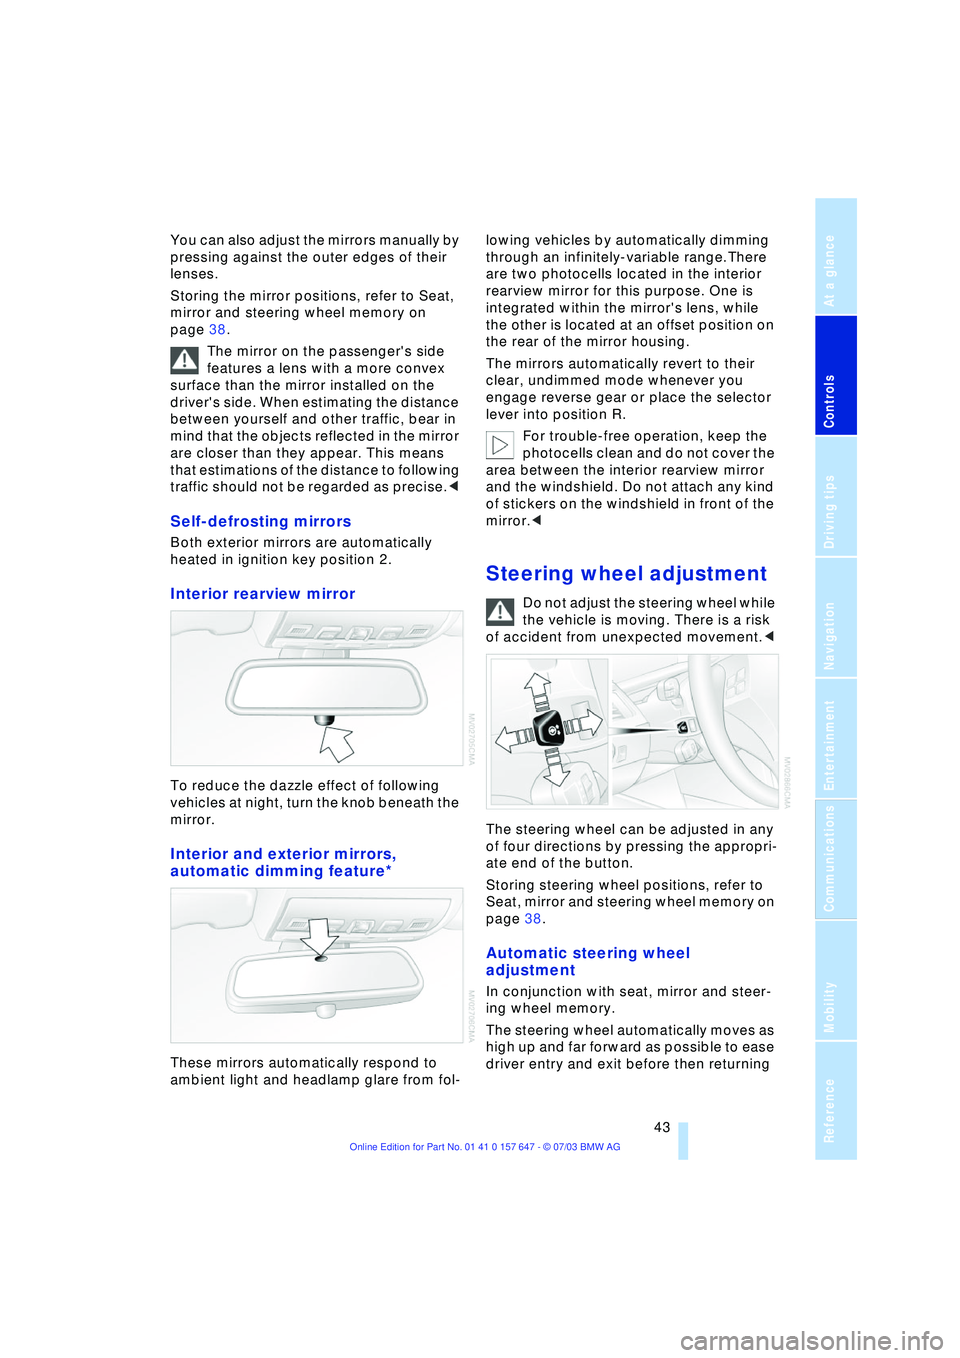
Interior rearview mirror
To reduce the dazzle effect of following
vehicles at night, turn the knob beneath the
mirror.
Interior and exterior mirrors,
automatic dimming feature*
These mirrors automatically respond to
ambient light and headlamp glare from fol-lowing vehicles by automatically dimming
through an infinitely-variable range.There
are two photocells located in the interior
rearview mirror for this purpose. One is
integrated within the mirror's lens, while
the other is located at an offset position on
the rear of the mirror housing.
The mirrors automatically revert to their
clear, undimmed mode whenever you
engage reverse gear or place the selector
lever into position R.
For trouble-free operation, keep the
photocells clean and do not cover the
area between the interior rearview mirror
and the windshield. Do not attach any kind
of stickers on the windshield in front of the
mirror.<
Steering wheel adjustment
Do not adjust the steering wheel while
the vehicle is moving. There is a risk
of accident from unexpected movement.<
The steering wheel can be adjusted in any
of four directions by pressing the appropri-
ate end of the button.
Storing steering wheel positions, refer to
Seat, mirror and steering wheel memory on
page 38.
Automatic steering wheel
adjustment
In conjunction with seat, mirror and steer-
ing wheel memory.
The steering wheel automatically moves as
high up and far forward as possible to ease
driver entry and exit before then returning
Page 46 of 220

Adjustments
44 to the standard position or stored memory
setting.
This automatic feature is governed by the
driver's door and the ignition lock.
Steering wheel heater*
The steering wheel heater operates when
the ignition is on.
Press the button to activate or deactivate
this system.
The indicator lamp within the button lights
up when the steering wheel heater is in
operation.
Programming button function
Depending on your vehicle's equipment,
you can assign an individual function to
each of the two programmable function
buttons
* on the steering wheel for each
specific key. This feature then provides you
with quick access to this function, allowing
you to control it without undue distraction
from road and traffic conditions.
Control Center, for principle details, refer to
page 16:
1.Open the menu
2.Select "Vehicle settings" and press the
controller
3.Select "Steering wheel buttons" and
press the controller A list with different functions is dis-
played:
>"Navigation"
Switching voice instructions on/off
>"Air recirculation on / off"
In this mode, you can block the sup-
ply of outside air, refer to AUC Auto-
matic recirculated-air control on
page 91
>"Mute on / off"
Mutes the audio sources
>"Screen on / off"
Switches the Control Display on/off
>"Next entertainment source"
Next audio source
>"Head-Up Display"
Switches the Head-Up Display
on/off
>"Horn"
*
4.Select the desired function and press
the controller.
.
5.If appropriate, select a button and press
the controller.
You can select the displayed function using
the button.
Page 51 of 220
Controls
49Reference
At a glance
Driving tips
Communications
Navigation
Entertainment
Mobility
Driving
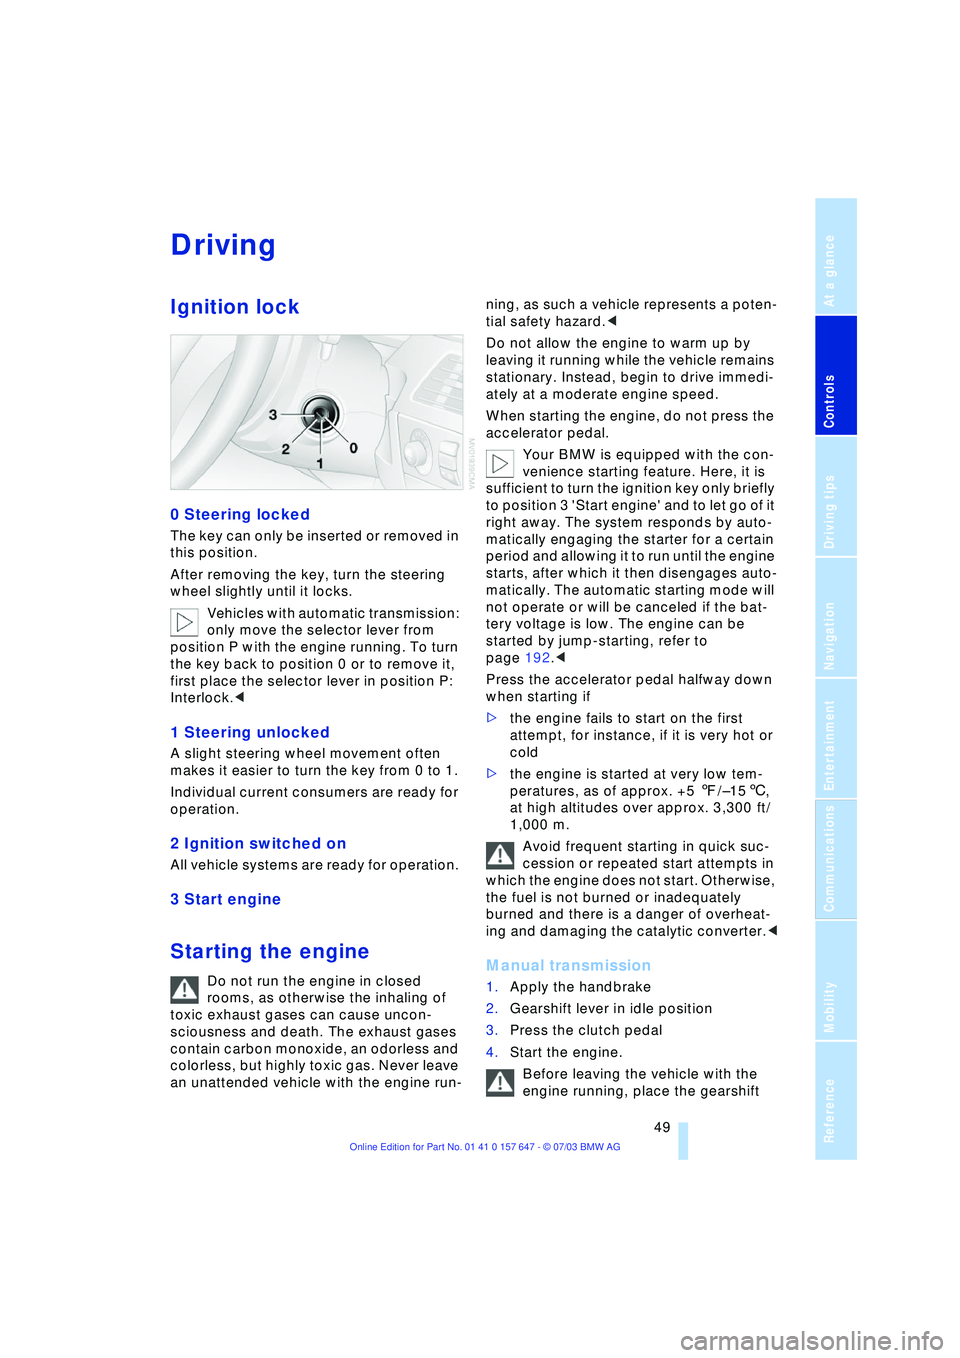
Ignition lock
0 Steering locked
The key can only be inserted or removed in
this position.
After removing the key, turn the steering
wheel slightly until it locks.
Vehicles with automatic transmission:
only move the selector lever from
position P with the engine running. To turn
the key back to position 0 or to remove it,
first place the selector lever in position P:
Interlock.<
1 Steering unlocked
A slight steering wheel movement often
makes it easier to turn the key from 0 to 1.
Individual current consumers are ready for
operation.
2 Ignition switched on
All vehicle systems are ready for operation.
3 Start engine
Starting the engine
Do not run the engine in closed
rooms, as otherwise the inhaling of
toxic exhaust gases can cause uncon-
sciousness and death. The exhaust gases
contain carbon monoxide, an odorless and
colorless, but highly toxic gas. Never leave
an unattended vehicle with the engine run-ning, as such a vehicle represents a poten-
tial safety hazard.<
Do not allow the engine to warm up by
leaving it running while the vehicle remains
stationary. Instead, begin to drive immedi-
ately at a moderate engine speed.
When starting the engine, do not press the
accelerator pedal.
Your BMW is equipped with the con-
venience starting feature. Here, it is
sufficient to turn the ignition key only briefly
to position 3 'Start engine' and to let go of it
right away. The system responds by auto-
matically engaging the starter for a certain
period and allowing it to run until the engine
starts, after which it then disengages auto-
matically. The automatic starting mode will
not operate or will be canceled if the bat-
tery voltage is low. The engine can be
started by jump-starting, refer to
page 192.<
Press the accelerator pedal halfway down
when starting if
>the engine fails to start on the first
attempt, for instance, if it is very hot or
cold
>the engine is started at very low tem-
peratures, as of approx. +5 7/Ð156,
at high altitudes over approx. 3,300 ft/
1,000 m.
Avoid frequent starting in quick suc-
cession or repeated start attempts in
which the engine does not start. Otherwise,
the fuel is not burned or inadequately
burned and there is a danger of overheat-
ing and damaging the catalytic converter.
2.Gearshift lever in idle position
3.Press the clutch pedal
4.Start the engine.
Before leaving the vehicle with the
engine running, place the gearshift
Page 52 of 220
Driving
50 lever in idle position and apply the hand-
brake.
Never leave an unattended vehicle with the
engine running, as such a vehicle repre-
sents a potential safety hazard.<
Automatic transmission
1.Press the brake pedal
2.Place the selector lever in position P
or N
3.Start the engine.
To prevent the vehicle from rolling,
always select position P or N and
engage the handbrake before leaving the
vehicle with the engine running.
Never leave an unattended vehicle with the
engine running, as such a vehicle repre-
sents a potential safety hazard.<
Sequential manual transmission
SMG
1.Press the brake pedal
2.Place the selector lever in the idle posi-
tion N
3.Start the engine.
If the engine does not start, engage
the last gear selected, refer to Display
in the instrument cluster, and return the
selector lever to the idle position N.<
Before leaving the vehicle with the
engine running, place the selector
lever in position N and apply the hand-
brake.
Never leave an unattended vehicle with the
engine running, as such a vehicle repre-
sents a potential safety hazard.<
Switching off engine
Do not remove the ignition key while
the vehicle is rolling, as otherwise the
steering wheel lock would engage while
steering.
When leaving the vehicle, always remove
the ignition key and lock the steering.
When parking on downward inclines, apply
the handbrake.<
Manual transmission
Turn the ignition key to position 1 or 0.
Automatic transmission
1.Engage selector-lever position P
2.Turn the ignition key to position 1 or 0.
Sequential manual transmission
SMG
If the selector lever is in position R or in the
sequential mode and you turn the ignition
key to position 1 or 0, the gear remains
engaged automatically.
If the selector lever is in the idle position N
and you turn the ignition key to position 1
or 0, an acoustic signal and the flashing
gear indicator in the display reminds you
that the vehicle is not secured against roll-
ing away.
The warning stops sounding after approx.
9 seconds.
When parking on downward inclines,
apply the handbrake. Engaging a gear
is not sufficient to secure the vehicle from
rolling away under certain circumstances.<
Handbrake
The handbrake is primarily intended to pre-
vent the vehicle from rolling while parked; it
brakes the rear wheels.
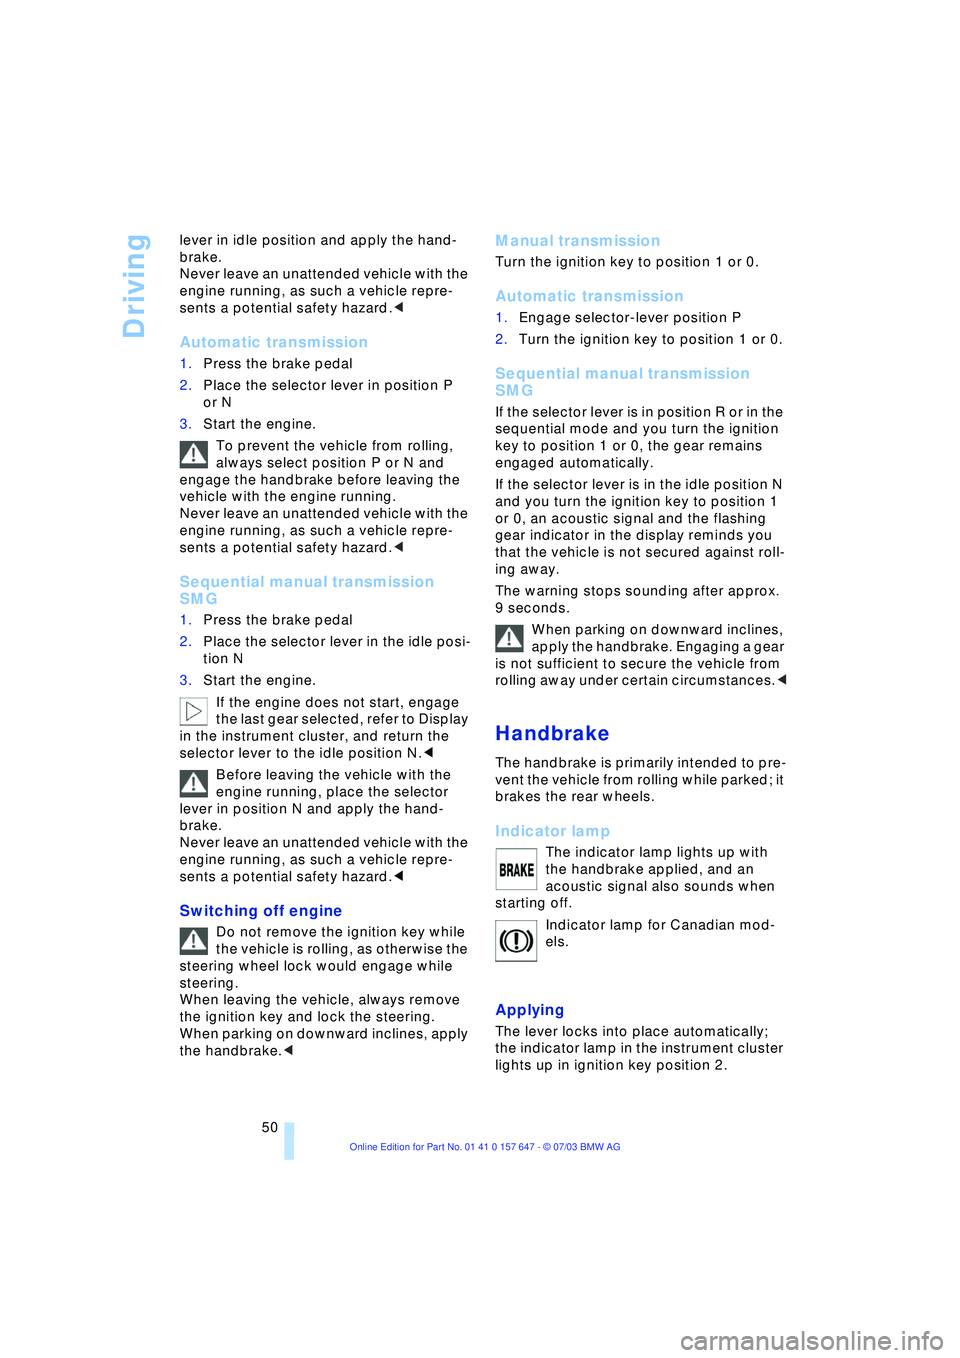
Indicator lamp
The indicator lamp lights up with
the handbrake applied, and an
acoustic signal also sounds when
starting off.
Indicator lamp for Canadian mod-
els.
Applying
The lever locks into place automatically;
the indicator lamp in the instrument cluster
lights up in ignition key position 2.
Page 53 of 220
Controls
51Reference
At a glance
Driving tips
Communications
Navigation
Entertainment
Mobility
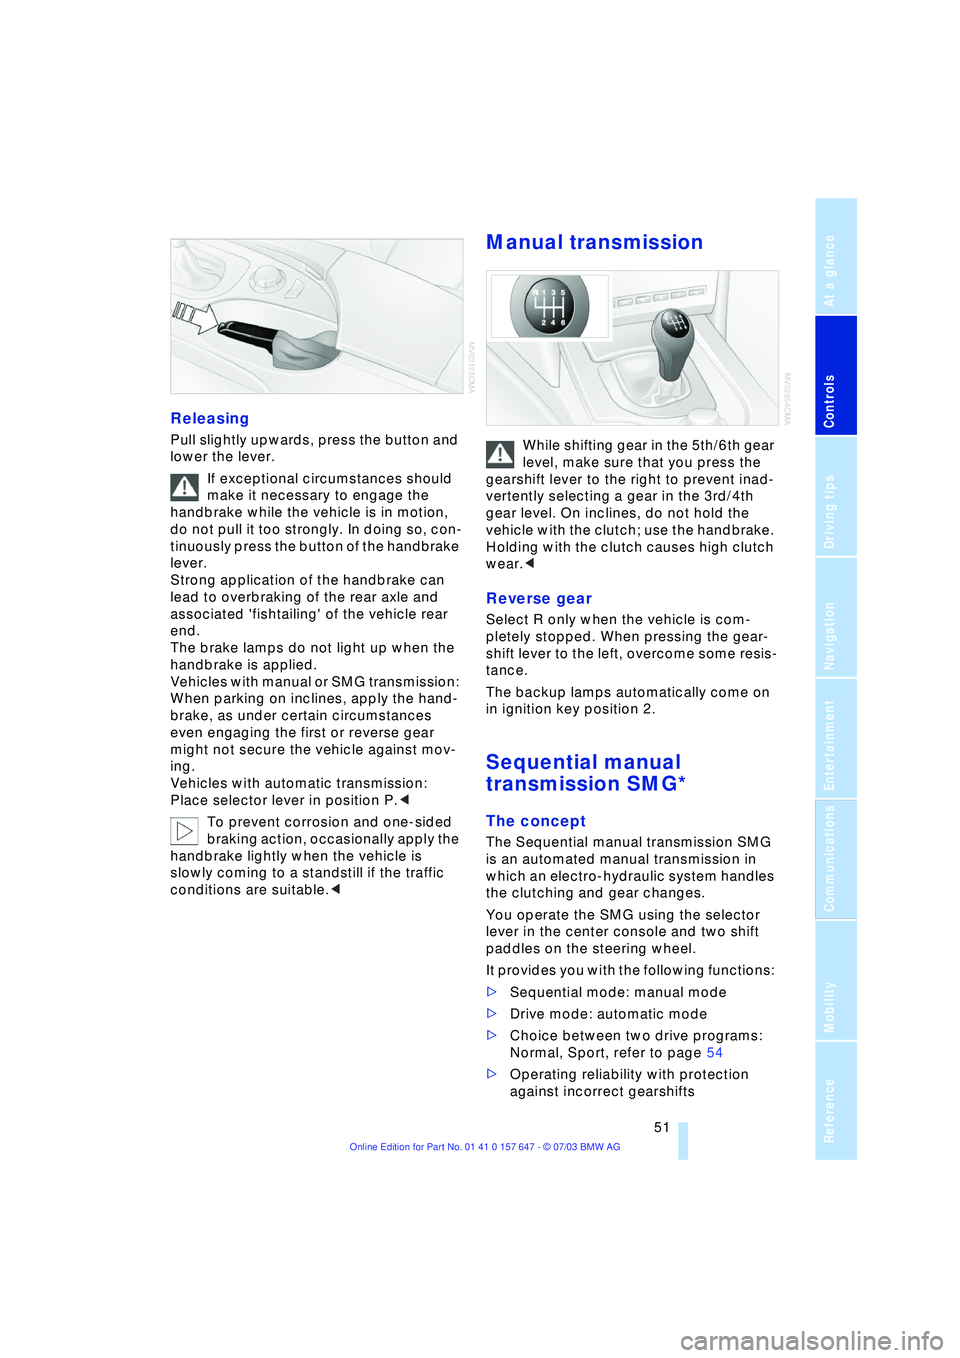
Releasing
Pull slightly upwards, press the button and
lower the lever.
If exceptional circumstances should
make it necessary to engage the
handbrake while the vehicle is in motion,
do not pull it too strongly. In doing so, con-
tinuously press the button of the handbrake
lever.
Strong application of the handbrake can
lead to overbraking of the rear axle and
associated 'fishtailing' of the vehicle rear
end.
The brake lamps do not light up when the
handbrake is applied.
Vehicles with manual or SMG transmission:
When parking on inclines, apply the hand-
brake, as under certain circumstances
even engaging the first or reverse gear
might not secure the vehicle against mov-
ing.
Vehicles with automatic transmission:
Place selector lever in position P.<
To prevent corrosion and one-sided
braking action, occasionally apply the
handbrake lightly when the vehicle is
slowly coming to a standstill if the traffic
conditions are suitable.<
Manual transmission
While shifting gear in the 5th/6th gear
level, make sure that you press the
gearshift lever to the right to prevent inad-
vertently selecting a gear in the 3rd/4th
gear level. On inclines, do not hold the
vehicle with the clutch; use the handbrake.
Holding with the clutch causes high clutch
wear.<
Reverse gear
Select R only when the vehicle is com-
pletely stopped. When pressing the gear-
shift lever to the left, overcome some resis-
tance.
The backup lamps automatically come on
in ignition key position 2.
Sequential manual
transmission SMG*
The concept
The Sequential manual transmission SMG
is an automated manual transmission in
which an electro-hydraulic system handles
the clutching and gear changes.
You operate the SMG using the selector
lever in the center console and two shift
paddles on the steering wheel.
It provides you with the following functions:
>Sequential mode: manual mode
>Drive mode: automatic mode
>Choice between two drive programs:
Normal, Sport, refer to page 54
>Operating reliability with protection
against incorrect gearshifts
Page 55 of 220
Controls
53Reference
At a glance
Driving tips
Communications
Navigation
Entertainment
Mobility
towards D or change the current gear using
the shift paddles or selector lever.
Gear changes
Using selector lever
>To shift up, briefly press the selector
lever towards +
>To shift down, briefly press towards Ñ.
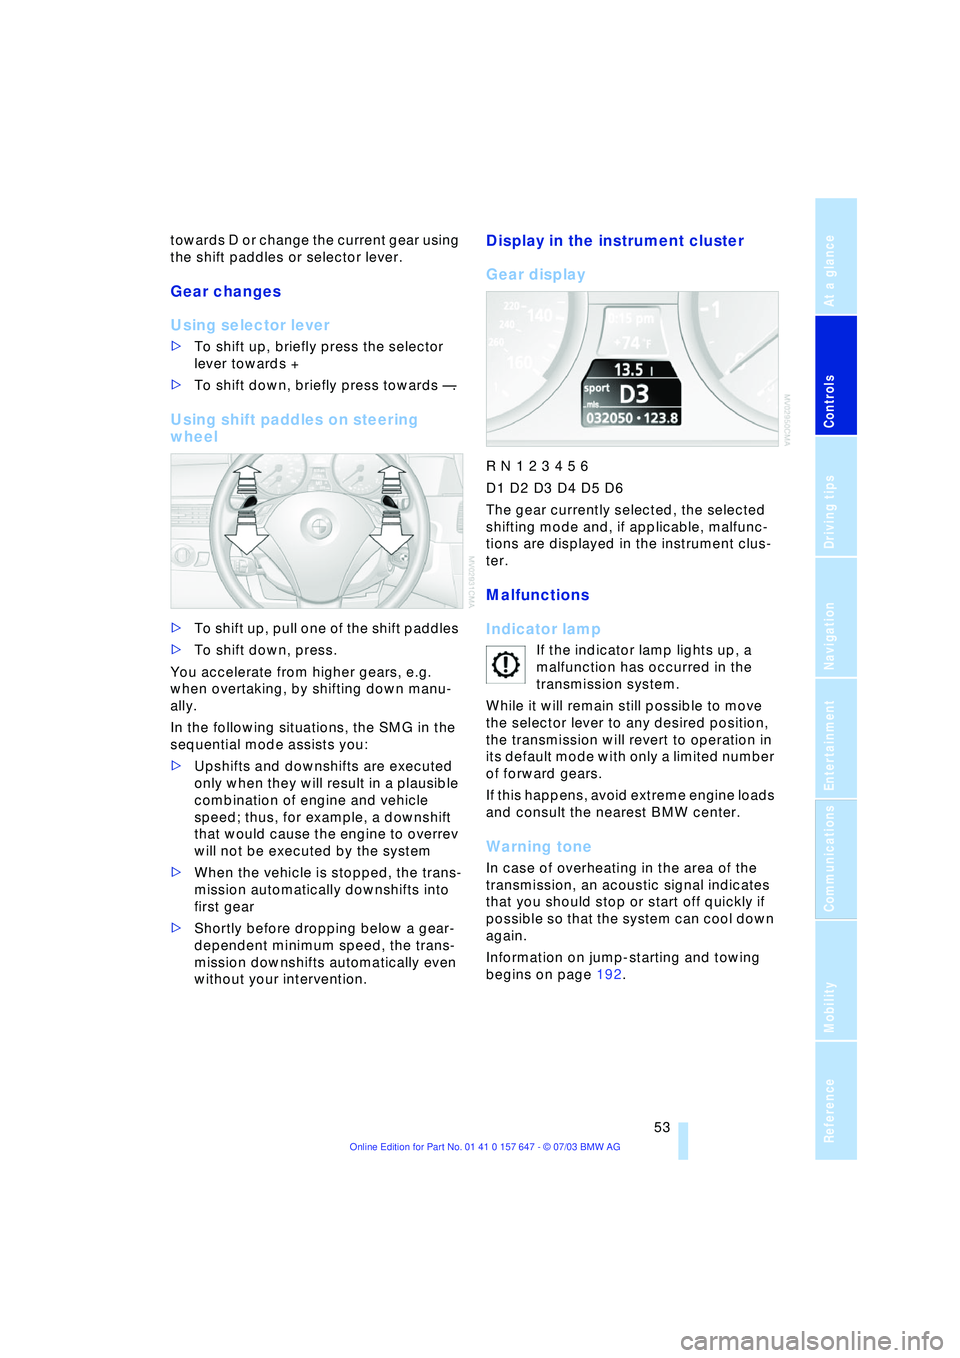
Using shift paddles on steering
wheel
>To shift up, pull one of the shift paddles
>To shift down, press.
You accelerate from higher gears, e.g.
when overtaking, by shifting down manu-
ally.
In the following situations, the SMG in the
sequential mode assists you:
>Upshifts and downshifts are executed
only when they will result in a plausible
combination of engine and vehicle
speed; thus, for example, a downshift
that would cause the engine to overrev
will not be executed by the system
>When the vehicle is stopped, the trans-
mission automatically downshifts into
first gear
>Shortly before dropping below a gear-
dependent minimum speed, the trans-
mission downshifts automatically even
without your intervention.
Display in the instrument cluster
Gear display
R N 1 2 3 4 5 6
D1 D2 D3 D4 D5 D6
The gear currently selected, the selected
shifting mode and, if applicable, malfunc-
tions are displayed in the instrument clus-
ter.
Malfunctions
Indicator lamp
If the indicator lamp lights up, a
malfunction has occurred in the
transmission system.
While it will remain still possible to move
the selector lever to any desired position,
the transmission will revert to operation in
its default mode with only a limited number
of forward gears.
If this happens, avoid extreme engine loads
and consult the nearest BMW center.
Warning tone
In case of overheating in the area of the
transmission, an acoustic signal indicates
that you should stop or start off quickly if
possible so that the system can cool down
again.
Information on jump-starting and towing
begins on page 192.
Page 57 of 220
Controls
55Reference
At a glance
Driving tips
Communications
Navigation
Entertainment
Mobility
Changing the selector-lever
positions
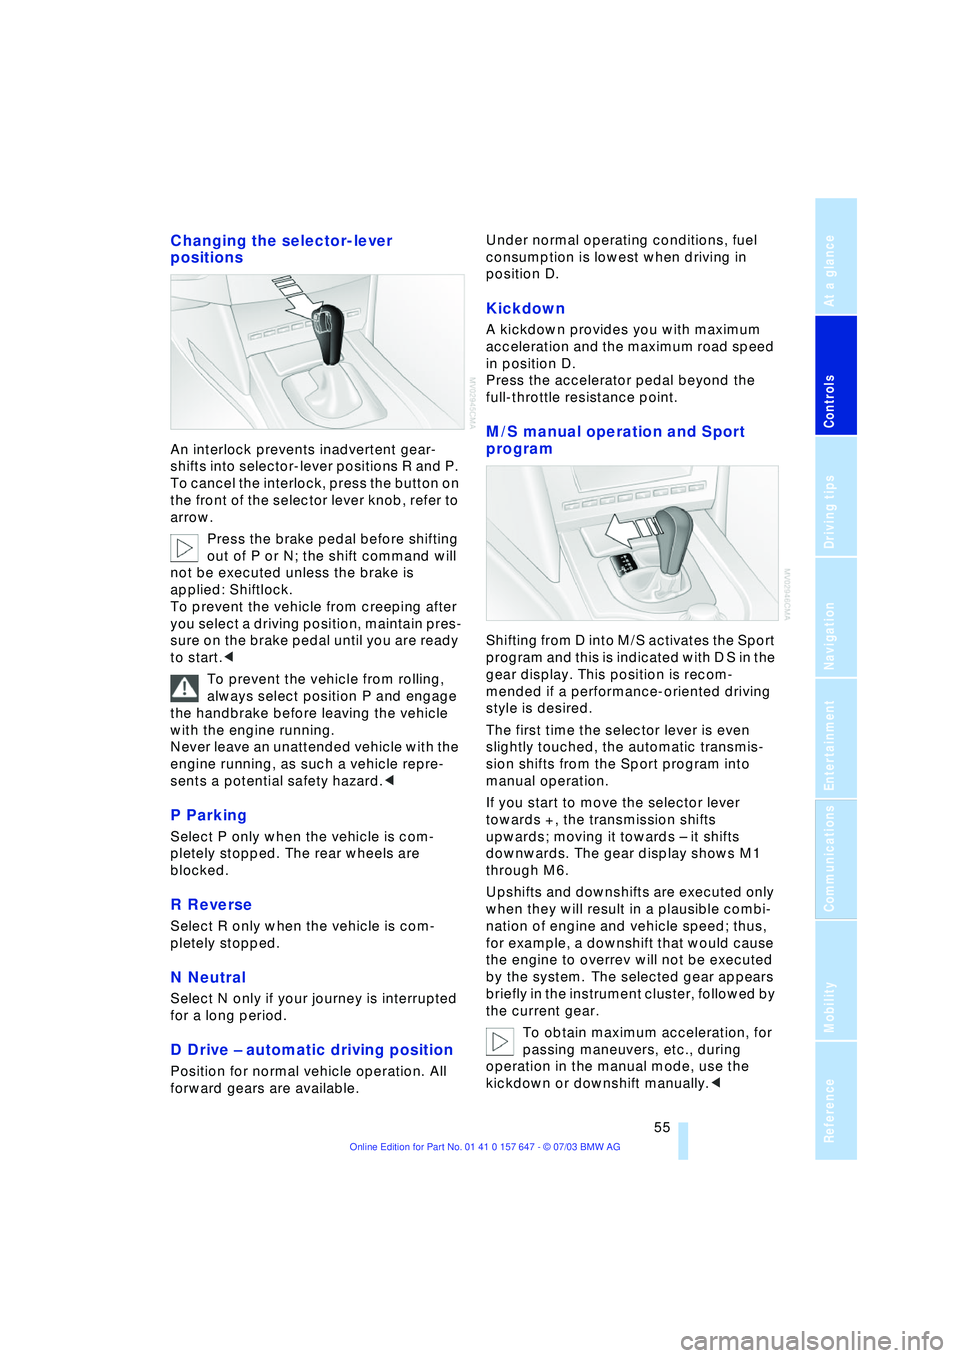
An interlock prevents inadvertent gear-
shifts into selector-lever positions R and P.
To cancel the interlock, press the button on
the front of the selector lever knob, refer to
arrow.
Press the brake pedal before shifting
out of P or N; the shift command will
not be executed unless the brake is
applied: Shiftlock.
To prevent the vehicle from creeping after
you select a driving position, maintain pres-
sure on the brake pedal until you are ready
to start.<
To prevent the vehicle from rolling,
always select position P and engage
the handbrake before leaving the vehicle
with the engine running.
Never leave an unattended vehicle with the
engine running, as such a vehicle repre-
sents a potential safety hazard.<
P Parking
Select P only when the vehicle is com-
pletely stopped. The rear wheels are
blocked.
R Reverse
Select R only when the vehicle is com-
pletely stopped.
N Neutral
Select N only if your journey is interrupted
for a long period.
D Drive Ð automatic driving position
Position for normal vehicle operation. All
forward gears are available.Under normal operating conditions, fuel
consumption is lowest when driving in
position D.
Kickdown
A kickdown provides you with maximum
acceleration and the maximum road speed
in position D.
Press the accelerator pedal beyond the
full-throttle resistance point.
M/S manual operation and Sport
program
Shifting from D into M/S activates the Sport
program and this is indicated with D S in the
gear display. This position is recom-
mended if a performance-oriented driving
style is desired.
The first time the selector lever is even
slightly touched, the automatic transmis-
sion shifts from the Sport program into
manual operation.
If you start to move the selector lever
towards +, the transmission shifts
upwards; moving it towards Ð it shifts
downwards. The gear display shows M1
through M6.
Upshifts and downshifts are executed only
when they will result in a plausible combi-
nation of engine and vehicle speed; thus,
for example, a downshift that would cause
the engine to overrev will not be executed
by the system. The selected gear appears
briefly in the instrument cluster, followed by
the current gear.
To obtain maximum acceleration, for
passing maneuvers, etc., during
operation in the manual mode, use the
kickdown or downshift manually.<