Page 356 of 426
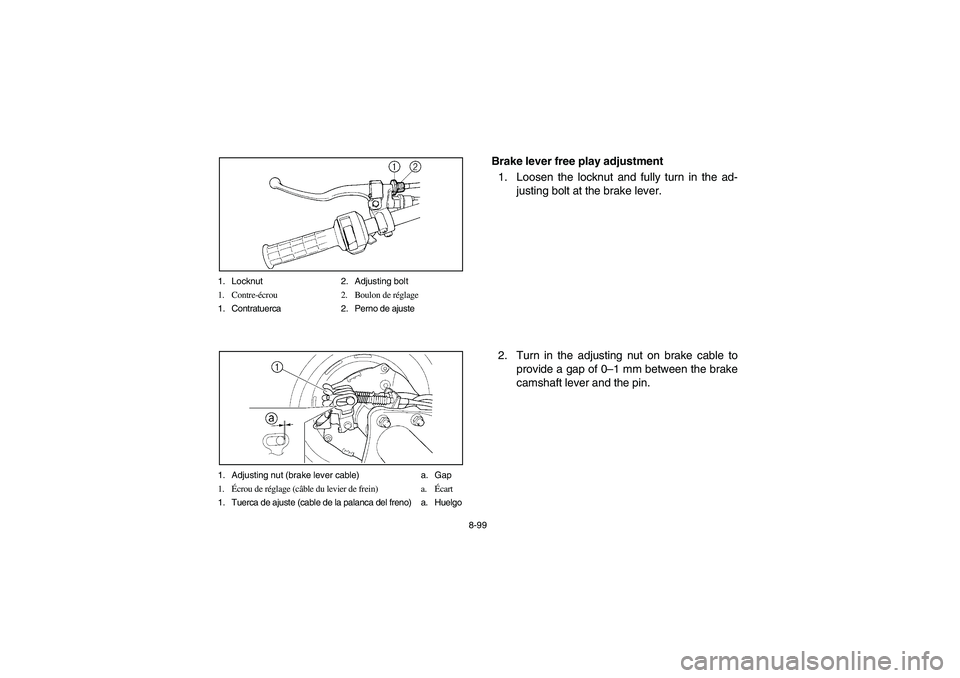
8-99 1. Locknut 2. Adjusting bolt
1. Contre-écrou 2. Boulon de réglage
1. Contratuerca 2. Perno de ajuste
1. Adjusting nut (brake lever cable) a. Gap
1.Écrou de réglage (câble du levier de frein) a.Écart
1. Tuerca de ajuste (cable de la palanca del freno) a. Huelgo
Brake lever free play adjustment
1. Loosen the locknut and fully turn in the ad-
justing bolt at the brake lever.
2. Turn in the adjusting nut on brake cable to
provide a gap of 0–1 mm between the brake
camshaft lever and the pin.
U5TE60.book Page 99 Monday, June 10, 2002 8:47 AM
Page 358 of 426
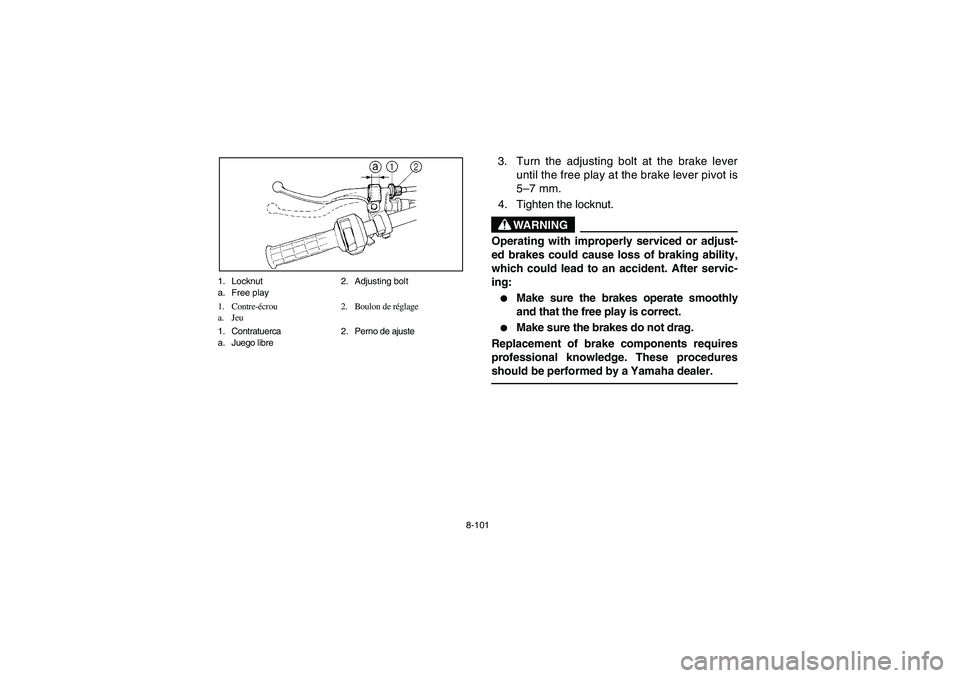
8-101 1. Locknut 2. Adjusting bolt
a. Free play
1. Contre-écrou 2. Boulon de réglage
a. Jeu
1. Contratuerca 2. Perno de ajuste
a. Juego libre
3. Turn the adjusting bolt at the brake lever
until the free play at the brake lever pivot is
5–7 mm.
4. Tighten the locknut.
WARNING
_ Operating with improperly serviced or adjust-
ed brakes could cause loss of braking ability,
which could lead to an accident. After servic-
ing: �
Make sure the brakes operate smoothly
and that the free play is correct.
�
Make sure the brakes do not drag.
Replacement of brake components requires
professional knowledge. These procedures
should be performed by a Yamaha dealer.
_
U5TE60.book Page 101 Monday, June 10, 2002 8:47 AM
Page 380 of 426
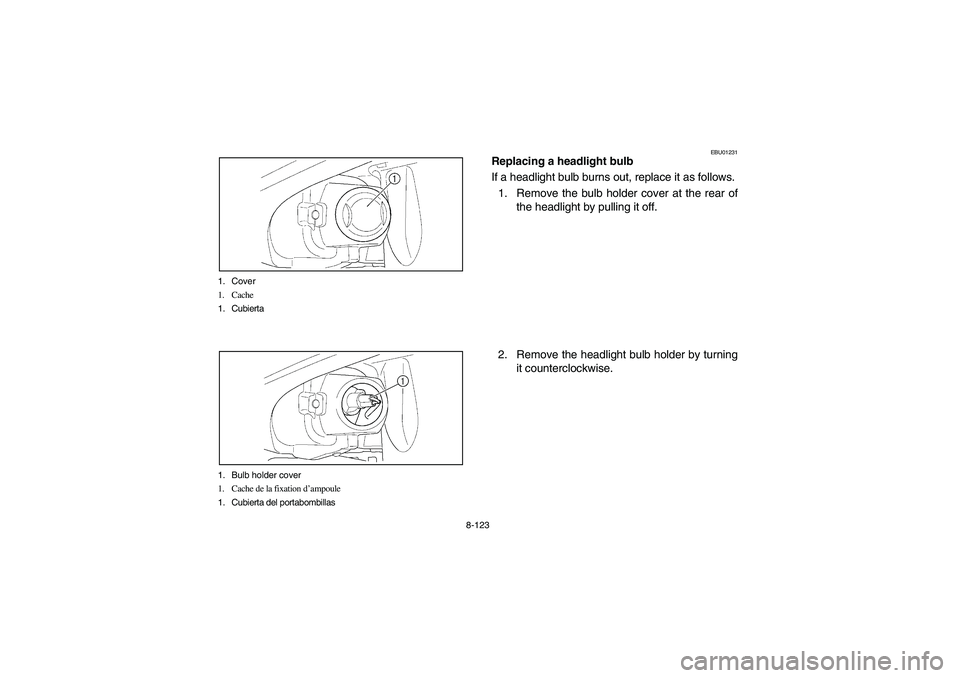
8-123 1. Cover
1. Cache
1. Cubierta
1. Bulb holder cover
1. Cache de la fixation d’ampoule
1. Cubierta del portabombillas
EBU01231
Replacing a headlight bulb
If a headlight bulb burns out, replace it as follows.
1. Remove the bulb holder cover at the rear of
the headlight by pulling it off.
2. Remove the headlight bulb holder by turning
it counterclockwise.
U5TE60.book Page 123 Monday, June 10, 2002 8:47 AM
Page 382 of 426
8-125
3. Remove the defective bulb by pushing it in
and turning it counterclockwise.
WARNING
_ A headlight bulb is hot when it is on and imme-
diately after it is turned off. Wait for the bulb to
cool before touching or removing it. You can
be burned or a fire could start if the bulb touch-
es something flammable. _4. Insert a new headlight bulb into the bulb hold-
er, push it in, and then turn the bulb clockwise
until it stops.
5. Install the bulb holder by turning it clockwise.
6. Install the bulb holder cover at the rear of the
headlight.
U5TE60.book Page 125 Monday, June 10, 2002 8:47 AM
Page 394 of 426
9-1
EBU00420
CLEANING AND STORAGE
A. CLEANING
Frequent, thorough cleaning of your machine will
not only enhance its appearance but will improve
its general performance and extend the useful life
of many components.
1. Before cleaning the machine:
a. Block off the end of the exhaust pipe to pre-
vent water entry. A plastic bag and strong
rubber band may be used.
b. Make sure the spark plug and all filler caps
are properly installed.
2. If the engine case is excessively greasy, ap-
ply degreaser with a paint brush. Do not ap-
ply degreaser to the wheel axles.
3. Rinse the dirt and degreaser off with a garden
hose. Use only enough pressure to do the
job.
U5TE60.book Page 1 Monday, June 10, 2002 8:47 AM
Page 400 of 426
9-7
EBU00427
B. STORAGE
Long term storage (60 days or more) of your ma-
chine will require some preventive procedures to
guard against deterioration. After thoroughly
cleaning the machine, prepare for storage as fol-
lows:
1. Fill the fuel tank with fresh fuel and add fuel
stabilizer (if available).NOTE:Use of fuel stabilizer eliminates the need to drain
the fuel system. Consult a Yamaha dealer if the
fuel system is to be drained instead.2. Remove the spark plug, pour about one ta-
blespoon of SAE 10W30 or 20W40 motor oil
in the spark plug hole and reinstall the spark
plug. Ground the spark plug wire and turn the
engine over several times to coat the cylinder
wall with oil.
3. Lubricate all control cables.
4. Block up the frame to raise all wheels off the
ground.
U5TE60.book Page 7 Monday, June 10, 2002 8:47 AM