Page 53 of 257

2003 VOLVO XC70
ignition key is in position II. If the headlight switch is in position all lights will go out when the
ignition is switched off.
The headlight switch must be in this position before the high beams will\
function.
Switch from high to low beams and vice versa by pulling the turn signal \
switch lever on the left side of
steering column toward you.
B - Instrument illumination
Move the thumbwheel up to increase brightness or down to decrease bright\
ness. There is also an
instrument panel illumination sensor (see illustration on
page 48) which automatically adjusts the level
of illumination.
C -Unlocking the fuel filler door
Press this button when the car is at a standstill to unlock the fuel fil\
ler door. Please note that the fuel
filler door will remain unlocked until the car begins to move forward. A\
n audible click will be heard
when the fuel filler door relocks.
See also
page 86.
NOTE: If the fuel filler door does not unlock after the button has been press\
ed, drive the car at a speed
of at least 5 mph (8 km/h), stop the car, and press the button again. \
D - Front fog lights (option)
The front fog lights will function only in combination with the low beam\
headlights.
An LED in the switch indicates when the front fog lights are on.
file:///K|/ownersdocs/2003/2003_XC70/03xc70_02b.htm (3 of 18)12/30/200\
6 4:17:54 PM
Page 56 of 257
2003 VOLVO XC70
Turn signals
1 Lane change position. In maneuvers such as lane changing, the driver can flash the turn signal\
s by
moving the turn signal lever to the first stop and holding it there. The\
lever will return to the neutral
position when released.
2 Signal lever engaged for normal turns.
3 High beam/low beam switch (headlights on).
Move the lever towards the steering wheel and release it.
Headlight flasher (headlights off).
Move the lever towards the steering wheel. The headlight high beam will \
be on until the lever is
released.
NOTE: If the turn signal indicator flashes faster than normal, check for a bur\
ned-out turn signal bulb.
pg. 37Windshield/tailgate wipers/washers
file:///K|/ownersdocs/2003/2003_XC70/03xc70_02b.htm (6 of 18)12/30/200\
6 4:17:54 PM
Page 58 of 257

2003 VOLVO XC70
High wiper speed
3 Windshield wiper/washer, headlight wiper/washer (certain models). Pull\
the lever toward you and
release. The wipers will make 2-3 sweeps across the windshield and headl\
ights (certain models) after the
lever is released.
"Single sweep" position: Move the lever slightly upward from the 0 position for one sweep of
the wipers. The lever returns automatically to 0 when released.
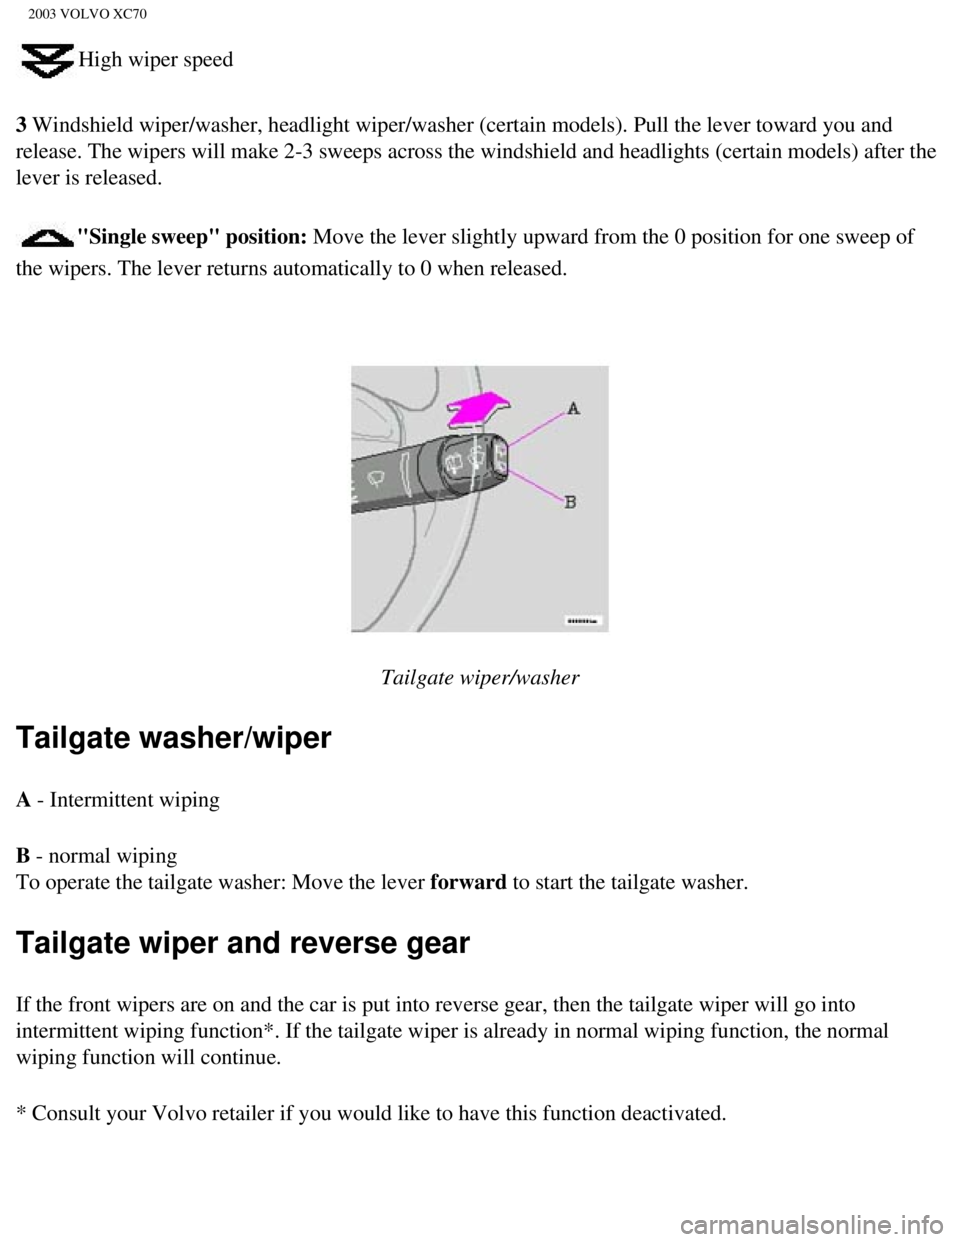
Tailgate wiper/washer
Tailgate washer/wiper
A - Intermittent wiping
B - normal wiping
To operate the tailgate washer: Move the lever forward to start the tailgate washer.
Tailgate wiper and reverse gear
If the front wipers are on and the car is put into reverse gear, then th\
e tailgate wiper will go into
intermittent wiping function*. If the tailgate wiper is already in norma\
l wiping function, the normal
wiping function will continue.
* Consult your Volvo retailer if you would like to have this function de\
activated.
file:///K|/ownersdocs/2003/2003_XC70/03xc70_02b.htm (8 of 18)12/30/200\
6 4:17:54 PM
Page 61 of 257
2003 VOLVO XC70
brake by pulling up firmly on the lever. Release the parking brake by de\
pressing the button at the end of
the lever and lowering the lever completely. WARNING!
l Always use the parking brake (hand brake) when parking. On hills, also\
turn the front wheels
toward the curb.
l The indicator light in the instrument panel will light up even if the pa\
rking brake is applied only
slightly. Be sure to pull the lever up sufficiently.
Front auxiliary socket
Rear auxiliary socket
Auxiliary sockets
file:///K|/ownersdocs/2003/2003_XC70/03xc70_02b.htm (11 of 18)12/30/20\
06 4:17:54 PM
Page 70 of 257
2003 VOLVO XC70
C Horizontal air flow
D Vertical air flow
Direct the outer air vents toward the side windows to demist.
In cold weather, close the air vents in the center of the dash to direct\
as much air as possible toward the
windows.
Air flow
The air that is drawn into the passenger compartment is distributed from\
14 ventilation points.
Air vents in door pillars
Air vents in door pillars
file:///K|/ownersdocs/2003/2003_XC70/03xc70_03.htm (2 of 12)12/30/2006\
4:17:55 PM
Page 71 of 257

2003 VOLVO XC70
A Open
B Closed
C Horizontal air flow
D Vertical air flow
Direct the air vents toward the rear side windows to demist.
Direct the air vents toward the rear seat for the best heating/cooling e\
ffect.
pg. 47 Climate control system - general information
Condensation on the inside of the windows
Keeping the insides of the windows clean will help reduce the amount of \
condensation that forms on the
windows. Use a commercial window cleaning agent to clean the windows.
Ice and snow
Always keep the air intake grille at the base of the windshield free of \
snow.
Cabin air filter
Replace the cabin air filter with a new one at the recommended intervals\
. The filter should be replaced
more often when driving under dirty and dusty conditions. The filter can\
not be cleaned and therefore
should always be replaced with a new one.
Sensors
The sunlight sensor on the dashboard and passenger compartment temperatu\
re sensor in the ECC control
panel should not be covered in any way as this could cause incorrect inf\
ormation to be sent to the ECC
system.
Parking the car in warm weather
If your car has been parked in the sun in warm weather, opening the wind\
ows and sun roof (option) for
file:///K|/ownersdocs/2003/2003_XC70/03xc70_03.htm (3 of 12)12/30/2006\
4:17:55 PM
Page 92 of 257
2003 VOLVO XC70
pg. 63 Rear seat and cargo area
Folding down an outboard head restraint
Extension of cargo area
The rear seat is in two sections and each section can be folded forward \
separately.
Before the backrests are folded down:
l Adjust the front seat backrests into a more upright position if they are\
excessively reclined.
l Pull the rear seat cushion strap and pull the cushion forward against th\
e front seat backrests.
l Fold down the outboard head restraint(s) by first pushing the restrain\
t sideways toward the center of
the car, and then pressing it downward.
Lowering the center head restraint
Center seat head restraint
file:///K|/ownersdocs/2003/2003_XC70/03xc70_04b.htm (1 of 21)12/30/200\
6 4:17:57 PM
Page 103 of 257

2003 VOLVO XC70
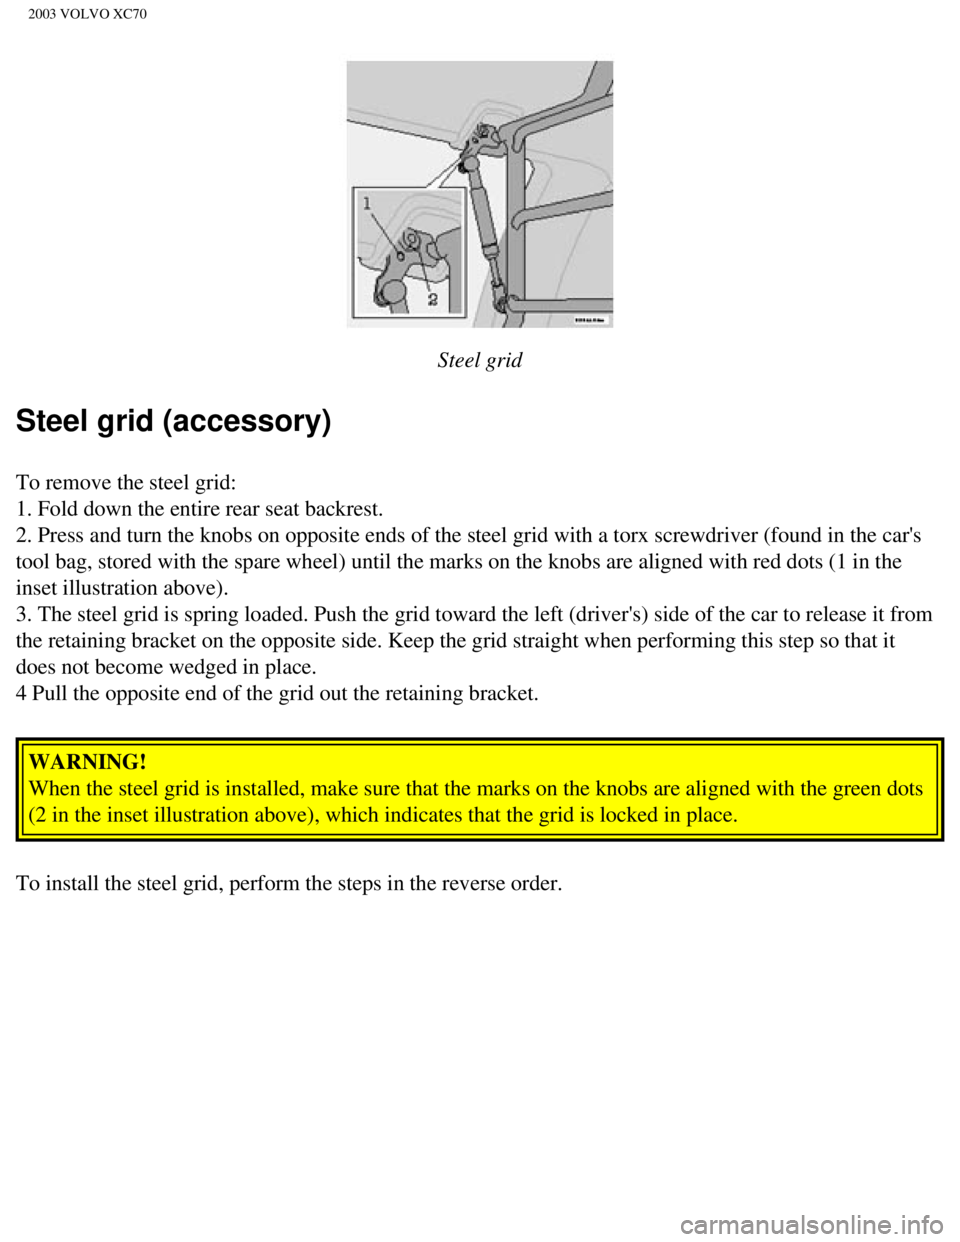
Steel grid
Steel grid (accessory)
To remove the steel grid:
1. Fold down the entire rear seat backrest.
2. Press and turn the knobs on opposite ends of the steel grid with a to\
rx screwdriver (found in the car's
tool bag, stored with the spare wheel) until the marks on the knobs are\
aligned with red dots (1 in the
inset illustration above).
3. The steel grid is spring loaded. Push the grid toward the left (driv\
er's) side of the car to release it from
the retaining bracket on the opposite side. Keep the grid straight when \
performing this step so that it
does not become wedged in place.
4 Pull the opposite end of the grid out the retaining bracket. WARNING!
When the steel grid is installed, make sure that the marks on the knobs \
are aligned with the green dots
(2 in the inset illustration above), which indicates that the grid is \
locked in place.
To install the steel grid, perform the steps in the reverse order.
file:///K|/ownersdocs/2003/2003_XC70/03xc70_04b.htm (12 of 21)12/30/20\
06 4:17:57 PM